
Subscribe to Our Youtube Channel
Related Manuals for Aseptico AEU-40 Endopex V


Summary of Contents for Aseptico AEU-40 Endopex V
- Page 1 OPERATION and MAINTENANCE INSTRUCTION MANUAL AEU-40 Endopex V Vector Based Root Apex Locator...
-
Page 2: Table Of Contents
TABLE OF CONTENTS: Introduction ......1 Package Contents ......1 Operation Functions . -
Page 3: Introduction
You’ve purchased the very latest in Apical Foramen Location technology. Aseptico has developed a new technology called "Impedance Vector Mapping". This approach uses a sin- gle pure tone signal to precisely identify the electrical charac- teristics of the endodontic file’s present position. These charac-... -
Page 4: Operation Functions
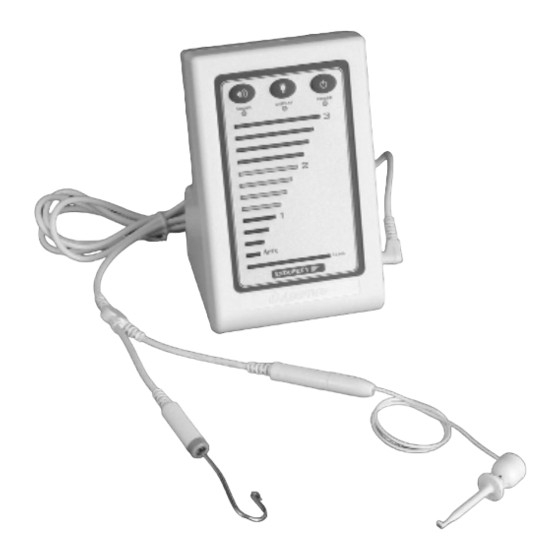
OPERATION FUNCTIONS: 1. Power Switch – Controls power on/off to the unit. When turned on, self-test will initiate and should illuminate a green power L.E.D. within a few seconds to indicate a properly functioning unit. a. A flashing yellow L.E.D. indicates a low battery requiring replacement. - Page 5 Illustration 1 - Endopex control panel SOUND ON/OFF DISPLAY POWER SWITCH SWITCH LED display gives clear indication of progress to the apical foramen. Adjustable Apex target - See below for setup Illustration 2 - Lip electrode and EZ Hook electrode...
-
Page 6: Setting Up The Unit
SETTING UP THE UNIT: 1. Unpack the unit and verify that it carries the proper certifica- tion markings. 2. Open the battery door on the back of the unit using a Phillips head screwdriver. Install the enclosed 9V battery (for approx. 5 hours of use). - Page 7 OPERATION (Continued): 1. Press the power switch in the upper right hand corner of the unit. The power indictor will turn red and yellow during self- test. Successful completion of self-test is signified with a quick sequence of light illumination on the front panel and an audible indication if sound is turned on.
-
Page 8: Disinfection & Maintenance
OPERATION (Continued): 11.DETECTING POST PERFORATION: Connect the file clip to a large file and make contact with the post. In the case of post perforation, the Endopex V will indicate a perforation illuminating the red L.E.D. at the bottom of the indication col- umn accompanied by a solid audio tone if sound is active. -
Page 9: Troubleshooting
CAUTIONS (Continued): including the connection to the unit. A poor connection can prevent accurate measurements. 7. Always take an x-ray to confirm the results. 8. Do not clean the main unit with Gluteraldhyde, Ethanol, or similar chemicals to avoid discoloration and surface corro- sion of the unit. - Page 10 TROUBLESHOOTING (Continued): b. Verify that the lip clip has a good connection to the patient’s oral mucosa. c. Verify the file clip metal is clean, free of debris and corro- sion, clean if not. d. Verify the pulp chamber is clean and dry. 6.
- Page 11 TROUBLESHOOTING (Continued): k. The canal may be extremely dry, moisten the canal with water or sodium hypochlorite. l. The canal may be exiting at a sharp angle. Sometimes the file is not able to follow a sharp bend and the file cannot be inserted any further.
-
Page 12: Warranty
Aseptico's sole obligation under product warranty is (at its sole option and discretion) to repair or replace any defective component or product in part or whole. Aseptico shall be the sole arbiter of such action.
Need help?
Do you have a question about the AEU-40 Endopex V and is the answer not in the manual?
Questions and answers