Table of Contents
Advertisement
TABLE OF CONTENTS
SPECIAL NOTES ON LCD MONITORS........................................................ 1
INFORMATION FOR YOUR SAFETY AND COMFORT ............................... 2
UNPACKING .................................................................................................. 5
ATTACHING / REMOVING THE BASE......................................................... 6
SCREEN POSITION ADJUSTMENT ............................................................. 6
WALL MOUNTING (OPTIONAL)................................................................... 7
CONNECTING THE POWER CORD ............................................................. 8
SAFETY PRECAUTION................................................................................. 8
CLEANING YOUR MONITOR........................................................................ 8
POWER SAVING ........................................................................................... 9
DDC ................................................................................................................ 9
CONNECTOR PIN ASSIGNMENT................................................................. 10
STANDARD TIMING TABLE ......................................................................... 12
INSTALLATION ............................................................................................. 13
USER CONTROLS......................................................................................... 14
HOW TO ADJUST A SETTING ..................................................................... 15
TROUBLESHOOTING ................................................................................... 19
Advertisement
Table of Contents

Related Manuals for Acer X193


Summary of Contents for Acer X193
-
Page 1: Table Of Contents
TABLE OF CONTENTS SPECIAL NOTES ON LCD MONITORS... 1 INFORMATION FOR YOUR SAFETY AND COMFORT ... 2 UNPACKING ... 5 ATTACHING / REMOVING THE BASE... 6 SCREEN POSITION ADJUSTMENT ... 6 WALL MOUNTING (OPTIONAL)... 7 CONNECTING THE POWER CORD ... 8 SAFETY PRECAUTION... -
Page 2: Special Notes On Lcd Monitors
SPECIAL NOTES ON LCD MONITORS The following symptoms are normal with LCD monitor and do not indicate a problem. NOTES Due to the nature of the fluorescent light, the screen may flicker during initial use. Turn off the Power Switch and then turn it on again to make sure the flicker disappears. You may find slightly uneven brightness on the screen depending on the desktop pattern you use. -
Page 3: Information For Your Safety And Comfort
INFORMATION FOR YOUR SAFETY AND COMFORT Safety instructions Read these instructions carefully. Keep this document for future reference. Follow all warnings and instructions marked on the product. CAUTION for plug as disconnecting device Observe the following guidelines when connecting and disconnecting power to the power supply unit: Install the power supply unit before connecting the power cord to the AC power outlet. -
Page 4: Product Servicing
Product servicing Do not attempt to service this product yourself, as opening or removing covers may expose you to dangerous voltage points or other risks. Refer all servicing to qualified service personnel. Unplug this product from the wall outlet and refer servicing to qualified service personnel when: the power cord or plug is damaged, cut or frayed liquid was spilled into the product the product was exposed to rain or water the product has been dropped or the case has been damaged... -
Page 5: Taking Care Of Your Vision
Warning! We do not recommend using the product on a couch or bed. If this is unavoidable, work for only short periods, take breaks regularly, and do some stretching exercises. For more information and help in recycling, please visit the following websites: Worldwide: http://global.acer.com/about/sustainability.htm EN- 4 X193W... -
Page 6: Unpacking
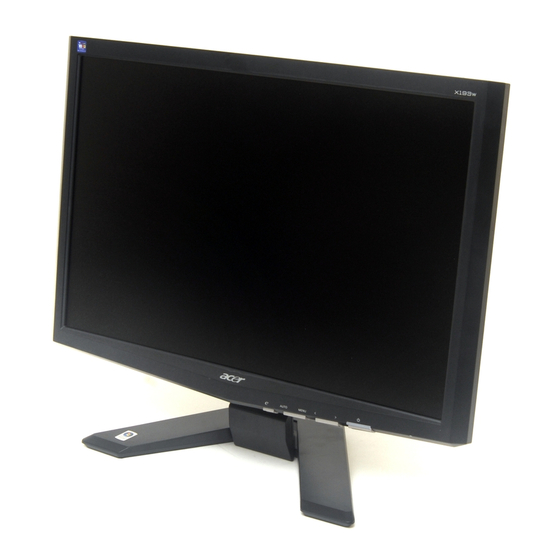
X193W UNPACKING Please check the following items are present when you unpack the box, and save the packing materials in case you will need to ship or transport the monitor in future. LCD Monitor 15-pin D-Sub Cable DVI Cable AC Power Cord (Only Dual-Input Model) User Manual Quick Start Guide... -
Page 7: Attaching / Removing The Base
ATTACHING / REMOVING THE BASE Install: Align the release button on the bottom of the monitor with the corresponding slots on the bottom of the base. SCREEN POSITION ADJUSTMENT In order to optimize the best viewing position, you can adjust the tilt of the monitor by using both of your hands to hold the edges of the monitor as shown in the figure below. -
Page 8: Wall Mounting (Optional)
X193W WALL MOUNTIN (OPTIONAL) To obtain a wall-mounting kit, contact your local dealer, Refer to the instructions that come with the base mounting kit. Screw holes (100 mm X 100 mm) * For use only with UL Listed Wall Mount Bracket EN- 7... -
Page 9: Connecting The Power Cord
CONNECTING THE POWER CORD Check first to make sure that the power cord you use is the correct type required for your area. This monitor has a universal power supply that allows operation in either 100/120V AC or 220/240 V AC voltage areas. -
Page 10: Power Saving
X193W POWER SAVING The monitor will be driven into Power Saving” mode by the control signal from the display controller, as indicated by the amber-color power LED. State LED Light Blue Power Saving Mode Amber The power saving states will be kept until a control signal has been detected or the keyboard or mouse is activated. -
Page 11: Connector Pin Assignment
CONNECTOR PIN ASSIGNMENT PIN NO. DESCRIPTION Green Monitor Ground DDC-return R-Ground G-Ground B-Ground 15-Pin Color Display Signal Cable PIN NO. Blue EN- 10 X193W DESCRIPTION Logic Ground Monitor Ground DDC-Serial Data H-Sync V-Sync DDC-Serial Clock... - Page 12 24-Pin Color Display Signal Cable Meaning TMDS Data2- TMDS Data2+ TMDS Data 2/4 Shield TMDS Data4- TMDS Data4+ DDC Clock DDC Data Analogue Vertical Sync TMDS Data1- TMDS Data1+ TMDS Data 1/3 Shield TMDS Data3- Meaning TMDS Data3+ +5V Power GND(return for +5V hsync.vsync) Hot Plug Detect...
-
Page 13: Standard Timing Table
STANDARD TIMING TABLE To reduce the need for adjustment for different modes, the monitor has default setting modes that are most commonly used as given in the table below. For optimum adjustment, the user is suggested to perform the Auto Setup under Windows “Full Screen” pattern or using the pattern in the floppy disk provided. The only condition to store as a user mode is the new display information must have 1 KHz difference for horizontal frequency or 1 Hz for vertical frequency or the sync signal polarities are different from the default modes. -
Page 14: Installation
INSTALLATION To install the monitor to your host system, please follow the steps as given below: Steps 1-1 Connect Video Cable a. Make sure both the monitor and computer are powered-OFF. b. Connect the VGA video cable to the computer. 1-2 Digital Cable (Only Dual-Input Model) a. -
Page 15: User Controls
X193W USER CONTROLS Front Panel Controls 1. Power Switch: To turn ON or OFF the power. 2. Power LED: Lights up to indicate the power is turned ON. 3. Empowering / Exit: 1) When OSD menu is in active status, this button will act as EXIT-KEY(EXIT OSD menu). 2) When OSD menu is in off status, press this button to select scenario mode. -
Page 16: How To Adjust A Setting
P/X Series OSD behave When user press “MENU” button on front bezel A. Acer eColor Management If selected to “Acer eColor Management” item, will appear the Acer eColor” OSD B. USER If selected to “USER” item, will appear the Standard OSD I. -
Page 17: Descriptions For Function Control Leds
ADJUSTING THE PICTURE The descriptions for function control LEDS A. Acer eColor Management Main Menu Sub Menu Sub Menu item icon icon User mode Text mode Standard mode Default Setting. Reflects native display capability Graphic mode Enhances colors and emphasize fine detail Movie mode B. - Page 18 Main Menu Sub Menu icon Sub Menu item icon H. Position V. Position Warm Cool User /Red User /Green User /Blue English 繁體中文 Deutsch Français Español Italiano 简体中文 日本語 Suomi Nederlands Русский H. Position V. Position OSD Timeout Analog Digital (only Dual Input Model) DDC/CI Information...
-
Page 19: Operation Instructions
Acer eColor Management Step 1: Press “ Key” to open the Acer eColor Management OSD and access the scenario modes Step 2: Press “<” or “>” to select the mode Step 3: Press “Auto Key” to confirm the mode and run Auto Adjust... -
Page 20: Troubleshooting
TROUBLESHOOTING Before sending your LCD monitor for servicing, please check the troubleshooting list below to see if you can self-diagnose the problem. (VGA Mode) Problems Current Status LED ON LED OFF No Picture LED displays amber color Unstable Picture Abnormal Picture Display is missing, center shift, or too small or too large in display size... - Page 21 50% less energy than conventional equipment. More information refers to http://www.energystar.gov http://www.energystar.gov/powermangement As an ENERGY STAR partner, Acer Inc. has determined that this product meets the ENERGY STAR guidelines for energy efficiency. Note: The statement above is applicable only to Acer LCD Monitor with an ENERGY STAR logo.
-
Page 22: Declaration Of Conformity
Declaration of Conformity Acer Computer (Shanghai) Limited 3F, No. 168 Xizang medium road, Huangpu District, Shanghai, China Contact Person: Mr. Easy Lai Tel: 886-2-8691-3089 Fax: 886-2-8691-3000 E-mail: easy_lai@acer.com.tw Hereby declare that: Product: 19”W LCD Monitor Trade Name: Acer Model Number: X193W SKU Number: X193Wxxx (“x”... -
Page 23: Federal Communications Commission Declaration Of Conformity
(“x” = 0~9, a ~ z, or A ~ Z) Name of Responsible Party: Address of Responsible Party: Contact Person: Phone No.: Fax No.: Acer America Corporation 333 West San Carlos St., San Jose CA 95110, U. S. A. 254-298-4000 Tel : 254-298-4147 Fax : www.acer.com...