Advertisement
Quick Links
Advertisement

Related Manuals for UNEEKOR QED BAR


Summary of Contents for UNEEKOR QED BAR
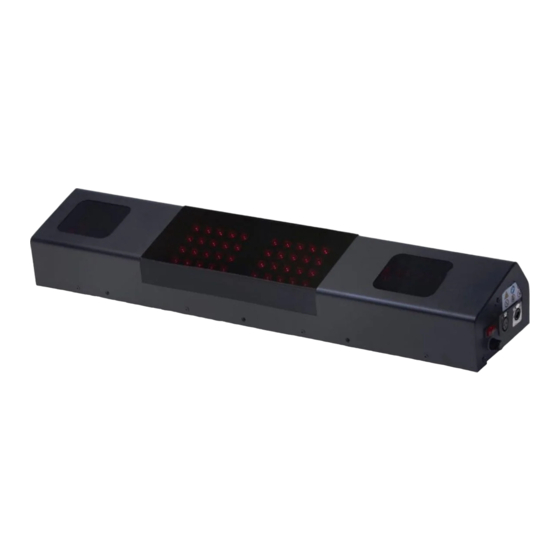
- Page 1 CALIBRATION GUIDE QED BAR IMPORTANT: Read Before Using.
-
Page 2: Calibration Guide
Calibration Guide How to calibrate your QED sensor after installation. Necessary Parts Necessary Tools Level Calibration Chart... - Page 3 Step 1: Open the “This PC” app. Step 2: Click the Local Disk (C:) Drive. Step 3: Click the “Z3CAMSensor” folder.
- Page 4 Inside the “Z3_CAM_TOOL” Make sure the status are all green. (If status is not green please contact support@uneekor.com) Step 6: Check the “Center Cam” and “Side Cam. ” Make sure they are on. Adjust brightness if needed. If you do not see anything, please refer to in the install link.
- Page 5 Step 7: If steps 5 and 6 passed, place the calibration chart on the hitting mat. Make sure the center line on the chart is straight on the “center cam” ONLY. Hitting Screen Hitting Screen Step 8: It is important the center line is straight (Make sure your hitting mat is level! If not you will get and circle tee position is...
- Page 6 Step 10: If calibration is successful you will see this message. Click (If calibration failed please contact support@uneekor.com) Step 11: check to see if you see a grid of green dots on both cameras. Then move onto “Area Setting. ”...
- Page 7 Step 13 : Make sure the “One Area Mode” is on. Step 14 : button. Step 15 : Then on the next page with calibration.
- Page 8 POWER FOR EVERY GOLFER Uneekor, Inc. 26249 Enterprise Court Lake Forest, CA 92630 Tel: 1-949-328-7790 sales@uneekor.com support@uneekor.com Uneekor © 2020 All Rights Reserved...
Need help?
Do you have a question about the QED BAR and is the answer not in the manual?
Questions and answers