Table of Contents
Advertisement
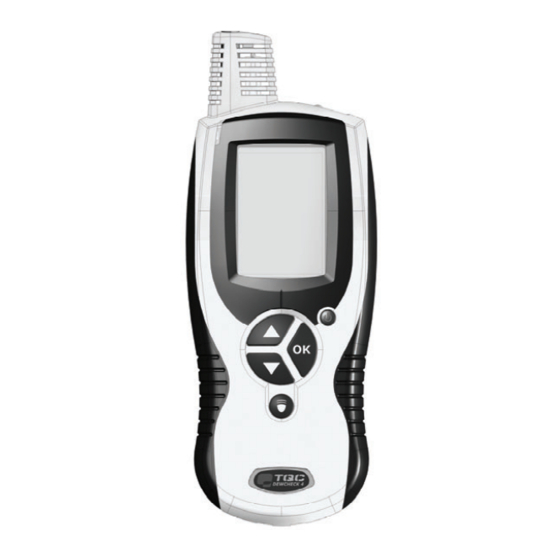
Quick Links
Advertisement
Table of Contents

Related Manuals for TQC DewCheck4


Summary of Contents for TQC DewCheck4
- Page 2 This product is RoHs conform 2002/95/EC Warranty TQC will grant a warranty for a period of 24 months for DewCheck Series 4 and 12 months for all related equipment from the date of delivery in respect of any evidence of faulty workmanship and materials.
-
Page 3: Table Of Contents
INSTRUCTION MANUAL DEWCHECK4 Introduction ..............1 Starting the DewCheck4 ..........2 The Keypad..............2 The Sensors...............3 The Start menu ............3 2.3.1 Measure ..............4 2.3.2 Log manual ............4 2.3.3 Log interval ............4 2.3.4 Setup..............4 Setup ................5 Interval ...............5 Limits................6 Language ..............7 °C / °F.................7 Date/time..............7... - Page 4 Dewpoint temperature - Td .......19 4.4.5 Delta-T - TΔ ............19 Batches ..............19 DewCheck4 Dock ............21 Installing the DewCheck4 Dock .......21 5.1.1 Positioning the DewCheck4 with Dock .....22 DewLog V1 - the software........23 5.2.1 Installation............23 5.2.2 Quick start............23 Safety, Care and Maintenance ........25 General Maintenance..........25...
-
Page 5: Introduction
In order to document the climatic conditions during a coating job, the DewCheck4 is equipped with two types of internal memory. The memory for manual logging can store up to 6,000 records in a maximum of 8 batches. The memory for interval logging can store up to 12,000 records in a maximum of 8 batches. -
Page 6: Starting The Dewcheck4
2 Starting the DewCheck4 The DewCheck4 is ready to start measuring as soon as it has been unpacked. The only settings you may need to check are the language, date, time, unit of measuring, and temperature (Celsius or Fahrenheit). See Section 3 for more information on setting up the instrument. -
Page 7: The Sensors
An external sensor can be used in combination with the optional DewCheck4 Dock. See Section 4.4 for detailed information on parameters. The Start menu When DewCheck4 is switched on, the menu in Figure 2-1 is displayed. The user can select the following submenus: • Measure •... -
Page 8: Measure
2.3.1 Measure Select Measure to start measuring immediately. See Section 4.1 for more information. 2.3.2 Log manual Select Log manual to start measuring in a batch and manually log the measurements. See Section 4.2 for more information. 2.3.3 Log interval Select Log interval to start measuring in a batch and log the measurements in a set interval. -
Page 9: Setup
3 Setup The Setup menu enables you to change the instrument’s settings. 1. Select Setup. 2. Press OK. The Setup menu displays. Figure 3-1 Setup menu The Setup menu contains the following submenus: • Interval • Limits • Language • °C / °F •... -
Page 10: Limits
Figure 3-2 Setting the interval When a critical logging time is set, the message Low battery will be displayed instead of % full. This means that the logging period cannot be fully used due to a lack of battery power. Note that the instrument retains the data even if the batteries are empty. -
Page 11: Language
3. Press OK. The second digit of the parameter can now be set. 4. Press OK. The line with Lo limit:On (or Off) is selected. 5. Press OK to change the current setting (On or Off). 6. Use the down button to go to the line with Hi limit:On or (Off). -
Page 12: Device Info
Device info Use this option to check the serial number and firmware. You must provide this information when you need support. This screen also displays the battery status (% full) and the memory status (% free). See Section 6.2 for more information on battery maintenance. -
Page 13: Measuring
4 Measuring In the start menu, you can select three kinds of measuring: • Select Measure to measure without logging (see Section 4.1.). • Select Log manual to measure with manual logging (see Section 4.2.). • Select Log interval to measure in intervals (see Section 4.3.). -
Page 14: The Log Manual Function
DO NOT USE EXCESSIVE FORCE! A light contact with the surface is sufficient. Using force does not increase the measuring speed or improve the accuracy of the measurement, but it does wear and/or damage the sensor tip. Do not drag the probe over the surface. - Page 15 Procedure 1. Select Log manual and press OK. The Log manual screen displays. When the memory is full, the batches are unavailable. This is indicated by a cross in the memory symbol . You must clear the batches before you can start logging.
- Page 16 triggered and the alarm sign displayed next to the concerned parameter. If no limits are set here, the settings in the Setup menu are used. Select Back and press OK to return to the Batch menu and start logging. Figure 4-5 Limits in batch 5.
-
Page 17: The Log Interval Function
The trend indicator between the parameter and the reading indicates if the value is increasing or decreasing. When a limit is exceeded, an audible alarm is triggered and the alarm sign displayed next to the concerned parameter. 7. Select Hold and press OK to freeze the measurements. The Hold option changes to Store. - Page 18 Procedure 1. Check the set interval in the Setup menu. See Section 3.1 for details on setting the interval. 2. Select Log interval and press OK. The Log interval screen displays. When the memory is full, the batches are unavailable. This is indicated by a cross in the memory symbol .
- Page 19 Since holding the surface temperature sensor against a surface for longer periods of time is impractical, we recommend using the optional DewCheck4 Dock, which is equipped to permanently position the instrument against a surface. See Section 5 for more information about the...
- Page 20 7. Select Log to display the parameter screen. The Start option at the bottom of the screen is automatically selected. Figure 4-12 Measuring with interval logging Note that a blinking battery symbol indicates the battery must be replaced. See Section 6.2 for more information on battery maintenance.
-
Page 21: Parameters
11. Select Back to return to the Log interval menu. You can select another batch for interval logging or return to the start menu. See Section 4.4 for detailed information on parameters. Recall Select Recall to evaluate stored measurements for a selected batch. -
Page 22: Relative Humidity - Rh
4.4.1 Relative humidity - RH The first parameter, RH, is the measured relative humidity. The humidity sensor is located behind the grid at the top of the instrument. To ensure an accurate RH is measured, check that the airflow through the grid is not obstructed. Although the sensor is equipped with an integrated dust filter, it is recommended to keep it away from paint dust and dirt as much as possible. -
Page 23: Dewpoint Temperature - Td
Batches All of the DewCheck4 measurements are stored in batches. A total of 8 batches are available that can be used for either manual or interval logging. Batches can be numbered of given names using the PC software. - Page 24 Batches with measurements can be Recalled and Cleared in the batch menu. Recall Select Recall to evaluate stored measurements for a selected batch. The Recall menu displays the Average, Maximum and Minimum values for Delta-T measurements in the saved dataset. Clear The Clear function deletes all stored batches from memory.
-
Page 25: Dewcheck4 Dock
5 DewCheck4 Dock The DewCheck4 Dock is an optional unit that serves as a USB interface between the instrument and a PC, and as a magnetic holder with an input for the magnetic surface temperature probe. (Thermocouple in Dock overrides gauges surface probe.) -
Page 26: Positioning The Dewcheck4 With Dock
For other types of measuring, see chapter 4. 5.1.1 Positioning the DewCheck4 with Dock In its role as magnetic holder, the Dock can be fixed to any ferrous steel surface for a longer period of time. The Dock must then be secured with a bolt (Figure 5-2). -
Page 27: Dewlog V1 - The Software
DewLog V1 - the software The dock software is designed to evaluate and analyze the data collected by your data logger. 5.2.1 Installation Insert the DewLog disc into the CD-ROM drive in your computer and wait for the installation screen to appear. If the screen does not appear automatically, start the installation by running the setup.exe file located on the CD- ROM. - Page 28 Step 5. Click Test; if the connection is successful the battery status of the data-logger is displayed. The firmware and serial number are displayed after clicking the More button. In addition, a Start button for real time measuring is displayed. Step 6.
-
Page 29: Safety, Care And Maintenance
Be careful not to scratch the LCD screen or break the glass screen. • Do not subject the DewCheck4 to a strong impact or extreme temperatures. If a Liquid Chrystal Display is heated above 50°C (120°F) it may be damaged. This can happen if it is left in a car parked in strong sunlight. -
Page 30: Battery Maintenance
• Do not leave the instrument in extremely dusty, damp or wet places. Dust and moisture can damage the gauge and cause it to malfunction. The instrument is not waterproof and may not be submerged. Battery maintenance The batteries need to be replaced when the battery symbol flashes. -
Page 31: Specifications
7 Specifications Humidity Accuracy at 23°C ±3%rh Measurement resolution 0.5% Measurement range 0…100%rh Temperature Ta (Air) Accuracy ± 0.5°C / 1°F Measurement resolution 0.1 °C / 0.1°F Measurement range -20…+80°C / -4..+175°F Temperature Ts (Surface) Accuracy ± 0.5°C / 1°F Measurement resolution 0.1°C / 0.1°F Measurement range... - Page 32 Memory Type Dynamic Memory size manual logging 6,000 records Record content Batch number, time/date, humidity, Ta, Ts, Td, TΔ, status byte for alarm. Memory size interval logging 12,000 records Record content Humidity, Ta and Ts. Other parameters and date and time are calculated.
- Page 33 (manual logging) 400 hours continuous operation.(data based upon use without backlight) Unit to be connected to Optional DewCheck4 Dock the back of the gauge. Unit provides communication through USB interface, K-type thermocouple input for external thermocouple and has three rubber...
-
Page 34: Menu Structure
8 Menu Structure Start menu Measure Log manual Log interval Setup The date and time are displayed at the bottom of the main menu. Measure menu Measure Hold/Release Menu Log manual menu Log Manual Batch 1 Batch 2 Batch 3 etc up to Batch 8 Batch 1 Hold... -
Page 35: Log Interval Menu
If a Batch is closed, the status Closed is displayed at the top of the Batch menu screen. The Log nr., whether Limits are On or Off, and Manual are displayed at the bottom of the screen. Log interval menu Log Interval Batch 1 Batch 2... -
Page 36: Setup Menu
E-mail: info@tqc.eu Internet site: http://www.tqc.eu This manual may not be reproduced, in whole or in part, by photo-copy or print or any other means, without written permission from TQC Text: .DOC, The Hague, © 2008 TQC, Printed in the Netherlands...
Need help?
Do you have a question about the DewCheck4 and is the answer not in the manual?
Questions and answers