Table of Contents
Advertisement
Quick Links
Please read all instructions before installing
SPECIFICATIONS
Voltage ............................................................... 120VAC, 60Hz
Load (Multi‑Way) ....................................................25‑500 Watt
Compatibility ........................................................Incandescent
Time Delay Adjustment ...................15 seconds to 30 minutes
Light Level Adjustment ..................................... 10 fc to 150 fc
Environment .................................................... Indoor use only
Operating Temperature .................. 32° to 104°F (0° to 40°C)
Humidity ......................................... 95% RH, non‑condensing
Electrical Supply Wire Requirement
Minimum temperature rating ............................ 75°C (167°F)
Tools Needed .............. Insulated Screwdriver, Wire Strippers
DESCRIPTION AND OPERATION
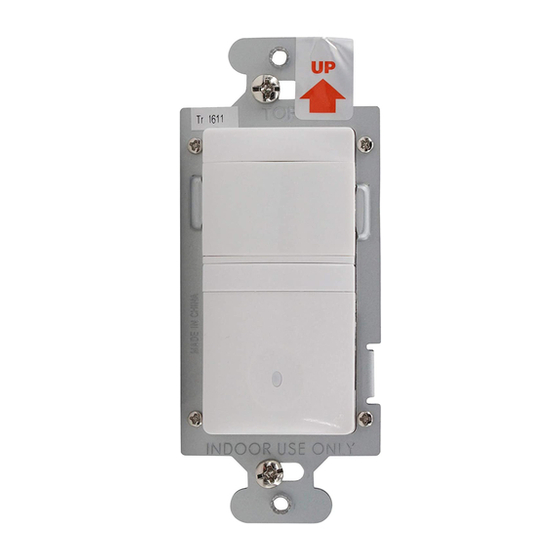
The RD‑250 Multi‑Way Dimming Wall Switch Convertible Occupancy Sensor is
designed to replace a standard single pole or multi‑way (3‑way, 4‑way) switch or
dimmer. It is ideal for indoor areas where occupancy sensor‑based manual ON/
OFF and Dimming control is desirable.
Like a standard switch, you press the ON/OFF/DIM button to turn the dimmable
lighting load ON and OFF. Unlike a standard switch, the RD‑250 automatically
turns OFF the controlled load after the coverage area has been vacant for a period
of time (Time Delay). If motion is detected within 30 seconds after it automatically
turns OFF, the RD‑250 automatically turns the load back ON. Like a standard
dimmer, once the lighting load is ON, you can dim it UP or DOWN by pushing and
holding the ON/OFF/DIM button. When you push the ON/OFF/DIM button to turn
the dimmable load ON, the RD‑250 recalls the last used dimming level.
While the sensor is factory preset as a Vacancy Sensor with manual ON operation,
it can be adjusted to work as an Occupancy Sensor that turns the controlled load
ON automatically upon detection of occupancy in the area.
The RD‑250 can be wired with up to 3 additional RD‑250s for multi‑way Manual/
Auto –ON/OFF of one or several loads (up to one load connected to each RD‑250).
It can also be wired to up to 4 RH‑253 single pole momentary wall switches for
multi‑way Manual‑ON/OFF Automatic‑OFF control of one load.
Multi‑Way Dimming Wall Switch
Call 800.879.8585 for Technical Support
RD‑250
Convertible
Occupancy Sensor
Santa Clara, CA 95050
Advertisement
Table of Contents

Summary of Contents for wattstopper RD‑250
- Page 1 Please read all instructions before installing RD‑250 Multi‑Way Dimming Wall Switch Convertible Occupancy Sensor SPECIFICATIONS Voltage ............... 120VAC, 60Hz Load (Multi‑Way) ............25‑500 Watt Compatibility ............Incandescent Time Delay Adjustment ....15 seconds to 30 minutes Light Level Adjustment ........10 fc to 150 fc Environment ............
- Page 2 OFF even though someone is in the area. Windows, glass doors, and other transparent barriers will obstruct the sensor’s view and prevent detection. INSTALLATION & WIRING These instructions describe single pole, 3‑way and (7.6m) multi‑way circuit applications. (3.7m) Fig. 1: Sensor Coverage Area www.wattstopper.com...
- Page 3 Steps 4a, 4b, and 4c describe each circuit application. For information about other applications, consult technical support or the WattStopper website. 1. Prepare the switch box. After the power is turned OFF at the circuit breaker box, remove the existing wall plate and mounting screws.
- Page 4 4c. Multi‑way wiring using one RD‑250 and up to four RH‑253s: One RD‑250 can be connected with up to 4 RH‑253 single pole momentary wall switches for multi‑way Manual‑ON/OFF control of one single load. The RD‑250 must be installed in the wiring wall box that connects to the load. www.wattstopper.com...
- Page 5 Connect the existing wires to the wire leads on the RD‑250 sensor as indicated below (See Fig. 4c). Cap them securely using wire nuts provided. • Connect the green or non‑insulated (copper) GROUND wire from the circuit to the green wire on the RD‑250. • Connect the NEUTRAL wire from the circuit and from the lamp (LOAD) to the white wire on the RD‑250. • Connect the power wire from the circuit box (HOT) to one terminal on each RH‑253 single pole momentary wall switch and to the TRAVELER 1 wire.
- Page 6 1. Press and hold the ON/OFF/DIM button. After 10 seconds the lighted switch turns off. The load turns ON if it was not already ON. The sensor is now in a TEST mode that lasts 5 minutes. (You can end the TEST mode sooner by www.wattstopper.com...
- Page 7 pressing the ON/OFF/DIM button for another 10 seconds). During the TEST mode, the controlled load turns ON for 5 seconds each time the sensor that initiated the TEST mode detects occupancy. 2. Move out of the coverage area or stand very still. The controlled load turns OFF after 5 seconds if no motion is detected.
- Page 8 If load does not respond properly after following troubleshooting, turn OFF power to the circuit then check wire connections or call technical support. COVER PLATES WattStopper RD wall switches fit behind industry standard decorator style switch cover plates. WARRANTY INFORMATION WattStopper warranties its products to be free of defects in materials and workmanship for a period of five (5) years.


Need help?
Do you have a question about the RD‑250 and is the answer not in the manual?
Questions and answers