Sony BDV-N590 Operating Instructions Manual
Blu-ray disc/ dvd home theatre system
Hide thumbs
Also See for BDV-N590:
- Reference manual (74 pages) ,
- Quick start manual (16 pages) ,
- Service manual (4 pages)

Related Manuals for Sony BDV-N590


Summary of Contents for Sony BDV-N590
- Page 1 4-418-144- Blu-ray Disc™/ DVD Home Theatre System Operating Instructions BDV-N590...
- Page 2 WARNING Do not install the appliance in a confined space, such as a bookcase or built-in cabinet. To reduce the risk of fire, do not cover the ventilation opening of the apparatus with newspapers, tablecloths, curtains, etc. Do not place the naked flame sources such as lighted candles on the apparatus.
-
Page 3: Copy Protection
The manufacturer of this product is Sony Corporation, 1-7-1 Konan Minato-ku Tokyo, 108-0075 Japan. The Authorized Representative for EMC and product safety is Sony Deutschland GmbH, Hedelfinger Strasse 61, 70327 Stuttgart, Germany. For any service or guarantee matters please refer to the addresses given in separate service or guarantee documents. - Page 4 Wi-Fi Alliance. • The Wi-Fi Protected Setup Mark is a mark of the Wi-Fi Alliance. • “PhotoTV HD” and the “PhotoTV HD” logo are trademarks of Sony Corporation. • MPEG Layer-3 audio coding technology and patents licensed from Fraunhofer IIS and Thomson.
- Page 5 should not affect unprotected content or content protected by other content access technologies. Content owners may require you to upgrade PlayReady to access their content. If you decline an upgrade, you will not be able to access content that requires the upgrade.
-
Page 6: About These Operating Instructions
damages, including but not limited to lost profits or replacement systems. About These Operating Instructions • The instructions in these Operating Instructions describe the controls on the remote. You can also use the controls on the unit if they have the same or similar names as those on the remote. -
Page 7: Table Of Contents
Table of Contents About These Operating Instructions ... 6 Unpacking ... 8 Index to Parts and Controls...9 Getting Started Step 1: Installing the System... 13 Step 2: Connecting the System... 13 Connecting the speakers ...13 Connecting the TV ...14 Connecting the other components (Set-top box, etc.) ...15 Connecting the antenna (aerial) ...17... -
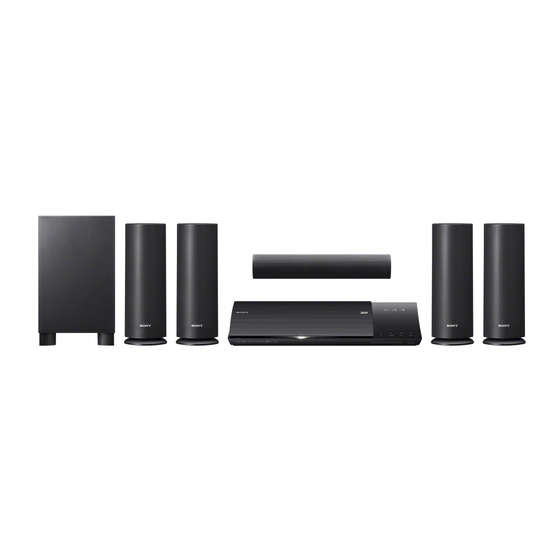
Page 8: Unpacking
Unpacking • Front speakers (2) • Surround speakers (2) • Center speaker (1) • Subwoofer (1) • FM wire antenna (aerial) (1) • Remote commander (remote) (1) • R6 (size AA) batteries (2) • Calibration mic (1) • High Speed HDMI cable (1) (Singapore models only) •... -
Page 9: Index To Parts And Controls
Index to Parts and Controls For more information, refer to the pages indicated in parentheses. Front panel A Disc slot (page 21) B Front panel display (remote sensor) USB 2 port (page 22) Open the cover using a fingernail in the slot. E Soft-touch buttons/indicators N (play) x (stop) -
Page 10: Front Panel Display
Front panel display About the indications in the front panel display A Lights up when repeat play is activated. B Lights up when stereo sound is received. (Radio only) C Lights up when the system is playing via the PARTY STREAMING function. D Lights up when muting is on. -
Page 11: Top Menu
Selects the sound mode. HOME (pages 18, 30, 32, 33, 36, 38) Enters or exits the system’s home menu. Converts 2D content into simulated 3D content when connected to a 3D compatible device. Accesses the “Sony Entertainment Network™” online service. - Page 12 F Playback operation buttons See “Playback” (page 21). ./> (previous/next) Skip to the previous/next chapter, track, or file. m/M (fast/slow/freeze frame) Fast reverse/fast forward the disc during playback. Each time you press the button, the search speed changes. Activates slow-motion play when pressed for more than one second in pause mode.
-
Page 13: Getting Started
Getting Started Step 1: Installing the System How to position the system Install the system by referring to the illustration below. A Front speaker (L (left)) B Front speaker (R (right)) C Center speaker D Surround speaker (L (left)) E Surround speaker (R (right)) F Subwoofer G Unit •... -
Page 14: Connecting The Tv
Connecting the TV Select one of the following connection methods according to the input jacks on your TV. USB 1 VIDEO OUT LAN (100) IN 1 IN 2 Video connections VIDEO OUT High Speed HDMI cable If the HDMI IN jack of your TV is compatible with the ARC (Audio Return Channel) function, an HDMI cable connection can also send a digital audio signal from the TV. -
Page 15: Connecting The Other Components (Set-Top Box, Etc.)
Connecting the other components (Set-top box, etc.) Connect the system, other components, and TV as follows. Video out* Connection A System * This connection is unnecessary for connection A (HDMI connection). Select one of the following connection methods according to the jack type of the component. USB 1 VIDEO OUT LAN (100) - Page 16 When you make connection A This connection can send both video and audio signals. • Video signals from the HDMI (IN 1/2) jacks are sent to the HDMI (OUT) jack only when the “HDMI1” or “HDMI2” function is selected. • To send an audio signal from the HDMI (IN 1/2) jacks to the HDMI (OUT) jack, you may need to change the audio output setting.
-
Page 17: Connecting The Antenna (Aerial)
Connecting the antenna (aerial) Rear panel of the unit AUDIO ANTENNA COAXIAL 75 A.CAL MIC AUDIO IN ECM-AC3 FM wire antenna (aerial) (supplied) • Be sure to fully extend the FM wire antenna (aerial). • After connecting the FM wire antenna (aerial), keep it as horizontal as possible. -
Page 18: Step 4: Performing The Easy Setup
LAN router to get the information about SSID and security key. For details: – visit the following website: For customers in Europe and Russia: http://support.sony-europe.com/hub/hub.html For customers in other countries/regions: http://www.sony-asia.com/section/support – refer to the instruction manual supplied with the wireless LAN router –... -
Page 19: Step 5: Selecting The Source
C/X/x/c Depending on the connection method (page 14), perform the following setting. • HDMI cable connection: Follow the instructions that are displayed on the TV screen. • Video cord connection: Select [16:9] or [4:3] so that the picture is displayed correctly. -
Page 20: Step 6: Enjoying Surround Sound
Sound mode Effect [3D Surround] [3D Surround] is a unique Sony (“3D SUR.”) algorithm that provides a 3D sound experience with depth and presence by creating a virtual sound field close to your ears. -
Page 21: Playback
Playback Playing a Disc For playable discs, see “Playable Discs” (page 51). Switch the input selector on your TV so that the signal from the system appears on your TV screen. Load a disc. Playback starts. If playback does not start automatically, select in the [Video],... -
Page 22: Playing From A Usb Device
Displaying the playback information You can check the playback information, etc., by pressing DISPLAY. The displayed information differs depending on the disc type and system status. Example: when playing a BD-ROM A Output resolution/Video frequency B Title number or name C The currently selected audio setting D Available functions ( subtitle) - Page 23 • The iPod/iPhone is charged when connected to the system while the system is turned on. • Sony cannot accept responsibility in the event that data recorded to iPod/iPhone is lost or damaged when using an iPod/iPhone connected to this unit.
-
Page 24: Playing Via A Network
Playing via a Network Enjoying Sony Entertainment Network (SEN) Sony Entertainment Network serves as a gateway delivering selected Internet content and a variety of on-demand entertainment straight to your unit. • Some Internet content requires registration via a PC before it can be played. For further details, visit the... - Page 25 (PARTY [Video], STREAMING) You can play the same music at the same time across all Sony components which are compatible with the PARTY STREAMING function and connected to your home network. Contents in [Music] and the “FM” and “AUDIO”...
-
Page 26: Available Options
• If content that is not compatible with the PARTY STREAMING function is played, the system closes PARTY automatically. To use the system as a PARTY guest Select [PARTY] in the PARTY host device icon. To leave the PARTY, press OPTIONS, then select [Leave PARTY]. - Page 27 Item Details [Leave PARTY] Leaves from a party which the system is participating in. The PARTY STREAMING function continues among other participating devices. [Close PARTY] For PARTY host: Closes a party. For PARTY guest: Closes a party which the system is participating in.
- Page 28 Item Details [Video Search] Displays information on the BD-ROM/DVD-ROM based on Gracenote technology. [Music] only Item Details [Add Slideshow Registers music files in the BGM] USB memory as slideshow background music (BGM). [Music Search] Displays information on the audio CD (CD-DA) based on Gracenote technology.
-
Page 29: Sound Adjustment
Sound Adjustment Selecting the Audio Format, Multilingual Tracks, or Channel When the system is playing a BD/DVD VIDEO recorded in multiple audio formats (PCM, Dolby Digital, MPEG audio, or DTS) or multilingual tracks, you can change the audio format or language. With a CD, you can select the sound from the right or left channel and listen to the sound of the selected channel through both the right and left... -
Page 30: Tuner
Tuner Listening to the Radio Press FUNCTION repeatedly until “FM” appears in the front panel display. Select the radio station. Automatic tuning Press and hold TUNING +/– until the auto scanning starts. [Auto Tuning] appears on the TV screen. Scanning stops when the system tunes in a station. -
Page 31: Using The Radio Data System (Rds)
Using the Radio Data System (RDS) (Europe models only) What is the Radio Data System? The Radio Data System (RDS) is a broadcasting service that allows radio stations to send additional information along with the regular program signal. This tuner offers convenient RDS features, such as station name display. -
Page 32: Other Operations
“BRAVIA” Sync This function is available on TVs with the “BRAVIA” Sync function. By connecting Sony components that are compatible with the Control for HDMI function via an HDMI cable, operation is simplified. • To use the “BRAVIA” Sync function, turn on the system and all components that are connected to the system after connecting them with an HDMI cable. -
Page 33: Setting The Speakers
Press C/c to select [Setup]. Press X/x to select [Audio Settings], then press Press X/x to select [Auto Calibration], then press The confirmation display for [Auto Calibration] appears. Connect the calibration mic to the A.CAL MIC jack on the rear panel. Set up the calibration mic at ear level using a tripod, etc. -
Page 34: Using The Sleep Timer
x [Relocation] You can correct the speaker position virtually to improve the surround effect. [On]: You can hear sound from a virtually relocated speaker position determined by [Auto Calibration]. [Off]: You can hear sound from the actual speaker position. • This setting is reflected after performing [Auto Calibration]. -
Page 35: Deactivating The Buttons On The Unit
By adjusting the remote signal, you can control your TV with the supplied remote. • When you replace the batteries of the remote, the code number may reset itself to the default (SONY) setting. Reset the appropriate code number. Preparing the remote for controlling the TV Press and hold TV "/1 while entering your... -
Page 36: Browsing Websites
Browsing Websites Prepare for Internet browsing. Connect the system to a network (page 17). Press HOME. The home menu appears on the TV screen. Press C/c to select Press X/x to select [Internet Browser], then press The [Internet Browser] display appears. •... - Page 37 Available options Various settings and operations are available by pressing OPTIONS. The available items differ depending on the situation. Items Details [Browser Setup] Displays the Internet Browser settings. • [Zoom]: Increases or decreases the size of the displayed contents. • [JavaScript Setup]: Sets whether to enable or disable JavaScript.
-
Page 38: Settings And Adjustments
Icon For information about update functions, refer to the following website: [Setup]. For customers in Europe and Russia: http://support.sony-europe.com/hub/hub.html For customers in other countries/regions: http://www.sony-asia.com/section/support During a software update, “UPDATING” appears in the front panel display. After the update completes, the main unit automatically turns off. -
Page 39: [Screen Settings]
[Screen Settings] x [3D Output Setting] [Auto]: Normally select this. [Off]: Select this to display all contents in 2D. • 3D video from the HDMI (IN 1) or HDMI (IN 2) jack is output regardless of this setting. x [TV Screen Size Setting for 3D] Sets the screen size of your 3D compatible TV. -
Page 40: [Audio Settings]
[16bit], [12bit], [10bit]: Outputs 16bit/12bit/ 10bit video signals when the connected TV is compatible with Deep Colour. [Off]: Select this when the picture is unstable or colors appear unnatural. x [SBM] (Super Bit Mapping) [On]: Smooths the gradation of video signals output from the HDMI (OUT) jack. -
Page 41: [Bd/Dvd Viewing Settings]
x [Speaker Settings] To obtain the best possible surround sound, set the speakers. For details, see “Setting the Speakers” (page 33). x [Auto Calibration] You can calibrate the appropriate settings automatically. For details, see “Calibrating the Appropriate Speaker Settings Automatically” (page 32). -
Page 42: [Music Settings]
[Music Settings] x [Super Audio CD Playback Layer] [Super Audio CD]: Plays the Super Audio CD layer. [CD]: Plays the CD layer. x [Super Audio CD Playback Channels] [DSD 2ch]: Plays the 2-channel area. [DSD Multi]: Plays the multi-channel area. [System Settings] x [OSD Language] You can select your language for the system on-... -
Page 43: [External Input Settings]
[Automatic Access Permission]: Sets whether or not to allow automatic access from a newly detected DLNA controller. [Smart Select]: Allows a Sony DLNA controller to find the system as the target component to operate by using the infrared ray. You can set this function to on or off. -
Page 44: [Easy Setup]
x [PARTY Auto Start] [On]: Starts a PARTY or joins an existing PARTY at the request of a networked device compatible with the PARTY STREAMING function. [Off]: Off. x [Media Remote Device Registration] Registers your “Media Remote” device. x [Registered Media Remote Devices] Displays a list of your registered “Media Remote”... -
Page 45: Additional Information
If you have any questions or problems concerning your system, please consult your nearest Sony dealer. On cleaning discs, disc/lens cleaners • Do not use cleaning discs or disc/lens cleaners (including wet or spray types). -
Page 46: Notes About Discs
IMPORTANT NOTICE Caution: This system is capable of holding a still video image or on-screen display image on your television screen indefinitely. If you leave the still video image or on-screen display image displayed on your TV for an extended period of time you risk permanent damage to your television screen. -
Page 47: Troubleshooting
Set the child lock function to off (page 35). “DEMO. LOCK” appears in the front panel display. t Contact your nearest Sony dealer or local authorized Sony service facility. “Exxxx” appears in the front panel display. t Contact your nearest Sony dealer or local authorized Sony service facility and give the error code. - Page 48 3D images from the HDMI (IN 1) or HDMI (IN 2) jack do not appear on the TV screen. t Depending on the TV or video component, 3D images may not appear. No picture appears when the video output resolution selected in [Output Video Format] is incorrect.
-
Page 49: Usb Device
The sound comes from the center speaker only. t Depending on the disc, the sound may come from the center speaker only. No sound or only a very low-level sound is heard from the surround speakers. t Check the speaker connections and settings (pages 13, 33). -
Page 50: Network Connection
Picture/sound quality may be poor depending on Internet content providers. t Picture/sound quality may be improved by changing the connection speed. Sony recommends a connection speed of at least 2.5 Mbps for standard-definition video and 10 Mbps for high-definition video. -
Page 51: Playable Discs
Playable Discs Blu-ray Disc BD-ROM BD-R/BD-RE DVD-ROM DVD-R/DVD-RW DVD+R/DVD+RW CD-DA (Music CD) CD-ROM CD-R/CD-RW Super Audio CD Since Blu-ray Disc specifications are new and evolving, some discs may not be playable depending on the disc type and version. Also, the audio output differs depending on the source, connected output jack, and selected audio settings. -
Page 52: Playable Types Of Files
Playable Types of Files Video File format 1)5) MPEG-1 Video/PS MPEG-2 Video/PS, 1)6) Xvid 1)5) MPEG4/AVC 1)5) WMV9 AVCHD Real video Music File format MP3 (MPEG-1 Audio Layer III) 1)4)5) AAC/HE-AAC 1)4) WMA9 Standard LPCM Photo File format JPEG The system does not play files encoded with DRM. AVCHD Ver.2.0 (AVCHD 3D/Progressive) compatible. -
Page 53: Supported Audio Formats
Supported Audio Formats Audio formats supported by this system are as follows. Function Format “BD/DVD” “HDMI1” “HDMI2” LPCM 2ch LPCM 5.1ch LPCM 7.1ch – Dolby Digital Dolby – TrueHD, Dolby Digital Plus DTS-ES – – Discrete 6.1, DTS-ES Matrix 6.1 DTS96/24 –... - Page 54 Speakers Front/Surround (SS-TSB111) Dimensions (approx.) Mass (approx.) Center (SS-CTB111) Dimensions (approx.) Mass (approx.) Subwoofer (SS-WSB111) Dimensions (approx.) Mass (approx.) General Power requirements Power consumption Dimensions (approx.) Mass (approx.) Design and specifications are subject to change without notice. • Standby power consumption 0.3W. •...
-
Page 55: Language Code List
Language Code List The language spellings conform to the ISO 639: 1988 (E/F) standard. Parental Control/Area Code List... -
Page 56: Index
Index Numerics 3D 21 3D Output Setting 39 A/V SYNC 28 Attenuate - AUDIO 40 Audio DRC 40 Audio Language 41 Audio Output 40 Audio Return Channel 42 Audio Settings 40 Auto Calibration 32, 41 Auto Display 42 Auto Standby 42 BD Audio MIX Setting 40 BD Hybrid Disc Playback Layer 41... - Page 57 WEP 18 WPA2-PSK (AES) 18 WPA2-PSK (TKIP) 18 WPA-PSK (AES) 18 WPA-PSK (TKIP) 18...
- Page 60 The software of this system may be updated in the future. To find out details on any available updates, please visit the following URL. For customers in Europe and Russia: http://support.sony-europe.com/hub/hub.html For customers in other countries/regions: http://www.sony-asia.com/section/support ©2012 Sony Corporation Printed in Malaysia...