
Subscribe to Our Youtube Channel
Related Manuals for RTX RTX4027


Summary of Contents for RTX RTX4027
- Page 1 RTX4027 REPEATER USER GUIDE Technical Reference Document Version 1.1 © May-2019 RTX A/S, Denmark...
- Page 2 20 cm de toutes les personnes. Disclaimer The contents of this document are provided about RTX products. RTX makes no representations with respect to completeness or accuracy of the contents of this publication and reserves the right to make changes to product descriptions, usage, etc., at any time without notice.
- Page 3 Confidentiality This document should be regarded as confidential, unauthorized copying is not allowed © May-2019 RTX A/S, Denmark, All rights reserved http://www.rtx.dk...
-
Page 4: Table Of Contents
Installation of Repeater .............................. 6 2.1. Package – Contents/Damage Inspection ......................6 2.2. Damage Inspection ............................6 2.3. RTX Base Station Mechanics ..........................7 2.4. Mounting the repeater............................8 Recommended external DC adapters ......................... 9 Repeater registration ..............................10 4.1. -
Page 5: Introduction
1. Introduction: The RTX4027 repeater user guide is designed to give a detailed overview on how to install, register and manage RTX repeaters 1.1. Document History REVISION AUTHOR ISSUE DATE COMMENTS 26-06-2019 20-09-2019 Add FCC and IC Regulatory information 1.2. What is new What new features have been added. -
Page 6: Installation Of Repeater
2. Installation of Repeater After planning the network, next is to determine the proper places or location the repeater. The repeater should be mounted as high as possible (2 meters or higher). 2.1. Package – Contents/Damage Inspection Before Package Is Opened: Examine the shipping package for evidence of physical damage or mishandling prior to opening. -
Page 7: Rtx Base Station Mechanics
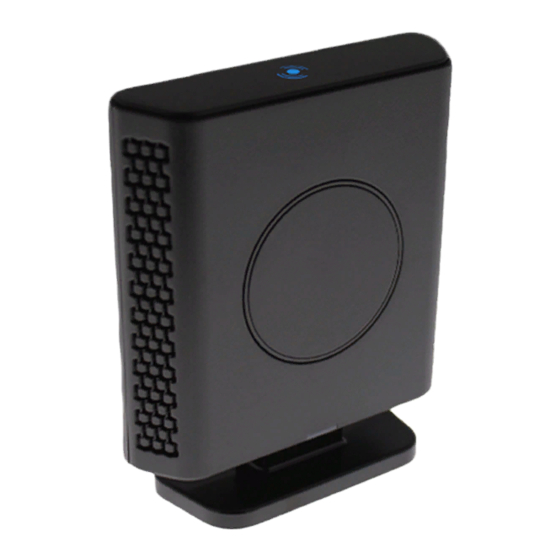
2.3. RTX Base Station Mechanics The repeaters front end shows an LED indicator that signals different functional states of the repeater. The indicator is off when the repeater is not powered on. Reset Button LED Indicator DC Power Connector... -
Page 8: Mounting The Repeater
1: Use the table stand that is in the box 2: Wall mount the repeater using the screws and anchors Screws and Anchors needed (Not supplied by RTX) 2x Screws = Screw wall mount M3.5x31 2x Anchors: Length 29,6mm, OD 6,0mm, ID 4,8mm... -
Page 9: Recommended External Dc Adapters
3. Recommended external DC adapters Module number Specification Manufacturer Type Ten Pao International Multi-Plug S008ACM0550060 SMPS,100-240VAC,5.5V 600mA, VI (body) User can use different Adaptor Plug listed below: Module number Specification Manufacturer Type 8W, VDE 8W, VDE Adaptor Plug EU Plug 8W, UL 8W, UL Adaptor Plug US Plug... -
Page 10: Repeater Registration
4. Repeater registration There are 2 different ways to register RTX repeater’s “Local Automatic” and “Manually” Local Automatic: In this mode the repeater registers to the base station with best signal strength, this option is only recommended for single cell systems and Multi cell systems where the repeater is only able to sync with one specific base station. -
Page 11: Register Repeater(S) "Manually
Step 4: Power on the repeater(s) and registration will start. When the LED is steady green the repeater is successfully registered. Screen shot PARAMETERS DESCRIPTION System counter SINGLE CELL SYSTEM: The base has always RPN00, first repeater will then be RPN01, second repeater RPN02 and third RPN03 (3 repeaters maximum per base) MULTI CELL SYSTEM: Bases are increment by 2^2 in hex, means first base RPN00 second base RPN04 etc., in... - Page 12 Step 1: To register repeater(s), navigate to the Repeater page. Screen shot Step 2: Click” Add Repeater” and select “Manually” from the dropdown Screen shot Step 3: Give the repeater a name and press “save”...
- Page 13 Step 4: select what base station the repeater needs to register to “DECT sync source” drop down In this case there are three base stations in the multicell (RPN00, RPN04 and RPN08) and three repeaters can be connected to each base station. Select the base station the repeater needs to register to.
-
Page 14: Firmware Update
5. Firmware update: The repeaters are updated over air. Step 1: Navigate to Firmware Update page Step 2: Enter “Firmware Update server address”, “Firmware path” and DECT402x firmware version Screen shot... - Page 15 Empty IP address or DNS of firmware update files source SERVER ADDRESS Valid Inputs: AAA.BBB.CCC.DDD or <URL> Example: firmware.rtx.net or 10.10.104.41 FIRMWARE PATH Empty Location of firmware on server (or firmware update server path where firmware update files are located).
-
Page 16: Led And Button
6. LED and button: Power cycle The repeater basically has two modes: Subscribed or not subscribed. When powered up without a registration, the following applies. Power Press Action 00s < x < XXs Nothing 00s < x < 05s Nothing 05s <... - Page 17 n flash n handset relayed by repeater Steady on 1. Registration procedure timed out after 5 min. 2: When key is held pressed the LED will light up in 2 sec. to indicate that releasing the key will delete registration, LED turns off after 4 more sec.
Need help?
Do you have a question about the RTX4027 and is the answer not in the manual?
Questions and answers