Advertisement
Quick Links
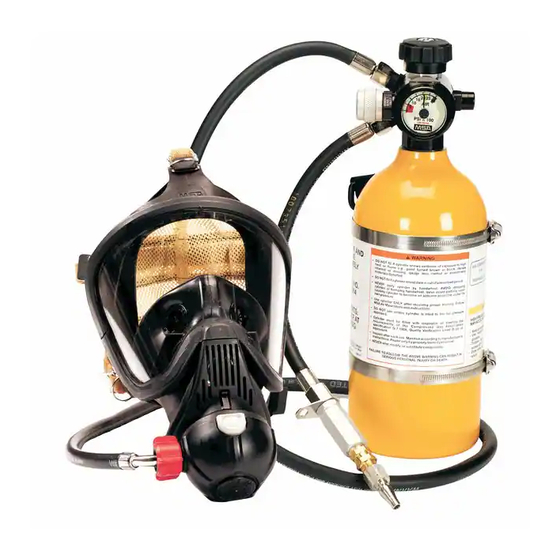
PremAire
TAL 4011 (L) Rev. 3
CADET 15 M LEVEL II MAINTENANCE PROCEDURES
© MSA 2004
®
WARNING
!
This manual, including Warnings and
Cautions inside, must be read and fol-
lowed carefully by all persons who will
use or maintain the product, including
those who have any responsibility
involving its selection, application, ser-
vice or repair. This product will per-
form as designed only if used and
maintained according to the instruc-
tions. Otherwise, it could fail to per-
form as designed, and persons who
rely on this product could sustain seri-
ous personal injury or death.
The warranties made by MSA with
respect to the product are voided if the
product is not installed, used, and ser-
viced in accordance with the instruc-
tions in this manual. Please protect
yourself and your employees by follow-
ing the instructions. Please read and
observe the WARNINGS and CAU-
TIONS inside. For any additional infor-
mation relative to use or repair, write or
call 1-800-MSA-2222 during regular
working hours.
Prnt. Spec. 10000005389(A)
Mat. 817081
Doc. 817081
Advertisement

Subscribe to Our Youtube Channel
Related Manuals for MSA PremAire Cadet 15M


Summary of Contents for MSA PremAire Cadet 15M
- Page 1 The warranties made by MSA with respect to the product are voided if the product is not installed, used, and ser- viced in accordance with the instruc- tions in this manual.
-
Page 2: Table Of Contents
Do not attempt repairs beyond those specified in this ratus being repaired. manual. Only trained or certified personnel, authorized by MSA, are permitted to maintain and repair this apparatus. Breathing apparatus must not be repaired Do not disconnect if pressurized. Always be sure to beyond manufacturer's recommendations. -
Page 3: Mask Mounted (Second Stage) Regulator Repair
MASK MOUNTED REGULATOR REPAIR MASK MOUNTED (SECOND STAGE) REGULATOR REPAIR All repair procedures assume that the regulator is disas- 6. Using the small span- sembled from the apparatus and facepiece. To do this: ner wrench, unthread • Be sure the cylinder valve is completely closed. the adjusting screw •... - Page 4 MASK MOUNTED REGULATOR REPAIR Push gently on the diaphragm or damage to the lever assembly could affect regulator operation. 3. Thread the shut-off hub into the regulator housing. 4. Pull the swivel shaft gently out of the regu- lator body. 4.
- Page 5 MASK MOUNTED REGULATOR REPAIR Removing the Inlet Screen, Internal Sleeve, O-Ring, 2. Place a new diaphragm Power Stage Spool, and Power Stage Diaphragm into the valve and lever assembly. Ensure the flat side of the Do not press on the lever assembly. Do not unthread diaphragm faces up the base and lever assembly or the divider skirt from and that the diaphragm...
- Page 6 MASK MOUNTED REGULATOR REPAIR 7. Place a 1" wrench on the hex flats of the base and lever assembly. Thread the sleeve into the valve and lever assembly clockwise hand-tight. 6. With the slot and lug Installing the Valve Core lined up, press the 1.
-
Page 7: Mask Mounted Regulator Static Pressure Test
PosiChek3 tester. 5. Attach the Airline Adaptor and pressurize the system. Note: When flow testing Premaire CADET 15M System, 6. Adjust the static pressure by turning the adjusting refer to the test procedures in the instructions for Airline screw with the small spanner wrench. -
Page 8: Cylinder Valve Repair
CYLINDER VALVE REPAIR CYLINDER VALVE DISASSEMBLY AND REPAIR Before repairing the cylinder valve, all air must be bled 6. Place the valve stem from the cylinder. Open the cylinder valve handwheel back in the valve body. 1/2 turn and leave it open until all air has been Turn the stem until the exhausted. - Page 9 Certified and disc lay flat. Level III MSA Air Mask Service Center for repair. 3. Clean the O-ring sealing surface on the cylinder with a clean, dry, lint-free cloth. Be sure the cylinder sealing surface is undamaged and free from contaminants, such as dirt or tape residue.
- Page 10 CYLINDER VALVE REPAIR a. Place a thin film of Christo-Lube lubricant on the Removing the Cylinder Pressure Gauge new O-ring. 1. Remove or loosen the cylinder band. b. Place two small diameter drops of Christo-Lube into 2. Position the cylinder valve so that the gauge is the O-ring groove at locations 180 degrees apart.
-
Page 11: High Pressure Regulator
HIGH PRESSURE REGULATOR HIGH PRESSURE REGULATOR DISASSEMBLY AND 2. Apply a thin film of Christo-Lube lubricant to the O-ring. REPAIR Do not over-tighten parts or you may damage the part or the fitting threads. Note: All repair procedures assume that the regulator is disconnected from the apparatus cylinder. -
Page 12: High Pressure Hoses
HIGH PRESSURE REGULATOR Removing the Airline Hose from the High Pressure Removing the High Pressure Hose from Cylinder Inlet Regulator 1. Place a 9/16" wrench on the hex flats of the hose fit- 1. Use a 9/16" wrench to unthread the hose from the ting.
Need help?
Do you have a question about the PremAire Cadet 15M and is the answer not in the manual?
Questions and answers