Table of Contents
Advertisement
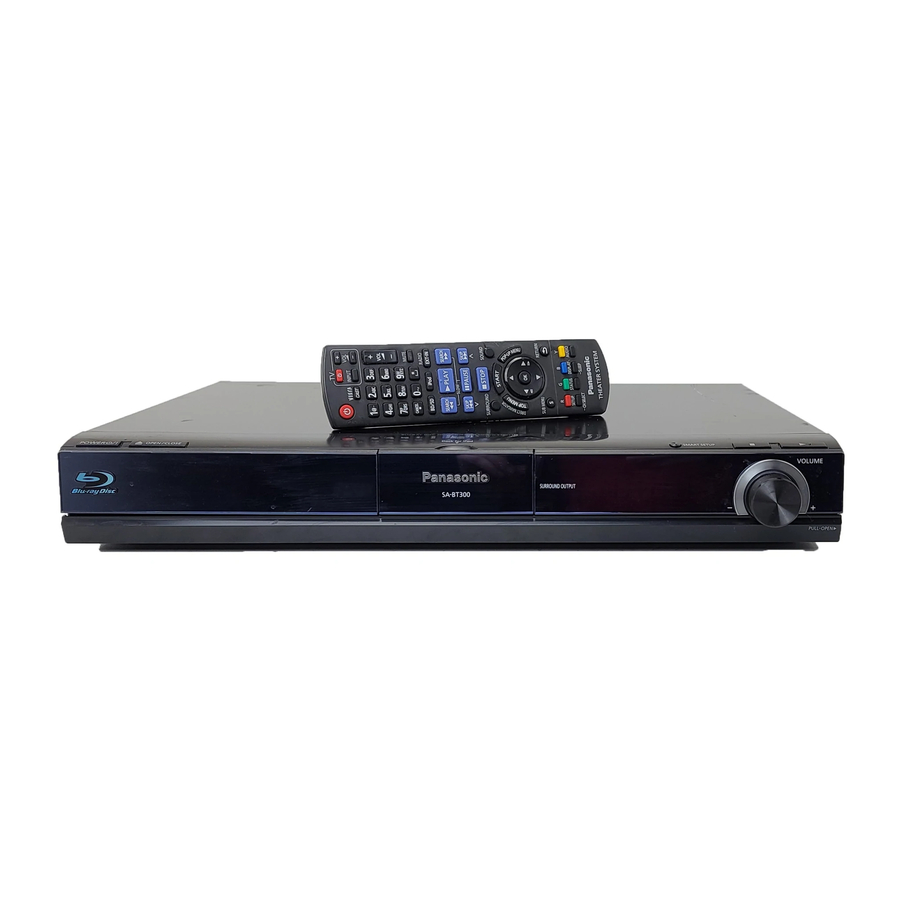
Blu-ray Disc Home Theater Sound System
The illustration shows the image of the unit SC-BT300 with "P" indicated on the packaging.
Dear customer
Thank you for purchasing this product.
For optimum performance and safety, please read these instructions carefully.
Before connecting, operating or adjusting this product, please read the instructions completely. Please keep this manual for future reference.
To update the firmware of this unit, refer to page 32.
Region management information
BD-Video
This unit plays BD-Video marked with labels containing the region code A.
DVD-Video
This unit plays DVD-Video marked with labels containing the region number "1" or "ALL".
[For[the[U.S.A.[and[Canada[
As an ENERGY
Panasonic has determined that
this product meets the ENERGY STAR
guidelines for energy efficiency.
For Canada only: The word "Participant" is used in place of the word
"Partner".
P
PC PX
®
STAR Partner,
®
Operating Instructions
Model No.
Example:
Example:
If you have any questions contact
[U.S.A.]and]Puerto]Rico]:1-800-211-PANA(7262)
[Canada]: 1-800-561-5505
[Only]for[U.S.A.]and]Puerto]Rico]:
The warranty can be found on page 58.
[Canada]:
The warranty can be found on page 59.
SC-BT303
SC-BT300
SC-BT203
SC-BT200
1
1
2
ALL
4
RQT9508-1P
Advertisement
Table of Contents

Related Manuals for Panasonic SC-BT300


Summary of Contents for Panasonic SC-BT300
-
Page 1: Operating Instructions
Blu-ray Disc Home Theater Sound System The illustration shows the image of the unit SC-BT300 with “P” indicated on the packaging. Dear customer Thank you for purchasing this product. For optimum performance and safety, please read these instructions carefully. Before connecting, operating or adjusting this product, please read the instructions completely. Please keep this manual for future reference. -
Page 2: Accessories
≥These operating instructions are applicable to models SC-BT300, SC-BT303, SC-BT200 and SC-BT203 for a variety of regions. Unless otherwise indicated, illustrations in these operating instructions are of SC-BT300. ≥Please note that the actual controls and components, menu items, etc. of your Blu-ray... -
Page 3: Important Safety Instructions
(1) This device may not cause harmful interference, and (2) this device must accept any interference received, including interference that may cause undesired operation. Responsible Party: Panasonic Corporation of North America One Panasonic Way Secaucus, NJ 07094 Support Contact: Panasonic Consumer Electronics Company Telephone No.: 1-800-211-PANA (7262) -
Page 4: Table Of Contents
Table of contents Getting started Accessories ...2 IMPORTANT SAFETY INSTRUCTIONS ...3 Control reference guide (remote control) ...5 Preparing the remote control...5 Batteries ... 5 Use ... 5 Control reference guide (main unit) ...6 Front panel ... 6 Rear panel terminals ... 6 Assembling the speakers...7 Positioning ...8 Speaker connections...9... -
Page 5: Control Reference Guide (Remote Control)
Control reference guide (remote control) INPUT MUTE CANCEL RADIO BD/SD iPod EXT-IN SEARCH SEARCH PLAY SLOW SKIP SKIP PAUSE STOP SURROUND SOUND RETURN SUB MENU SETUP STATUS DISPLAY AUDIO -CH SELECT -SLEEP Preparing the remote control Batteries Insert so the poles ( and ) match those in the remote control. Press in and lift up. -
Page 6: Control Reference Guide (Main Unit)
Control reference guide (main unit) Front panel POWER OPEN CLOSE Dock for iPod 1 Standby/on switch (POWER Í/I) ( Press to switch the unit from on to standby mode or vice versa. In standby mode, the unit is still consuming a small amount of power. 2 Open or close the disc tray ( 3 [BT300] \BT303\... -
Page 7: Assembling The Speakers
Assembling the speakers [BT300] \BT303\ : Front speakers Preparation ≥To prevent damage or scratches, lay down a soft cloth and perform assembly on it. Make sure you have all the indicated components before starting assembly, setup, and connection. Keep the screws out of reach of children to prevent swallowing. 2 Front speakers Position the cable between the ridges. -
Page 8: Positioning
SH-FX70 It is also possible to connect the Surround and Surround back speakers with 2 sets of the optional Panasonic wireless system SH-FX70. ( ≥Use only supplied speakers Using other speakers can damage the unit, and sound quality will be negatively affected. -
Page 9: Speaker Connections
Speaker connections Turn off all equipment before connection and read the appropriate operating instructions. Do not connect the AC power supply cord until all other connections are complete. AC IN Main unit Setup example Sheet of speaker cable Speaker cable for front stickers speaker (L) (White)* Speaker cable for surround... -
Page 10: Tv Connections
TV connections AC IN Main unit My TV has COMPONENT VIDEO IN terminals and HDMI IN terminal. Which should I connect with? ≥The different levels of picture quality input are listed below in order from highest to lowest. HDMI IN )COMPONENT VIDEO IN )VIDEO IN. However, it will take longer for the picture output to start up when this unit is connected with the HDMI IN terminal. -
Page 11: Connections With A Component Video Cable
: Please use High Speed HDMI Cables that have the HDMI logo (as shown on the cover). It is NOTE recommended that you use Panasonic’s HDMI cable. Recommended part number: RP-CDHG10 (1.0 m/3.3 ft), RP-CDHG15 (1.5 m/4.9 ft), RP-CDHG20 (2.0 m/6.6 ft), RP-CDHG30 (3.0 m/9.8 ft), RP-CDHG50 (5.0 m/16.4 ft), etc. -
Page 12: Connections To A Set Top Box, Etc
Connections to a Set Top Box, etc. Use the following connections when you want to output the original surround audio from your Set Top Box, cable TV, VCR, DVD recorder, etc. through this unit’s speakers. ≥Do not connect through the video cassette recorder. Due to copy guard protection, the picture may not be displayed properly. -
Page 13: Radio Antenna Connections
Radio antenna connections AC IN Main unit ≥Keep loose antenna cables away from other wires and cables. FM Indoor antenna AM loop antenna FM indoor antenna (included) Affix this end of the antenna where reception is best. Adhesive tape FM ANT Main unit Using an FM/AM outdoor antenna (optional) Use outdoor antenna if FM/AM radio reception is poor. -
Page 14: Broadband Network Connections
Broadband Network Connections The following services can be used when this unit is connected to the internet via a broadband connection. ≥Firmware can be updated ( ≥You can enjoy the BD-Live ( ≥You can enjoy the VIERA CAST ( Internet Straight LAN cable (not included) Telecommunications equipment (modem, etc.) -
Page 15: Smart Setup / Easy Setup
SMART SETUP / EASY SETUP The SMART SETUP / EASY SETUP screen assists you to make the necessary settings. When the system is switched on for the first time, the SMART SETUP / EASY SETUP screen for the basic settings is displayed automatically. Follow the on-screen prompts to make basic settings for the system. -
Page 16: Showing Start Menu
Showing START menu Some functions of this unit can be operated from the START menu. RQT9508 1 Press [Í] to turn on the unit. 2 Press [START]. ≥Items displayed vary according to the chosen selector and media. 3 Press [3, 4] to select the item and press [OK]. Items Functions Playback DISC... -
Page 17: Selecting The Playback Source
Selecting the playback source RADIO BD/SD RADIO/EXT-IN BD/SD iPod EXT-IN iPod START SD CARD SD CARD SETUP MIC SETUP MIC SELECTOR SELECTOR SELECTOR Selecting the source from the START menu You can select sound modes, desired source, or access playback/menus by using the START menu. -
Page 18: Enjoying Sound From All Speakers And Various Sound Effects
Enjoying sound from all speakers and various sound effects ≥The following sound effects/modes may not be available or have no effect with some sources, or when headphones are used ( ≥You may experience a reduction in sound quality when these sound effects/modes are used with some sources. If this occurs, turn the sound effects/modes off. -
Page 19: Basic Operations
Basic operations Instructions for operations are generally described using the remote control in these operating instructions. Preparation Turn on the TV and select the appropriate video input on the TV. Inserting or removing a disc. 1 Press [< OPEN/CLOSE] to open the disc tray. 2 Insert or remove the disc. -
Page 20: Other Operations During Play
Basic operations Other operations during play SEARCH SLOW SKIP SUB MENU STATUS Stop STOP The stopped position is memorized. Resume play function Press [1PLAY] to restart from this position. ≥The position is cleared if the tray is opened or you press [∫STOP] several times to display “STOP”... -
Page 21: Playing Video Recorded On A Video Camera Or Video Recorder
It is possible to playback the High Definition (AVCHD format) video Play status recorded on a Panasonic High definition Video Camera on a DVD-RAM/R/RW/R DL/+R/+RW/+R DL, or SD card and Standard Definition (MPEG2 format) Video recorded on the Panasonic SD Video Camera on a SD card. -
Page 22: Enjoying Bd-Live Or Bonusview In Bd-Video
Enjoying BD-LIVE or BONUSVIEW in BD-Video [BD-V] What is BONUSVIEW? BONUSVIEW allows you to enjoy functions such as picture-in-picture or secondary audio etc., with BD-Video supporting BD-ROM Profile 1 version 1.1/ Final Standard Profile. What is BD-Live? In addition to the BONUSVIEW function, BD-Video supporting BD-ROM Profile 2 that has a network extension function allows you to enjoy more functions such as subtitles, exclusive images and online games by connecting this unit to the Internet. -
Page 23: Playing Still Pictures
Playing still pictures [JPEG] Playback of a BD-RE, DVD-RAM/R/R DL, CD-R/RW, or SD card with still pictures recorded. (About structure of folders 44, “Structure of folders that can play back on this unit”) 1 Insert a disc or an SD card. ( BD-RE, DVD-RAM “Album View”... -
Page 24: Useful Functions During Still Picture Play
Playing still pictures Useful functions during still picture play Start Slideshow You can display still pictures one by one at a constant interval. BD-RE, DVD-RAM 1 While the “Album View” screen is displayed Press [3, 4, 2, 1] to select the album and press [SUB MENU]. 2 Press [3, 4] to select “Start Slideshow”... -
Page 25: Playing Music
The “Music list” for the folder appears. Playing music continuously even after turning off power to the When the unit is connected to a Panasonic TV (VIERA) that supports HDAVI Control 2 or later and another device supports VIERA Link, the unit is turned off if the power to the TV is turned off, since “Power off link”... -
Page 26: Radio
Listening to the Radio Setting up the radio Numbered buttons SEARCH STATUS STATUS SD CARD Presetting stations automatically Up to 30 stations can be set in each band, FM and AM. 1 Press [RADIO] to select “FM” or “AM”. 2 Press [STATUS] to select the position to start the auto preset search. -
Page 27: Enjoying Tv, Etc. With This Unit's Speakers
Enjoying TV, etc. with this unit’s speakers You can enjoy TV broadcasts with this unit’s speakers. EXT-IN SURROUND SOUND SURROUND STATUS STATUS SD CARD SETUP MIC SELECTOR Preparation Confirm the audio connection to the OPTICAL IN or AUX terminal on the main unit. -
Page 28: Linked Operations With The Tv
EZ Sync VIERA Link “HDAVI Control” is a convenient function that offers linked operations of this unit, and a Panasonic TV (VIERA) under “HDAVI Control”. You can use this function by connecting the equipment with an HDMI cable. See the operating instructions for connected equipment for operational details. -
Page 29: Easy Control Only With Viera Remote Control
Automatic input switching When the following operations are performed, the TV will automatically switch the input channel and display the corresponding action. – When play starts on the unit – When an action that uses the display screen is performed (e.g., Direct Navigator screen) ≥When you switch the TV input to TV tuner mode, this unit will automatically switch to “AUX”*... -
Page 30: Using The Ipod
≥Compatibility depends on the software version of your iPod. ≥Audio/video cannot be recorded or transmitted to the iPod via this system. ≥Panasonic makes no warranty for iPod data management. ≥For more information, refer to the operating instructions for iPod. ≥The contents of the operating instructions and... -
Page 31: Ipod Playback
iPod Playback This system features two different iPod playback modes. The first of these is EXTENDED mode, for playback of music and video contents. With this mode, you can operate the iPod from the main unit. The second mode is SIMPLE mode, which can be used for playback of three types of contents – music, photos, and videos. With this mode, simple operations such as play, stop, and search can be performed on the display of your iPod. -
Page 32: Enjoying Viera Cast Tm
NOTE Welcome to Network Service Your Panasonic Network Service allows you to access web-based content on your Player/Recorder. Some web content may be inappropriate for some viewers. You may disable the Network Service feature by following the instructions found in your Operating Instructions. -
Page 33: Network Settings
Network settings These settings are used if you will connect this unit to the Internet. ≥The connection to the Internet may take time or the Internet may not be connected depending on the connection environment. ( It is required that you use a broadband connection. Preparation ≥Connect to a broadband network. - Page 34 Network settings Setting the connection speed When the connection test results in “Fail” after the IP and DNS-IP addresses are assigned, perform the following settings. After performing steps 1 to 4 ( 5 Press [3, 4] to select “Auto Detect Connection Speed”...
-
Page 35: Changing Settings With The On-Screen Menu
Changing settings with the on-screen menu On-screen menu operations e.g., [BD-V] 1 Press [BD/SD] to select “BD/DVD” or “SD”. Disc 2 Press [DISPLAY]. Play 3 Press [3, 4] to select Video Audio the menu and press [1]. 4 Press [3, 4] to select Menus the item and press [1]. - Page 36 Changing settings with the on-screen menu To select these settings, perform steps 1 to 5 ( Menus Items Play Repeat Play Random Playback Information Window Video Picture Progressive 24p [DVD-V] Audio Sound Effects* Dialog Enhancer* High Clarity Sound *1 When audio is output from the HDMI AV OUT terminal this function is effective only when “Dolby D/Dolby D +/Dolby TrueHD” or “DTS/ DTS-HD”...
-
Page 37: Changing The Unit's Settings
Changing the unit’s settings Change the unit’s settings if necessary. The settings remain intact even if you switch the unit to standby. Setup menu operations 1 Press [BD/SD] to select “BD/ DVD” or “SD”. While stopped Press [SETUP]. 3 Press [3, 4] to select the menu and press [OK]. - Page 38 Changing the unit’s settings To select these settings, perform steps 1 to 5 ( “Audio” Dynamic Range Compression [BD-V] [AVCHD] [DVD-V] (Dolby Digital, Dolby Digital Plus and Dolby TrueHD only) Change the dynamic range ( 54) for late night viewing. Digital Audio Output ≥Press [OK] to show the following settings.
- Page 39 “TV / Device Connection” TV Aspect Set to match the type of TV connected. Time Delay* When connected with a Plasma display, adjust if you notice the audio is out of sync with the video. HDMI Connection ≥Press [OK] to show the following settings. HDMI Video Mode Select “On”...
- Page 40 Changing the unit’s settings To select these settings, perform steps 1 to 5 ( “Network” IP Address/DNS Settings ( ≥Press [OK] to show the following settings. Connection Test IP Address Auto Configuration ( DHCP ) IP Address Subnet Mask Default Gateway DNS Auto Configuration ( DHCP ) Primary DNS Secondary DNS...
-
Page 41: Speaker Settings
Speaker settings Adjusting the sound lag between speakers Delay time ( For optimum listening with 7.1-channel sound, all the speakers, except for the subwoofer, should be the same distance from the seating position. If you have to place the center, surround and surround back speakers closer to the seating position, adjust the delay time to make up for the difference. -
Page 42: Disc And Card Information
Disc and card information Packaged discs This chart shows the different type of retail/commercial discs you can use, and also includes the industry-standard logos that should appear on the discs and/or packaging. Type of media/ Features Logo BD-Video High Definition (HD) movie and music discs ≥Discs supporting BD-Live (BD-ROM... -
Page 43: Sd Cards
≥If the SD card is formatted on a PC, you may not be able to use it on [JPEG] this unit. [AVCHD] ≥We recommend using a Panasonic SD card. [MPEG2] Please confirm the latest information on the following website. http://panasonic.co.jp/pavc/global/cs (This site is in English only.) -
Page 44: About Mp3/Jpeg Files
About MP3/JPEG files File format Playable media CD-R* , CD-RW* Extension Files must have the extension “.mp3” or “.MP3”. Picture resolution Compression rate 32 kbps to 320 kbps Sampling rate 44.1 kHz/48 kHz Reference ID3 tags: version 1, 2.2, 2.3, 2.4 ID3 is a tag embedded in MP3 track to provide information about the track. -
Page 45: Wireless Connections (Optional)
Wireless connections (optional) Connecting the speakers with the optional wireless system (SH-FX70: 2 units) ∫ Wireless setup diagram 7.1ch e.g., Main unit (with the digital transmitter) Seating position Wireless system Wireless system Surround speaker cables LS: Surround (left), RS: Surround (right) ≥Place on the side of the seating position, about 1 m (3 ft) higher than ear level. -
Page 46: Speaker Installation Options
Speaker installation options Attaching to a wall You can attach all of the speakers (except subwoofer) to a wall. ≥The wall or pillar on which the speakers are to be attached should be capable of supporting 10 kg (22 lbs) per screw. Consult a qualified building contractor when attaching the speakers to a wall. -
Page 47: Troubleshooting Guide
Troubleshooting guide Before requesting service, make the following checks. If you are in doubt about some of the check points, or if the solutions indicated in the chart do not solve the problem, refer to “Customer Services Directory (United States and Puerto Rico)” on page 58 if you reside in the U.S.A.and Puerto Rico, or refer to “Product information”... - Page 48 Troubleshooting guide Displays The display is dim. The elapsed time displayed is actually less than the play time. TV screen and video The images from this unit do not appear on the TV. Picture is distorted. Jittering occurs. The screen changes automatically.
- Page 49 Sound ≥Turn the volume up. No sound. ≥Turn the muting off. Low volume. ≥Check connections to speakers and other equipment. Distorted sound. ≥Select the corresponding source. Cannot hear the desired audio ≥Press [AUDIO] to select the audio. type. ≥Ensure the speaker settings for your speakers are correct. ≥When “BD-Video Secondary Audio”...
- Page 50 When other Panasonic products respond to this remote control Change the remote control code on this unit and the remote control (the two must match) if you place other Panasonic products close together. 1) Press [BD/SD] to select “BD/DVD” or “SD”.
-
Page 51: Messages
Messages The following messages or service numbers appear on the TV or unit’s display when something unusual is detected during startup and use. On the TV ≥You inserted an incompatible disc (Discs recorded in PAL video, etc.). Cannot play. ≥You tried to play a non-compatible image. Cannot display on this unit. -
Page 52: Frequently Asked Questions
≥The following operations are available. – Play back JPEG data recorded with a digital camera etc. – Play back AVCHD motion pictures recorded with Panasonic High Definition Video Camera – Play back MPEG-2 motion pictures recorded with Panasonic Standard Definition Video Camera ≥If a BD-Video disc supporting BD-Live or BONUSVIEW is used, it is possible to copy... -
Page 53: Language Code List
Panasonic Corporation. EZ Sync™ is a trademark of Panasonic Corporation. “AVCHD” and the “AVCHD” logo are trademarks of Panasonic Corporation and Sony Corporation. SDHC Logo is a trademark. Portions of this product are protected under copyright law and are provided under license by ARIS/SOLANA/4C. -
Page 54: Glossary
Glossary AVCHD AVCHD is a new format (standard) for high definition video cameras that can be used to record and play high-resolution HD images. BD-J Some BD-Video discs contain Java applications, and these applications are called BD-J. You can enjoy various interactive features in addition to playing normal video. - Page 55 P4HD (Pixel Precision Progressive Processing for HD) This is a processor which makes use of an exclusive Panasonic algorithm. Various processing is supported, including a high-level conversion of the TV scanning format from interlace to progressive and a high-level conversion of standard resolution (480i or 576i) video signal to a 1080 High Definition video signal.
-
Page 56: Specifications
Specifications SPEAKER SECTION ∫ Front speakers SB-HF770 [BT300] Type 1 way, 1 speaker system (Bass-ref.) Full range 6.5 cm (2 Impedance/Input power (IEC) Output sound pressure Frequency range Dimensions (WkHkD) Mass (Weight) ∫ Front speakers SB-HF470 [BT200] Type 1 way, 1 speaker system (Bass-ref.) Full range 6.5 cm (2 Impedance/Input power (IEC) -
Page 57: Listening Caution
DISC SECTION Playable disc: BD-Video:BD-ROM Version 2 BD-RE: Version 3 (Single Layer, Dual Layer), JPEG* BD-R Version 2 (Single Layer, Dual Layer) DVD-RAM: DVD Video Recording format, AVCHD format* , JPEG* DVD-R/DVD-R DL: DVD-Video format* , DVD Video Recording format* AVCHD format* 2, 8 , JPEG*... -
Page 58: Limited Warranty (Only For U.s.a. And Puerto Rico)
For hearing or speech impaired TTY users, TTY: 1-877-833-8855 Accessory Purchases (United States and Puerto Rico) Purchase Parts, Accessories and Instruction Books online for all Panasonic Products by visiting our Web Site at: http://www.pstc.panasonic.com or, send your request by E-mail to: npcparts@us.panasonic.com... -
Page 59: Limited Warranty (Only For Canada)
Limited Warranty (ONLY FOR CANADA) PANASONIC PRODUCT—LIMITED WARRANTY Panasonic Canada Inc. warrants this product to be free from defects in material and workmanship and agrees to remedy any such defect for a period as stated below from the date of original purchase. -
Page 60: Index
DTS-HD ..... 38, 54 [For[the[U.S.A.[and[Puerto[Rico[ Panasonic Consumer Electronics Company, Division of Panasonic Corporation of North America One Panasonic Way, Secaucus, New Jersey 07094 http://www.panasonic.com...