Table of Contents
Advertisement
Quick Links
Advertisement
Table of Contents

Subscribe to Our Youtube Channel
Related Manuals for Dewenwils HPST16M


Summary of Contents for Dewenwils HPST16M
- Page 1 Power Saving Strip Timer HPST16M...
- Page 2 Warning: To reduce the risk of fire, electric shock or personal injury, please follow the instructions precisely before you start the operation. - Do not connect any devices that exceed the maximum ratings of the timer. - Do not connect the timer to the appliances that contain heating elements (cooking,appliances,heaters,irons,ect.).Failure of turning off such appliances may lead to overheating and potential fire.
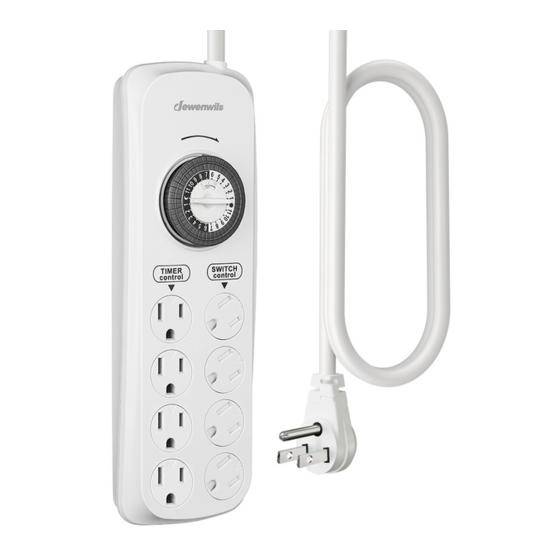
- Page 3 1. Red Switch: Power Main Switch and Overload Protection. 2. Timer Mode Switch: Change the Timer Mode to Always ON or Always OFF or Timer Control. 3. Timer Dial. 4. Outlets: 4 “TIMER control” outlets. 5. Outlets: 4 “SWITCH control” outlets. Installation This indoor mechanical power strip has 48 pins with 24 hours daily repeat function.
- Page 4 Set the ON/OFF time: Begin with all pins pulled up. Push the pins down for the periods of time you want the timer to be ON. Pins in down position represents ON and up position represents OFF, shown as picture. Install the power strip 1.
- Page 5 EXTENSION CORD. One Year Limited Warranty DEWENWILS warrants this product to be free from defects in material and workmanship for a period of one year from the date of purchase. Warranty is void if damage is caused by misuse or improper installation.
Need help?
Do you have a question about the HPST16M and is the answer not in the manual?
Questions and answers