Table of Contents
Advertisement
Quick Links
Quick Setup Guide
Help Hisense improve the environment by reducing paper
waste. For detailed instructions and feature descriptions,
access the full user manual online:
www.xclasstv.com/support/documentation/hisense
Before using the TV, please read this guide carefully and keep
it for future reference.
English
ES-Y218721-1
Advertisement
Table of Contents

Related Manuals for Hisense XClass


Summary of Contents for Hisense XClass
- Page 1 Quick Setup Guide Help Hisense improve the environment by reducing paper waste. For detailed instructions and feature descriptions, access the full user manual online: www.xclasstv.com/support/documentation/hisense Before using the TV, please read this guide carefully and keep it for future reference.
- Page 2 Hisense Company Ltd. and Comcast is a violation of the rights of Hisense Company Ltd. and Comcast under the aforementioned laws.
-
Page 3: Table Of Contents
This Quick Setup Guide supports the following models: 43A6GX/50A6GX Table of Contents What's in the box ......................3 Getting started ........................4 Step 1. Attach stand or mount ..................4 Step 2. Connect devices to your TV ................6 Step 3. Get your remote ready ...................9 Step 4. - Page 4 Congratulations on the purchase of your Hisense XClass TV! To learn more about all things Hisense, contact us using the support info below. To learn more about XClass TV’s privacy practices, please use the below link to view our privacy policy.
-
Page 5: What's In The Box
What's in the box Your Hisense XClass TV comes with the following items: ● TV ● Quick Setup Guide (this document) ● 1 set of AAA (1.5Vcc) batteries ● 2 base stands ● Remote control ● Important safety information and warranty card ●... -
Page 6: Getting Started
Getting started Step 1. Attach stand or mount Before using your TV, attach your TV stand or mount it on the wall. CAUTION: • Disconnect the AC power cord before installing a stand or a wall mount bracket. • The LED display on your TV is fragile. Make sure the TV screen is not scratched or damaged by hard objects or from pressure. - Page 7 Attach the wall mount bracket (not included) Before you begin the third-party manufacturer instructions, be sure to do the following things: 1. Place the TV face down on a clean, safe Screw and cushioned surface. (not included) 2. Remove the TV stand if you have already attached it.
-
Page 8: Step 2. Connect Devices To Your Tv
Step 2. Connect devices to your TV Check to ensure that you have connected right cables for right ports securely. Loose connections can affect picture image and color. Back View Power input P o w e r b u t t o n : Hold it 30 seconds for reset AV IN... - Page 9 Brief De- TV label Port Cable External Equipment scription Connect an VHF/UHF Antenna outdoor VHF/ UHF antenna. ANT OUT Antenna Connect a High Definition Multimedia Interface HDMI (HDMI) cable from an external device. DVD Player/Recorder Connect a VIDEO Video Set-top Box Satellite Yellow composite...
- Page 10 Brief TV label Port Cable External Equipment Description Connect an Ethernet cable to access a network or the Internet. The TV is also WiFi- compatible. This port can only be used by factory for testing purposes. SERVICE This port may not be available in some models.
-
Page 11: Step 3. Get Your Remote Ready
Step 3. Get your remote ready Mute Settings Volume More Voice control Hold down and say: “Live TV” Select “Free Movies” “Cooking on YouTube” Navigation pad “Netflix” Last /back Home App shortcut App shortcut... - Page 12 • Do not mix old and new batteries • Do not mix alkaline, standard (carbon-zinc), or rechargeable (for example NiCd or NiMH) batteries • If your remote gets warm or hot during use, stop using it and contact customer support www.hisense-usa.com/support immediately at...
-
Page 13: Step 4. Power On The Tv
Step 4. Power on the TV Connect your power cord to the TV and plug it into a power outlet. Your TV will display a launch screen showing the Hisense XClass TV logo. Wall Outlet Power Cord Step 5. Set up your TV Turn on your TV and follow the on-screen instructions to connect it to the Internet and set your preferences. -
Page 14: Step 6. Enjoy Your Tv
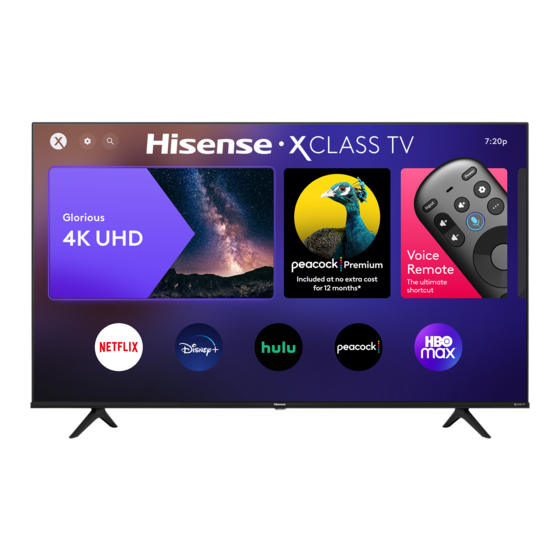
Step 6. Enjoy your TV! Your Hisense XClass TV gives you access to instant entertainment, all in one place. Connect to your favorite apps to start streaming today. Plus, a personalized launchpad gives you a tailored experience. Press the Home button on your remote to get started. -
Page 15: Troubleshooting
Troubleshooting If you are having trouble with your TV, first try turning it off and on again. If this does not fix the problem, check the tips in the following table. If your problem is not listed, then contact us. Issues Possible solutions •... -
Page 16: Product Specifications
Product Specifications Model Name 43A6GX 50A6GX Dimension Without Stand 37.9 × 22.0 × 2.9 in 44.0 × 25.4 × 2.9 in (W × H × D) (963 × 560 × 74 mm) (1117 × 646 × 74 mm) With Stand 37.9 ×... -
Page 17: Certification And Compliance
20 centimeters between the radiator and your body. Declaration of Conformity Trade Name: Hisense Model: 43A6GX/50A6GX Responsible Party: Hisense USA Corporation Address: 7310 McGinnis Ferry Road, Suwanee, GA 30024 Telephone Number: 678-318-9060 This device complies with Part 15 of the FCC Rules. Operation is subject to the... - Page 18 New York, at the following link: www.mrmrecylcing.com. ©2021. All rights reserved. Hisense and the Hisense logo are registered trademarks of Hisense. Other brand and product names are registered trademarks of their respective...
Need help?
Do you have a question about the XClass and is the answer not in the manual?
Questions and answers