Advertisement
Quick Links
Advertisement

Related Manuals for TRENDnet TV-NVR2216


Summary of Contents for TRENDnet TV-NVR2216
- Page 1 Quick Installation Guide TV-NVR2208/TV-NVR2216/TV-NVR2432(V1)
- Page 2 Table of Content 1 English 1. Before you start 2. Installation 3. App...
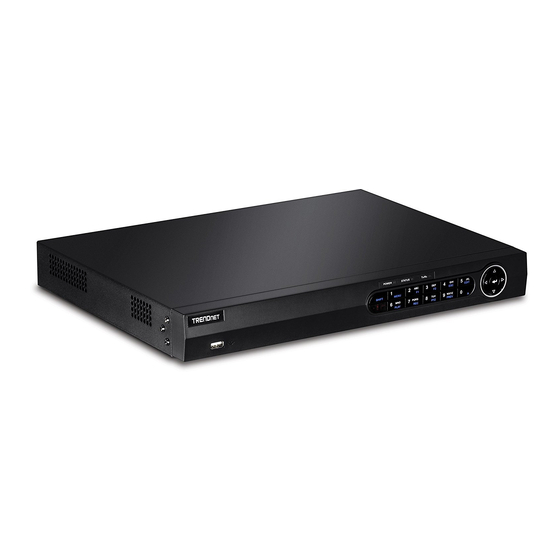
- Page 3 1. Before You Start Package Contents Ÿ NVR (No HDD installed) Ÿ CD-ROM (Utility & User's Guide) Ÿ Power Adapter or Power Cord (depending on your model) Ÿ Network cable (1.8 m / 6 ft.) Ÿ HDMI cable (1.8 m / 6 ft.) Ÿ...
- Page 4 2. Installation Note: Before you install the NVR please ensure that all cameras are configured and available on the network. 2.1 Hard Drive Installation Note: Ÿ Static Electricity can damage the NVR. Before handling the unit, discharge any static electricity, or use an anti-static wrist strap. Ÿ...
- Page 5 3. Attach the SATA data and power cables to the hard disc drive, then connect the SATA cable and the molex connect or the control board. 4. Mount the hard drives to the drive bays of the NVR using the mounting screws, screwing from the underside of the NVR into the hard drive case.
- Page 6 2.2 Wiring 1. Connect an HDMI cable or a VGA cable (not included) from your display to the NVR's HDMI or VGA port on the rear panel. Grounding point Display VGA cable Display not included (Not included) (Not included) 2. Connect the included mouse to the front or rear USB port on the NVR. For ease of configuration you can also connect a USB keyboard (not included) to the NVR.
- Page 7 3. Connect network cable to the LAN1 port and connect the other end to your network. 4. Attach the power adapter or power cord (rear panel) and plug the unit into an electrical outlet.
- Page 8 1. Turn the NVR by toggling the power switch to the “on” position. Follow the onscreen wizard to configure the NVR. The first screen requires you to change the password, for security purposes TRENDnet recommends that you change the default password on the NVR.
- Page 9 3. The Setup Wizard will start each time you restart the NVR. You can disable the wizard by unchecking “Start wizard when device starts?” then click “Next”. Wizard Start wizard when device starts? Next Exit 4. Enter the password again then click “Next”. Wizard Admin Password New Admin Password...
- Page 10 5. Set the time and date on the NVR then click “Next”. Wizard Time Zone Date Format System Date 05: 05: 2016 System Time 06: 15: 27 Previous Next Exit 6. Configure the IPv4 address of the NVR, select DHCP to get an IP address from your network, then click “Next”. Wizard Network Type 10/100/1000 Self-adaptive...
- Page 11 7. Configure the desired port values and dynamic DNS account information then click “Next”. Wizard Server Port 8000 HTTP Port RTSP Port Enable UPnP Enable DDNS DDNS Type dyn.com Sever Address Device Domain Name Status DDNS is not enabled. Username Password Previous Next...
- Page 12 9. Initializing the drives will erase all data on them. Click “OK” on the warning pop-up then click “OK” after the drives finish initializing to complete the setup wizard. L... Capacity Status Property Type Free Space 149.02GB Normal Local Initialize Initialization will erase all data on the HDD.
- Page 13 11. Configure the NVR to continuously record at all times or to record only motion detected events then click “OK”. Continuous Motion Detection 12. Congratulations! You have completed the configuration of the NVR. You can now view live cameras and access additional options by right clicking on the display to bring up the configuration menu.
- Page 14 3. App Scan the QR codes here to install the TRENDnet IPView app on your phone. Android 1. Open TRENDnet IPView and tap on Add option .
- Page 15 2. Enter the NVR's IP address (remote IP), port number, and login information then tap icon 3. Tap on List from the menu and enable the specific NVR and tap Connect to view.
- Page 16 4. Added cameras will display. 5. App setup is complete. For details information on how to manage the NVR, please refer to the User's Guide on the CD-ROM.
- Page 17 TV-NVR2208 / TV-NVR2216 / TV-NVR2432 Trade Name: TRENDnet TRENDnet hereby declare that the product is in compliance with the essential requirements and other relevant provisions under our sole responsibility. Safety EN 60950-1: 2006 + A11: 2009: +A1: 2010 + A12: 2011 + A2: 2013...
- Page 18 TRENDnet devices are designed for indoor use only and in a dry location (except those that are rated for outdoor applications) To clean a TRENDnet device, disconnect it from the mains supply first and only use a dry towel.
- Page 19 Informations générales GPL/LGPL Ce produit TRENDnet comprend un logiciel libre gratuit par des programmeurs tiers. Ces codes sont sujet à la GNU General Public License ("GPL" Licence publique générale GNU) ou à la GNU Lesser General Public License ("LGPL" Licence publique générale limitée GNU). Ces codes sont distribués SANS GARANTIE et sont sujets aux droits d'auteurs des programmeurs.
- Page 20 Garantía Limitada TRENDnet garantiza sus productos contra defectos en los materiales y mano de obra, bajo uso y servicio normales, durante el siguiente periodo de tiempo a partir de la fecha de compra. Garantía: 2 años (Cuando proceda: 1 año de garantía para componentes de adaptadores de corriente, fuente de alimentación y ventiladores de refrigeración.) Visite TRENDnet.com para revisar la política de garantía, derechos y restricciones para este producto.
Need help?
Do you have a question about the TV-NVR2216 and is the answer not in the manual?
Questions and answers