Table of Contents
Advertisement
Quick Links
Advertisement
Table of Contents

Subscribe to Our Youtube Channel
Related Manuals for TRENDnet 0710931110555


Summary of Contents for TRENDnet 0710931110555
- Page 1 Cover Page TRENDnet User’s Guide ...
-
Page 2: Table Of Contents
Table of contents TRENDnet User’s Guide Shutdown your NVR .................... 21 Table of Contents Rebooting your NVR .................... 21 Table of Contents ................ 2 Log out from NVR management .................. 21 Product Overview ................ 5 Camera Settings Menu .............. 22 Package Contents ...................... 5 Camera Connection Settings .................. 22 Features ......................... 5 ... - Page 3 Table of contents TRENDnet User’s Guide NTP ........................ 39 Hard Drive Maintenance ..................... 55 Email ........................ 40 S.M.A.R.T Settings .................... 55 UPnP ........................ 41 Bad Sector Detection .................. 55 More settings ..................... 41 Hard Drive Management .............. 56 Live View ........................ 42 ...
- Page 4 Table of contents TRENDnet User’s Guide Playback ...................... 80 Log ........................ 82 System Information ................... 82 Logout ........................ 83 Advanced ........................ 84 System ....................... 84 Network ...................... 89 Video ........................ 91 Events ........................ 96 Storage Settings .................... 101 Appendix .................. 1 02 ...
- Page 5 TV‐NVR208 TRENDnet User’s Guide Product Overview Features TRENDnet’s standalone 8‐channel 1080p HD PoE+ NVR, model TV‐NVR208R, offers a comprehensive rack mountable video display, storage, and management solution. The NVR networks and powers up to eight PoE cameras* and auto‐recognizes TRENDnet cameras. Install up to 8 terabytes of storage (hard drives sold separately) to record over three weeks of ...
- Page 6 TV‐NVR208 TRENDnet User’s Guide Mouse Included Over one month of recording per camera with 8 TB of storage (HDDs sold separately) and 8x 720p cameras at 30 fps with medium VBR Includes a mouse and does not require a keyboard Scheduled Recording Rack Mount Create weekly continuous and motion detection recording schedules Rack mount hardware included for each camera with video overwrite when storage is full Free App Advanced Playback See live video on a mobile device with the free iOS®/Android™ app Advanced archived video playback with a quick reference timeline Remote Access and calendar Access the NVR over the internet Video Export Camera Setup Quickly export specific video types over a specified time Auto‐recognizes TRENDnet cameras* and works with most PoE Dynamic DNS Support network cameras Support for dyn.com and NO‐IP.org Live View IPv6 Multiple camera viewing options with variable‐time auto‐scan IPv6 support ...
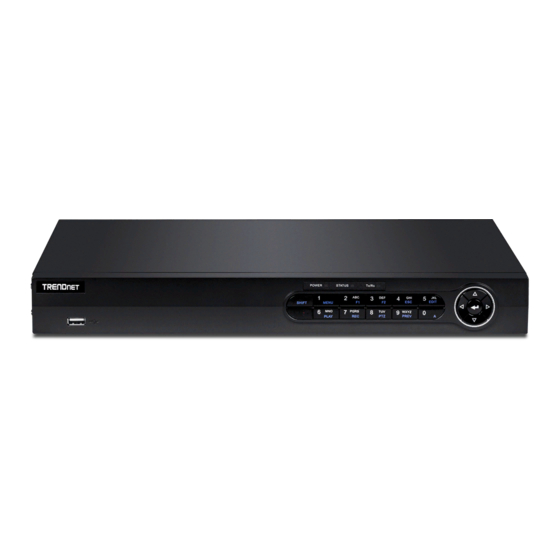
- Page 7 TV‐NVR208 TRENDnet User’s Guide Rear View Product Hardware Features Network port HDMI Port Front View Power port Audio Ports VGA Port Power USB 2.0 port USB 3.0 button Push button control PoE Ports ...
- Page 8 TV‐NVR208 TRENDnet User’s Guide Basic System Setup Setup Wizard Soft Keyboard Instruction Keyboard styles First time starting the NVR, the device will go through the basic settings first, please follow the onscreen display to complete these information. There are three keyboard styles available, English letter, numeric, and special characters. The default keyboard style is English letter keyboard in lower case letter mode. Click the keyboard style button if you want to change it into another style. 1. Click the text field to the right of Admin Password. Enter the default administrator password of admin. Click the text field to the right of New Admin Password to enter a new administrator password. Enter default password admin and your new password here. Capital Special Characters Then click on Special characters Next. ...
- Page 9 TV‐NVR208 TRENDnet User’s Guide 2. Select Language and click Apply to continue 4. Click the selection list to the right of Time Zone. 5. Time Zone 6. Date Format 7. Date 8 Time 3. Setup wizard will show up after the TV‐NVR208 is powered up. Click Next to 5. Select your time zone. ...
- Page 10 TV‐NVR208 TRENDnet User’s Guide 6. Click the selection list to the right of Date Format and then select a date format. 7. Click the selection list to the right of System Date. Select the year by clicking on left or right arrow. Select the month by clicking on left or right arrow. Select the day by clicking on the date. ...
- Page 11 TV‐NVR208 TRENDnet User’s Guide 10. Configure the port related settings here. 9. Display current network type ...
- Page 12 TV‐NVR208 TRENDnet User’s Guide 11. Click OK to exit the wizard if you have a brand new installation. Select the hard 12. Select type of recording method you would like to set the cameras to be. This settings can also be configure later under recording section. drive and then click Init to initiate your hard drive if you are running the setup wizard in later time and want to clean up the video on the hard drive. Then click OK. ...
- Page 13 TV‐NVR208 TRENDnet User’s Guide Start Recording System Management (local) You can start recording immediately just with a few clicks. In Live View, right click With the basic system setup, your system is now up and running. Now, you can use on the mouse. A short menu will come up. Choose Start Recording and then your mouse pointer and monitor to view, set up, and manage your network video Continuous Record. recorder. Using the Short Menu Right click your mouse while you are viewing the live video. The short menu will be popped out. Click Yes to start continuous recording. Instant Playback Move your mouse pointer over the camera display you want to playback the video and select the display by click on it. The instant playback tool bar will show up. Short Menu Click on to playback the last 5 minutes of recording. (For more advanced Common Menu: Click to go to the Configuration section directly video playback features, please see the Video playback on page 64 for more details.) Menu: Click to show the main menu (see page 19 for Main ...
- Page 14 TV‐NVR208 TRENDnet User’s Guide Single Screen: Display video live view one at a time. Click on Single Screen and then choose the camera you want. (The video you choose will be replaced with other video if the auto‐switch is on, and the auto‐switch is on by default.) Previous Screen: In Single Screen mode, you can manually switch the video to the previous channel. Next Screen: In Single Screen mode, you can manually switch the video to the next channel. Stop/ Start Auto‐ Start (default) or stop automatic live view switch. The switch: live view video will be changed by channel sequence. Start Recording: Start Continuous or Motion Detection recording. Multi‐screen: Display all four video live views at the same time. By To set up motion detection area, or stop continuous and default, the video live view is set in the Multi‐screen motion detection recordings, you need to navigate to ...
- Page 15 TV‐NVR208 TRENDnet User’s Guide Playback: Click Playback to go full playback menu. Picture Mode: Select a monitor display setting from Standard, Bright, Gentle, and Vivid of your choice. Click OK to confirm your choice. PTZ Control: Click this to open the PTZ control panel for the supported cameras © Copyright 2016 TRENDnet. All Rights Reserved. 15 ...
- Page 16 TV‐NVR208 TRENDnet User’s Guide Instant playback Shortcut Menu Click on to playback the last 5 minutes of recording. Each video in live view has a short cut menu to perform the frequent adjustments of the video. Move your mouse pointer over the camera display you want to bring Audio up the Shortcut Menu. Click on the video. The frame of the video shows active Click on to enable the audio on selected channel. Click to mute the audio. (yellow frame). And then click on the button of the selected jobs. PTZ control Click on to proceed PTZ operations. The PTZ menu will show up on the screen. Basic pan and tilt Click the buttons you want to pan or tilt the camera. Adjust the distance of each ...
- Page 17 TV‐NVR208 TRENDnet User’s Guide Advanced PTZ PTZ Configuration You can further control zoom, focus, and aperture with compliant PTZ camera. Click on + or – to adjust zoom, focus and aperture (iris). Click button, the camera will Quickly access the PTZ presets by clicking the One‐touch button and to access the turning it around continuously. Click the button again to stop moving. preset settings, click on the General button. Special features (Feature availability depends on camera models) Menu. Bring up the advanced PTZ menu. Zoom operation. Zoom In: Click and drag area from left to right to zoom in the defined area. Zoom Out: Drag area from right to the left to zoom out that area. Center operation. Point and click on the video. The camera will move the camera and make the pointed spot ...
- Page 18 TV‐NVR208 TRENDnet User’s Guide Image settings Live view strategy Click on to adjust the video display settings. Click on to manage the live view strategy. The Real‐time strategy allocate all resources to minimize the delay of video delivery. When the network is congested, the video may be interrupted. Fluency strategy makes larger video buffer to save and play video back. It makes the communication more robust, but the live view playback timing is delayed. Balanced strategy set up the good enough video buffer to take care of the playback fluency while maintain the network robustness. Use the slider or enter a number (0‐255) to adjust the image brightness. Default: 128 Information Use the slider or enter a number (0‐255) to adjust the image contrast. Default: 128 Click on to see current camera stream frame rate, bandwidth, ...
- Page 19 TV‐NVR208 TRENDnet User’s Guide Using the Main Menu Login to the Management Pages Right click your mouse while you are viewing the live video. The short menu will be The NVR will ask you to enter the password every time you want to login to the popped out. Mouse over the Menu and click the button to bring up the Main management page. Enter the password and then click on OK to bring up the main Menu. menu. © Copyright 2016 TRENDnet. All Rights Reserved. 19 ...
- Page 20 TV‐NVR208 TRENDnet User’s Guide NVR identity and start up time. Please do not power off your NVR before you Restore Default Password complete the password reset process. Otherwise, the secure code you get from the For security purposes, if you find yourself in need of restoring the TV‐IPNVR104 to support center may not work to reset the password to factory default. factory default settings you will need to contact support. Click Reset Password and provide the Serial Number to the support agent for a temporary access code. This code is time sensitive; please ensure you reset the password immediately. USA/Canada phone support: Toll Free English: (855) 373‐4741 • Monday – Friday: 7:00 AM – 5:30 PM, PST After hours 24/7: (866) 845‐3673 Global Support: Find the support number for your country at: www.trendnet.com/contact Online Support: www.trendnet.com/support/helpdesk In the call or email, you need to supply the serial information. Click Reset Password to get the information. The serial number is a calculated number based on your © Copyright 2016 TRENDnet. All Rights Reserved. ...
-
Page 21: Shutdown Your Nvr
TV‐NVR208 TRENDnet User’s Guide Logout, start up, or shut down the NVR The TV‐NVR208 is a class A network equipment designed for 24/7 operation. Just plug‐in the power source, the TV‐NVR208 is up and running. When you want to change the NVR settings, manage the cameras proceed system maintenance or software upgrade, you need to log in, log out, restart, or shut down your NVR gently. Pulling out the power source may cause unexpected hard drive damage and system malfunction which is not a suggested way to power down your NVR. Rebooting your NVR Startup your NVR Make sure the power supply is plugged into an electrical outlet. It is highly Click Reboot to reboot your NVR without power down. recommended that an uninterruptible power supply (UPS) to be used in conjunction with the unit. Shutdown your NVR Log out from NVR management Bring up the main menu. Click on Shutdown Menu icon. The Shutdown sub When you have done the NVR settings and managements, you’ll want to lock your NVR before you leave. Click Logout to exit the NVR management. ... -
Page 22: Camera Settings Menu
Please see the compatible The TV‐NVR208 is compatible with TRENDnet PoE cameras, the compatible cameras camera list for more detail. can be found on TRENDnet website. There are three major groups of TRENDnet PoE Password Set: If you install plug‐and‐play TRENDnet 1 with its factory compatible cameras interacts differently with the TV‐NVR208, TRENDnet 1, ... - Page 23 of TV‐NVR208. Plug‐and‐Play installation When you click this button, all plug‐and‐play TRENDnet This is an effort free installation. Just to make sure all your cameras are set to 1camera passwords are synchronized. factory default and connect the plug‐and‐play cameras to the PoE ports. One for ...
- Page 24 TV‐NVR208 TRENDnet User’s Guide 3. Select the protocol. (See compatible camera list for more details) Manual installation 1. Click the Edit icon and then select Manual on Adding Method. 4. Management port. (See compatible camera list for more details) 2. Enter the camera IP address. 5. Choose the camera video channel number or leave it with default channel 1. © Copyright 2016 TRENDnet. All Rights Reserved. ...
-
Page 25: On Screen Display Settings
TV‐NVR208 TRENDnet User’s Guide 6. Enter camera access user name. On screen Display Settings Compatible camera on screen display can be changed directly through camera access or through NVR. Note: Please reference compatible camera list for more details. 7. Enter camera access password. 8. Click OK to save the settings. Camera: Click to choose the camera you want to change the settings. Camera Name: The name of the chosen camera. Display Name: Check this box to display camera name. Display Date: Check this box to display system time. Display Week: Check this box to display time of the week. Time Format: Select 12 or 24‐hour time format. ... -
Page 26: Display Settings
TV‐NVR208 TRENDnet User’s Guide image HUE setting. Default: 128 Display Settings Mirror: Adjust video image quality, lightness, and color settings here. Note: Please reference compatible camera list for more details. Choose horizontal, vertical or both to adapt to the physical installation. Click Apply to apply the settings. Camera: Click to choose the camera you want to change the settings. Camera Name: The name of the chosen camera. Brightness: Use the slider or enter a number (0‐255) to adjust the image brightness. Default: 128 Contrast: Use the slider or enter a number (0‐255) to adjust the image contrast. Default: 128 Saturation: Use the slider or enter a number (0‐255) to adjust the color saturation. The greater number means the color will be more saturated. Default: 128 ... -
Page 27: Display Settings
TV‐NVR208 TRENDnet User’s Guide Basic pan and tilt Display settings All compatible PTZ cameras can do the basic pan and tilt to adjust the video Control PTZ camera’s video shooting position, patrol route, zoom, focus, and iris. shooting position. Click the buttons you want to pan or tilt the camera. Adjust the Note: Please reference compatible camera list for more details. distance of each step of moving by sliding the Speed. Each step can have farther distance when sliding the Speed toward the right, and vice versa. Right‐Up Up Right Down Left‐Up Right Down Left Left Down Speed Advanced PTZ You can further control zoom, focus, and aperture with compliant PTZ camera. Click on + or – to adjust zoom, focus and aperture (iris). Click button, the camera will ... - Page 28 TV‐NVR208 TRENDnet User’s Guide 2. Adjust the zoom, focus and aperture. 3. Click to stop and save recording. 3. Select Save Preset. 4. Click the number of preset. Running the pattern of behaviors: Click to start running the pattern. Click to stop recording. You can setup up to 255 presets depends on camera’s capability. To access preset ...
- Page 29 TV‐NVR208 TRENDnet User’s Guide 2. To erase a key point, click on the key point. If you want to edit a key point, just erase the key point and then add a new one. 3. Click or to move the order of the patrol key points. 4. Click to clean up all key points. Start or stop a patrol: Camera: Click to choose the camera you want to change the settings. Click to start patrol. Enable Motion Check this box to enable motion detection. Click Apply to ...
- Page 30 TV‐NVR208 TRENDnet User’s Guide 2. Enter the period of time you want to actively detect the motion events. Arming schedule Copy to: To quickly setup the same schedule over the week, click Copy. Click another day of the week (1: Monday, 2: Tuesday, 3: Wednesday, 4: Thursday, 5: Friday, 6: Saturday and 7: Sunday). Click All to select the whole week. Click OK after you select the day of the week you want to copy to. 1. Select day of the week you want to edit on the row of Week. © Copyright 2016 TRENDnet. All Rights Reserved. 30 ...
-
Page 31: Privacy Mask
TV‐NVR208 TRENDnet User’s Guide Linkage action Privacy Mask When motion event detected, the corresponding actions will be executed. Create a masking area to keep your privacy. Note: Please reference compatible camera list for more details. Camera: Click to choose the camera you want to change the Full Screen Switch the video on the VGA/HDMI monitor to the settings. Monitoring: camera detected motion event. Enable Privacy Mask: Check this box to enable privacy masking. Audible Warning: Activate the audible on board buzzer. Draw Area: Click and drag on the area you want to set up the Send Email: Send email to notify the system manager. privacy mask. Clear All: Click this button to clear all the masking area. ... -
Page 32: Video Tamper
TV‐NVR208 TRENDnet User’s Guide Video tamper settings Video Tamper Click Settings to bring out the detailed set up menu. Detects if a camera has been tampered with and surveillance is compromised. You Arming Schedule can set up video tamper notifications to alert the system manager to check the camera. Note: Please reference compatible camera list for more details. 1. Select day of the week you want to edit on the row of Week. Camera: Click to choose the camera you want to change the settings. Enable Tamper‐ Check this box to enable video tamper. proof: Draw Area: Click and drag on the area you want to set up the video tamper. 2. Enter the period of time you want to actively detect the motion events. Clear: Click this button to clear the video tamper area. Sensitivity: Move the slider to adjust detection sensitivity. Sliding ... - Page 33 TV‐NVR208 TRENDnet User’s Guide Copy to: Linkage action To quickly setup the same schedule over the week, click Copy. Click another When motion event detected, the corresponding actions will be executed. day of the week (1: Monday, 2: Tuesday, 3: Wednesday, 4: Thursday, 5: Friday, 6: Saturday and 7: Sunday). Click All to select the whole week. Click OK after you select the day of the week you want to copy to. Full Screen Switch the video on the VGA/HDMI monitor to Monitoring: the camera detected motion event. Audible Warning: Activate the audible on board buzzer. Send Email: Send email to notify the system manager. © Copyright 2016 TRENDnet. All Rights Reserved. 33 ...
-
Page 34: Video Loss
TV‐NVR208 TRENDnet User’s Guide Video loss settings Video Loss Click Settings to bring out the detailed set up menu. Detects if a camera has lost its video. You can set up video loss notifications to alert Arming Schedule the system manager to check the camera. 1. Select day of the week you want to edit on the row of Week. Camera: Click to choose the camera you want to change the settings. Click Apply to apply the changes 2. Enter the period of time you want to actively detect the motion events. © Copyright 2016 TRENDnet. All Rights Reserved. 34 ... - Page 35 TV‐NVR208 TRENDnet User’s Guide Copy to: Linkage action To quickly setup the same schedule over the week, click Copy. Click another When motion event detected, the corresponding actions will be executed. day of the week (1: Monday, 2: Tuesday, 3: Wednesday, 4: Thursday, 5: Friday, 6: Saturday and 7: Sunday). Click All to select the whole week. Click OK after you select the day of the week you want to copy to. Full Screen Switch the video on the VGA/HDMI monitor to Monitoring: the camera detected motion event. Audible Warning: Activate the audible on board buzzer. Send Email: Send email to notify the system manager. © Copyright 2016 TRENDnet. All Rights Reserved. 35 ...
-
Page 36: System Settings
TV‐NVR208 TRENDnet User’s Guide Configuration Menu Setting and manage your NVR system by bring up the main menu. Click on Configuration Menu icon. Time Zone: Click the selection list to the right of Time Zone. System Settings Date Format: Click the selection list to the right of Date Format and General then select a date format. Set up the basic time, display resolution, and operation settings here. System Date: Click the selection list to the right of System Date. System Time: ... -
Page 37: Dst Settings
TV‐NVR208 TRENDnet User’s Guide DST settings More settings Set up Daylight Saving Time. Daylight saving time More settings Auto DST The daylight saving time adjustment is setting to Device Name: This is the name of the NVR. Default: TV‐NVR208 adjustment: automatic adjustment according to the time zone setting by default. If you want to set the daylight settings Auto logout: Set up the timeout to logout NVR management after manually, uncheck this box to disable the automatic DST management inactive for a period of time. adjustment. Menu Output The video output is active for both HDMI and VGA Enable DST: Manually enable or disable daylight saving time Mode: interfaces. adjustment. ... -
Page 38: Network
TV‐NVR208 TRENDnet User’s Guide Network IPv6 Address 1: IPv6 self‐assigned address including the subnet prefix expression in the end of the string. Set up NVR network, DDNS, NTP, Email, and UPnP settings. IPv6 Address 2: IPv6 static address including the subnet prefix expression General in the end of the string. Setup the network interface connecting to the Internet. IPv6 Default The default route going further from IPv6 subnet Gateway: MAC Address: The MAC address of the NVR network interface. MTU: Maximum transmission unit. The maximum field size in the Ethernet packet. Default: 1500 Preferred DNS: Enter your first IPv4 or IPv6 DNS server address Alternate DNS: Enter your second IPv4 or IPv6 DNS server address Click Apply to apply the changes. Network General Settings ... -
Page 39: Ddns
TV‐NVR208 TRENDnet User’s Guide DDNS NTP Dynamic Domain Name Service, DDNS, allows you to find your NVR from the Network Time Protocol Service. The accuracy of the system clock is important for Internet with an easy to remember domain name. scheduling and accurate logging. You can automatically check the time accuracy with a network time server (NTP server). DDNS Enable DDNS: Check this box to enable DDNS Service. NTP settings DDNS Type: Select a DDNS service provider: dyn.com or no‐ip.com. Enable NTP: Check this box to enable NTP Service. Server Address: Enter the DDNS server address. Interval: The time interval that the TV‐NVR208 will synchronize the Device Domain Enter your registered domain/host name on selected time with NTP server. Default: 60 minutes Name: DDNS service. NTP Server: Specify a time server (NTP server) to synchronize with. (e.g. ... - Page 40 TV‐NVR208 TRENDnet User’s Guide Email Select Receiver: Select the pull down menu to select the receiver you Set up email accounts for notifications. want to set up the detail. You can send to 3 accounts at the same time, but just set up separately. Receiver: The receiver’s name. Receiver’s The receiver’s email address. Address: *Note: Many ISPs does not allow service port 25 going through their network. ...
- Page 41 TV‐NVR208 TRENDnet User’s Guide UPnP Status: UPnP Status. Universal Plug‐and‐Play is a device discovery protocol set. It allows your camera to easily be found, for example, on a Windows operation system. Click Apply to apply the changes. More settings UPnP Enable UPnP: Check this box to enable UPnP connection. Mapping Type: Choose Manual or Auto port mapping. More Settings UPnP List Server Port: The service port number for NVR management. The default service port of TV‐NVR208 is 8000. Port Type: The service type on the UPnP port HTTP Port: The default web access port. You can change the port Edit: Click the icon to manually edit the port mapping. ...
- Page 42 TV‐NVR208 TRENDnet User’s Guide Click Apply to apply the changes. Enable Audio Enable or disable audio output on the NVR. Default: Output: disabled Live View Event Output: Define where the video is going out when event Change the live view settings. triggered. The TV‐NVR208 is set to both VGA and HDMI. Full Screen When event triggered full screen display, who long the Monitoring video is going to stay on the screen. Default: 10 Dwelling Time: seconds. Click Apply to apply the changes. View Setting live view display arrangement and sequence. General Live view general settings Video Output The video output interface is VGA or HDMI Interface: Live View Mode: Choose the default Live View mode to be 1x1 single ...
- Page 43 Control Panel TV‐NVR208 TRENDnet User’s Guide Channel‐Zero Encoding Camera List: Installed cameras will be listed here by channel. Setting camera to certain frame rate and bit rates. Layout Panel: Preview how the layout the video display. To remove a camera from the display, just click on the selected cell to remove the channel number. To assign a channel to a display cell, choose the camera from the camera list. Note: Each video channel can be assigned to one display cell. Click on camera when it is not assigned and ...
- Page 44 TV‐NVR208 TRENDnet User’s Guide maintenance tools on the NVR checking and managing Exceptions your hard drive. See page 55 for more detail.) Setup the action when exception happened. Select the exception you want to Network The exception is triggered when network port is monitor and then choose the audible warning or email notification. Click Apply to Disconnected: disconnected. apply the changes and remember to setup your email account if you choose the email notification. IP Conflicted: The NVR is constantly monitoring if there’s an IP conflict is happening. Exception is triggered when there’s an IP conflict. Illegal Login: Exception is triggered when NVR detect the attempt login with wrong credential. Record Exception: Exception will be triggered when anything goes wrong during video recording process. Alarm feature is not supported on this model. ...
- Page 45 TV‐NVR208 TRENDnet User’s Guide User Accounts Add account You can setup up to 16 user accounts to access the camera’s video stream with a User: Enter the user name. web browser or real time video stream (RTSP). Only one administrator account Password: Enter the password. (username: admin) can be setup to configure the TV‐NVR208 and cannot be deleted. Confirm: Enter the password again. Level: Select the user’s level from Guest or Operator for the preset permissions. By default, an operator can view the video and operate the camera pan, tilt, and zoom. Guest can only view the video. NVR settings are only allowed to be changes with administrator account. User’s MAC Enter the user’s MAC address limit the access to add on security. Address: Leave it 00:00:00:00:00:00 as wild card address if you don’t limit the access. Edit Click Edit on user to change the account settings. ...
- Page 46 TV‐NVR208 TRENDnet User’s Guide Permission: Local configuration Permission: Remote configuration Local Log Search: Search the NVR log with local login. Remote Log Search: Search the NVR log with web login. Local Parameters Setting NVR with local login. Remote Parameters Setting NVR with web login. Settings: Settings: Local Camera Manage cameras on NVR with local login. Remote Camera Manage cameras on NVR with web login. Management: Management: Local Advanced Setting NVR advanced features with local login. Remote Advanced Setting NVR advanced features with web login. Operation: Operation: Local Shutdown / ...
- Page 47 TV‐NVR208 TRENDnet User’s Guide Maintenance Menu Manage your NVR system by bring up the main menu. Click on System Maintenance Menu icon. System Maintenance System Information is displaying here for system maintenance. Permission: Camera configuration NVR information Camera Permission: The camera management permission list: Remote Live View: Viewing video through the network. Local Manual Operation: Manage camera settings with local NVR login. Remote Manual Operation: Manage camera settings with web login. Local Playback: Allow recording playback on connected monitor. Remote Playback: Allow recording playback via network access. Local PTZ Control: Allow camera PTZ operations through NVR with local NVR login. NVR Information Remote PTZ Control: Allow camera PTZ operations ...
- Page 48 TV‐NVR208 TRENDnet User’s Guide Camera information Recording Information Camera Information NVR Recording Status Information Camera No.: The channel number camera assigned into. Camera No.: The channel number camera assigned into. Camera Name: Camera device name Recording Status: Showing the status and setup of the video recording. Status: Showing the camera is connected or disconnected. Frame Rate: Showing the camera recording frame rate. Motion Detection: Showing the status and setup of the camera motion Bitrate: Showing the camera recording video stream bitrate in detection. thousands bits per second. Tamper‐proof: Showing the status and setup of the camera video Resolution: Showing the camera recording video resolution. ...
- Page 49 TV‐NVR208 TRENDnet User’s Guide Network Information Storage Information NVR Network Interface Information HDD Status Information NIC: Network Interface Card. LAN1 is the assigned network Label: Index of the HDD. TV‐NVR208 supports 2 Hard Drive interface which represent to the non‐PoE network port. bays with up to 6TB each. IPv4 Address: The IPv4 address on this interface Status: Showing the hard drive working condition. IPv4 Subnet Mask: Network range of the subnet Capacity: The total hard drive storage capacity after formatting. IPv4 Default The default route going further from TV‐IP320PI IPv4 Free space: Displays how much space is available free for video Gateway: subnet recordings. ...
- Page 50 TV‐NVR208 TRENDnet User’s Guide IP conflict, network disconnect, recording Log Information exception, IP camera disconnection, IP camera All NVR activities are registered on the log. Find the activity by searching with time address conflict, recording buffer overflow. range and log type. Click Search to start the search. Operation: Log Search power on, abnormal shutdown Local operations: shutdown, reboot, login, logout, configure parameters, upgrade, start recording, stop recording, PTZ control, lock file, unlock file, initialize HDD, add IP camera, delete IP camera, set IP camera, playback by file, playback by time, export configuration file, import configuration file, export recordings, restore administrator’s password, operate tag, and HDD detect. Remote operations: reboot, login, logout, configure parameters, upgrade, start recording, stop recording, PTZ control, lock file, unlock file, initialize HDD, add IP camera, delete IP camera, set IP camera, playback / download by file, playback / download by time, export ...
- Page 51 TV‐NVR208 TRENDnet User’s Guide Export Log Export Click Export on this page to export log on the list. To export all logs saved on NVR, click the Log Export tab, select the hard drive, and then click Export. Click Export again to export the log to the USB drive of your choice. Select the USB drive on the Device Name and then click Refresh if you want to change the drive. Click New Folder to create a new folder on current directory. Click Format to format this USB storage. Click Export again to export the log to the USB drive of your choice. Select the USB drive on the Device Name and then click Refresh if you want to change the drive. Click New Folder to create a new folder on current directory. Click Format to format this USB storage. © Copyright 2016 TRENDnet. All Rights Reserved. 51 ...
- Page 52 TV‐NVR208 TRENDnet User’s Guide 1. If a firmware upgrade is available, download the firmware to your Import/Export Configuration Settings computer. To save current or load previous TV‐NVR208 settings, choose the Import / Export 2. Unzip the file to a folder on your computer. page and then export the file to the USB drive or import the file. 3. Read the firmware upgrade instruction for specific version update ...
- Page 53 TV‐NVR208 TRENDnet User’s Guide Network Monitoring Traffic To monitor the network traffic, navigate to the traffic chart. Factory Default To reset your TV‐NVR208 to the factory default, navigate to this Default page and then click on OK to reset all TV‐NVR208 settings back to factory default. Traffic LAN1: The network interface. Sending: The network traffic generated from the NVR. Receiving: The network traffic receiving by the NVR. Link Status: The network linking status. Type: Type of network, Ethernet. MAC Address: Media Access Address of the network interface. MTU: Maximum Transmission Unit in bytes. NIC Type: Type of the network card. Speed and duplexing. ...
- Page 54 TV‐NVR208 TRENDnet User’s Guide Network Tools Use network tools (Network Detection) on the NVR to test the network status. Network packet export Capture packets and save to external USB storage for network analysis. Plug‐in your USB network drive and then click Export to export the packet capture files. Click Refresh to list the directory on your USB storage again. Network Statistics To review the network statistic information, navigate to the Network Statistics page. Click Refresh to update the information. Network delay and packet loss test The basic PING test tool. Enter the testing destination IP address and then click on the Test. © Copyright 2016 TRENDnet. All Rights Reserved. 54 ...
-
Page 55: Hard Drive Maintenance
TV‐NVR208 TRENDnet User’s Guide Hard Drive Maintenance and conveyance tests. S.M.A.R.T Settings S.M.A.R.T.: Click to start S.M.A.R.T. test. The S.M.A.R.T. (Self‐Monitoring, Analysis and Reporting Technology) is a monitoring Temperature: The temperature of the hard drive in Celsius. technology to detect and report on various performance and reliability factors to help predict and prevent disk failures. Power on days: Days the hard drive is on. Self‐evaluation: The result of self‐evaluation. All‐evaluation: Functional evaluations. S.M.A.R.T. Detailed S.M.A.R.T. hard drive information. Information: Bad Sector Detection Detect if there’s any bad sector on the disk drive. S.M.A.R.T. Settings Continue to use: Check the Continue to use this disk when self‐... -
Page 56: Hard Drive Management
TV‐NVR208 TRENDnet User’s Guide Hard Drive Management Bad Sector Detection Manage and allocate your storage space by bring up the main menu. Click on HDD HDD No.: The Disk number. The TV‐NVR208 has one HDD. Capacity: The total hard drive storage capacity after Menu icon. formatting. Type of Select key area detection or full detection. Detections: Format / Initiate the Hard Drive Detect: Click this button to start bad sector detection. Select the hard drive and then click on Init to format and initialize the hard drive. HDD Capacity: The storage capacity of the hard drive. Block Capacity: The block capacity. Status: The status of bad sector detection. Error count: The total error count detected. Error Info. Detailed sector damage or shield information. ... -
Page 57: Advanced Storage Quota Settings
TV‐NVR208 TRENDnet User’s Guide Click Copy to copy the same quota setting to other channel. Advanced Storage Quota Settings To set up the disk quota for each channel video recording, select the camera and Click Apply to apply the changes. then enter the maximum recording capacity. Scheduled recording Setup the video recording settings by bring up the main menu. Click on Scheduled Recording Menu icon. Schedule Select the video channel, type of recording, and then click and drag on the weekly schedule. Click Edit to bring up the detailed schedule setting table or click Copy to copy the same schedule to other channel. Storage quota settings Mode: Quota setting Camera: Select the camera you want to setup the storage quota. Used Record The storage space spend in recording for the Capacity: specific channel. HDD Capacity: The storage capacity of the hard drive. Max. Record ... - Page 58 TV‐NVR208 TRENDnet User’s Guide 1. Select channel. 4. If you want to define the schedule in finer intervals, click on Edit button. 2. Select recording type. Choose from Continuous or Motion recording. If you want to clear out some scheduled recording time, choose None. 5. Make your selection and then click Apply to apply the changes. 3. Select the time slots you want to make the scheduled recording. Each time slot represents a half hour interval. The row number represents the week of the day starting from Monday. Schedule: Select the day of the week All Day: Select if you want to setup the all‐day recording. © Copyright 2016 TRENDnet. All Rights Reserved. ...
-
Page 59: Video Settings
TV‐NVR208 TRENDnet User’s Guide Video Settings Start/End Time: Specify the starting and end of recording time in 24‐hour format. Set up the video quality for recording (main stream), the higher video quality require larger storage space and better network condition. Please choose the best Type: Select Continuous or Motion Detection recording profile of your choice. Copy to: To quickly setup the same schedule over the week, click Copy. Click another day of the week (1: Monday, 2: Tuesday, 3: Wednesday, 4: Thursday, 5: Friday, 6: Saturday and 7: Sunday). Click All to select the whole week. Click OK after you select the day of the week you want to copy to. Note: Settings in this section are not available all cameras. The NVR will prompt the message to remind you the setting is not available on selected camera. Main Stream (Record) Settings Camera: Select the camera you want to change the recording ... - Page 60 TV‐NVR208 TRENDnet User’s Guide Sub Stream Stream Type: Select you want to stream video only or video and audio. The sub stream video is mainly for NVR live view. Change your camera option to Resolution: Select the video resolution. lower resolution if your camera generates too much information to the NVR for live Bitrate type: The bitrate is the rate of information generated from the view. video. The higher bitrate means more data and more traffic and better video quality. Constant bitrate generates same amount of information over the same period of time. Variable bite rate takes one step further to compress the information whenever it can, therefore, generates the same or lower amount of information compare to the constant bitrate. Video Quality: Select the video compression algorithm. Frame rate: Select the frame rate to decide how many pictures you want to take in each second. Max. Bitrate Mode: Select General to set the maximum bitrate in certain brackets. Choose Customized to set the maximum Sub Stream ...
-
Page 61: Holiday Scheduling
TV‐NVR208 TRENDnet User’s Guide want to take in each second. Advanced recording setting Max. Bitrate Mode: Select General to set the maximum bitrate in certain Setup if the NVR can overwrite the previous video recording or not. If you checked brackets. Choose Customized to set the maximum this option, the NVR will overwrite old recordings when the disk is full. Otherwise bitrate on your own. the NVR will send Disk Full Notification to let administrator knows that the disk is full and cannot proceed any recording. Max. Bitrate: The maximum information allowed to record on the NVR in thousands of bits per second. Max. Bitrate Range Recommended bitrate setting. Recommended: ... -
Page 62: Backup Video Recordings
TV‐NVR208 TRENDnet User’s Guide Backup Video Recordings Quickly and backup and export your video recordings with the file exporting menu. Bring up the main menu then click on Export Menu icon. Export Select the video channel and range of time and then click on Search to search the video you want to export. Click Quick Export if you want to export all video recordings. Edit Holiday Schedule Holiday Name: Change the holiday name to meaningful name instead of index numbers. Enable: Enable or disable this holiday rule. Mode: Select the holiday is for a day, a week or a month. Day mode: Select the start and end dates to specify the period of holidays. This setting is good for one time only. It does not repeat periodically. Week mode: Select the start and end dates of the week to specify the period of holidays. This setting is repeating every year. Month mode: Select the start and end dates to specify the period of holidays. This setting is repeating every year. ... - Page 63 TV‐NVR208 TRENDnet User’s Guide Quick export Export with search Click Export again to export all the video recordings to the USB drive of your choice. Select the video clips you want to export by check or uncheck the video clip. Then Select the USB drive on the Device Name and then click Refresh if you want to click Export to export the video recordings. change the drive. Click New Folder to create a new folder on current directory. Click Format to format this USB storage. Click to preview the video clip. © Copyright 2016 TRENDnet. All Rights Reserved. 63 ...
-
Page 64: Video Playback
TV‐NVR208 TRENDnet User’s Guide Video playback Click to lock the video clip. When video is locked, the video clip is not going to be overwrite accidentally. To unlock the video clip, click . The warning message will remind you again you are unlocking the video clip. Click Yes if you want to Bring up the main menu then click on Export Menu icon. proceed unlock. Click Export again to export the video recordings to the USB drive of your choice. Select the USB drive on the Device Name and then click Refresh if you want to change the drive. Click New Folder to create a new folder on current directory. Click Format to format this USB storage. ... -
Page 65: Playback Screen
TV‐NVR208 TRENDnet User’s Guide Playback screen Channel Selection Type of Playback Live View Recording search Action Playback Time Line Scale Buttons Buttons Buttons © Copyright 2016 TRENDnet. All Rights Reserved. 65 ... -
Page 66: Search For Video Recordings
TV‐NVR208 TRENDnet User’s Guide Search for video recordings Playback buttons Check on the camera you want to see the playback or check on Camera to select all Use playback controls to play back the video recording. channels. Then, choose the date for the recording. If there are video recording in selected channel, the date on the calendar will show blue. Double click the date to start playback. Click this button to play the video backward. Click this button to play the video. Click this button to pause video playback. Click this button to stop playback. Click this button to skip forward 30 seconds. Click this button to skip backward 30 seconds. Time line ... - Page 67 TV‐NVR208 TRENDnet User’s Guide Playback operations Tagging More playback operations such as mute the audio, clip a customized video, add and Tagging on video recordings help you to mark the critical time of video recording manage tags, and zoom in the viewing are available on the action buttons section. and easier tracking and editing. Find the video is critical and click on to make the tag with default tag name “tag”. Click on to make the tag with customized tag name. Search the video on Tagged video playback mode explained in following sections. The audio is on. Click this button to mute the audio. Zoom The audio is muted. Click this button to enable audio. Click to zoom the playback. A navigate window will showed up on right lower screen corner. Drag and drop or double click to define the area you want to zoom Click this button to start video clipping. in. The defined area is showed in red rectangular. Right click to exit the zoom mode. ...
- Page 68 TV‐NVR208 TRENDnet User’s Guide Playback modes Use the scroll bar to browse the recordings and adjust the pre‐play and post‐play between 5 seconds and the maximum amount of a single section of recording to The video playback not only can playback the video recorded on the hard drive decide the length of playback before and after the motion event. indexed by the time. You can also search the video with motion detection event, tag, or playback the video stored on the USB external hard drive. Tag If you set up the tags and want to search video with the tags, click and select the Tag playback mode. Select the channel you want to search the tags. Enter the start and stop time. If you want to search for specific tag name, enter the tag name or leave it blank for all tags. And, then click on Search. Event To search video with motion detection event, click and select the Event playback mode. Select the channel you want to search the motion detection. Enter the start and stop time. And, then click on Search. ...
- Page 69 TV‐NVR208 TRENDnet User’s Guide The tags searched are showed on the list. Click to view the video. Use the scroll bar to browse the recordings and adjust the pre‐play and post‐play between 5 seconds and the maximum amount of a single section of recording to decide the length of playback before and after the motion event. © Copyright 2016 TRENDnet. All Rights Reserved. 69 ...
- Page 70 TV‐NVR208 TRENDnet User’s Guide External file Access your NVR with the Web Browser To playback the video files saved on the USB drive, click and select the External File Default Settings and Factory Reset playback mode. To manage your TV‐NVR208 through the web browser, you have to setup the network connection first. If you didn’t set up your NVR attaching to your ...
-
Page 71: Logging-In To The Nvr For The First Time (Windows)
TV‐NVR208 TRENDnet User’s Guide 3. The NVR management page will detect if you installed the camera video System Requirement streaming plug‐in or not. Click the link to download the plug‐in from TV‐... - Page 72 TV‐NVR208 TRENDnet User’s Guide 8. Open the browser and login again. 9. (Go to step 11 if you already changed your password). The TV‐NVR208 will ask you to change your password from default setting. Please enter the new password twice and click OK. The password must be between 8 and 16 ...
-
Page 73: Logging-In To The Camera For The First Time (Os X)
TV‐NVR208 TRENDnet User’s Guide 11. The Live View page will show up and begin streaming video. Logging‐in to the Camera for the First Time (OS X) 1. Open the web browser on your computer. In the address bar, enter the IP address of the camera 192.168.10.60. (If you have a DHCP server on your ... - Page 74 TV‐NVR208 TRENDnet User’s Guide 3. The camera management page will detect if you installed the camera video 4. Quit your browser completely by command‐Click on the browser icon and then streaming plug‐in or not. Click the link to download the plug‐in from the TV‐...
- Page 75 TV‐NVR208 TRENDnet User’s Guide 6. Click Open to start installation. 8. Select a destination to install the plug‐in. Then click Continue. 7. Click Continue to install the plug‐in. 9. Use the default location and click Install. © Copyright 2016 TRENDnet. All Rights Reserved. 75 ...
- Page 76 TV‐NVR208 TRENDnet User’s Guide 10. Enter your password and click Install Software 13. Open the browser and login again with the default IP 192.168.10.30 or the IP that was dynamically assigned by your router. 11. Installation will process automatically. 14. Enter the user name, admin, and the default password, admin, and then click OK. 12. Click Close to exit the installation. © Copyright 2016 TRENDnet. All Rights Reserved. ...
- Page 77 TV‐NVR208 TRENDnet User’s Guide 15. Click Trust (You’ll have to do this again when your camera changes to a new IP 17. Enter the user name admin and new password again to start secured session. address.) 18. The Live View page shows up and the video starts to stream. 16. The TV‐NVR208 will ask you to change your password from the default setting. Please enter the new password twice and click OK. The password must be ...
-
Page 78: Basic
TV‐NVR208 TRENDnet User’s Guide Basic Live View After you log‐in into the camera management page, you’ll see the Live View page. © Copyright 2016 TRENDnet. All Rights Reserved. 78 ... - Page 79 TV‐NVR208 TRENDnet User’s Guide Select single video display and then click once to enable zoom. When enabled, click and drag the area on the picture to zoom in. Right click to resume 100% zoom. Click Start/Stop Streaming the icon again to disable zoom. The zoom function works in full screen mode as Click this button to start or stop streaming. Select the display cell by click on it, (The well. yellow frame will wrap around the selected display cell.) then click on the icon of Microphone the stream you want. If the channel has been selected by others, stop that streaming before you change. Select the video channel and then click on this button to start/stop talking through the camera. Video Stream Click this button to choose the video stream between main stream and sub stream. Speaker 1: main stream; 2: sub stream. Select the video channel and then click on this button to start/stop listening from the camera. Use the slide below to adjust the volume. ...
-
Page 80: Playback
TV‐NVR208 TRENDnet User’s Guide Playback Time Line You can playback the video recording one at a time at this page. You can also There is a play back head in the center of the time line represented in a yellow download the video clip and snapshots to your local computer. Select the video vertical line. To look for a specific video recording, move the time line by clicking channel on the left hand side and then search for the video. and dragging it. Play video Use playback controls to play back the video recording. Click this button to play the video. Click this button to pause video playback. Click this button to stop playback. Click this button increase playback speed*. Search for video recordings ... - Page 81 TV‐NVR208 TRENDnet User’s Guide Slice images from video playback Download recorded videos You can take snapshots from playback video or make new video clips from the To save complete video sections, you can download the files directly. video you are playing back. Click selected icon to open camera recording download page Click this button to stop video playback streams. Click this button to take a snapshot of current playback. Click this button to start clipping a video from playback. Click this button or anywhere on the timeline to zoom Click this button to download the files. Click this button to enable or disable the audio playback. ...
-
Page 82: Log
TV‐NVR208 TRENDnet User’s Guide Log System Information The log of the TV‐NVR208 is saving on the hard disk drive. You can search the System Information page shows the TV‐NVR208’s basic information. Click System relevant records and save to your local computer. then click System Info to show the page. Search for logs Click the type of log and then the Start Time and End Time. Click Search to start searching. Basic Information Device Name: Human readable device name for easy identification. Click First Page, Prev Page, Next Page, and Last Page to show the logs. Click Save Firmware Version: Firmware version Log to save the logs to your computer. MAC Address: The MAC address of Ethernet Interface System Time: The system time setup in the camera. Keeping this ... -
Page 83: Logout
TV‐NVR208 TRENDnet User’s Guide Logout Logout page allows user to log out the NVR web configuration page totally. Click OK Network Information to logout completely or Cancel to stay in the configuration page. IP Address: IP address of the TV‐NVR208 Subnet Mask: Network range of IP address Default Gateway: The default route going from the TV‐NVR208 subnet. Primary DNS: Primary DNS server address Secondary DNS: Secondary DNS server address ... -
Page 84: Advanced
TV‐NVR208 TRENDnet User’s Guide User Accounts Advanced You can setup up to 16 user accounts to access the NVR’s video stream with a web browser or real time video stream (RTSP). Only one administrator account can be System setup to configure the TV‐NVR208 and cannot be deleted. Device Settings Setup your system name for easy identification. This device name will also be recognized by other network camera software as the name of this camera. OSD, On Screen Display, camera name is referring to this setting as well. User Accounts Add: Click Add button to add one user account Enter the customized device name and the click on Save to save the settings. Modify: To change a user’s name and password, highlight the user by clicking on it. Then, click Modify button. You can change the user’s name and password. You can also change the administrator’s password here. But, the administrator’s name is fixed, you cannot change that. ... - Page 85 TV‐NVR208 TRENDnet User’s Guide Time Settings The accuracy of the system clock is important for scheduling and accurate logging. You can synchronize the system time with your computer, or automatically check the time accuracy with a network time server (NTP server). Manual Time Sync Device Time: The system time of this camera. Set Time: Click the calendar icon and manually select the date. Automatic Update Check the Sync. with computer time to copy the time from your computer. NTP Specify a time server (NTP server) to synchronize with. Server: (e.g. pool.ntp.org) Click Save to save the changes Interval: The time interval that the TV‐NVR208 will synchronize the time with NTP server. Default: 1440 minutes (24 hours) Click Save to save the changes ...
- Page 86 TV‐NVR208 TRENDnet User’s Guide Daylight Savings Live View Settings Setup daylight savings. Setup the live view video quality, file size and file saving directories. Automatic Update Enable DST: Check this box if your time zone has daylight savings. Start Time: Enter the date that daylight savings starts End Time: Enter the date that daylight savings ends DST Bias Enter how much time the daylight saving adjusted by Live View Parameters daylight savings. Live View Configure the buffer size for live view video stream. Buffer: With low buffer size setting, you can get real‐time video Click Save to save the changes stream, but the video may be stop and go if the network is congested. With high buffer setting, you can have ...
- Page 87 TV‐NVR208 TRENDnet User’s Guide your user name, under the subdirectory Record File Settings TRENDnet/PlaybackFiles. Click Browse and then Record file size: This size of live view video recording. You can choose choose a new destination if you want to save the file 256MB, 512MB, or 1GB a file. Smaller file size is good somewhere else. for many short recordings. Click Save to save the changes Save record By default, files will be saved under the folder with files to: your user name, under the subdirectory Maintenance TRENDnet/RecordFiles. Click Browse and then choose a new destination if you want to save the file You can restart, load camera settings and upgrade the camera firmware on this somewhere else. page. Save By default, files will be saved under the folder with downloaded your user name, under the subdirectory files to: TRENDnet/DownloadFiles. Click Browse and then ...
- Page 88 TV‐NVR208 TRENDnet User’s Guide is a firmware upgrade available for your device, please check your TRENDnet model Reboot and version using the link. Reboot: Click this button to reboot this camera. http://www.trendnet.com/downloads/ 1. If a firmware upgrade is available, download the firmware to your computer. Reset 2. Unzip the file to a folder on your computer. Reset: Reset all NVR settings, except the IP network settings 3. Read the firmware upgrade instruction for specific version update ...
-
Page 89: Network
TV‐NVR208 TRENDnet User’s Guide Network Network Interface Duplex and Choose one of the Ethernet duplex and speed to TCP/IP Speed: match your network. Default: auto. Setup your basic IPv4 and IPv6 network settings on this page. MAC Address: Click this button to reboot this camera. MTU: Maximum transmission unit. The maximum field size in the Ethernet packet. Primary DNS: Enter your first IPv4 or IPv6 DNS server address Secondary DNS: Enter your second IPv4 or IPv6 DNS server address IPv4 DHCP: Check this box if the IP address is assigned by DHCP server. IPv4 Address: The IPv4 dynamic or static address Subnet Mask: Network range of the subnet ... - Page 90 TV‐NVR208 TRENDnet User’s Guide Port DDNS You can change the service port numbers of TV‐NVR208 and enable/disable RTSP or Dynamic Domain Name Service, DDNS, allows you to find your camera from the HTTP services. Internet with an easy to remember domain name. Port Numbers DDNS HTTP Port: The default web access port. You can change the port number. However, you cannot disable the web Enable DDNS: Check this box to enable DDNS Service. service. The default port number is 80. DDNS Type: Select a DDNS service provider. RTSP Port: The Real‐Time Streaming Protocol port for video Server Address: Enter the DDNS server address. streaming. You can change the port number or disable the service by uncheck the box. The default Domain: Enter your registered domain/host name on ...
-
Page 91: Video
TV‐NVR208 TRENDnet User’s Guide Virtual Host Video Virtual Host allows you to set virtual ports for each camera. Video Format Adjust the settings of video streams. Virtual Host Enable Virtual Check this box to enable Virtual Host Host: Camera: Select camera to configure Virtual HTTP Create a virtual HTTP port number for the camera Port: Virtual RTSP Create a virtual RTSP port number for the camera Channel: Select which video stream for video format Port: changes. Virtual HTTPS Create a virtual HTTPS port number for the camera Port: ... - Page 92 TV‐NVR208 TRENDnet User’s Guide On Screen Display Settings Bitrate Type: Choose between variable bit rate and constant bit Display the camera name and the time the video. Select the video channel you want rate for video compression. The default is variable to change the setting, then change the settings. Move the red box to position the rate. text. Click on Save to save the changes. Video Quality: Choose the video quality. The default is medium quality. Frame Rate: Choose the capturing frame rate. Reduce the frame rate to reduce the capture file size. Max. Bitrate: Choose the maximum video sampling bit rate. Click Save to save the changes Channel: Select the video channel you want to edit. Display Name: Check this box to display the product name that was setup in the device settings. Display Date: Check this box to display system time. Display Week: Check this box to display time of the week. ...
- Page 93 TV‐NVR208 TRENDnet User’s Guide Text Overlay Privacy Mask Display extra information on the screen over the image. Move the red box to Create a masking area to keep your privacy. You can create up to four independent position the text. Click on Save to save the changes. masking areas by clicking and dragging on the screen. Channel: Select the video channel you want to edit. Channel: Select the video channel you want to edit. Check Box: Check this box to enable text overlay. Enable Privacy Mask: Check this box to enable privacy masking. Text Field: Enter the text you want to display. The length of the Stop Drawing: Click this button to stop drawing. text is decided by limitation of the camera. Clear All: Click this button to clear all the masking areas. Click Save to save the changes ...
- Page 94 TV‐NVR208 TRENDnet User’s Guide Video Recording Expire Time: Specify how many days you want to lock the recording. Click Save to save the changes Edit: Click Edit to edit the recording schedule. The Edit Schedule window will pop up. 1. Select day of the week you want to edit. 2. Select All Day or Customized schedule of Channel: Select the video channel you want to edit. the day. 3. Set the time period and the event you Enable Record Check this box and then click Save to enable video want to trigger the video recording Schedule: recording. continuous (always recording) or motion Pre‐record: Recording time before trigger event. ...
- Page 95 TV‐NVR208 TRENDnet User’s Guide Holiday Settings Edit Holiday Schedule Recording video in holidays may has different requirements. You can set up to 11 Holiday Name: Change the holiday name to meaningful name holidays of a year sharing the same holiday profile. instead of index numbers. Set up the holiday schedule by click on button. Enable: Enable or disable this holiday rule. Type: Select the holiday is for a day, a week or a month. Day mode: Select the start and end dates to specify the period of holidays. This setting is good for one time only. It does not repeat periodically. Week mode: Select the start and end dates of the week to specify the period of holidays. This setting is repeating every year. Month mode: Select the start and end dates to specify the period of holidays. This setting is repeating every year. Start Date: Select the day when the holiday starts. End Date: Select the day when the holiday ends. ...
-
Page 96: Events
TV‐NVR208 TRENDnet User’s Guide Events Motion Save to save the choice. Detection: Motion Detection Draw Area: Click Draw Area button to start drawing. Click and Set up how the motion detection event will be triggered and what actions will be drag on the area you want to set up the motion triggered. detection. The number of areas you can set up depends on camera models. Click Stop Drawing to Note: This feature is camera dependent. stop drawing motion detection areas. The red grids represent the motion detection area, by default, the entire area is selected. Click Clear All to erase the area to restart. Sensitivity: Move the slider to adjust detection sensitivity. Clear All: Click this button to clear all the set up areas. ... - Page 97 TV‐NVR208 TRENDnet User’s Guide Arming Schedule Linkage Method Edit: Click Edit to edit the recording schedule. The Edit Schedule window will pop up. 3. Select day of the week you want to edit. Alarm is not supported for this model. 4. Select All Day or Customized schedule of the day. 5. Set the time period and the event you want Click Save to save the changes to trigger the video recording continuous (always recording) or motion detection. 6. Click Select All or the weekday you want to have the same schedule on different day. 7. Click another day of the week by clicking on ...
- Page 98 TV‐NVR208 TRENDnet User’s Guide Video Tampering Draw Area: Click Draw Area button to start drawing. Click and Set up how the video tampering detection event will be triggered and what actions drag on the area you want to set up the tamper will be triggered. When video is suddenly blocked or blacken, tampered, the video detection. Click Stop Drawing to stop drawing motion tamper notifications will alert the system manager to check the camera. detection areas. The gray block represents the Note: This feature is camera dependent. detection area. Sensitivity: Move the slider to adjust detection sensitivity. Clear All: Click this button to clear all the set up areas. Arming Schedule Edit: Click Edit to edit the recording schedule. The Edit Schedule window will pop up. 1. Select day of the week you want to edit. 2. Select All Day or Customized schedule of the ...
- Page 99 TV‐NVR208 TRENDnet User’s Guide Exception 4. Click Select All or the weekday you want to have the same schedule on different day. Provide notifications for other system events, set up your notifications here. 5. Click another day of the week by clicking on its tab to set the next schedule. Click OK when you have finished your settings. Linkage Method Notification Exception Type: First, choose the exception type, and then choose the corresponding action. Full Screen Switch the video on the VGA/HDMI monitor to the Monitoring: camera detected motion event. Audible Activate the audible on board buzzer. Warning: Audible Activate the audible on board buzzer. ...
- Page 100 TV‐NVR208 TRENDnet User’s Guide Click Save to save the changes address as your incoming email server, maybe not. Email Please ask your email service provider for detail. Set up email accounts for notifications. SMTP Port: Service port number for outgoing email.* Authentication: Check this box if your server requires a password in order to send email. Most email servers require authentication when sending an email. User name: Enter the user name of outgoing email account Password: Enter the password Confirm: Enter the password again to confirm that the password was entered correctly. Click Save to save the changes Receiver Receiver 1: The first receiver’s name. Receiver 1’s The first receiver’s email address. Address: Receiver 2: The second receiver’s name. ...
-
Page 101: Storage Settings
TV‐NVR208 TRENDnet User’s Guide Storage Settings Network Storage Network Storage must be setup before it can be managed. You can add up to 8 network storages for your NVR. The recordings will subsequently be stored in these Storage Management spaces. Save video from the first storage and then the next when the first one is full. To setup and initiate the hard drive remotely, check the hard disk drive and then Click on the entry to change the settings and click Save to save the settings. click on Format. ... -
Page 102: Appendix
TV‐NVR208 TRENDnet User’s Guide Appendix Install your NVR System on Your Network Turn on network discovery on Windows To enable remote network access to the NVR, you need to install your NVR onto your network. Make sure your NVR system is working on the same network The TV‐NVR208 is UPnP enabled device. Find your camera is easy with Windows segment your router defined. Reserve a pool of IP addresses for NVR and all network discovery. If your network discovery is turned off, go to Control Panel >> cameras. You can then access your NVR and network cameras everywhere over the Network and Internet >> Network and Sharing Center >> Advanced sharing network. settings and then select Turn on network discovery. Click Save changes to save the The other option to setup the NVR and cameras on your network is using DHCP. The changes. If you still have difficulty to find your camera with network discovery, TV‐NVR208 DHCP client is default disabled. You can enable DHCP client manually. check it out if it has to network discovery setting on other network profiles. 1. Go to General Network Settings to enable the TV‐NVR208 getting its IP address from your router DHCP. 2. Reboot your TV‐NVR208. 3. Plug in the PoE cameras to the PoE ports. 4. All the cameras are getting the assigned IP address from your router. 5. For plug‐and‐play cameras, such as TV‐IP320PI, installed directly on the PoE ... -
Page 103: Compatible Camera List
TV‐NVR208 TRENDnet User’s Guide You can visit the camera with the new preset password. (For more camera * TV‐IP430PI and TV‐IP450P cameras require 802.3at PoE+ power supply. TV‐ IP450PI camera require proprietary PoE power supply. Please supply the power password management, please see Camera Connection Settings on page separately instead of dragging power from the TV‐NVR208. Dragging PoE power 22 for more details.) ... -
Page 104: Regulations
TV‐NVR208 TRENDnet User’s Guide IMPORTANT NOTE: Regulations FCC Radiation Exposure Statement Federal Communication Commission Interference Statement This equipment complies with FCC radiation exposure limits set forth for an This equipment has been tested and found to comply with the limits for a Class B uncontrolled environment. This equipment should be installed and operated with minimum distance 20cm between the radiator & your body. digital device, pursuant to Part 15 of the FCC Rules. These limits are designed to provide reasonable protection against harmful interference in a residential This transmitter must not be co‐located or operating in conjunction with any other installation. This equipment generates uses and can radiate radio frequency energy antenna or transmitter. and, if not installed and used in accordance with the instructions, may cause The availability of some specific channels and/or operational frequency bands are harmful interference to radio communications. However, there is no guarantee that country dependent and are firmware programmed at the factory to match the interference will not occur in a particular installation. If this equipment does cause intended destination. The firmware setting is not accessible by the end user. harmful interference to radio or television reception, which can be determined by turning the equipment off and on, the user is encouraged to try to correct the interference by one of the following measures: • Reorient or relocate the receiving antenna. • Increase the separation between the equipment and receiver. •... -
Page 105: Europe - Eu Declaration Of Conformity
TEW‐821DAP TRENDnet User’s Guide Europe – EU Declaration of Conformity direktiv 2004/108/EF, 2006/95/EF og 2009/125/EF. Deutsch [German] Hiermit erklärt TRENDnet, dass sich das Gerät TV‐NVR208 in TRENDnet hereby declare that the product is in compliance with the essential Übereinstimmung mit den grundlegenden Anforderungen und den requirements and other relevant provisions under our sole responsibility. übrigen einschlägigen Bestimmungen der Richtlinie 2004/108/EG, 2006/95/EG und 2009/125/EG befindet. Eesti [Estonian] Käesolevaga kinnitab TRENDnet seadme TV‐NVR208 vastavust direktiivi 2004/108/ EÜ, 2006/95/ EÜ ja 2009/125/ EÜ põhinõuetele ja nimetatud direktiivist tulenevatele teistele asjakohastele sätetele. English Hereby, TRENDnet, declares that this TV‐NVR208 is in compliance with the essential requirements and other relevant provisions of Directive Safety 2004/108/CE2006/95/CE, and 2009/125/CE. EN 60950‐1: 2006 + A11: 2009: +A1: 2010 + A12: 2011 + A2: 2013 Español [Spanish] Por medio de la presente TRENDnet declara que el TV‐NVR208 cumple con los requisitos esenciales y cualesquiera otras disposiciones EMC ... -
Page 106: Rohs
Dirrettiva 2004/108/KE, 2006/95/KE u 2009/125/KE. Magyar Alulírott, TRENDnet nyilatkozom, hogy a TV‐NVR208 megfelel a [Hungarian] vonatkozó alapvetõ követelményeknek és az 2004/108/EK, 2006/95/EK és a 2009/125/EK irányelv egyéb elõírásainak. Polski [Polish] Niniejszym TRENDnet oświadcza, że TV‐NVR208 jest zgodny z zasadniczymi wymogami oraz pozostałymi stosownymi postanowieniami Dyrektywy 2004/108/WE, 2006/95/WE i 2009/125/WE. Português TRENDnet declara que este TV‐NVR208 está conforme com os [Portuguese] requisitos essenciais e outras disposições da Directiva2004/108/CE, 2006/95/CE e 2009/125/CE. Slovensko TRENDnet izjavlja, da je ta TV‐NVR208 v skladu z bistvenimi zahtevami [Slovenian] in ostalimi relevantnimi določili direktive2004/108/ES, 2006/95/ES in ... - Page 107 General Public License ("LGPL"). shipping from outside of the USA are responsible for custom charges, including but not Go to http://www.trendnet.com/gpl or http://www.trendnet.com Download section limited to, duty, tax, and other fees. and look for the desired TRENDnet product to access to the GPL Code or LGPL Code. These codes are distributed WITHOUT WARRANTY and are subject to the copyrights of WARRANTIES EXCLUSIVE: IF THE TRENDNET PRODUCT DOES NOT OPERATE AS the developers. TRENDnet does not provide technical support for these codes. Please go ...
- Page 108 ...
Need help?
Do you have a question about the 0710931110555 and is the answer not in the manual?
Questions and answers