Table of Contents
Advertisement
Quick Links
Advertisement
Table of Contents

Subscribe to Our Youtube Channel
Related Manuals for Newworld NWG60W

Summary of Contents for Newworld NWG60W
- Page 1 Instruction manual Built-in Gas Hob NWG60W/B/X...
- Page 2 You’ll soon be enjoying your new Built-in Gas Hob It all begins here, with your instructions. Don’t worry, there’s nothing too technical coming up. Just simple, step-by-step guidance to get you up and running quickly. Sound good? Then let’s get started. Help and Guidance We’re here to help you get the most from your Built-in Gas Hob.
-
Page 3: Table Of Contents
Contents Safety information Care and Maintenance Safety information Cleaning Routine maintenance Getting to know your Technical specifications Built in Gas Hob Overview Placement of Burner Heads and Caps Product support Installing your Bulit in GasHob Troubleshooting Help and assistance Advance Preparation Declaration of conformance to product standards Positioning the Hob... - Page 4 Safety information...
-
Page 5: Safety Information
Safety information Important - Please read these instructions fully before installing or operating INSTALLATION WARNINGS DURING USAGE IMPORTANT: This product MUST be installed by a IMPORTANT: This appliance can be used by children qualified Gas Safe registered installer in aged from 8 years and above and persons with accordance with local regulations. - Page 6 Safety information Important - Please read these instructions fully before installing or operating IMPORTANT: Position pans over the centre of the IMPORTANT: Do not hang towels, dishcloths burners and turn handles to a safe position where or clothes from the hob or its controls. they can not be knocked or grabbed.
-
Page 7: Getting To Know Your Built In Gas Hob
Getting to know your Built-in Gas Hob... - Page 8 Getting to know your Built in Gas Hob You’ll be up and running in no time Ready? Let’s begin... Please read these instructions carefully. They contain important information which will help you get the best from your Built-in Gas Hob and ensure safe and correct installation and operation.
-
Page 9: Overview
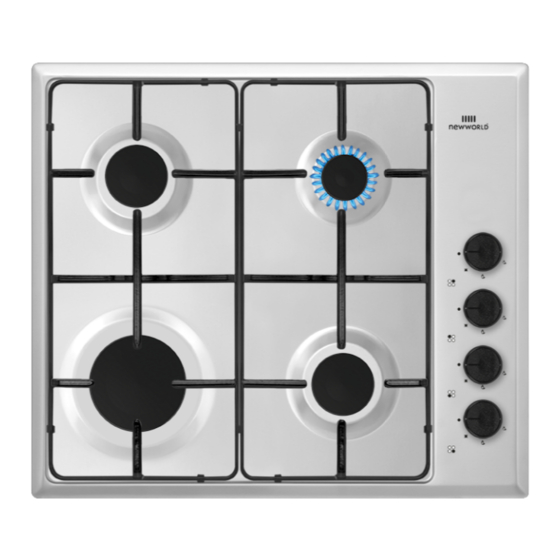
Getting to know your You’ll be up and running in no time . Enamel pan stands . Hob tray . Control knobs . Small burner . Medium burner x 2 . Large burner Getting to know your... -
Page 10: Placement Of Burner Heads And Caps
Getting to know your Built in Gas Hob You’ll be up and running in no time Placement of Burner Heads and Caps For all burners: • Place a burner cap on each burner head (see Figur. 1 ), matching the cap size to the head size. -
Page 11: Installing Your Bulit In Gashob
Installing your Built-in Gas Hob... -
Page 12: Advance Preparation
RISK OF ELECTRIC SHOCK DO NOT OPEN CAUTION: !" #$ %&' $ !($ # )* + " ,- $.$'!#)'-*("'+/ %"- 0"! #$1 "2$- ' "2 $#-3"# 45 '+67 0" & *$ #8*$# 2)' $5 4.$-95#! *-) 0*)%$7 #$,$# -* $# 2)')0: !"-;&5.),)$% -* $#2)'$ 9$ # *"... - Page 13 Installing your Built-in Gas Hob Bringing it all together 65 mm Fig. .2 NOTE: If the built-in hob is being installed directly Clearance above a built-in oven, an additional spacer (not supplied) may be required to maintain a clearance of 10 Wall 10 mm mm between the underside of the built-in hob...
-
Page 14: Installing The Hob
Installing your Built-in Gas Hob Bringing it all together Fixing the seal to the back of the hob The hob must be sealed to the work surface to prevent liquid from entering into the cabinet. A tape seal is supplied with the hob. Refer to Fig. 3.4. Turn the hob over and place in on a secure, level surface. - Page 15 Installing your Built-in Gas Hob Bringing it all together Fig. .4 Gas Connection Gas Connection Rear Screw (R) seal C seal C overlaps Rear Screw (R) seals B Mains Connection seal C overlaps seal B seals B seal A Front Screw (F) Front Screw (F) Fig.
-
Page 16: Gas Conversion
Installing your Built-in Gas Hob Bringing it all together This appliance must be installed by a suitably qualified gas safe registered gas installer to standard BS 6172: 2010 Accessories 1. Installation clip*4 2. Screw*4 3. Single side glue*1 4. LPG Nozzel*5 Installing your Built-in Gas Hob... -
Page 17: Electrical Connection
Installing your Built-in Gas Hob Bringing it all together Electrical Connection Before making the connection, make sure that: 1) The safety circuit-breaker and the electrical system are able to with stand the load of the appliance. 2) The power supply system has a ground connection in good working order in accordance with the regulations in force. -
Page 18: Using Your Built In Gas Hob
Using your Built-in Gas Hob... -
Page 19: Controls
Using your Built-in Gas Hob Getting the most from your appliance Controls Instructions for use (gas hob burners) Fig. . The symbols on the control knobs mean the following: No gas flow or ‘Off’ ArtNo.316-0025 RGG77 hob control to high Maximum gas flow or ‘high’... -
Page 20: Using The Gas Hob Burners
Using your Built-in Gas Hob Getting the most from your appliance For correct use of the gas hob To light the gas burners For lower gas consumption and better efficiency, To light the burner, press the control knob fully use only flat-bottomed pan of dimensions down and hold the knob down before rotating anti clockwise to the High Flame position. -
Page 21: Care And Maintenance
Care and maintenance... -
Page 22: Cleaning
Care and maintenance Looking after your appliance Cleaning Burner Caps: WARNING! Isolate the power supply to the cooker and make sure that the oven is cool. Periodically, the enamelled pan support, enamelled covers and burner heads must be washed with warm soapy water, rinsed and Before cleaning your oven or performing dried. -
Page 23: Routine Maintenance
Care and maintenance Looking after your appliance Routine maintenance Have the condition and efficiency of the gas pipe and the pressure regulator (if installed) checked periodically. If anomalies are found, do not repair components but have the faulty component replaced. To ensure good performance and safety, the gas regulator taps must be greased periodically. -
Page 24: Technical Specifications
Care and maintenance Looking after your appliance Technical Specification We apologise for any inconvenience caused by minor inconstancies within these instructions that may occur due to product improvements and development All images and drawings are for illustration purposes only. Care and maintenance... -
Page 25: Product Support
Product support... -
Page 26: Troubleshooting
Product support Help is always at hand Troubleshooting 3. DO NOT ATTEMPT TO REPAIR THIS 1. If no electrical functions appear to work, check COOKER YOURSELF. CALL BUSH PRODUCT the cooker isolation switch has not been turned SUPPORT ON 0333 3052263 OR CONSULT off also check the fuse in the switch and the A GAS SAFE REGISTERED INSTALLER circuit breaker in you consumer unit... -
Page 27: Help And Assistance
Product support Help is always at hand Help and assistance If you require any technical guidance or find that your Freestanding Cooker is not operating as intended, a simple solution can often be found in the Troubleshooting section of these instructions or online at www.newworldassist.co.uk If you still require further assistance, call one of our experts on 0333 3052263*. -
Page 28: Declaration Of Conformance To Product
Product support Help is always at hand Declaration of conformance to Disposal product standards This appliance conforms to all relavant standards applicable to domestic appliances sold in the UK crossed out wheelie bin Product support... - Page 29 Activate your 12 month guarantee Thank you for choosing New World. Your new product is guaranteed against faults and breakdowns for 12 months. Don’t forget to register it with us today so we can provide you with our best possible after-sales service and useful updates. www.newworldassist.co.uk Or Call 0333 3052263 Your New World Guarantee...
- Page 30 Contact: www.newworldassist.co.uk Helpline: 0333 3052263...
Need help?
Do you have a question about the NWG60W and is the answer not in the manual?
Questions and answers