
Subscribe to Our Youtube Channel
Related Manuals for Carlson Boretrak2


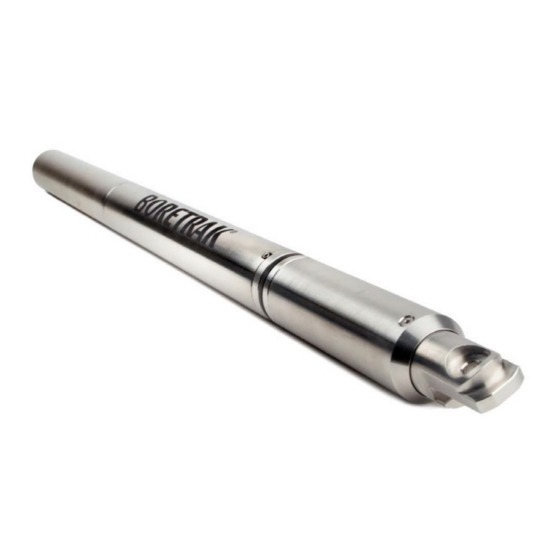
Summary of Contents for Carlson Boretrak2
- Page 1 Boretrak2 Borehole deviation survey system User manual H-5911-9004-02-B BT2 user manual - H-5911-9004-02-B December 2021...
-
Page 3: Table Of Contents
OPERATIONAL GUIDE ...................................... 9 Boretrak2 deployments – gyro introduction ..........................10 Boretrak2 deployments – geo-referencing ..........................13 Boretrak2 deployments – a typical project in the field ......................... 15 HARDWARE ........................................34 Boretrak2 hardware description ..............................35 Regular checks and preventative maintenance .......................... 54 SOFTWARE ........................................ -
Page 4: Introduction
INTRODUCTION P a g e | 4 BT2 user manual - H-5911-9004-02-B... -
Page 5: Customer Information
Carlson is prohibited. Reverse engineering is also prohibited. The information in this manual is subject to change without notice. For any feedback or comments, or if there are questions about the Boretrak2 which are beyond the scope of this manual, contact Carlson Software. - Page 6 They also feature improved power management and the ability to upgrade to future firmware versions remotely, via Bluetooth. On connection with Carlson Boretrak software, if your probe is identified as running version 1.0 firmware, a message appears.
-
Page 7: Boretrak2 System Concepts
Boretrak rods must be used. Your Boretrak2 probe will have been set as a Basic or Advanced unit in the factory. If your probe is set as a Basic unit, you can purchase an upgrade to convert it into an Advanced unit. Contact Carlson for details. - Page 8 At each deployment interval, with the system held steady, the operator on the surface records a time stamp using Carlson Boretrak. Once a survey has been completed, and the Boretrak2 is back on the surface, the Bluetooth link is re-established and all IMU data from the probe is automatically downloaded to Carlson Boretrak.
-
Page 9: Operational Guide
OPERATIONAL GUIDE P a g e | 9 BT2 user manual - H-5911-9004-02-B... -
Page 10: Boretrak2 Deployments - Gyro Introduction
IMU. The raw gyro drift over a given time is kept to a minimum and constant checks on the drift throughout the deployment ensure that temperature changes are mostly accounted for. If the accelerometers detect that the Boretrak2 is held static at any point, then the gyro is effectively locked so that any drift during this period is ignored. - Page 11 Figure 1 Gyro exceeded rotational speed limit Note that this error can only be registered by Carlson Boretrak while the Boretrak2 probe and tablet have a live Bluetooth communications link established. If the rotation limit is exceeded while the probe is out of Bluetooth range of the tablet, then the message appears as soon as the Bluetooth connection is restored.
- Page 12 3.4 Gyro check After the probe is retrieved from the hole it is possible to perform a gyro check to confirm that the dynamics, shocks and rotations experienced during the deployment have not caused the gyro to drift or lose accuracy. As long as the Broretrak2 is still aligned, place the probe back on the alignment jig and select Align >...
-
Page 13: Boretrak2 Deployments - Geo-Referencing
4.3 Orientation and positioning of the alignment jig Find a location for the alignment jig. The location must be close enough to the collar so that the Boretrak2 can be promptly deployed when the alignment is complete. The location should be solid and not subject to movement or vibrations. Ensure the jig is roughly horizontal (ie. - Page 14 Boretrak2 is to be used in conjunction with data from other systems such as GPS or the Quarryman Pro.
-
Page 15: Boretrak2 Deployments - A Typical Project In The Field
Ensure that all batteries – in your tablet & in the Boretrak2 probe – are fully charged before starting a project. Place the rechargeable batteries into the Boretrak2 nose cone and screw the nose cone securely onto the probe. - Page 16 The Browse window appears. Navigate to find the file containing the design holes. These may be in the form of a standard ASCII text file such a *.TXT or *.CSV file, or else a Carlson *.DRL file. P a g e | 16...
- Page 17 To import holes from an ASCII text file, the ASCII Import window appears. Pre-defined import formats can be setup so that the file is directly imported into Carlson Boretrak. When importing for the first time, manually assign fields for the data in the *.CSV file. Tap on the header of a column then select the appropriate field from the Data drop down list.
- Page 18 Figure 9 Project window > Holes tab Tap Create to create the new project. 5.2.3 Connection On creation of a new project, Carlson Boretrak automatically starts searching for a paired Boretrak within communication range. P a g e | 18...
- Page 19 11). Ensure the jig is on solid ground and reasonably close to level (i.e.: within 20 degrees). Connect the steel cable securely to the Boretrak2 probe using the deployment adaptor (see section 6.6). Position your probe in the supplied jig. The probe can be rolled around its axis in any rotation, but the nosecone must point towards Hole 2.
- Page 20 1 to hole 2 Boretrak2 on alignment jig Steel cable attached to Boretrak2 probe Hole 1 Figure 11 The probe in the alignment jig aligned between two holes Figure 12 Probe held in the alignment jig P a g e | 20...
- Page 21 In the Control tab, the Gyro button turns green once the heading has been initialised and then disappears. If the Boretrak2 probe is moving, the alignment may be delayed. In this case, the gyro button turns yellow. The P a g e | 21...
- Page 22 alignment will complete when the probe is stable. After a successful alignment, an Alignment icon appears in the top left hand of the Control tab which can be accessed between holes to realign the gyro (see section 15.4). From this point onwards, the IMU tracks the orientation of the probe in relation to this starting heading. The probe logs all IMU data.
- Page 23 Figure 17 Boretrak2 ready to deploy Leave the jig in place. Pick up the Boretrak2 probe ready to deploy into Hole 1. Tap the Zoom to hole button. The 3D View zooms in on the hole selected for survey. An animated model of the Boretrak2 probe is visible at the hole collar.
- Page 24 Deploy the Boretrak2 probe 2 m into the borehole. The deployment distance is measured from the nose of the probe. 2m will take the probe down the borehole so that the second nodule on the steel cable is level with the hole collar.
- Page 25 5.5 Bluetooth connection When the Boretrak2 probe starts a survey, there is a live Bluetooth link between the probe and the tablet. While the live link is retained, data is ‘silently’ downloaded from the probe to the tablet, approximately every thirty seconds.
- Page 26 In the 3D View all segments added after the Bluetooth link has been disconnected are shown as flashing yellow. These yellow segments are provisional and are just based on the last live reading taken. They will be updated when the Bluetooth link is reconnected, and data is downloaded from the probe at the end of the survey. Figure 22 Readings taken while Bluetooth is disconnected In addition, with no live Bluetooth link, the deployment displayed in the Project tab is shown as a yellow warning triangle.
- Page 27 5.6 Completing a deployment When you feel the Boretrak2 probe touch the end of the borehole, keep the steel cable tight so that the probe remains upright with respect to the hole.
- Page 28 The next nodule that would have been used Final offset Hole collar Figure 25 Final offset at end of deployment Enter the measured offset into the Final Offset field. This value is deducted from the last reading’s full segment length. In the example in Figure 24 above, 9 * 2 m readings have been taken, giving a total of 18 m.
- Page 29 Figure 29 Alignment Options The Boretrak2 probe must be positioned on the alignment jig. The jig may be left in the same position as for the previous alignment, if it is still convenient to use it in that location, or it could be repositioned between the next two holes.
- Page 30 5.8.1 Probes running version 1.0 firmware The first generation of Boretrak2 probes run firmware version 1.0. If you are using a first-generation probe, it is recommended that you use the Verify Alignment button to check the current quality of the gyro heading. The software identifies when a probe running version 1.0 firmware is connected.
- Page 31 5.9 Data analysis and deliverables To view the details of a deployment, go to the Project tab, tap on a specific Deployment and tap the Deployment Details button. Figure 30 Deployment Details button The Deployment Details window appears. A table shows details of each reading taken in the selected hole, including the deviation from the planned hole at each deployment depth.
- Page 32 5.10 Points to remember The following points summarise some important points to remember to ensure the optimal accuracy and consistency from your Boretrak2 surveys. If you are having problems with your survey results, check that all these points have been taken into consideration.
- Page 33 Carlson for advice on disposable fittings such as those shown below. Figure 32 Boretrak2 probe fitted with centralisers for uphole deployment P a g e | 33...
-
Page 34: Hardware
HARDWARE P a g e | 34 BT2 user manual - H-5911-9004-02-B... -
Page 35: Boretrak2 Hardware Description
The Boretrak2 probe operates at any inclination. The IMU tracks the probe’s orientation whether it is deployed upwards, downwards, or horizontally. A ring of LEDs provides visible information on the status of the Boretrak2. The information conveyed is outlined below. - Page 36 The nose cone at the bottom end of the probe houses the batteries and should be unscrewed for transportation or for changing the batteries. The Boretrak2 probe is ruggedised but should be handled with due care to best protect the calibrated sensors inside the housing.
- Page 37 20 seconds to allow the supercapacitor to fully discharge. As described in the table in section 6.1, when the Boretrak2 probe is powered ON, the LEDs will light up, initially yellow and then in a colour and pattern dependent on the current status of the probe.
- Page 38 Figure 37 Silicon grease A tube of silicon grease is supplied with the Boretrak2. This grease should be lightly smeared on the O-ring to ensure it is kept well lubricated and the probe retains its seal. Keep grease off the retaining thread.
- Page 39 Figure 39 Boretrak2 transit case Components of the Boretrak2 system are contained within a dedicated transit case. The case ensures the system is protected from shocks and vibrations. When the lid is closed and the latches are snapped in place, the case is both dust-tight and water-tight (IP67).
- Page 40 Figure 40 Gyro alignment jig (left) with probe during alignment (right) When in use, the gyro inside the Boretrak2 must be aligned before a deployment. The gyro is not a north-seeking device so an initial starting heading must be defined. The starting heading forms the basis of all subsequent orientation data collected over the course of a deployment.
- Page 41 Figure 41 Gyro alignment jig mounted on a survey tripod Wherever the jig is positioned, if it is held securely in place, multiple, repeatable alignments can be taken from the same position. Also, if required, the jig can be left in place for a surveyor to observe with their total station after the deployment has been completed.
- Page 42 With the deployment adaptor connected to the selected deployment device, the adaptor can be connected to the Boretrak2 probe before commencing a survey. Retract the sprung brass cuff to reveal the quick release connection pin. Figure 43 Deployment adaptor with brass cuff un-retracted (left) & retracted (right) To connect the deployment adaptor to the probe, hold the two at 90°...
- Page 43 Figure 45 Retracted deployment adaptor ready to connect to the probe Figure 44 Connecting the deployment adaptor to the probe Allow the brass cuff to spring back into place, locking the Boretrak2 probe in line with the deployment adaptor. Figure 46 Deployment adaptor connected to the probe To disconnect the probe, retract the brass cuff, move the probe so it is at a 90°...
- Page 44 = 1m and subsequent odd metre intervals Figure 48 Longer nodule at odd metre intervals With the Boretrak2 probe connected to the cable, the first nodule along the cable from the probe is exactly 1 m from the tip of the Boretrak2 nose cone.
- Page 45 6.8 Push rod system (optional) The push rod system is used to push the Boretrak2 probe during horizontal or uphole deployments. It is also suitable for use in shallow, downhole deployments when the hole is not steep enough for gravity to pull the probe down the hole under its own weight.
- Page 46 Boretrak2 probe. Even numbers of metres are marked with red nodules, odd numbers with silver. A brass cone connector is fastened to the end of the push rod. Screw the deployment adaptor into the brass cone connector. The Boretrak2 probe can then be easily connected to the push rod.
- Page 47 • 2 x Rubber wheels 2 x M6 x 40 mm screw with nut and washer • 4 x M6 x 35 mm screw with washer • 2 x M8 x 45 mm screw with nut and washer • The tools required for assembly are: 6 mm hex key •...
- Page 48 Insert a M8 x 45 mm screw through both holes in the wheel axle. Secure the axle to the frame with a nut and washer. Tighten the screw with a 6 mm hex key. Wheel axle secured with two M8 x 45 mm bolt, nut and washer sets Figure 54 Assembling the push rod system - step 3...
- Page 49 To secure the wheels in place, insert and secure a clevis pin through the hole on each end of the axle. Clevis pin Figure 56 Assembling the push rod system - step 5 Insert the handle into the connectors at the top of the frame. Ensure the holes in the handle are aligned with the holes in the frame.
- Page 50 Insert a M6 x 40 mm screw through the holes in each connector. Secure the handle to the frame with a nut and washer. Tighten the screw using a 5 mm hex key. Handle secured with M6 x 40 mm bolt, nut and washer sets Figure 58 Assembly of the push rod system - step 7 Thread the cable guide onto the brass connector.
- Page 51 To attach the optional stud feet to the frame, turn the frame on its side so it is resting on the handle. Attach the stud feet to the frame through the 4 holes in the base of the frame. Use the M6 x 35 mm screws with washers. Tighten the screws using the 5 mm hex key.
- Page 52 Rods are stacked in a rod rack. The rod rack can fit up to 36 rods, arranged in two stacks of 18. The rod at the bottom of each stack is fitted with a female quick-release joint. This joint can connect to the rod on the top of the next stack which is fitted with a male quick-release joint.
- Page 53 An Android device can run the Carlson Boretrak application and interact with the Boretrak2 probe. Figure 64 PDA An Android tablet or PDA can be supplied by Carlson as part of the Boretrak2 system. Carlson Boretrak is pre- loaded on any such device supplied by Carlson.
-
Page 54: Regular Checks And Preventative Maintenance
Only use battery cells which are in an intact condition. Prior to each use, check the condition of your battery cells. If the plastic coating around the battery is pierced, ripped or torn, do not load the battery into the Boretrak2 probe. - Page 55 The rods and hinges are designed to be used predominantly in the plane of the rack. They are designed to be load- bearing along their length (tensional loads) so can withstand the weight of a long Boretrak2 deployment. However, take care not to force the rods in a twisting action (torsional loads) or a lever action (transversal loads).
-
Page 56: Software
SOFTWARE P a g e | 56 BT2 user manual - H-5911-9004-02-B... -
Page 57: Setting Up Carlson Boretrak Software On An Android Device
8.3 Recommended PDA settings On receipt of a new Boretrak2 system, no changes of any Android settings are required to run the PDA as part of the Boretrak2 system. However, it is recommended that you set the correct time and date for your region. - Page 58 The new installer is supplied as an *.APK file which is loaded onto the Carlson USB drive supplied with each Boretrak2 system. Connect the device to your PC using a USB cable. Copy the *.APK file from your PC to the root drive of the device (Figure 65).
- Page 59 Boretrak2 probe must be ‘paired’. When purchased as a complete system, the Boretrak2 is supplied ready to use, with the Bluetooth connection already established. However, if you have purchased your own device or, if you are reconfiguring a device or swapping over a probe, you may find it necessary to establish / re-establish communications.
- Page 60 A Bluetooth pairing request appears (Figure 69). Tap OK. A pairing code is required but this will be pre-entered by default. Tap Pair. The device pairs with the Boretrak2 probe. When successful, the Boretrak2 probe is listed under Paired devices.
- Page 61 • There are no obstructions over the Boretrak2 probe’s LED window. • When you have checked each of these points, in the Bluetooth screen, tap Scan to check again for the Boretrak2 probe. 8.6 Data storage and file formats By default, projects created in Carlson Boretrak on an Android device are saved in the location: <AndroidDevice>:\Internal shared storage\Documents\Carlson Boretrak.
- Page 62 Alternatively, in Carlson Boretrak, go to the Menu and select Send. A series of options are offered to send the project, or elements of it via different medium – Bluetooth, Wi-Fi, or Cell, depending on the options configured and available on your device.
-
Page 63: Setting Up Carlson Boretrak Software On A Windows Device
Carlson Boretrak can be run in Desktop mode which is designed to be used in an office environment in conjunction with a standard mouse, keyboard and large monitor. Carlson Boretrak can also be run in Touch mode. This mode is optimized for use in the field on a touch-screen tablet. - Page 64 If you are supplying your own tablet, you must install the software before using your Boretrak2 for the first time. The Carlson Boretrak installer is loaded onto the USB drive packaged with all Boretrak2 systems. Updates are made available online.
- Page 65 In your tablet go to Settings > Bluetooth & other devices. Ensure the Bluetooth switch is turned ON. Figure 73 Settings > Bluetooth and other devices The Boretrak2 probe is identified over Bluetooth by its serial number. To operate in conjunction with the PDA, the probe must be listed under Other devices.
- Page 66 9.6 Data storage and file formats A Carlson Boretrak project is saved as an *.NDV file. You can open this file from within Carlson Boretrak by using the Open function. Alternatively, double-click on the file in Windows Explorer to automatically open the selected project inside Carlson Boretrak.
- Page 67 If problems are encountered with the hardware, software or any collected datasets, then it may be necessary to contact Carlson for support. In this case you may be requested to send the *.NDV file for further analysis and troubleshooting. This will help to ensure the highest level of support.
-
Page 68: Carlson Boretrak - Introduction
Carlson Boretrak runs on a Windows tablet / PC or on an Android device. The detailed description of the software in this manual focuses on the Windows version, but both versions run in an almost identical way. -
Page 69: Touch Mode - Home Screen
Boretrak2 probe which has been paired to the tablet and which is currently powered ON. When a Boretrak2 is identified, the connection is made and the probe is displayed graphically on screen, located at an automatically generated station. The Boretrak2 deployment is now ready to begin. - Page 70 Browse to the project location and select the *.NDV file to open the project in Carlson Boretrak. On opening a project, you can reconnect to a Boretrak2 via the Find Boretraks button on the Control tab (see section 15) or through the Project Details window (see section 14.1).
- Page 71 • DXF: Deswick DXF • DWG: AutoCAD drawing file • XML: LandXML • OMF: Open Mining Format • MDL: Carlson Model Format • TIN: Carlson triangulation format • DRL: Carlson hole data • OBJ: Wavefront Object • PLY: Polygon library •...
- Page 72 User name: enter the name of the operator. This appears on reports and saved project information. • Allow GPS: this feature allows Carlson Boretrak to interact with Carlson Surv-PC when using a GNSS • system to survey the position of collar coordinates.
- Page 73 11.3.2 Boretrak The Boretrak tab collects together settings specifically concerning the operation of the Boretrak2. Figure 80 Settings > Boretrak Automatic naming – hole: select the naming convention for new holes. The Custom option allows you to • specify a project or site-specific hole-naming convention.
- Page 74 11.3.3 Units The Units tab allows you to set the units of measurement for your project. Figure 81 Settings > Units Imperial Defaults: tap to set all units to default imperial measurement units. • Metric Defaults: tap to set all units to default metric measurement units. •...
- Page 75 Square Yards Square Inches Square Kilometres Volume Unit • Cubic Feet Cubic Metres Cubic Yards Cubic Inches Litres US Gallons Angular unit: • Decimal degrees Degrees minutes Degrees, minutes, seconds Radians Gradians (gons) Heading: define the 0° reference direction: • North East South...
- Page 76 The Folders tab defines the storage location of Carlson Boretrak projects on your tablet. Figure 82 Settings > Folders By default, Carlson Boretrak uses project files, as described in section 9.6. The Use Project Files radio button is selected by default.
- Page 77 11.3.5 Interface The Interface tab collects together settings which determine the appearance of Carlson Boretrak on your tablet. Figure 83 Settings > Interface UI scale: select a scale to ensure a best fit for Carlson Boretrak on your tablet. •...
- Page 78 11.3.6 Graphics The Graphics tab collects settings relating to graphics performance. Figure 84 Settings > Graphics • Pixel thickness: change the thickness of lines displayed in the 3D View. Near plane: the closest distance from your viewpoint that is rendered in the 3D View. •...
- Page 79 Default Hole Location: defines the coordinates which are used when a hole is automatically generated by • Carlson Boretrak. These can be changed at any time before or after a survey. You may find it convenient to enter default station coordinates which are close to those of your mine coordinate system.
- Page 80 Max radius: sets the maximum radius to which the range lines expand during a deployment. 11.3.8 Imports The Imports tab lists all file formats which can be imported into Carlson Boretrak. Tap on any import to define default options for each format.
- Page 81 11.3.10 Keystrokes The Keystrokes tab lists common actions in Carlson Boretrak and allows you to assign shortcut keys to each of these actions. This enables you to utilise hardware buttons on your mobile device to activate actions such as taking a reading or finishing a hole.
- Page 82 Carlson’s website. If available, tap the Update button to download the new version. 11.4.2 Manuals The Manuals tab provides access to this Carlson Boretrak software manual, as well as to other hardware manuals related to this software. 11.5 Light / Dark Three colour themes are available for Carlson Boretrak.
- Page 83 Figure 88 Carlson Boretrak Home screen with Light (left), Dark (centre) and Black (right) colour themes 11.6 Desktop Tap the Desktop button to change to Desktop mode. Carlson Boretrak automatically restarts and opens in Desktop mode (see section 16). 11.7 Exit Tap the Exit button to close Carlson Boretrak.
-
Page 84: Touch Mode - Screen Layout
Note that you may use the options in the Settings window to modify the appearance from the default layout shown in this manual (see section 11.3.7). Also note that the screen will look different depending on the model and screen-size of the device on which Carlson Boretrak is running. - Page 85 12.1.2 Boretrak2 model A model of the Boretrak2 is shown on screen. Once the gyro has been aligned, the internal sensors allow the model to be correctly orientated in real-time, showing the heading and inclination of the probe. As the Boretrak2’s LEDs change colour, this is also reflected in the 3D View.
- Page 86 The Planned hole is displayed in the 3D View as a solid blue line. 12.1.5 Deployments A Deployment is attached to a specific Hole. As the Boretrak2 is deployed, Boretrak readings are taken. These readings are all visible on-screen as they are recorded.
- Page 87 • 12.1.7 Imported data Any pre-existing data imported into the project can be viewed alongside data generated by the Boretrak2 within a project. The Project tab contains controls to turn imported data on and off in the 3D View window (see section 14.1.1).
- Page 88 Tap the tab Delete 3D View button to delete a 3D View tab. 12.3 View buttons Buttons along the bottom of the 3D View window provide options for viewing data. View control Drag Vertical and function Horizontal compass Figure 93 3D View buttons These buttons are described below.
- Page 89 12.3.2 View control The View control provides pre-defined view of all data currently active in the 3D View. To zoom to pre-defined views of specific scans, deployments, or stations, use other zoom buttons in the Control tab or in the Project tab. Tap View to open the View dialog.
- Page 90 Horizontal Orthographic ruler options button Orthographic options dialog Vertical ruler Figure 97 Orthographic view options Show Grid: toggles the background grid off and on. Lock Grid: holds the grid squares constant as you zoom in and out of the 3D View. With Lock Grid switched off, the grid resizes depending on the zoom level.
- Page 91 12.4 Function tabs By default, on the right-hand side of the screen, are three function tabs which allow control of the Boretrak2 probe, provide data viewing and analysis tools, and enable management of the project. Function tabs Tap the required tab to make it active.
-
Page 92: Menu Tab
Tap Save or Discard and the Project Details window opens (see section 14.1). Enter the required details for your new project and tap Accept to create the project. To connect to a Boretrak2 probe, open the Control tab and click Find Boretraks (see section 15). 13.2 Open 13.2.1 Open Carlson Boretrak projects... - Page 93 13.2.2 Import existing survey data The Open function can also be used to import other files into your active Carlson Boretrak project. These files may contain pre-existing data such as surveyed points, solids or linework. This data can be used as a backdrop to data collected with the Boretrak2.
- Page 94 The Managed Wi-Fi option in the Settings window > General tab (see section 11.3.1) determines whether the Wi- Fi is managed though Carlson Boretrak’s own Wi-Fi manager or through the standard Windows Wi-Fi manager. P a g e | 94...
- Page 95 Exit Tap Exit to exit Carlson Boretrak. A message window opens: ‘Do you want to save changes? All unsaved edits will be lost’. Tap Save to save all changes in your existing project and exit Carlson Boretrak. • • Tap Discard to reject any changes in your existing project and exit Carlson Boretrak.
-
Page 96: Project Tab
14 Project tab The Project tab contains a record of all data collected or imported within the active Carlson Boretrak project. Figure 99 Project tab The list of elements in the Project tab expand indefinitely as more stations are added, scans are recorded, and data imported. - Page 97 Back Left Right Export: exports the selected element and, by default, all elements nested beneath it in the Project tab. • Individual elements can be switched on or off during the export process. Each element in the Project tab (other than the project itself at the top of the Project tab) has a context menu, accessed by right-clicking the element.
- Page 98 Figure 103 Project Details > Project The Project Details window contains tabs. 14.1.1 Project tab Directory: displays the current location of the project. If required, edit the directory path in the text entry • box, or tap the Browse button to the right to select a different address in which to save the project. Project Name: displays the name of the project.
- Page 99 In the 3D View, the location of these coordinates is marked by a hole graphic. Tap Import to add holes from a file to the project. The file may be a Carlson *.DRL file, or a *.CSV text file. The text file may contain hole name, row name, coordinates, hole names and reference headings.
- Page 100 To start a survey from the end of a specific deployment, tap the Deploy BT button next to the appropriate hole. You may use this option if, for example, the Boretrak2 probe is still positioned in the hole at the end of a deployment after the operation was interrupted due to power failure.
- Page 101 The list shows the Name of the alignment, followed by the Azimuth that has been manually input or computed. To edit an alignment in the list, tap on the appropriate alignment to open the Alignment Details window. Edit the details as required. Figure 108 Alignment Details Note that if the heading is edited, all data collected using the selected alignment will be affected by this edit.
- Page 102 To apply the same planned hole values to all holes which already exist in the active project, tap Apply to existing holes. 14.2.2 Deployments tab The Deployments tab lists the Boretrak2 deployments which have been carried out from the selected Hole. P a g e | 102 BT2 user manual - H-5911-9004-02-B...
- Page 103 To start a survey from the end of a specific deployment, tap the Deploy BT button next to the appropriate hole. You may use this option if, for example, the Boretrak2 probe is still positioned in the hole at the end of a deployment after the operation was interrupted due to power failure.
- Page 104 Downloaded: A blue tick indicates that this reading has been successfully downloaded. A download symbol • indicates that the data is provisional and that the download has not yet occurred. Az: recorded azimuth / heading of the Boretrak2 probe • Inc: recorded inclination of the probe.
- Page 105 Editor tab The Editor tab provides controls which allow editing of the Deployment. Use these controls with caution. Figure 113 Deployment Details > Editor tab Segments: these controls concern the deployment intervals used during the deployment. • Segment Length: edit the deployment interval that was used for the deployment. Final Offset: edit the offset that was entered after the last reading taken during the deployment.
- Page 106 Figure 114 Deployment Details > Visuals tab • Deployment Layer Colour: select the method by which the deployment is coloured. Three colours can be defined with values related to the selected method. Type: select the graphical appearance of the selected deployment: •...
- Page 107 Figure 115 2D Views Plan View: shows a plan view of the deployment against a radial plot centred on the hole collar. • Select Top-Down from the Target drop down list to view a standard plan view. Select Hole Incline to view the hole along a line drawn between the start and end points of the survey.
-
Page 108: Control Tab
The autodetect routine can be started automatically by tapping New from the Touch mode Home screen. Alternatively, if you open an existing project and want to connect to a Boretrak2 probe, tap the Find Boretraks button in the Control tab to initiate the autodetect routine. - Page 109 Boretrak2 are sound and to read information from the probe. With all checks complete, a graphic of the Boretrak2 probe appears in the 3D View attached to the default Hole. The Control tab becomes active, displaying deployment controls. These controls are outlined below.
- Page 110 Reconnect to manually reconnect the tablet with the probe. 15.2.2 Alignment icon The Alignment icon appears only when the Boretrak2 probe is aligned, and logging has been started. Tap on the icon to realign the probe or to verify the current alignment.
- Page 111 Note that during this stage, the probe must be absolutely stable and free from movement and vibration. The probe must also be positioned in a known heading. The alignment jig is supplied with a Boretrak2 system to stabilise the probe and provide a baseline for the heading to be established.
- Page 112 To name the alignment, enter a name in the Alignment ID text field. By default the name is Alignment hh:mm. The heading of the alignment jig can be entered in the Azimuth frame. Note that the different methods listed under Azimuth are determined by the configuration of settings in the Settings window >...
- Page 113 Figure 125 Gyro exceeded rotational limit message Note that this error can only be registered by Carlson Boretrak while the Boretrak2 probe and tablet have a live Bluetooth communications link established. If the rotation limit is exceeded while the probe is out of Bluetooth range of the device, then the message appears as soon as the Bluetooth connection is restored.
- Page 114 Figure 126 Control tab after aligning the gyro, before the first reading has been taken 15.4.4 Realign / check alignment While the gyro is aligned, the Alignment icon is displayed in the top right of the Control tab. Tap the Alignment icon to realign, or to check the alignment.
- Page 115 Figure 129 Alignment Drift 15.4.5 Segment length During most deployments, the Boretrak2 probe is lowered at fixed intervals. At each interval, the probe is held steady while a Boretrak reading is taken. Use the Segment length drop-down to define this deployment increment.
- Page 116 15.7 Deployment controls When the Boretrak2 probe is deployed by the amount selected in the Segment length drop down list, tap Take Reading to take the first reading along the hole. After the first reading the Final Reading and Undo Last buttons are active.
- Page 117 Tap Undo Last to remove a Boretrak reading that has been taken mistakenly. When you feel the Boretrak2 probe touch the end of the borehole, keep the steel cable tight so that the probe remains upright with respect to the hole.
- Page 118 Figure 133 Final Offset controls 15.8.1 Final offset Commonly, when the probe reaches the end of the hole, the last deployment interval does not equal the full, user- defined Segment Length (see section 15.4.5). The next nodule that would have been used in the deployment Final offset Hole collar...
- Page 119 hole collar back along the cable to the next measurement point, i.e. the next interval / nodule / rod joint to which you would deploy if the hole were longer. Enter this value into the Final Offset field. This value is deducted from the last reading’s full segment length.
-
Page 120: Desktop Mode
16 Desktop mode When a project has been completed, the data is usually viewed and analysed back in the office. In this case, if you are using a larger format laptop or desktop computer then select Desktop mode. Desktop mode has a more traditional interface and is intended for use with a standard keyboard and mouse. Figure 136 Desktop mode All the same functionality is present in the Desktop mode, although the UI is arranged slightly differently. - Page 121 16.2 Home The Home menu bar includes all the controls which are present in the Menu tab in Touch mode (see section 13). In addition to these controls are: Touch button: A Touch button is available when first starting the software. The option to swap modes is •...
- Page 122 16.4 Edit The Edit menu contains tools to edit points which have been imported into Carlson Boretrak. The editing tools cannot be used to edit collected Boretrak data. Erase and Masking functions are available. The Undo/Redo buttons are used in conjunction with the editing tools.
- Page 123 Click the List button to open the Layers tab in the Project window. Layer tab Tick or untick the Visible check box to turn the layer on or off in the 3D View. The display options of each layer can be changed in the Layers tab. Select options from the Display Settings drop down list.
-
Page 124: Android Version
17 Android version This manual has focused on the operation of Carlson Boretrak software on a windows tablet. As noted, a version of the software is also available for Android mobile devices. The interface and operation are almost identical and projects created in one version can be transferred and worked on in the other version. - Page 125 The Menu, Project and Control tabs are the same as the Windows version. 17.3.2 Landscape mode In landscape mode, the Carlson Boretrak interface has the same arrangement on an Android device as on a Windows tablet. Figure 139 Landscape mode 17.4 3D View...
- Page 126 Look: sets the centre of rotation to be your current viewpoint, so you can look around the scene from a • fixed location. • Zoom: zooms in when you drag up the screen and zooms out when you drag down the screen. 17.5 Sending projects If your Android device has Wi-Fi or cellular connectivity you can share a project via any means available to your device.
-
Page 127: Product Information
PRODUCT INFORMATION P a g e | 127 BT2 user manual - H-5911-9004-02-B... -
Page 128: Product Specifications
−10 °C to +60 °C Storage temperature (probe)** −20 °C to +70 °C * Proved under Carlson test conditions. **The probe operating & storage temperature may be limited by the choice of battery. P a g e | 128 BT2 user manual - H-5911-9004-02-B... -
Page 129: System Information
19.1.4 Safety The Boretrak2 is designed as a means of auditing the results of drilling activity quickly and accurately, for downhole and uphole use. The system is non-magnetic and therefore may be used in all types of rock, flooded holes and areas of ferrous materials and hole castings. - Page 130 – Limits and methods of measurement, the Boretrak2 probe is defined as Group 1, Class A equipment. The Boretrak2 probe is suitable for use in all locations other than those allocated in residential environments and those directly connected to a low-voltage power supply network which supplies buildings used for domestic purposes.
- Page 131 19.1.13 Battery safety The Boretrak2 is supplied with non-rechargeable alkaline batteries (3 × Duracell LR20 1.5 V). The probe also contains a CR 2032 3 V 220 mAh lithium coin cell. The PDA contains a lithium polymer battery (4500 mAh).
- Page 132 short circuiting prior to disposal. 19.1.15 Bluetooth module: U.S. compliance Contains Transmitter Module FCC ID: T9J-RN42 This device complies with part 15 of the FCC Rules. Operation is subject to the following two conditions: 1. This device may not cause harmful interference, and 2.
-
Page 133: Carlson Boretrak End User License Agreement
IMPORTANT-READ CAREFULLY: This Carlson Software End-User License Agreement ("EULA") is a legal agreement between you (either an individual or a single entity) and Carlson Software, Inc for the software accompanying this EULA, which includes computer software and may include associated media, printed materials, and "online"... - Page 134 If Carlson consents to a transfer, such transfer shall be allowed only as a one-time permanent transfer of this EULA and Software to another end user, provided the initial End User retains no copies or previous versions of the Software.
- Page 135 End Users using the Software Product. These features will generally be password protected, with no other built security for Software Product usage. Carlson accepts no responsibility for compromised data or loss due to unauthorized messaging or communication through Cloud technology provided in the Software Product.
- Page 136 20.1.10 Customer Service Although it is the LICENSOR's customary practice to provide reasonable assistance and support in the use of its products to its customers, LICENSOR shall not be obligated to any End User to provide technical assistance or support through this Agreement and may at LICENSOR's sole election charge a fee for customer support. 20.1.11 Termination of End User License If any one or more of the provisions of this Agreement is breached, the license granted by this Agreement is...
- Page 137 identity. 20.1.18 Civil/Criminal Investigation End user shall fully cooperate with LICENSOR and or any person authorized by LICENSOR (including local, state, or federal law enforcement officials) to investigate any alleged theft, misuse or unauthorized use of SOFTWARE or data related thereto. 20.1.19 U.S.
Need help?
Do you have a question about the Boretrak2 and is the answer not in the manual?
Questions and answers