Table of Contents
Advertisement
Quick Links
Advertisement
Table of Contents

Subscribe to Our Youtube Channel
Related Manuals for Kinfine HomePop K7068


Summary of Contents for Kinfine HomePop K7068
- Page 1 Style Number: K7068 Upholstered Bed >>assembly instructions Page 1 of 14...
- Page 2 Congratulations on your latest HomePop purchase. Now what? Don’t start sweating over this box of parts. This will be easy. We did the hard work for you. All you need to do is follow our simple instructions and you’ll be on your way to transforming your room in no time.
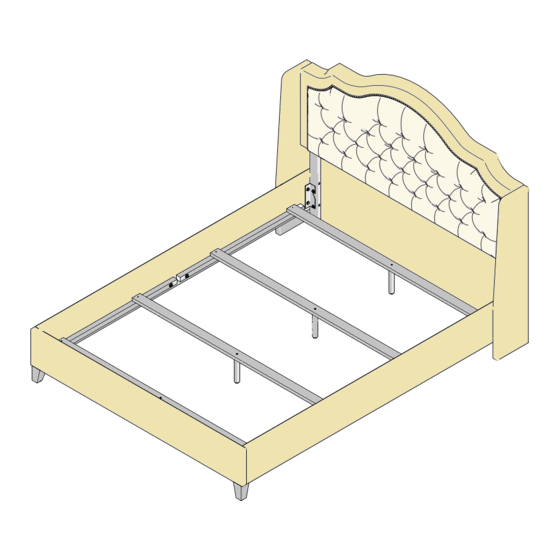
- Page 3 ITEM DESCRIPTION QUANTITY headboard footboard left side rail right side rail wood slat cleat headboard leg left wing panel right wing panel wood slat slat support with leveler footboard leg Page 3 of 14...
-
Page 4: Table Of Contents
hardware (A) x 2 (B) x 18 8 x 100mm 8 x 30mm round hex screw round hex screw (C) x 8 (D) x 8 8 x 60mm flat head 40mm round hex screw phillips wood screw (E) x 4 (F) x 4 (G) x 8 6 x 30mm... -
Page 5: (H) X 4
step 1. Headboard Legs hex screws installation (2 legs) Please do not assemble with power tools, do the same thing for two legs. Do not tighten the screws. About 1/2 inches (B) x 4 (H) x 4 ( I ) x 4 (K) x 1 8 x 30mm 8mm lock washer... - Page 6 step 2. Headboard installation (2 legs) Headboard legs push through the bottom headboard hole, align the 3 insert nut holes (each side) Tighten all 6 screws. Completed (B) x 6 (H) x 6 ( I ) x 6 (K) x 1 8 x 30mm 8mm lock washer 8 x 18 x 2...
-
Page 7: X 30Mm Round Hex Screw
step 3. Footboard installation (2 legs & screws) Tighten the leg. Do not tighten the screws. About 1/2 inches (A) x 2 (B) x 4 8 x 100mm 8 x 30mm round hex screw round hex screw (H) x 6 ( I ) x 6 (K) x 1 8mm lock washer... -
Page 8: (G) X 8
step 4. Bed rails installation (Left & Right) (C) x 8 (H) x 8 (G) x 8 (K) x 1 8 x 60mm 8mm lock washer 8 x 22 x 2 5mm Hex wrench round hex screw flat washer Page 8 of 14... - Page 9 step 5. Tighten all 8 screws on HB & FB Now you may tighten all 8 screws. Page 9 of 14...
-
Page 10: I ) X
step 6. Bed rail and headboard leg screws (B) x 4 (H) x 4 ( I ) x 4 (K) x 1 8 x 30mm 8mm lock washer 8 x 18 x 2 5mm Hex wrench round hex screw flat washer Page 10 of 14... - Page 11 step 7. Wing panels with u-hook ( left & right ) Completed (E) x 4 (L) x 1 (M) x 4 6 x 30mm phillips screw driver U-Hook (metal) flat head screw Page 11 of 14...
-
Page 12: Round Hex Screw
step 8. Wing panels attach to headboard Do not tighten the screw all the way Completed (F) x 4 8 x 15mm round hex screw About 3/8 inches (K) x 1 or less 5mm Hex wrench Page 12 of 14... - Page 13 step 9. Wood slat and support installation (4 sets) Adjustable leveling (J) x 4 3.5 x 2mm plastic washer Page 13 of 14...
- Page 14 step 10. Wood slats installation (D) x 8 (L) x 1 flat head 40mm phillips screw driver phillips wood screw Page 14 of 14...
Need help?
Do you have a question about the HomePop K7068 and is the answer not in the manual?
Questions and answers