Table of Contents
Advertisement
Quick Links
Advertisement
Table of Contents

Subscribe to Our Youtube Channel
Related Manuals for Amano Pioneer Eclipse PE450GP


Summary of Contents for Amano Pioneer Eclipse PE450GP
- Page 1 Propane Hard Floor Machine PE450GP Operator’s Manual...
- Page 3 Each operator must be trained in the operation of this machine before being allowed to use it. Contact Amano Pioneer Eclipse Customer Service at 1-800-367-3550 or +1-336-372-8080 or an authorized Amano Pioneer Eclipse Distributor to inquire about training or to request a replacement manual.
- Page 4 DANGER! For your safety, if you smell DANGER! Do not store or use gasoline or propane: other flammable vapors and liquids in the vicinity of this or any other appliance. 1. Extinguish any open flame. 2. Open window. 3. Do not touch electrical switches. 4.
-
Page 5: Table Of Contents
Table of Contents Quick Reference Specifications..........6 Oil Filter Replacement..........25 Safety Precautions..............7 Spark Plug Inspection and Replacement....25 Refueling and Storage of Fuel Cylinders......9 Air Filter Inspection and Replacement....26 Operator Responsibility............9 Valve Clearance & Re-torque Heads......26 Canadian Safety Requirements........10 Valve Seating............26 Test for Operator-Ear Sound Pressure Level....11 Head Bolt Maintenance..........26 Test for Hand Arm Vibration..........11 Cooling Fin Maintenance..........26... -
Page 6: Quick Reference Specifications
Pad Holders / Brushes - 17” Pad Holder: MP178800 -17” Mal-Grit Brush: MP178900 -17” Mal Grit Xtra: MP179100 l Splash Skirt: MP402700 Your Authorized Amano Pioneer Eclipse Distributor: _____________________________________ Authorized Amano Pioneer Eclipse Distributor Phone Number: _____________________________ Amano Pioneer Eclipse Phone Number: +1-336-372-8080... -
Page 7: Safety Precautions
Safety Precautions DANGER! Federal law and California State law Anyone operating the machine should read the prohibits the following acts or the causing thereof: (1) following carefully and be informed of potentially the removal or rendering inoperative by any person dangerous operating conditions. - Page 8 WARNING! Continuous exposure to high noise levels can replacement parts supplied by Amano Pioneer Eclipse cause hearing loss. Hearing protection is recommended or a Amano Pioneer Eclipse Authorized Distributor or while the machine is in operation. Service Center. WARNING! Machine vibration may cause tingling CAUTION! When loading or unloading machine onto or or numbness in the fingers or hands.
-
Page 9: Refueling And Storage Of Fuel Cylinders
CE compliant. Filling should be done ONLY Amano Pioneer Eclipse does not recommend use of by a qualified propane dealer. FILL THROUGH THE the machine in any environment other than an indoor SERVICE VALVE ONLY. -
Page 10: Canadian Safety Requirements
Canadian Safety Requirements Exigences de sécurité pour le Canada 1. A sign indicating “NO SMOKING” shall be 1. Un panneau indiquant “ INTERDICTION DE FUMER“ permanently displayed at the storage area. The doit être affiché en permanence dans la zone de sign shall be in accordance with the sign required in stockage. -
Page 11: Test For Operator-Ear Sound Pressure Level
Test for Operator-Ear Sound Pressure Level Test for Hand-Arm Vibration at the Grip Surface of Hand-Guided Machinery Amano Pioneer Eclipse measures and rates the operator-ear sound pressure level for hand-guided floor Amano Pioneer Eclipse measures and rates the treatment and floor cleaning machines for industrial use. -
Page 12: Machine Preparation
Machine Preparation Unpacking the Machine Filling the LP Cylinder The machine is shipped boxed on a wooden pallet. To This machine uses the 20 lb (9.1 kg) capacity cylinder, unpack machine: which meets the D.O.T. 4E240 standards. These cylinders are also listed by UL. In addition, the steel 1. -
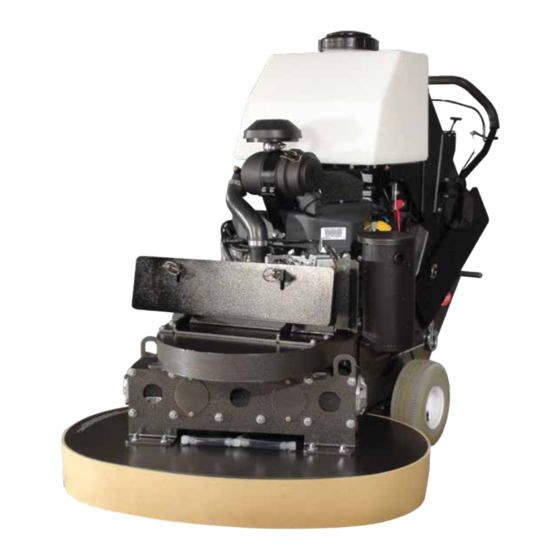
Page 13: Controls And Instruments
Machine Components Controls and Instruments Bail Throttle Handle Pivot Knob Deck EcoSense Switch Light Ignition Hour Meter/ Switch Tachometer Solution Control Engine Throttle... -
Page 14: Ignition Switch
Ignition Switch Hour Meter / Tachometer This machine features a key switch ignition. The hour meter / tachometer records the number of hours the machine has been powered ON. The Start: Turn the key all the way clockwise or START to hour meter reading is used to mark recommended engage the engine starter motor. -
Page 15: Ecosense Emission Monitioring
EcoSense Emission Monitoring System 3. When ready to restart, open the gas valve on the EcoSense is an emissions monitoring device that tank, put the throttle in slow position and turn key monitors the exhaust emissions and will shut the engine switch to the start position. -
Page 16: Handle Adjustment / Position
Handle Adjustment / Position To adjust the operating position of the handle simply 3. Remove any of the remaining weight plates from the loosen the two handle pivot knobs, slide the handle to front of the machine. the desired position and tighten the two handle pivot knobs. -
Page 17: Fuse
9. If it is necessary to remove or replace the head, 3. Remove the solution tank lid. each head can be removed by rotating the head toward the center of the machine. Facing the heads from the front of the machine, turn the head on the right counter-clockwise with a quick motion and pull the head towards you. -
Page 18: How The Machine Works
How the Machine Works Installing the LP Cylinder This machine is a propane hard floor machine. It has 1. Before bringing a propane cylinder indoors, always two counter-rotating heads that are bevel gear driven via check it for over-filling. a clutch and belt. The clutch is controlled by a switch on CAUTION! Always connect or change cylinders in a the control panel and a safety bail on the handle. -
Page 19: Starting The Machine
Starting the Machine Work Site Transporting 1. Check oil and fuel levels. 1. Close the valve on the propane cylinder, allow the engine to stop and turn the machine OFF. 2. Check and clean engine dust filter. 2. Place two of the weight plates on each side of the CAUTION! Never run continuously for more than 1 control panel. -
Page 20: Operating The Machine
Operating the Machine Splash Skirt 1. Inspect the area in which the machine is going to be 1. The skirt should be removed after each use and used. Remove any loose debris, objects, or standing cleaned. studs from the floor. 2. -
Page 21: Adjusting Deck
Adjusting Deck NOTE: It is recommended to adjust the deck to be 7. Using the axle height adjustment “T” handle, adjust parallel with the floor. Improper adjustment could result the height of the axle to the desired position. in inefficient operation. 1. -
Page 22: Machine Troubleshooting
Machine Troubleshooting Problem Possible Cause Solution Propane cylinder is not properly connected. Check connection and open service valve slowly. Problem Possible Cause Solution Battery is weak. Charge battery or replace. Propane cylinder is not properly connected. Check connection and open service valve slowly. Oil level is to low. -
Page 23: Maintenance
Clean cooling fins Inspect drive belt Inspect gear box assembly Check gear box(s) oil level First 500 hrs., then every 2500 hrs. Change oil in gearboxes As Required Replace drive belt * Check FS481V Service Manual. Contact Amano Pioneer Eclipse Certified Technician. -
Page 24: Oil Level Inspection
Oil Level Inspection 4. Locate the drain hose underneath the bulkhead compartment. Remove the cap on the end of the oil 1. Push machine to level surface. drain hose. 2. Turn off LP cylinder and remove it. 3. Clean area around the oil gauge before removing it. 4. -
Page 25: Oil Filter Replacement
be expected -40, 5W-20) than recom- Oil Filter Replacement Spark Plug Inspection and Replacement 1. Place a suitable container underneath the oil filter. 1. Turn off LP cylinder and remove it. 2. Using a strap wrench or oil filter wrench, remove the 2. -
Page 26: Air Filter Inspection And Replacement
Air Filter Inspection and Replacement Valve Clearance & Re-torque Heads: 1. Push machine to a level surface. Refer to Kawasaki’s FS481V service manual. 2. Turn off LP Cylinder valve and remove from the Valve Seating: machine. Refer to Kawasaki’s FS481V service manual. 3. -
Page 27: Engine Dust Filter
Engine Dust Filter Inspect Fuel Hose and Connections 1. The engine dust filter should be cleaned each hour 1. Push machine to level surface. and after each use by shaking out the dust and then 2. Turn off LP cylinder and remove it. rinsing with mild detergent. -
Page 28: Belt Maintenance
Belt Maintenance 6. Remove one of the clutch retainer brackets, allowing 1. Push machine to a level surface. the bottom of the clutch to turn. 2. Turn off LP Cylinder and remove it. 3. Remove all of the weights from the front of the machine. -
Page 29: Shear Pin Replacement
Shear Bolt Replacement Battery Maintenance 1. Push the machine to a level work surface. The battery supplied with this machine is a sealed, absorbed glass mat (AGM), maintenance free type. It 2. Turn the LP Cylinder off and remove it from the never needs servicing. -
Page 30: Gearbox Maintenance
Gearbox Maintenance Check Gearbox Oil Level: 7. Remove the left side cover plate by removing the (2) 1. Push machine to level surface. 1/4” bolts. 2. Turn off LP cylinder and remove it. 3. Level the machine by raising or lowering the axle with the “T-Handle”... -
Page 31: Changing Gearbox Oil
Changing Gearbox Oil 10. Remove the 1/4” bolt from the center of each driver 1. Remove the oil plug from each gearbox (3). assembly. Remove the driver assembly from the gearbox shaft. (Note: Slowly threading a 3/8”-16 X 4” Tap Bolt into the bottom of the driver assembly will push the driver assembly off of the gearbox shaft). -
Page 32: Gearbox Replacement
Gearbox Replacement: 1. Remove the front gearbox mount plate from the NOTE: Use diagram to verify proper orientation of gearbox assembly by removing the twelve (12) bolts gearbox asm. from the front of the gearboxes. 11. Reverse steps 1-10 to reassemble the gearbox assembly to the machine. -
Page 33: Loading The Machine For Transport
Loading the Machine 1. Turn the machine OFF. 6. Secure the machine with ratchet straps. 2. Remove Skirt. See Removing & Installing Skirt section. 3. Remove weight plates. 4. Hook the Transport handle to the bracket under the deck. Transporting the Machine When transporting a propane powered floor machine with the fuel cylinder installed, the cylinder should be securely fastened with the service valve closed and... -
Page 34: Machine Specifications
Machine Specifications Starting: 12VDC, 275 CCA, AGM Starter Battery Battery: MP120800 Deck: Fabricated Steel Sheet Metal Construction with a Powder Coat Finish Sound Level: < 89 dB(A) Vibration: Less than 2.5 m/s Engine: Kawasaki FX481V, 603cc Air Cooled Engine Speed: Idle - 1800-2000 rpm High Idle - 3600 rpm Engine Oil:... -
Page 35: Parts Manual
PE450GP Propane Hard Floor Machine Parts Manual Notes: ________________________________________________ ________________________________________________ ________________________________________________ ________________________________________________ ________________________________________________ ________________________________________________ ________________________________________________ ________________________________________________ ________________________________________________ ________________________________________________ ________________________________________________ ________________________________________________ ________________________________________________ ________________________________________________ ________________________________________________ ________________________________________________ ________________________________________________ ________________________________________________ ________________________________________________ ________________________________________________ ________________________________________________ ________________________________________________ ________________________________________________... -
Page 36: Electrical Schematic
Electrical Schematic... -
Page 37: Connections
Connections Item Ref. No. Description Item Ref. No. Description MP400900 HARNESS, WIRING, MAIN MP354900 WIRE, SOLENOID, BATTERY MP311500 WIRE, METER, HOUR MP442500 CONTROLLER, CLUTCH, ASM. MP373000 WIRE, SENSOR, OXYGEN MP402300 MODULE, EMISSION, ASM. MP2011 CABLE, BATTERY, POSITIVE SS2570 FUSE, 20A MP2012 CABLE, BATTERY, NEGATIVE... -
Page 38: Engine Assembly
Engine Assembly... - Page 39 Engine Assembly (continued) Item Ref. No. Description Item Ref. No. Description KA110607016 GASKET, MUFFLER MP365300 MUFFLER, VERTICAL SPACER, CLUTCH (TOP) NB8310 CLAMP, 3/4” MP298000 MP044800 ADAPTER, CONVERSION MP387601 BRACKET, MUFFLER MP028700 SWITCH, PRESSURE, DP NB032300 BOLT, HEX, 7/16” X 2” NB2460 HOSE, VACUUM, 5/32”...
-
Page 40: Regulator & Handle Assembly
Regulator & Handle Assembly... - Page 41 Regulator & Handle Assembly (continued) MP042000 BAIL, PAINTED SA026300 REGULATOR, LP MP4500 COUPLER, QUICK REGO, MP038600 GRIP, HANDLE, BLACK, 1" MP4325 FITTING, 3325 X 4, REG TO FEMALE I.D., 25" LENGTH FUELOCK MP4330 FITTING, 49 X 6, REG TO MP042100 BLOCK, SLIDE, HANDLE, MP509300 FITTING, TEE, 1/4"...
-
Page 42: Bulkhead & Control Panel Assembly
Bulkhead & Control Panel Assembly... - Page 43 Bulkhead & Control Panel Assembly (continued) Item Ref. No. Description Item Ref. No. Description NB009900 GROMMET, 11/16” NB6111 WASHER, LOCK, 5/16” RV009500 LOOP, FOOTMAN NB3260 NUT, HEX, 5/16” NB010400 SCREW, #10 X 5/8” NB6545 BOLT, HEX, 5/16” X 1” NB3275 NUT, LOCK, 1/4”...
-
Page 44: Frame Assembly
Frame Assembly RF040100 052813... - Page 45 Frame Assembly (continued) Item Ref. No. Description Item Ref. No. Description MP294300 WHEEL, 10” NB6545 BOLT, HEX, 5/16” X 1” NB6110 WASHER, LOCK, 1/4” NB3260 NUT, HEX, 5/16” NB3350 WASHER, FLAT, 1/4” NB9267 WASHER, FLAT, 5/16” NB6530 BOLT, HEX, 1/4” X 1” NB046200 NUT, HEX, 3/8”...
-
Page 46: Gearbox Assembly
Gearbox Assembly... - Page 47 Gearbox Assembly (continued) Item Ref. No. Description Item Ref. No. Description NB3265 NUT, LOCK, 5/16” NB068400 BOLT, HEX, 5/16” X 2-3/4” NB6042 BOLT, HEX, 3/8” X 1” NB6044 BOLT, HEX, 3/8” X 1-1/4” MX1075 WASHER, LOCK, 3/8” NB6535 BOLT, HEX, 1/4” X 3/4” NB9267 WASHER, FLAT, 5/16”...
-
Page 48: Front Main Assembly
Front Main Assembly RF040600 072617... - Page 49 Front Main Assembly (continued) Parts List ITEM PART NUMBER DESCRIPTION MP178800 PADHOLDER, 17" w/ LUGS NB6111 WASHER, LOCK, 5/16" NB3260 NUT, 5/16"-18, NC NB8130 CLAMP, 3/4" ID, RETAINER MP416800 PLATE, MOUNT, ENGINE, ASM. NB6042 SCREW, CAP, 3/8" X 1" MX1075 WASHER, LOCK, 3/8"...
-
Page 50: Rear Main Assembly
Rear Main Assembly RF040700 102412... - Page 51 Rear Main Assembly (continued) Item Ref. No. Description Item Ref. No. Description NB010100 BOLT, CARRIAGE, 3/8” X 2” MP098700 RETAINER, CLUTCH RV005100 KNOB, HANDLE MP281500 TANK, SOLUTION NB011400 WASHER, WAVE, 1” OD MP152700 CAP, SCREW, 6” MP400300 HANDLE, HD, ASM. MP152800 GASKET, CAP, 6”...
-
Page 52: Head Assembly
Head Assembly... - Page 53 Head Assembly (continued) Item Ref. No. Description Item Ref. No. Description MP441700 PLATE, DRIVER, 17.5” NB024100 PIN, HITCH NB3275 NUT, LOCK, 1/4” MP098700 RETAINER, CLUTCH MP331100 PLATE, ATTACHMENT, HEAD MP197400 LUG, P74 NB060500 SCREW, #10 X 1/2” MP287500 SPACER, 1” OD X 5/8” L NB060600 SPACER, .200”...
-
Page 54: Diamond Selection List
Diamond Selection List Usage Concrete Type Part Number Grit Configuration Bond ● ● ● ● ● ● DP401030 20/30 Dove Tail Metal ● ● ● ● ● DP501040 30/40 Dove Tail Metal ● ● ● ● ● ● DP320030 Spiral Waffle Semi-Metal ●... -
Page 55: Small Off Road Engine Certification Warranty
Where a warrantable condition exists, (5) Notwithstanding the provisions of Subsection (C4) above, Amano Pioneer Eclipse Corporation will repair your small off-road engine warranty services or Repairs must be provided at all at no cost to you including diagnosis, parts and labor. - Page 56 Amano Pioneer Eclipse will not reimburse expenses for service of your machine. Please cooperate with your Distributor in calls or travel. For the Distributor in your area, call Amano Pioneer supplying necessary information on the card. Eclipse Customer Service Department at 800-367-3550 or 336-372- 8080.
-
Page 57: Safety Awareness Form
Clean air filter..............Cautions: Allow only qualified, trained personnel to operate the machine. Use only D.O.T. approved fuel cylinders supplied by Amano Pioneer Eclipse. Always store fuel cylinders outside in a proper enclosure. Never vent a fuel cylinder inside. Always wear a CO detector badge. - Page 60 1 Eclipse Rd l PO Box 909 Sparta, North Carolina 28675 l USA www.pioneereclipse.com +1-336-372-8080 1-800-367-3550 Fax +1-336-372-2913 EC Machinery Directive 2006/42/EC, EC Restriction of Hazardous Substances Directive (2011/65/EU) Harmonized Standards Applied: EN 12100-1, EN12100-2 LT062200 © 2018 Amano Pioneer Eclipse Corporation 450GP_J...
Need help?
Do you have a question about the Pioneer Eclipse PE450GP and is the answer not in the manual?
Questions and answers