Table of Contents
Advertisement
Quick Links
PN 666856
November 1998 Rev.1, 11/99
© 1998, 1999 Fluke Corporation. All rights reserved. Printed in U.S.A.
All product names are trademarks of their respective companies.
Automotive Meter
Service Manual
For IEC 61010 CAT II Meters Only
Test Equipment Depot
99 Washington Street
Melrose, MA 02176-6024
www.testequipmentdepot.com
Test Equipment Depot
800-517-8431
99 Washington Street
781-665-0780 FAX
Melrose, MA 02176-6024
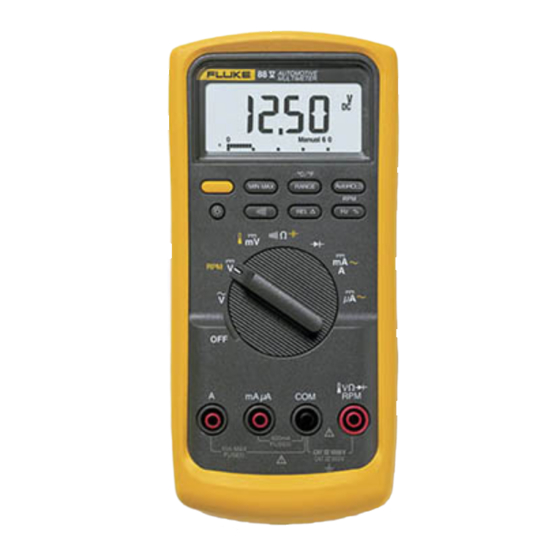
88
Advertisement
Table of Contents
Troubleshooting

Related Manuals for Test Equipment Depot 88


Summary of Contents for Test Equipment Depot 88
- Page 1 Automotive Meter Service Manual For IEC 61010 CAT II Meters Only Test Equipment Depot 99 Washington Street Melrose, MA 02176-6024 www.testequipmentdepot.com Test Equipment Depot PN 666856 800-517-8431 99 Washington Street November 1998 Rev.1, 11/99 781-665-0780 FAX Melrose, MA 02176-6024 © 1998, 1999 Fluke Corporation. All rights reserved. Printed in U.S.A.
- Page 2 LIMITED WARRANTY & LIMITATION OF LIABILITY Fluke Corporation (Fluke) warrants this product to be free from defects in material and workmanship under normal use and service for the life of the product. This warranty extends only to the original buyer or end-user customer of a Fluke authorized reseller, and does not apply to fuses, batteries or to any product which, in Fluke’s opinion, has been misused, altered, neglected or damaged by accident or abnormal conditions of operation or handling.
- Page 3 Safety Information This meter complies with EN 61010-1:1993, ANSI/ISA S82.01-1994 and CAN/CSA C22.2 No. 1010.1-92 Overvoltage Category II. Use the meter only as specified in the Users Manual, otherwise the protection provided by the meter may be impaired. A Warning identifies conditions and actions that pose hazards to the user; a Caution identifies conditions and actions that might damage the meter.
- Page 4 • Never touch the probe to a voltage source when the test leads are plugged into the 10 A input jack. • Always use clamp-on probes (dc current clamps) when measuring current exceeding 10 A. • DO NOT connect thermocouple to voltages exceeding 30 V. •...
-
Page 5: Table Of Contents
Table of Contents Chapter Title Page Introduction and Specifications............1-1 1-1. Introduction ..................1-3 1-2. Organization of the Service Manual............. 1-3 1-3. Conventions..................1-4 1-4. Specifications ..................1-4 Theory of Operation................2-1 2-1. Introduction ..................2-3 2-2. Functional Block Description............... 2-3 2-3. - Page 6 Service Manual 3-6. Reassembling the Case..............3-6 3-7. Replacing the Battery............... 3-7 3-8. Testing Fuses ................... 3-7 3-9. Replacing Fuses ................3-7 3-10. Cleaning ................... 3-8 3-11. Input Terminals................3-8 3-12. Function Encoding Potentiometer ..........3-8 3-13. Performance Test.................. 3-9 3-14.
- Page 7 Ohms Test ......................3-13 3-8. Milliamp Tests ....................... 3-14 3-9. Amp Tests ......................3-14 3-10. Functional Description of Power Supply Components ......... 3-20 3-11. Voltage Levels ....................... 3-20 4-1. Fluke 88 Final Assembly ..................4-5 4-2. A1 Main PCA ......................4-7...
- Page 8 Service Manual...
- Page 9 Setup for Inductive Pickup Test ................3-16 3-5. Waveform for Inductive Pickup Test..............3-17 3-6. Calibration Adjustment Points................3-19 3-7. Simplified Power Supply Schematic ..............3-22 4-1. Fluke 88 Final Assembly ..................4-6 4-2. A1 Main PCA ......................4-9 5-1. A1 Main PCA ......................5-3...
- Page 10 Service Manual POWER-UP OPTIONS DISPLAY AUTOMOTIVE METER POWER-UP OPTIONS AUTO RANGE RECORD MAX MIN AVG AC DC PRESS 2 SEC. WHILE TURNING METER ON m s % m V A LOW, OHMS/HIGH RESOLUTION ZERO DISABLE AUTOMATIC POWER-OFF TRIG 4000 MIN MAX HI ACCURACY, 1 SEC.
-
Page 11: Introduction And Specifications
Chapter 1 Introduction and Specifications Title Page 1-1. Introduction ..................1-3 1-2. Organization of the Service Manual............. 1-3 1-3. Conventions..................1-4 1-4. Specifications ..................1-4... - Page 12 Service Manual...
-
Page 13: Introduction
Introduction and Specifications Introduction 1-1. Introduction This Service Manual provides information necessary to service the Fluke 88 Automotive Meter. This information includes the following: • Specifications • Theory of operation • Calibration routines • Performance testing and troubleshooting procedures •... -
Page 14: Conventions
The following conventions are used in this manual: • Instrument Reference The term "Meter" is used when discussing the Fluke 88 Automotive Meter. • Printed Circuit Assembly The term "pca" is used to mean a printed circuit board and its attached parts. - Page 15 Introduction and Specifications Specifications Table 1-1. Summary of Accuracy Specifications Function Bassic Accuracy (± % of Reading) Volts AC AV 1.5% Volts DC d V 0.15% Resistance e 0.2% Milliamps/Amps DC mA A d 0.8% Frequency Hz 0.01% Input Terminal Limits Rotary Min Display Max Display...
- Page 16 Service Manual Volts DC Range Resolution Accuracy ±(0.15%+2) 4.000 V 0.001 V ±(0.15%+2) 40.00 V 0.01 V ±(0.15%+2) 300.0 V 0.1 V ±(0.3%+2) 300 V Millivolts DC Range Resolution Accuracy ±(0.15%+2) 400.0 mV 0.1 mV Resistance Range Resolution Accuracy 400.0 Ω ±(0.2%+2) 0.1Ω* ±(0.2%+2)
- Page 17 Introduction and Specifications Specifications mA/A AC (45 Hz to 2 kHz) Range Resolution Accuracy ** Burden Voltage (typical) ±(3%+10) 40.00 mA 0.01 mA 2.3 mV/mA ±(3%+5) 400.0 mA 0.1 mA 2.3 mV/mA ±(1.5%+5) 4000 mA 1 mA 0.03 V/A ±(1.5%+5) 10.0 A* 0.01 A 0.03 VA...
- Page 18 Service Manual Common and Normal Mode Rejection Ratio Function Overload Input Common Mode Rejection Normal Mode Protection* Impedance Ratio (1 kΩ unbalance) Rejection Ratio (nominal) 300 V rms 10 MΩ, <100 pF >120 dB at dc, 50 Hz, or 60 Hz >60 dB at 50 Hz or 60 Hz F mV...
- Page 19 Introduction and Specifications Specifications General Maximum Voltage between any Terminal and Earth Ground 300 V Fuse Protection 1 A 600 V FAST FUSE 15 A 600 V FAST FUSE Display (LCD) Digital Counts: 4,000 19,999 in High Resolution, 4½ -digit Mode only. Update Rate: 1/sec in High Resolution, 4½...
- Page 20 Service Manual 1-10...
-
Page 21: Theory Of Operation
Chapter 2 Theory of Operation Title Page 2-1. Introduction ..................2-3 2-2. Functional Block Description............... 2-3 2-3. Detailed Circuit Description ..............2-5 2-4. Input Overload Protection..............2-5 2-5. Rotary Switch................... 2-5 2-6. Input Signal Conditioning Circuits ..........2-5 2-7. Volts..................... 2-6 2-8. - Page 22 Service Manual...
-
Page 23: Introduction
Schematic diagrams are in Chapter 5. 2-2. Functional Block Description Figure 2-1 is a block diagram of the Fluke 88 Automotive Meter. The Meter is partitioned into analog and digital sections. The integrated meter chip (U4) performs both analog and digital functions. - Page 24 Service Manual aad02f.tif Figure 2-1. Overall Functional Block Diagram...
-
Page 25: Detailed Circuit Description
(R7 for mA, R10 for A). R7 and R10 are connected to U4 sense lines AP4 and AP5 (pins 89 and 88). Resistors R8 and R48 provide VDD pull up for AP4, and R11 is the pull up resistor for AP5. -
Page 26: Volts
Service Manual 2-7. Volts In voltage functions, signal flow for input divider Z1 begins with the unknown voltage at the T input, which is connected to the high end of the 9.996-MΩ resistor (pin 1 of Z1) through R1 and RT1. In ac volts, C1 is also connected in series. In dc volts, C1 is shorted by S1 (contacts 3 and 4). - Page 27 Theory of Operation Detailed Circuit Description phase occurs following every eight-sample sequence. Therefore, each digital display update requires 240 ms, approximating 4 updates per second. Basic a/d conversion elements and waveforms are shown in Figure 2-2. As this figure shows, a residual charge is retained by the integrator capacitor due to the overshoot past the true-zero base line.
-
Page 28: Microcomputer Control
Service Manual aad03f.wmf Figure 2-2. A/D Conversion 2-10. Microcomputer Control A 4-bit microcomputer, integrated within U4, controls the various Meter functions and drives the display. A/D converter and counter measurements are controlled via... -
Page 29: Peripherals To U4
Theory of Operation Detailed Circuit Description microcomputer interface lines. The MIN MAX, Touch Hold, and ZERO (relative) modes involve additional data processing by the microcomputer to generate the display value. Note that the microcomputer runs on its own RC clock at a frequency of 525 to 800 kHz and is asynchronous from the crystal clock. -
Page 30: Ac Buffer
Service Manual 2-12. AC Buffer On the Meter, R14, R15, C5, and C27 are part of the ac buffer circuit that drives the ac converter and guard. The Meter’s ac buffer can be configured for an ac gain of 1 or 10. 2-13. -
Page 31: Display
The Fluke 88 features a transflective LCD with a light-emitting diode (LED) backlight. Refer to the Fluke 88 Users Manual for a more detailed description of the display. 2-20. Rotary Knob Switch and Potentiometer... - Page 32 Service Manual aad4f.tif Figure 2-3. Function-Encoding Switch 2-12...
-
Page 33: Maintenance
Chapter 3 Maintenance Title Page 3-1. Introduction ..................3-3 3-2. Required Tools and Equipment............3-3 3-3. Operator Maintenance ................3-4 3-4. Disassembing the Case..............3-5 3-5. Removing and Reinstalling the Circuit Assembly......3-5 3-6. Reassembling the Case..............3-6 3-7. Replacing the Battery............... 3-7 3-8. - Page 34 Service Manual...
-
Page 35: Introduction
Maintenance Introduction 3-1. Introduction Warning Service procedures described in section 3 should performed by qualified service personnel only. To avoid electrical shock, do not perform any servicing unless you are qualified to do so. Chapter 3 covers the following procedures: •... -
Page 36: Operator Maintenance
Service Manual Table 3-1. Required Equipment (cont) Equipment Used in Performance Tests Performance Test DMM Calibrator Function Generator Oscilloscope AC Voltage Frequency Accuracy Sensitivity Trigger Level DC Voltage mV DC Ohms Diode Test RPM/Inductive Pickup 3-3. Operator Maintenance Warning To avoid electrical shock, remove the test leads and any Input signals before replacing the battery or fuses. -
Page 37: Disassembing The Case
Maintenance Operator Maintenance 3-4. Disassembing the Case Perform the following procedure to disassemble the case: 1. Disconnect the test leads from any live source, turn the Meter rotary switch to OFF, and remove the test leads from the front terminals. 2. -
Page 38: Reassembling The Case
Service Manual aad06f.wmf Figure 3-2. Assembly Details 3-6. Reassembling the Case Perform the following procedure to reassemble the case: 1. Make sure that the Meter rotary switch and circuit board switch are in the OFF position (see Figure 3-2). -
Page 39: Replacing The Battery
Maintenance Operator Maintenance 2. Dress the battery leads so that they will not be pinched between the case top and bottom. 3. Ensure that the gasket remains secured to the case bottom. 4. Starting with the two snaps at the display end and finishing at the terminal end, cradle the case top into the gasket. -
Page 40: Cleaning
Service Manual Referring to Figures 3-1 and 3-2, perform the following procedure to examine or replace the meter’s fuses: 1. Perform steps 1 through 3 of the battery replacement procedure. 2. Remove the defective fuse by gently prying one end of the fuse loose and sliding the fuse out of the fuse bracket. -
Page 41: Performance Test
Maintenance Performance Test 4. Reassemble the circuit assembly, shields, and case parts as described previously in this section under "Removing and Reinstalling the Circuit Assembly" and "Reassembling the Case". 5. Execute the PERFORMANCE TEST after reassembly. 3-13. Performance Test Perform the following procedure to check basic Meter operations: 1. -
Page 42: Testing Function Selection (Rotary Switch)
Service Manual 3-15. Testing Function Selection (Rotary Switch) The function selection test checks the operation of the rotary switch function selector circuit. The selector circuit relies on the interface between a PTF region on the circuit assembly and a rotating contact assembly on the switch shaft. The function selection test exercises this interface by checking the various range codes and displaying their representative numbers. -
Page 43: Testing The Frequency Counter Function
Maintenance Performance Test Table 3-3. AC Voltage Test Input Display Reading Step Voltage Frequency Limits 350.0 mV 60 Hz 343.7 to 356.3 350.0 mV 1 kHz 343.7 to 356.3 350.0 mV 5 kHz 342.3 to 357.7 3.500 V 60 Hz 3.442 to 3.558 3.500 V 1 kHz... -
Page 44: Testing Frequency Sensitivity And Trigger Level
Service Manual 3-18. Testing Frequency Sensitivity and Trigger Level The following procedure verifies the counter sensitivity and trigger levels for all frequency modes and ranges. For any function and range, the sensitivity and trigger level is the same in both frequency and duty cycle modes. 1. -
Page 45: Testing The Dc Mv Function
Maintenance Performance Test 3-20. Testing the DC mV Function Perform the following procedure to verify the accuracy of dc millivolt measurements. 1. Connect the calibrator to the z and COM inputs on the Meter. 2. Set the Meter rotary switch to F mV. 3. -
Page 46: Testing The Amp Functions
Service Manual 5. Apply the inputs in steps 3 through 6 and compare the display reading with the values shown. Table 3-8. Milliamp Tests Step DC mA Display Readings 35.00 mA 34.70 to 35.30 350.0 mA 347.0 to 353.0 AC mA Frequency Display Readings 35.00 mA... - Page 47 Maintenance Performance Test 1. Solder a 10-inch piece of 14 AWG wire to each end of a 10-Ohm 1% resistor. 2. Connect the other end of the 10-Ohm resistor to the terminal LOW output of the function generator. Place the other end of the 14-AWG wire to the HIGH output of the function generator.
- Page 48 Service Manual 16. Set the scope for 5.0 ms/DIV and return the variable voltage gain control to the calibrated (CAL) position. 17. Turn the inductive pickup so that "SPARK PLUG SIDE" points along the wire connected to the LOW output of the function generator. Check that the waveform is less than 2V.
- Page 49 Maintenance Performance Test aad09f.wmf Figure 3-5. Waveform for Inductive Pickup Test 3-17...
-
Page 50: Calibration
Service Manual 3-26. Calibration Calibrate the meter once a year to ensure that it performs according to specifications. Connect the calibrator to the z and COM inputs on the Meter. Calibration adjustment points are identified in Figure 3-6. Perform the following procedure to calibrate the Meter: 1. -
Page 51: Troubleshooting The Power Supply
Maintenance Troubleshooting the Power Supply aad10f.eps Figure 3-6. Calibration Adjustment Points 3-27. Troubleshooting the Power Supply If the Meter fails, check the battery and fuses and replace as needed. If problems still persist, review the operating instructions in the Users Manual. If these measures suggest a fault with the Meter, consult the TROUBLESHOOTING THE POWER SUPPLY procedures that follow and the signal flow diagrams in Chapter 5. - Page 52 Service Manual Table 3-10. Functional Description of Power Supply Components Component Function Vdd Regulator series regulator device Power on/off device Power supply startup device. Q10 provides Q8 base startup current. Q10 is always off during meter operation. CR5 is in the power supply series loop, allowing for generation of Vbt=+3.6V for diode test.
-
Page 53: Common (Shunt) Regulator Troubleshooting
Maintenance Troubleshooting the Power Supply 3-28. Common (Shunt) Regulator Troubleshooting Refer to Figure 3-7 for a simplified diagram of the common regulator. To troubleshoot the common regulator, connect the power supply so that VDD, VSS, and DGND (digital ground) are supplied from an external power supply. This procedure overdrives the large on-chip shunt transistors;... - Page 54 Service Manual aad11f.tif Figure 3-7. Simplified Power Supply Schematic 3-22...
-
Page 55: Vdd (Series) Regulator Troubleshooting
Maintenance Troubleshooting a Function Selection Malfunction 3-29. VDD (Series) Regulator Troubleshooting If a problem still exists after troubleshooting the common regulator, toubleshoot the VDD regulator. Often, a short or sneak current path causes power supply problems. Refer to Figure 3-7 for a simplified diagram of the VDD (Series) Regulator. Make the following tests: 1. -
Page 56: Meter Does Not Turn Off (Problem 1)
Service Manual 1. The Meter will not turn off when the rotary switch is in the OFF position. 2. The Meter does not enter the function indicated by the rotary switch setting. Both of these problems can be intermittent and can be caused by different malfunctions. 3-31. -
Page 57: List Of Replaceable Parts
Chapter 4 List of Replaceable Parts Title Page 4-1. Introduction ..................4-3 4-2. How to Obtain Parts ................4-3 4-3. Manual Status Information..............4-3 4-4. Newer Instruments................4-4 4-5. Service Centers..................4-4 4-6. Parts Lists ..................... 4-4... - Page 58 Service Manual...
-
Page 59: Introduction
Introduction 4-1. Introduction This chapter contains an illustrated list of replaceable parts for the Fluke 88 Automotive Meter. Parts are listed by assembly; alphabetized by reference designator. Each assembly is accompanied by an illustration showing the location of each part and its reference designator. -
Page 60: Newer Instruments
Or, visit Fluke’s Web site at www.fluke.com. 4-6. Parts Lists The following tables list the replaceable parts for the Fluke 88 Automotive Meter. Parts are listed by assembly; alphabetized by reference designator. Each assembly is accompanied by an illustration showing the location of each part and its reference designator. - Page 61 List of Replaceable Parts Parts Lists Table 4-1. Fluke 88 Final Assembly Ref Des Description Fluke PN Notes * MAIN PCA BT 1 BATTERY, PRIMARY, ALKALINE, 9V, 0-200MA 614487 CR 6 BACKLIGHT, WHITE 609922 CONTACT PTF 822676 CONTACT, ANNUNCIATOR 822791 FUSE, .406X1.375, 1 A, 600 V, FAST...
- Page 62 Service Manual aad12f.wmf Figure 4-1. Fluke 88 Final Assembly...
- Page 63 List of Replaceable Parts Parts Lists Table 4-2. A1 Main PCA Ref Des Description Fluke PN Notes CAP,POLYES,.01UF,+-10%,1000V 822361 CAP,VAR,3-11PF,100V,CER 641712 CAP,VAR,9-90PF,50V,CER 643130 CAP,CER,430PF,+-2%,50V, COG,1206 851816 CAP,TA,15UF,+-20%,6.3V 807636 C 8, 9 CAP,POLYCA,0.027UF,+-10%,63V 720979 C 10 CAP,POLYES,0.47UF,+-10%,50V 697409 C 11 CAP,POLYPR,0.022UF,+-10%,63V 821579 C 14, 21 CAP,TA,47UF,+-20%,10V,7343...
- Page 64 Service Manual Table 4-2. A1 Main PCA (cont.) Ref Des Description Fluke PN Notes R 24 * RES,CERM,324K,+-1%,.125W,100PPM,1206 911243 R 25 * RES,CERM,210K,+-1%,.125W,100PPM,1206 821660 R 30 RES,MF,20K,+-0.25%,0.125W,50PPM 715029 R 31, 40 RES,MF,22.6K,+-0.25%,0.125W,50PPM 715011 R 34 RES,VAR,CERM,1K,+-20%,.3W 831420 R 35 * RES,CERM,665K,+-1%,.125W,100PPM,1206 867460 R 37 * RES,CERM,205K,+-1%,.125W,100PPM,1206...
- Page 65 List of Replaceable Parts Parts Lists 8x-3021 aad14f.eps Figure 4-2. A1 Main PCA...
- Page 66 Service Manual 4-10...
- Page 67 Chapter 5 Schematic Diagrams...
- Page 68 Service Manual Test Equipment Depot 99 Washington Street Melrose, MA 02176-6024 www.testequipmentdepot.com 800-517-8431 781-665-0780 FAX...
- Page 69 Schematic Diagrams FLUKE 88-1221 (1 of 2) aad15f.eps Figure 5-1. A1 Main PCA...
- Page 70 Service Manual Test Equipment Depot 99 Washington Street Melrose, MA 02176-6024 www.testequipmentdepot.com 800-517-8431 781-665-0780 FAX FLUKE 88-1221 (2 of 2) aad16f.eps Figure 5-1. A1 Main PCA (cont.)
Need help?
Do you have a question about the 88 and is the answer not in the manual?
Questions and answers