Table of Contents
Advertisement
Quick Links
Advertisement
Table of Contents

Subscribe to Our Youtube Channel
Related Manuals for Bartscher Snackjet 200


Summary of Contents for Bartscher Snackjet 200
- Page 1 120751...
- Page 2 Bartscher GmbH Phone: +49 5258 971-0 Franz-Kleine-Str. 28 Fax: +49 5258 971-120 Service hotline: +49 5258 971-197 D-33154 Salzkotten Germany www.bartscher.com Version: 1.0 Date of preparation: 2020-06-15...
-
Page 3: Table Of Contents
Original instruction manual Safety ......................2 Explanation of Signal Words ..............2 Safety instructions..................3 Intended Use ................... 8 Unintended Use ..................8 General information ..................9 Liability and Warranty ................9 Copyright Protection ................9 Declaration of Conformity ................ 9 Transport, Packaging and Storage .............. -
Page 4: Safety
Safety Diese Bedi enungsanlei tung besc hrei bt di e Installation, Bedi enung und Wartung des Geräts und gilt als wic htige Infor mationsquelle und N achschl agewer k. Di e Kenntnis aller enthaltenen Sic herheits hinweis e und H andlungs anweisungen schafft die Vorauss etz ung für das sichere und s ac hger echte Ar beiten mit dem Gerät. D arüber hi naus müs sen die für den Ei ns atz ber eic h des Geräts geltenden ör tlichen Unfall verhütungs vorsc hriften und allgemeinen Sicherheits besti mmungen eing ehalten wer den. Dies e Bedi enungs anleitung is t Bes tandteil des Produkts und muss i n unmi ttelbarer N ähe des Ger äts für das In¬s tall ations-, Bedi enungs-, Wartungs- und R einigungspers onal jederzeit z ugänglich auf¬bewahrt werden. Wenn das Ger ät an eine dritte Pers on weiterg egeben wird, muss die Bedi enungsanlei tung mit ausgehändigt wer den. -
Page 5: Safety Instructions
Safety WARNING! The signal word WARNING warns against hazards that may lead to moderate or severe injuries or death if the hazards are not avoided. CAUTION! The signal word CAUTION warns against hazards that may lead to light or moderate injuries if the hazards are not avoided. , di e IMPORTANT! The signal word IMPORTANT indicates possible property damages,... - Page 6 Safety • Always completely unwind the power cord. • Never place the appliance or other objects on the power cord. • Always take hold of the plug to disconnect the appliance from the power supply. • Check the power cord regularly for damage. Do not use the appliance if the power cord is damaged.
- Page 7 Safety • It is extremely important to not damage the door and that it can be closed properly. Example of damage to the door which may be unsafe include the following: – warping and indentations, – cracked and/or properly secured hinges and screws, –...
- Page 8 Safety • If materials in the thermal processing chamber incinerate, leave the appliance door closed, switch the appliance off and pull the plug out or switch the main fuse off. • Do not use metal pots, pans nor lids. Metal may be the source of sparking in the thermal processing chamber.
- Page 9 Safety Operating Personnel • The appliance may only be operated by qualified personnel and trained specialist personnel. • This appliance may not be operated by persons (including children) with limited physical, sensory or mental capabilities, nor by persons with limited experience and/or limited knowledge.
-
Page 10: Intended Use
Safety Intended Use As described below, every use of the appliance for a purpose differing and/or diverging from its intended standard use, is prohibited and considered to be an unintended use. The following is an intended use: – Preparing foods with the use of suitable cookware. Unintended Use An unintended use may lead to personal injuries or property damages caused by hazardous voltage, fire or high temperature. -
Page 11: General Information
General information General information Liability and Warranty All information and instructions in this instruction manual account for legal regulations in force, current level of technical engineering knowledge as well as our expertise and experience, developed over the years. If special models or additional options are ordered, or state-of-the-art technical solutions were implemented, the actual scope of delivery of the appliance may, in some circumstances, differ from descriptions and numerous drawings in this instruction manual. -
Page 12: Transport, Packaging And Storage
Transport, Packaging and Storage Transport, Packaging and Storage Delivery Check Immediately upon reception, check the delivery for completeness and possible shipping damage. In the case of visible transport damage refuse to accept the appliance or accept it conditionally. Mark and note the scope of damage in shipping documents/consignment list of the shipping company and lodge a complaint. -
Page 13: Technical Data
Technical Data Technical Data Technical Specifications Name: Snackjet 200 120751 Art. No.: Material: Stainless steel Thermal processing chamber material: Stainless steel Thermal processing chamber dimensions 305 x 325 x 180 (W x D x H), in mm: Thermal processing programs,... - Page 14 Technical Data Version / Characteristics • Appliance connection: ready to plug in • Functions: – combination of hot air and microwaves – hot air – microwave • Setting options: temperature, time, microwave power • Temperature control: thermostatic, in 1°C increments •...
-
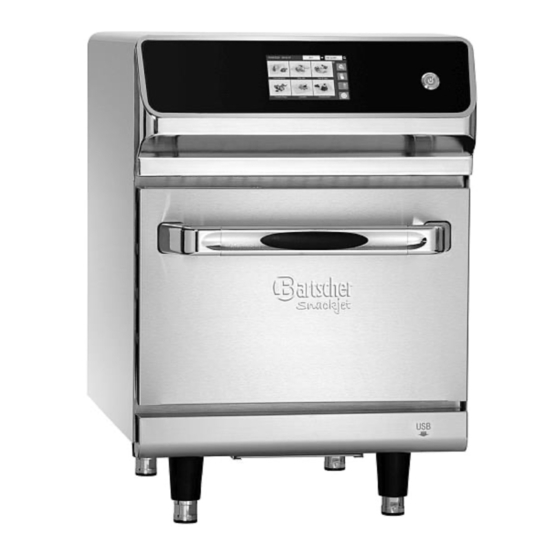
Page 15: List Of Components Of The Appliance
Technical Data List of Components of the Appliance Fig. 1 120751 13 / 40... -
Page 16: Functions Of The Appliance
Technical Data Description for Fig. 1 1. Main switch 2. Fan 3. Thermal processing chamber 4. Appliance door 5. USB connection 6. Filter 7. Door handle 8. Height-adjustable feet (4 pcs) 9. Thermal processing chamber 10. Housing ventilation openings 11. Display 12. -
Page 17: Installation And Operation
Installation and operation Installation and operation Installation CAUTION! Incorrect installation, positioning, operation, maintenance or misuse of the appliance may lead to personal injury or property damage. Positioning and installation, as well as repairs may be performed by authorised technical service only and in compliance with the applicable national law. - Page 18 Installation and operation • Maintain minimum clearance of 60 cm from walls and objects at both sides and at the rear, and 140 mm over the appliance. Maintain sufficient space in front of the appliance to open door. • When installing the appliance never cover not block ventilation openings, not the fume extractor at the rear wall: warm air from electric installation and fumes from the thermal processing chamber are extracted through those openings, thus providing for correct operation of the appliance.
-
Page 19: Suitable Cookware
Installation and operation Suitable Cookware Information in the below table may be helpful in selecting the right cookware: Containers resistant to high temperatures √ Safety glass Do not use cookware with metal elements (e.g. golden border of √ Glass-ceramic a plate). Microwaves do not √... -
Page 20: Operation
Installation and operation Operation • Prior to firs t operation, cl ean the appli anc e and its equi pment ac cor ding to i nstr ucti ons in sect ion 6 'Cleaning'. Make sur e no water enters el ectric i nstallation and connec tion box. T hen thoroughl y dr y the appli anc e and the entire eq uipm ent. •... - Page 21 Installation and operation Control Elements / Displayed Messages Fig. 3 1. Date 2. Time 3. Thermal processing program 4. Search field 5. Setting button 6. Selection button 7. Temperature setting button 8. ON/OFF button 9. Menu selection Menu Settings In main menu, you may select from amongst the factory installed recipes (automatically) and individually set thermal processing programs (manually).
- Page 22 Installation and operation 1. Press the button to set the pre-heating temperature. The preheating temperature may be set in the range of 25–280°C. 2. Press the ON/OFF button to confirm the setting. 3. Press and hold for a while the ON/OFF button to return to main menu.
- Page 23 Installation and operation By pressing arrow button you may move to the previous or subsequent thermal processing stage. You may call up the required parameters of each thermal processing stage. 2. Press this field to change the displayed thermal processing time. A numeric keypad is displayed.
- Page 24 Installation and operation When is shown in the display, the preheating is finished, and the appliance is ready to put food in it. When is shown in the display, it means that temperature is higher than the pre-set temperature, and the appliance is cooling down. 8.
- Page 25 Installation and operation Fig. 6 After closing the door, the thermal processing is continued. If the pre-set temperature is not cooled down, the system signalises it: Fig. 7 If you press the button and no food will be put into the oven, the following message is shown: 120751 23 / 40...
- Page 26 Installation and operation Fig. 8 13. Put food into the oven and confirm by pressing When the thermal processing is over, the following message window is opened: Fig. 9 14. Press '+10' to add 10 seconds to the thermal processing time, and then press to continue.
- Page 27 3. Using the right fields, set the required parameters (time, temperature, fan speed, microwave power) for the new thermal processing stage. 4. Press the symbol when the settings are configured. NOTE! New proposed recipes for preparation in Snackjet are available at www.bartscher.com 120751 25 / 40...
- Page 28 Installation and operation System Settings In this menu you may call up and modify various information about the system and appliance. Recipe Setting 1. In the main menu, press the symbol. The following window is opened: Fig. 11 2. Press 'Recipe Setting'. The following window is opened: Fig.
- Page 29 Installation and operation 3. Select one of the predefined categories by pressing the right image in the display. Reading and saving recipes. Reading: recipes from a USB drive are transferred to the appliance menu. Saving: recipes set in appliance menu are transferred to a USB drive. Recipes, images or settings, which are not needed any more, may be discarded by pressing this field.
- Page 30 Installation and operation The message ma, for example, have the form of: Fig. 14 7. Press the suitable recipe image from a selected category. You may select the following categories: breakfast, dinner, supper, whole-day menu, etc. 8. To provide a name for the recipe, press the 'Name' field, and then using the keypad (as shown below) introduce a suitable name: Fig.
- Page 31 Installation and operation If for one program there are more than two stages of thermal processing, for each of the stages — except for the last one — you may set an alarm. 9. Press 'Alarm' to set alarm information the following way: Fig.
- Page 32 Installation and operation System 1. Press 'System' in main menu to move to the system settings interface. Subsequent settings may be introduced in the following screen: Fig. 17 2. 'Language': press this field and select language. The following languages are available: German, English, French, Italian, Dutch, Polish, Russian.
- Page 33 Installation and operation Service 1. In main menu press 'Service'; the password is '****' (in order to authorise the password, contact the supplier or the manufacturer). Fig. 18 In this menu interface you may check and introduce subsequent service settings: 'Product Count': press here to see, how often a given menu has been used.
- Page 34 Installation and operation Appliance 1. Press the 'Appliance' field. The password is '***' (in order to authorise the password, contact the supplier or the manufacturer). In this menu interface you may check and introduce subsequent appliance settings: Fig. 19 Fig. 20 'Copy Appliance From USB': transferring appliance data from USB drive.
- Page 35 Installation and operation 'Appliance Passcode': administrator's password for entering appliance settings. 'Demo Mode': 'Yes' — only the touch-screen is operation in the demo mode, no heating functions' 'No' — both the touch-screen and the heating functions are operational. 'Restore Factory Default': restoring factory default settings. 'Update Firmware': updating and repairing firmware;...
-
Page 36: Cleaning
Cleaning Cleaning Safety Instructions for Cleaning • Before cleaning, disconnect the appliance from the power supply. • Leave the appliance to cool down completely. • Make sure water does not enter the appliance. Do not immerse the appliance in water or other liquids during cleaning. Do not clean the appliance with a pressurized water jet. - Page 37 Cleaning When the temperature drops to 70°C, the cooling down process will stop automatically. 3. Open the appliance door. 4. Clean the thermal processing chamber with a soft, damp cloth and mild cleaning agent. 5. In case of stubborn soiling, use commonly available oven cleaning agents. Observe instructions of the manufacturer of such a cleaning agent.
-
Page 38: Possible Malfunctions
Possible Malfunctions Possible Malfunctions Mögliche The table below contains descriptions of possible causes and solutions to malfunctions or errors during operation of the appliance. When malfunction cannot be removed, contact the technical service. Error Possible Cause Solution Appliance does not No electric power supply Restore the electric power work... - Page 39 Possible Malfunctions Error Possible Cause Solution Unsatisfactory result Thermal processing Clean the appliance of thermal chamber is soiled (fat, food thoroughly according to processing left-overs) instructions in section 'Cleaning' Wrong menu or program Select the right thermal selected processing program Initial condition of food Before putting them into the products was inadequate...
-
Page 40: Disposal
Disposal Disposal Electrical Appliance Electric appliances are marked with this symbol. Electrical appliances must be disposed of and recycled in a correct and environmentally friendly manner. You must not dispose of electric appliances with household waste. Disconnect the appliance from the power supply and remove power cord from the appliance.
Need help?
Do you have a question about the Snackjet 200 and is the answer not in the manual?
Questions and answers