Advertisement
FLR3-400 Installation Quick Guide
This quick guide provides steps for installing the receiver and setting up a FLR3-400 key fob with a
Fuelight
Gen 3 display.
TM
Installing the Receiver
1.
Using a flat-head screwdriver, open the digit face to
access inside the digit cabinet.
2.
Remove both antenna hole plugs from the digit face.
Refer to Figure 1.
3.
Place the receiver on to the mounting studs on the back
of the digit face. Refer to Figure 2.
4.
Use a
/
" nut driver to secure the receiver to the
5
16
mounting studs using the two provided nuts.
5.
Place the threaded end of the antenna cable through
the antenna hole.
6.
Place the flat washer over the threaded end of the
antenna cable. Refer to Figure 2.
7.
Thread the provided nut on to the threaded end
of the antenna cable and tighten using an
wrench.
8.
Thread the female end of the antenna on to the
threaded end of the antenna cable and turn the
antenna clockwise until snug. Refer to Figure 2.
9.
Connect the receiver cable from receiver to the
driver. Refer to Figure 3.
10. Neatly secure any excess cable with cable ties.
11. Close and secure the digit face.
Figure 3: Final Receiver Assembly
DD2239290 Rev 03
PO Box 5128 201 Daktronics Drive, Brookings, SD 57006-5128
6 August 2014
/
"
11
32
Receiver
Antenna Cable
tel: 800-325-8766 fax: 605-697-4700
www.daktronics.com
Mounting Stud
Antenna Hole Plug
Figure 1: Digit Door Receiver Mounting Overview
Digit Face
Mounting Stud
Antenna
Nut
Figure 2: Mounting Profile
Driver
Digit Cabinet
Page 1 of 4
Receiver
Nut
Washer
Advertisement
Table of Contents

Related Manuals for Daktronics FLR3-400


Summary of Contents for Daktronics FLR3-400
- Page 1 FLR3-400 Installation Quick Guide Page 1 of 4 This quick guide provides steps for installing the receiver and setting up a FLR3-400 key fob with a Fuelight Gen 3 display. Installing the Receiver Mounting Stud Using a flat-head screwdriver, open the digit face to access inside the digit cabinet.
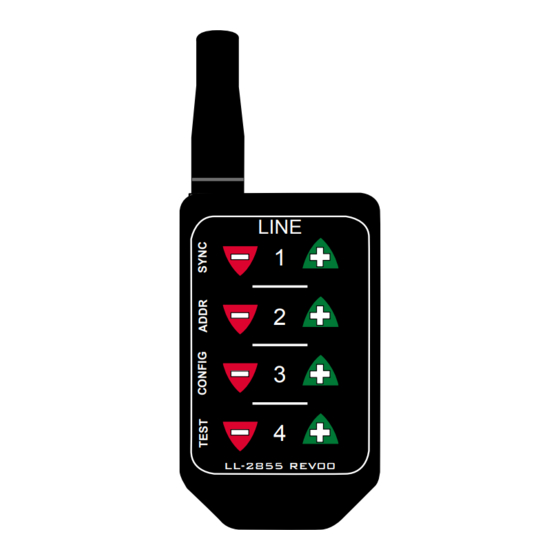
- Page 2 Setting the Security DIP Switches The FLR3-400 key fob has a series of dip switches on the back to give it a unique address setting. Set these switches to a unique setting to prevent others from being able to control your display.
- Page 3 2. Exit test mode by pressing and holding the Plus (+) and Minus (-) keys on line four until the displays return to showing prices; approximately five seconds. DD2239290 Rev 03 PO Box 5128 201 Daktronics Drive, Brookings, SD 57006-5128 6 August 2014 tel: 800-325-8766 fax: 605-697-4700...
- Page 4 LSOPER 12 SEP 12 NONE 1113268 ADDED JBX WIRING TABLE 1 OF 1 P1611 R 01 A 20 SEP 2013 DD2239290 Rev 03 PO Box 5128 201 Daktronics Drive, Brookings, SD 57006-5128 6 August 2014 tel: 800-325-8766 fax: 605-697-4700 www.daktronics.com...
Need help?
Do you have a question about the FLR3-400 and is the answer not in the manual?
Questions and answers