
Related Manuals for AGA RAYBURN 400GL PX


Summary of Contents for AGA RAYBURN 400GL PX
- Page 1 Users Instructions 400GL PX (PF) For use in GB and IE DESN 512548 A PLEASE READ THESE INSTRUCTIONS BEFORE USING THIS APPLIANCE raywarranty@aga-web.co.uk 06/15 EOPI 512533...
-
Page 2: Table Of Contents
CONTENTS SECTION PAGE INTRODUCTION FEATURES AND ACCESSORIES 4 - 5 INTRODUCTION TO TIMER USING THE AUTOMATIC COOKING FACILITY 7 - 10 USING THE MINUTE MINDER MAIN OVEN OPERATION COOKING WITH YOUR APPLIANCE COOKING CHART CLEANING AND CARE OF YOUR APPLIANCE SERVICING, BURNER RESET, GAS LEAK OR FAULT AND POWER FAILURE NOTE: SMOKE/SMELL EMITTED DURING INITIAL USAGE. -
Page 3: Introduction
IMPORTANT NOTICE: PLEASE READ THE ACCOMPANYING WARRANTY. Any alteration that is not approved by AGA could invalidate the approval of the appliance, operation of the warranty and could affect your statutory rights. It could be dangerous. -
Page 4: Features And Accessories
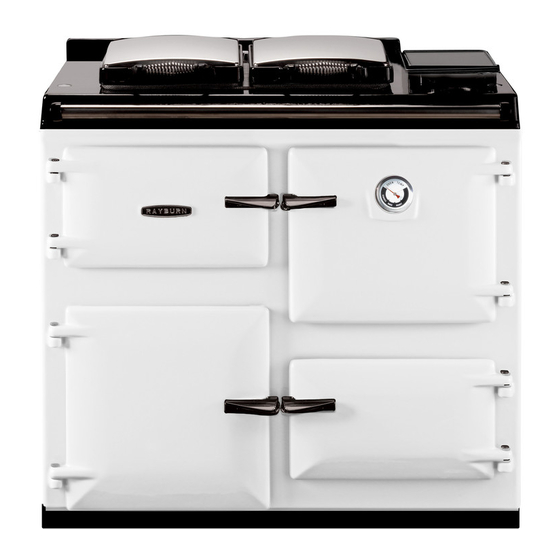
Features/Accessories Doors Fig. 1 To open the doors. Twist the handle slightly to disengage the door catch from the locking spindle and pull the door open. Thermodial See Fig. 2 Fig. 1 The thermodial positioned on the main oven door is an approximate guide to the internal oven temperature. - Page 5 Features/Accessories (cont.) PLAIN SOLID SHELF TOP RUNNER SHELF POSITION 1 SHELF POSITION 2 SHELF POSITION 3 SHELF POSITION 4 SHELF POSITION 5 OVEN BASE Fig. 3A DESN 511743 Further accessories, tins, grid shelves, solid shelves, saucepans, aprons and gauntlets, etc. are available from your Rayburn stockist.
-
Page 6: Introduction To Timer
Introduction to Timer • Press and hold the button. Now press the [+] or [-] buttons to increase or decrease the time (Fig. 5). Holding the [+] or [-] buttons for more than 2 seconds will advance/decrease the set time quickly. Release the buttons to set the time of day. -
Page 7: Using The Automatic Cooking Facility
Using the Automatic Cooking Facility AUTOMATIC COOKING CONTROL This can be used to set an automatic cooking programme. It switches the oven on and off at the pre-set times. The maximum length of cooking programme which can be set is 23 hours and 59 minutes e.g. a delay time + cooking time = maximum 23 hours and 59 minutes. - Page 8 Using the Automatic Cooking Facility Fig. 11 DESN 517074 Fig. 14 DESN 517077 Now press and hold the button (Fig. 12) and then Set the oven to the required temperature. When cooking press the [+] button (or [-] button) until the required 'stop is finished [AUTO] will flash and the beeper will sound.
- Page 9 Using the Automatic Cooking Facility For an overview of the functions refer to table below. Symbol Function Notes Used with the [+] and [-] Sets the Minute Minder buttons Sets the duration/ Used with the [+] and [-] cook period buttons Sets the end/ Used with the [+] and [-]...
- Page 10 Using the Automatic Cooking Facility Using this facility on the Rayburn timer allows the user to select the amount of time the appliance is on and the finish/off time. HINTS ON THE USE OF THIS FACILITY The Rayburn should be COLD before starting any automatic cooking where there is a delay in the start time. Because the Rayburn is made from cast iron and will therefore retain the heat for a number of hours after it is turned off, food should NOT be loaded into the appliance for automatic cooking if the Rayburn has been used earlier in the day, or is slightly warm even if it has been turned off for some hours.
-
Page 11: Using The Minute Minder
Using the Minute Minder Minute Minder Press and hold the button (Fig. 16), and then press the [+] button (or {-] button) until the length of time you want is shown (Fig. 17). Fig. 16 DESN 517068 Fig. 17 DESN 517069 You can check the time remaining by pressing When the beeper sounds cancel it by pressing any button. -
Page 12: Main Oven Operation
Main Oven Operation Note: care should be taken not to touch the hotplate, oven combustion chamber door and flue areas unless a n insulated glove is used, as these areas are hot working surfaces and will burn unprotected skin. The oven is indirectly heated from the outside by hot gases from the heat source so that no flame or elements within the oven means full use can be made of the whole cooking area. -
Page 13: Cooking With Your Appliance
Cooking with your appliance Grilling The top of the oven is where grilling takes place. When the main oven is hot use the meat tin with a grill rack (used on the highest position) so that the fat can drip into the tray. Position the food on the rack and put into the oven on the highest runner. -
Page 14: Cooking Chart
Cooking with your appliance COOKING CHART (MAIN OVEN) Setting Shelf Approximate Time Position SCONES 10-15 mins SMALL CAKES 20 mins (Turn the tray round halfway through cooking. For best results place the solid plain shelf on the top runner). VICTORIA SANDWICH 3 + 5 25-35 mins (Move the lower cake up when the... -
Page 15: Cleaning And Care Of Your Appliance
CITRIC ACID ON ENAMELLED SURFACES. IMPORTANT NOTE: AGA recommend Vitreous Enamel Association approved cleaners for cleaning the vitreous enamelled surfaces of this product. But it is unsuitable for use on: chrome and stainless steel components including the hand-rail and their brackets. -
Page 16: Servicing, Burner Reset, Gas Leak Or Fault And Power Failure
Servicing or Fault BURNER RESET If a fault occurs on the burner then it automatically shuts down and the red button on the front plinth will be illuminated. This can be reset, after 10 seconds by depressing the reset button. The reset button is located in the lower plinth panel. OPERATING BY PRESSING WITH FINGER ONLY Please wait at least 10 seconds between resetting the lockout button. - Page 20 For further advice or information contact your local distributor/stockist With AGA Rangemaster’s policy of continuous product improvement, the Company reserves the right to change specifications and make modifications to the appliance described at any time. Manufactured by AGA Rangemaster Station Road...
Need help?
Do you have a question about the RAYBURN 400GL PX and is the answer not in the manual?
Questions and answers