
Subscribe to Our Youtube Channel
Related Manuals for Majacraft Suzie


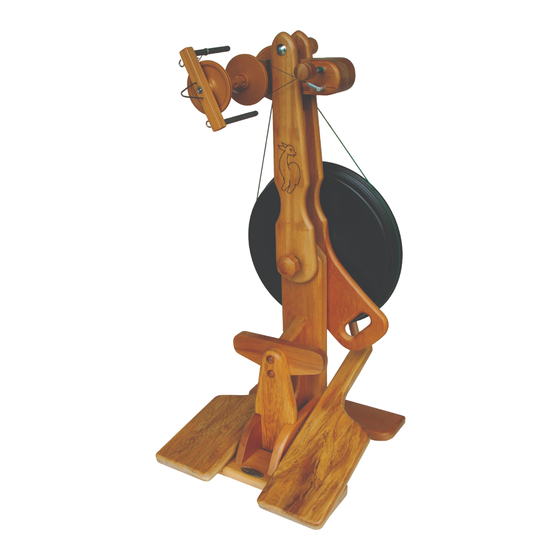
Summary of Contents for Majacraft Suzie
- Page 1 Your new Suzie & Suzie Professional spinning wheel majacraft all you need to spin your dreams... majacraft...
- Page 2 Thank you for choosing Majacraft, it is your belief in us that drives our innovation and creativity in building captivating tools for you.
- Page 3 Assembling a Suzie & Suzie Professional These instructions demonstrate how to assemble your Majacraft Suzie and Suzie Professional spinning wheel 1. Prepare the components We recommend that you find a clear work area where you can lay out all the components for working on them.
- Page 4 Check the star washer is still on the drive shaft. Now slide the drive wheel and drive shaft back into the stem/handle assembly. When the drive shaft is in place then screw the front handle nut on and tighten it up. majacraft...
- Page 5 SHDW assembly. Partially tighten the bolts, checking that they are threaded in correctly before finally tightening all bolts. The drive wheel should go on the same side of the Base/Pedal assembly as the narrow end of the pedals. majacraft...
- Page 6 JCB bolt firmly. There is no need to over-tighten this. The spinning head can be raised or lowered to suit the tensioning of the drive belt and the height at which you wish to spin. 5. Pulley Required: 1 - Pulley 2mm allen T-wrench majacraft...
- Page 7 1 - Green drive band (in the hardware bag) The green drive band goes on the grooves on the drive wheel and then through one of the grooves on the whorl. It is important that the drive belt is reasonably tight otherwise the treadling will feel heavy. majacraft...
- Page 8 Push the green joiner into the hole at the end of the pedal on your left until it protrudes by about 2mm. Screw the 25mm gold screw into the hole on the side of the pedal so it holds the green joiner in place. majacraft...
- Page 9 The joiner on the conrod that is furthest from you goes into the hole in the pedal that is on your right. majacraft...
- Page 10 (assuming you are right handed). It may also be treadled on by holding the flyer in one hand and treadling the wheel in an anticlockwise direction. If assembling the Suzie Professional, the same process applies for putting on the e-flyer. 10. Bobbin Bars...
- Page 11 Your Majacraft Suzie or Suzie Professional is now assembled and you are ready to start on a new spinning adventure! From the team at Majacraft, we wish you great spinning in the future.
- Page 12 Notes majacraft suzie_professional assembly_1.06_11-06-2019...
Need help?
Do you have a question about the Suzie and is the answer not in the manual?
Questions and answers