Advertisement
Quick Links
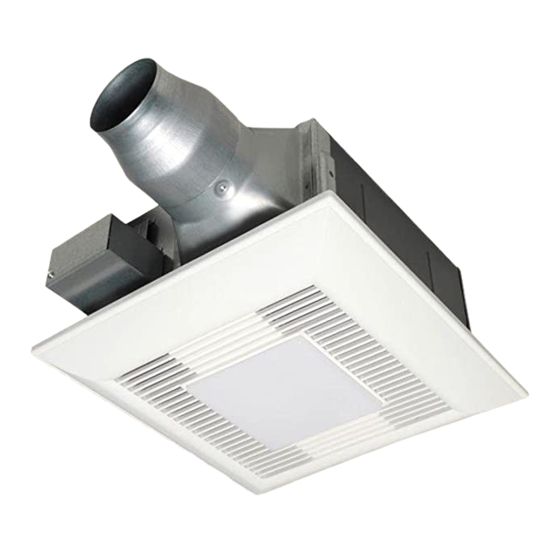
FV-05VFL4
FV-08VFL4
FV-11VFL4
Thank you for purchasing this Panasonic product.
INSTALLATION INSTRUCTIONS
FV-05VFL4 FV-08VFL4
FV-11VFL4
Contents
General Safety lnformation
Description
Unpacking
Supplied Accessories
Dimensions
Wiring Diagram
lnstallation
lnstallation
lnstallation
lnstallation
lnstallation
lnstallation
Maintenance
Maintenance
Practical
Guide to lnstallation
Specifications
Product Service
Ventilating Fan
(Joist Mounting - )
(Joist Mounting - )
(Joist Mounting )
(Between Joist Mounting)
(Wooden Header)
(In Existing Construction)
(Cleaning)
(Replacement of Lamp)
2-3
4
4
4 4
5
5
6-8
9-10
11
11-12
12
13
13
14
15
Advertisement

Subscribe to Our Youtube Channel
Related Manuals for Panasonic FV-05VFL4


Summary of Contents for Panasonic FV-05VFL4
- Page 1 9-10 lnstallation (Joist Mounting ) lnstallation (Between Joist Mounting) 11-12 lnstallation (Wooden Header) lnstallation (In Existing Construction) FV-05VFL4 Maintenance (Cleaning) FV-08VFL4 Maintenance (Replacement of Lamp) FV-11VFL4 Practical Guide to lnstallation Specifications Product Service Thank you for purchasing this Panasonic product.
- Page 2 For Your Safety To reduce the risk of injury, loss of life, electric shock, fire, malfunction, and damage to equipment or property always observe the following safety precautions. Explanation of symbol word panels The following symbol word panels are used to classify and describe the level of hazard, injury, and property damage caused when the denotation is disregarded and improper use is performed.
- Page 3 USA only: This product has two fluorescent lamps that contain mercury. Disposal may be regulated in your community due to environmental considerations. For disposal or recycling information, please contact your local authorities or visit Panasonic website: http://www.panasonic.com/environmental or call 1-888-769-0149.
-
Page 4: Supplied Accessories
(2) this device must accept any interference received, including interference that may cause undesired operation. Responsible Party: Panasonic Corporation of North America One Panasonic Way, Secaucus, New Jersey 07094 Customer Support: 1-866-292-7292 UNPACKING Unpack and carefully remove unit from carton. - Page 5 FV-05VFL4 FV-08VFL4 FV-11VFL4 Lens FV-05VFL4 FV-08VFL4 FV-11VFL4...
- Page 7 CAUTION...
- Page 8 8. Finish ceiling work Ceiling hole should be aligned with the edge of the flange.(Fig.6) Gloves Plug connector Lighting unit Insert Plug connector Claw Remove screw (M4X8). Fig.6 Remove light cover. (Fig.7) 10. Install the night lamp and fluorescent lamps. (Fig.8) 11.
- Page 9 (Fig.11) Fig.11 (Fig.12) Fig.12...
- Page 10 (Fig.13) (Fig.14) Fig.13 Fig.15-1 Fig.14 Fig.12 of page.9) Fig.15-2 Fig.15-3 Fig.15-4...
- Page 11 Fan body Fig.16 Fig.17 Fig.18 Fig.19 Fig.20...
- Page 12 Fig.21 Fig.22 Fig.23 Fig.24...
- Page 13 CAUTION WARNING Fig.25 CAUTION Fig.26 1.Clean grille. (Don’t put into hot water. Use non-abrasive kitchen detergent, wipe dry with clean cloth) (Fig.25) Fig.27...
- Page 14 WARNING Gloves ‘ Plug connector Lighting unit Insert Plug connector Claw CAUTION Fig.28 Remove dust and dirt from light cover and lens, before replace the lamps. Fig.29. Fig.29. 3. Replace the fluorescent lamps (Maxlite MLS13GU35 13W) as shown in step 1 and step 2 of Fig.30. Fig.29 4.
- Page 15 Fig.31 9.3 (4.2) FV-05VFL4 9.7 (4.4) FV-08VFL4 FV-11VFL4 9.9 (4.5)
Need help?
Do you have a question about the FV-05VFL4 and is the answer not in the manual?
Questions and answers
can this fan be used in shower/ bathroom with high moisture?