
Subscribe to Our Youtube Channel
Related Manuals for Netgate SG-2100


Summary of Contents for Netgate SG-2100
- Page 1 Security Gateway Manual SG-2100 © Copyright 2022 Rubicon Communications LLC Jan 03, 2022...
-
Page 2: Table Of Contents
2 Initial Configuration 3 pfSense Plus Overview 4 Input and Output Ports 5 Safety and Legal 6 Netgate 2100 Wall Mount 7 Connecting to the Console Port 8 Reinstalling pfSense Plus Software 9 Optional M.2 SATA Installation 10 Configuring the Switch Ports... - Page 3 Security Gateway Manual SG-2100 This Quick Start Guide covers the first time connection procedures for the Netgate® 2100 Firewall Appliance. It will provide the information needed to keep the appliance up and running. Tip: Before getting started, we recommend downloading the...
-
Page 4: Getting Started
CHAPTER GETTING STARTED The basic firewall configuration begins with connecting the Netgate® appliance to the Internet. The Netgate appliance should be unplugged at this time. Connect one end of an Ethernet cable to the WAN port (shown in the Input and Output Ports section) of the Netgate appliance. - Page 5 Security Gateway Manual SG-2100 Warning: The default IP Address on the LAN subnet on the Netgate firewall is 192.168.1.1/24. The same subnet cannot be used on both WAN and LAN, so if the default IP address on the ISP-supplied modem is also 192.168.1.1/24, disconnect the WAN interface until the LAN interface on the firewall has been renumbered...
-
Page 6: Initial Configuration
Warning: If your DSL or Cable Modem has a default IP Address of 192.168.1.1, please disconnect the Ethernet cable from the WAN port on your Netgate 2100 Security Gateway before proceeding. You will need to change the default IP Address of the device during a later step in the configuration. - Page 7 Security Gateway Manual SG-2100 Fig. 2: Click Advanced and then Proceed to 192.168.1.1 (unsafe) Fig. 3: Click Next © Copyright 2022 Rubicon Communications LLC...
- Page 8 Tip: If your DSL or Cable Modem has a default IP Address of 192.168.1.1, change the IP Address of your Netgate 2100 Security Gateway to a different subnet, such as 192.168.2.1 with a subnet mask of 24 to avoid an IP Address conflict.
- Page 9 Security Gateway Manual SG-2100 Fig. 5: Change the Timezone and Click Next Fig. 6: Default Settings Should be Acceptable. Click Next © Copyright 2022 Rubicon Communications LLC...
- Page 10 Fig. 7: Read and Click Accept If you unplugged the Ethernet cable at the beginning of this configuration, reconnect it to the WAN port now. This completes the basic configuration for the Netgate appliance. © Copyright 2022 Rubicon Communications LLC...
-
Page 11: Pfsense Plus Overview
firewall. ® Fig. 1: The pfSense Plus Dashboard Section 1 shows important system information such as the model, Serial Number, and Netgate Device ID for this Netgate firewall. ® Section 2 identifies what version of pfSense Plus software is installed, and if an update is available. - Page 12 Click Download configuration as XML and save a copy of the firewall configuration to the computer con- nected to the Netgate firewall. This backup (or any backup) can be restored from the same screen by choosing the backed up file under Restore Configuration.
- Page 13 Security Gateway Manual SG-2100 Fig. 3: Backup & Restore Fig. 4: Click Download configuration as XML © Copyright 2022 Rubicon Communications LLC...
- Page 14 See also: Connecting to the Console Port Connect to the console. Cable is required. Tip: To learn more about getting the most out of your Netgate appliance, sign up for a pfSense Plus Training course or browse our extensive Resource Library.
-
Page 15: Input And Output Ports
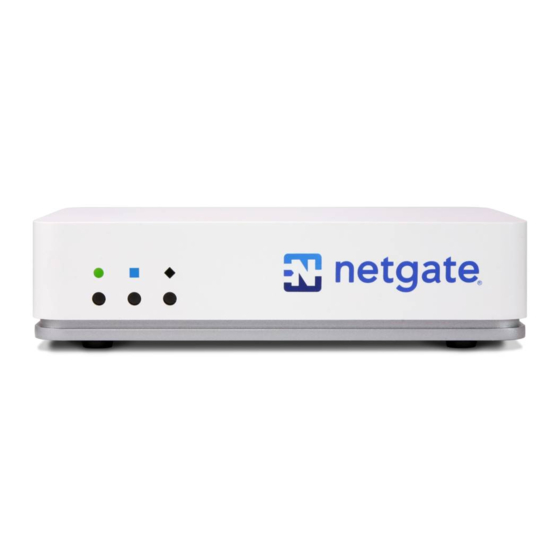
CHAPTER FOUR INPUT AND OUTPUT PORTS 4.1 Rear Side 4.1.1 Routed Ethernet The WAN Combo-Port is shared between an RJ-45 port and an SFP port. Only one port can be used. Interface Name Port Name mvneta0 LED Pattern Description Left LED only green Flashes with 1Gb traffic, solid with link. - Page 16 Security Gateway Manual SG-2100 4.1.2 Switched Ethernet Interface Name Port Name LAN1 mvneta1 LAN2 mvneta1 LAN3 mvneta1 LAN4 mvneta1 LED Pattern Description Both LEDs green Left Flashes with 1Gb traffic, solid with link. Left flashes with 100Mb traffic, solid with link.
- Page 17 Security Gateway Manual SG-2100 LED Pattern Description Boot Process The sequence, circle -> square -> diamond, quickly flashes blue. Boot Completed The diamond slowly flashes blue. Update is Available The square slowly flashes orange. © Copyright 2022 Rubicon Communications LLC...
-
Page 18: Safety And Legal
CHAPTER FIVE SAFETY AND LEGAL 5.1 Safety Notices 1. Read, follow, and keep these instructions. 2. Heed all warnings. 3. Only use attachments/accessories specified by the manufacturer. Warning: Do not use this product in location that can be submerged by water. Warning: Do not use this product during an electrical storm to avoid electrical shock. - Page 19 Security Gateway Manual SG-2100 5.3 FCC Compliance Changes or modifications not expressly approved by the party responsible for compliance could void the user’s au- thority to operate the equipment. This device complies with Part 15 of the FCC Rules. Operation is subject to the following two conditions: 1.
- Page 20 Security Gateway Manual SG-2100 5.7.2 Deutsch Die Europäische Richtlinie 2002/96/EC verlangt, dass technische Ausrüstung, die direkt am Gerät und/oder an der Verpackung mit diesem Symbol versehen ist, nicht zusammen mit unsortiertem Gemeindeabfall entsorgt werden darf. Das Symbol weist darauf hin, dass das Produkt von regulärem Haushaltmüll getrennt entsorgt werden sollte. Es liegt in Ihrer Verantwortung, dieses Gerät und andere elektrische und elektronische Geräte über die dafür zuständigen und von...
- Page 21 SG-2100 5.8 Declaration of Conformity 5.8.1 ˇ Cesky[Czech] NETGATE tímto prohla uje, e tento NETGATE device, je ve shod se základními po adavky a dal ími p íslu n mi ustanoveními sm rnice 1999/5/ES. 5.8.2 Dansk [Danish] Undertegnede NETGATE erklærer herved, at følgende udstyr NETGATE device, overholder de væsentlige krav og øvrige relevante krav i direktiv 1999/5/EF.
- Page 22 Alulírott, NETGATE nyilatkozom, hogy a NETGATE device, megfelel a vonatkozó alapvetõ követelményeknek és az 1999/5/EC irányelv egyéb elõírásainak. 5.8.10 Íslenska [Icelandic] Hér me l sir NETGATE yfir ví a NETGATE device, er í samræmi vi grunnkröfur og a rar kröfur, sem ger ar eru í tilskipun 1999/5/EC. 5.8.11 Italiano [Italian] Con la presente NETGATE dichiara che questo NETGATE device, è...
- Page 23 Security Gateway Manual SG-2100 5.8.16 Slovensky [Slovak] NETGATE t mto vyhlasuje, e NETGATE device, sp a základné po iadavky a v etky príslu né ustanovenia Smernice 1999/5/ES. 5.8.17 Svenska [Swedish] Härmed intygar NETGATE att denna NETGATE device, står I överensstämmelse med de väsentliga egenskapskrav och övriga relevanta bestämmelser som framgår av direktiv 1999/5/EG.
- Page 24 Security Gateway Manual SG-2100 4616 West Howard Lane, Suite 900 Austin, Texas 78728 legal@netgate.com The arbitration will be conducted by the American Arbitration Association (AAA) under its rules. The AAA’s rules are available at www.adr.org. Payment of all filing, administration and arbitrator fees will be governed by the AAA’s rules.
- Page 25 Security Gateway Manual SG-2100 5.13 Limited Warranty DISCLAIMER OF WARRANTIES AND LIMITATION OF LIABILITY THE PRODUCTS/SERVICES AND ALL INFORMATION, CONTENT, MATERIALS, PRODUCTS (INCLUD- ING SOFTWARE) AND OTHER SERVICES INCLUDED ON OR OTHERWISE MADE AVAILABLE TO YOU THROUGH THE PRODUCTS/SERVICES ARE PROVIDED BY US ON AN “AS IS” AND “AS AVAILABLE” BA- SIS, UNLESS OTHERWISE SPECIFIED IN WRITING.
-
Page 26: Netgate 2100 Wall Mount
CHAPTER NETGATE 2100 WALL MOUNT The Netgate 2100 has built in wall-mount keyholes on the bottom of the appliance. This page provides an overview and a PDF template for attaching the system to the wall. - Page 27 SG-2100 The Netgate 2100 can be mounted vertically or horizontally. If mounted horizontally, the ports and cables should face up to reduce the pull from the weight of the cables on the ports. Click on the button below to download the Wall Mount Template.
- Page 28 Security Gateway Manual SG-2100 Follow the pictured instructions on the PDF to complete the wall mount installation. © Copyright 2022 Rubicon Communications LLC...
-
Page 29: Connecting To The Console Port
CHAPTER SEVEN CONNECTING TO THE CONSOLE PORT There are times when directly accessing the console is required. Perhaps webGUI or SSH access has been locked out, or the password has been lost or forgotten. This guide shows how to regain access directly through the console. 7.1 Install the Driver A Silicon Labs CP210x USB-to-UART Bridge driver is used to provide access to the console, which is exposed via the Mini-USB port on the appliance. - Page 30 Security Gateway Manual SG-2100 7.3 Locate the Console Port Device The appropriate console port device that the workstation assigned as the serial port must be located before attempting to connect to the console. Note: Even if the serial port was assigned in the BIOS, the workstation’s OS may remap it to a different COM Port.
- Page 31 Security Gateway Manual SG-2100 driver and then try again. FreeBSD The device associated with the system console is likely to show up as /dev/cuaU0. Look for messages about the device attaching in the system log files or by running dmesg.
- Page 32 Security Gateway Manual SG-2100 Fig. 1: An example of using PuTTY in Windows. © Copyright 2022 Rubicon Communications LLC...
- Page 33 Security Gateway Manual SG-2100 Fig. 2: An example of using PuTTY in Linux. GNU screen In many cases screen may be invoked simply by using the proper command line, where <console-port> is the console port that was located above. sudo screen <console-port> 115200 If portions of the text are unreadable but appear to be properly formatted, the most likely culprit is a character encoding mismatch in the terminal.
- Page 34 Security Gateway Manual SG-2100 7.5 Troubleshooting 7.5.1 No Serial Output If there is no output at all, check the following items: • Ensure the cable is correctly attached and fully inserted • Ensure the terminal program is using the correct port •...
-
Page 35: Reinstalling Pfsense Plus Software
1. Please open a support ticket General Problem and then select Netgate SG-2100 for the platform. Make sure to include the serial number in the ticket to expedite access. Once the ticket is processed, the latest stable version of the firmware will be attached to the ticket, with a name such as: pfSense-plus-SG-2100-recovery-21.05.2-RELEASE-aarch64.img.gz... - Page 36 Security Gateway Manual SG-2100 © Copyright 2022 Rubicon Communications LLC...
- Page 37 Security Gateway Manual SG-2100 © Copyright 2022 Rubicon Communications LLC...
- Page 38 Security Gateway Manual SG-2100 © Copyright 2022 Rubicon Communications LLC...
-
Page 39: Optional M.2 Sata Installation
NINE OPTIONAL M.2 SATA INSTALLATION The Netgate® 2100 has built-in onboard eMMC storage. Optionally, a M.2 SATA drive could be installed as an upgrade or to bypass the onboard eMMC flash memory. Note: The Netgate 2100 does not support NVMe drives. - Page 40 Security Gateway Manual SG-2100 Fig. 1: Removing the Netgate 2100 Case Screws 2. Turn system upright and carefully remove the cover. Set the cover off to the side and keep it upright so the top is not scratched. Identify where the M.2 SATA drive slot is located and remove the screw from the standoff.
- Page 41 4. Gently push down the M.2 SATA card and replace the screw into the standoff. 5. Place the cover back on and turn the Netgate 2100 over. Replace the four T10 Torx case screws. Be careful not to crossthread the screws or overtighten them.
- Page 42 Security Gateway Manual SG-2100 Fig. 4: The M.2 SATA Drive Installed © Copyright 2022 Rubicon Communications LLC...
-
Page 43: Configuring The Switch Ports
This optional guide shows the steps required to configure the 4 switched Ethernet ports as discrete ports. The following attributes are used in this configuration guide but can be changed to suit your particular requirements: • SG-2100 Ethernet Port: LAN4 • IP Address Assignment: 192.168.100.1/24 •... - Page 44 Security Gateway Manual SG-2100 4. In the lower right-hand corner of the screen, click + Add. 5. Choose mvneta1 (MAC Address) - lan from the Parent Interface drop-down menu. 6. Set the VLAN Tag to 4084. Type Lan port 4 as the Description. Click Save.
- Page 45 Security Gateway Manual SG-2100 Click on + Add. 9. Click on OPT1. This is the Interface that matches the new VLAN being created. 10. Check the Enable Interface check-box. 11. Change the IPv4 Configuration Type from None to Static IPv4.
- Page 46 Security Gateway Manual SG-2100 13. Click Save. 14. Click Apply Changes. 15. Go to Interfaces -> Switches. 16. Go to the VLANs sub-menu. Click in the Enable 802.1q VLAN mode check-box and click Save. 17. You will notice that the table changes. Click + Add Tag.
- Page 47 Security Gateway Manual SG-2100 18. Type 4084 for the VLAN Tag and 4 for Member(s). This represents LAN4 (port 4) and tagged should be unchecked. 19. Click + Add Member to add the LAN Uplink, 5. This member should be tagged as shown.
- Page 48 25. Click on Port VID 1 beside LAN4. Backspace through 1 and insert 4084, the new VLAN ID. 26. Click Save. This completes the configuration of a discrete port on the Netgate SG-2100. You will need to create the appropriate firewall rules...
-
Page 49: Additional Resources
Netgate training has got you covered. https://www.netgate.com/training 11.2 Resource Library To learn more about how to use your Netgate appliance and for other helpful resources, make sure to browse our Resource Library. https://www.netgate.com/resources 11.3 Professional Services Support does not cover more complex tasks such as CARP configuration for redundancy on multiple firewalls or... -
Page 50: Warranty And Support
CHAPTER TWELVE WARRANTY AND SUPPORT • One year manufacturer’s warranty. • Please contact Netgate for warranty information or view our Product Lifecycle page. • All Specifications subject to change without notice For support information, view our support plans. See also: ®...
Need help?
Do you have a question about the SG-2100 and is the answer not in the manual?
Questions and answers