Satel ABAX 2 Manual
Wireless panic button
Hide thumbs
Also See for ABAX 2:
- Manual (15 pages) ,
- Quick installation manual (9 pages) ,
- Quick installation manual (12 pages)

Related Manuals for Satel ABAX 2


Summary of Contents for Satel ABAX 2
- Page 1 APB-200 Wireless panic button Firmware version 1.00 apb-200_en 10/21 SATEL sp. z o.o. • ul. Budowlanych 66 • 80-298 Gdańsk • POLAND tel. +48 58 320 94 00 www.satel.eu...
- Page 2 13 August 2005). The device meets the technical regulations of the Eurasian Customs Union. SATEL aims to continually improve the quality of its products, which may result in changes in their technical specifications and software. Current information about the changes being introduced is available on our website.
- Page 3 CONTENTS Features ........................... 2 Description ........................2 Radio communication ....................... 2 Alarms ..........................2 Energy saving mode (ECO) ....................2 Test mode ......................... 2 LED ........................... 2 Battery status control ......................3 Electronics board ......................3 Installation ........................3 Specifications ........................6...
- Page 4 The APB-200 panic button is used to trigger a panic alarm or call for help in emergency situations. It can also be used to control the operation of various devices (e.g. automation or access control system devices). It is designed to operate within the ABAX 2 two-way wireless system. The button is supported by: ...
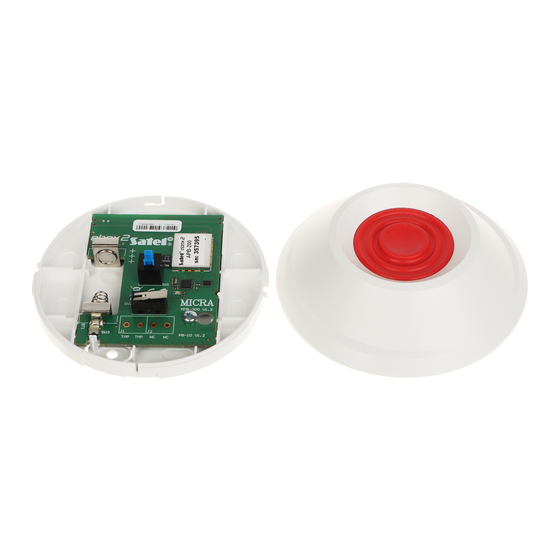
- Page 5 SATEL APB-200 Battery status control When the battery voltage is below 2.75 V, information about low battery is sent during each transmission. 3. Electronics board battery (CR14250). tamper switch activated by removal from mounting surface. button. LED. tamper switch activated by cover removal.
- Page 6 4. Place the button at its future mounting location. 5. Check the level of signal received from the button by the ABAX 2 controller. If the signal level is lower than 40%, select another mounting location. Sometimes, it is sufficient to shift the device ten or twenty centimeters.
- Page 7 SATEL APB-200 6. Remove the button cover (Fig. 2). 7. Remove the battery. 8. Remove the electronics board (Fig. 4). 9. Drill the holes for screws in the enclosure base (Fig. 5). We recommend to mount the enclosure base to the surface with 3 screws. Remember to take into account the mounting hole in the tamper protection element as indicated by the sign in Fig.
- Page 8 APB-200 SATEL 10. Use screws to mount the enclosure base to the surface. If necessary, select appropriate wall plugs (anchors) based on the type of the mounting surface (different for concrete or brick wall, different for plaster wall, etc.). 11. Fasten the electronics board.
Need help?
Do you have a question about the ABAX 2 and is the answer not in the manual?
Questions and answers