Iqinvision IQeye 7 Series Technical Training Manual
Hide thumbs
Also See for IQeye 7 Series:
- Quick install manual (9 pages) ,
- Quick install manual (12 pages)
Advertisement
Quick Links
Advertisement

Subscribe to Our Youtube Channel
Related Manuals for Iqinvision IQeye 7 Series

Summary of Contents for Iqinvision IQeye 7 Series
- Page 1 IQEYE TECHNICAL TRAINING IQinvision IQeye 7xx Series Megapixel Cameras...
- Page 2 IQEYE TECHNICAL TRAINING Agenda 1. Overview (Hardware) 2. IQtools CD-ROM 3. Live Page 4. Focusing 5. Settings Page 5.1 Image Tab 5.2 Windows Tab 5.3 Networking Tab 5.4 Security Tab 5.5 I/O Tab 5.6 Multiview Tab 5.7 IQrecorder Tab 5.8 Playback Tab 5.9 Triggers Tab 6.
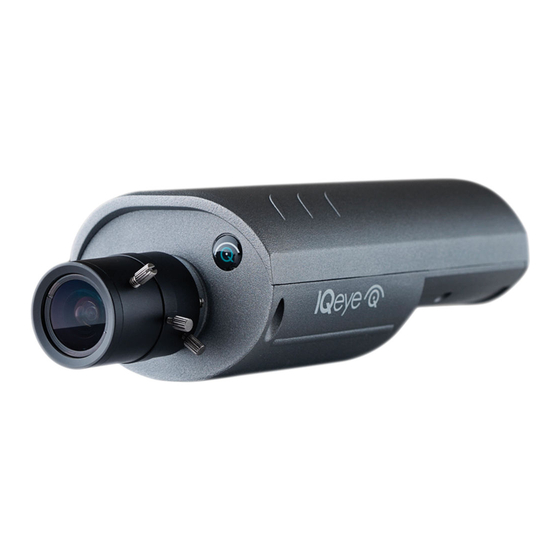
- Page 3 IQEYE TECHNICAL TRAINING Overview / Setup of the IQeye Cameras IQeye 700 / 750 Connections 1. RJ-45 Ethernet connector - 802.3af PoE 2. Direct Power 12-24VDC or 24VAC 3. Factory Reset button - Recessed 4. BNC - Analog (NTSC / PAL) Video Output 5.
- Page 4 IQEYE TECHNICAL TRAINING IQtools CD-ROM The IQtools CD-ROM includes the resources needed to check if the PC being used is ready to view images from an IQeye camera, and the software utilities needed to configure camera IP addresses. Includes: 1. Utility to check if the PC is ready to view images from an IQeye camera.
- Page 5 IQEYE TECHNICAL TRAINING IQtools CD-ROM The Edit window allows: 1. The Name, IP address, Subnet, and Gateway of the camera to be changed manually. 2. It also allows the camera to be configured to DHCP Click the "Apply" button after making the desired changes.
- Page 6 IQEYE TECHNICAL TRAINING Live Page Open Internet Explorer and type in the camera's IP address: For example http://192.168.1.100 Adjust Lens The Live page provides the following functions: 1. Open Iris to the open position 2. Set Field-of-View 1. Digital Pan Tilt Zoom within the image 3.
- Page 7 IQEYE TECHNICAL TRAINING Settings Page - Image Tab Select the "Settings" folder Factory default username = root Factory default password = system Quality: Default = High Available options = Medium - High - Fine - Super Fine Higher quality results in higher quality images, larger file sizes, and slower transmission times.
- Page 8 IQEYE TECHNICAL TRAINING Settings Page - Image Tab Gain Style: Default = Clip Average The autogain algorithm of your camera will set brightness to best display the exposure window (which can be set on the IQeye7xx series with the Exposure Window Page.
- Page 9 IQEYE TECHNICAL TRAINING Settings Page - Image Tab Electronic Shutter: Sets the type of shutter response Default = Auto optimize speed: Use this setting for fast moving subjects. This setting may cause images to appear grainy in low light conditions. optimize quality: Use this setting for high quality images.
- Page 10 IQEYE TECHNICAL TRAINING Settings Page - Image Tab LIGHTGRABBER: Default = 4X Available options = 4X - 2X - 1X - Disabled Enables or disables special processing for low light images. The 4X setting specifies integration of four frames, twice the low light correction as the 2X setting which specifies integration of two frames Max frame rate: Enter a maximum frame rate in frames per second.
- Page 11 IQEYE TECHNICAL TRAINING Settings Page - Image Tab Sharpness: Increasing the sharpness value will enhance the edges and small features in your camera's images. If your image's edges appear too smooth or blurred, increase sharpness. If your image seems rippled or noisy, decrease sharpness. Increasing sharpness works against increasing compression by increasing file sizes Saturation: Saturation describes the difference of a color from the gray of the same lightness.
- Page 12 IQEYE TECHNICAL TRAINING Settings Page - Image Tab Overlays are information which is added on top of an image. Timestamp: Enable or disable a timestamp overlay that will appear on your image. Overlay text: Enter a text message, of no more than 31 characters, that will appear as an overlay on your image.
- Page 13 IQEYE TECHNICAL TRAINING Settings Page - Window Tab Exposure: Use the Exposure Settings Page to set the part of the image used for automatic exposure (gain) calculations. You can select a rectangular region of interest for which brightness and color balance will be best.
- Page 14 IQEYE TECHNICAL TRAINING Settings Page - Window Tab Cropping: Use the Crop Page to personalize the size of your camera's image. Cropping involves discarding all but a selected a region of interest in your camera's image, creating a smaller image, possibly increasing your frame rate. Press the apply button to set your camera to use the crop settings currently shown on the page.
- Page 15 IQEYE TECHNICAL TRAINING Settings Page - Window Tab Privacy: Use the Privacy Settings Page to cover parts of your camera's image with privacy masks. You can configure up to 8 rectangular privacy windows in the image to be masked from view. Initially the pulldown menu includes all currently-configured privacy windows plus, at the end of the pulldown, an entry for one un-configured privacy window.
- Page 16 IQEYE TECHNICAL TRAINING Settings Page - Window Tab Motion detection: Use the Motion Settings Page to configure motion detection on the camera. The motion detection settings allow you to configure up to 8 rectangular windows of the image to be used for motion detection. The motion detection algorithm running on your camera will trigger when "significant"...
- Page 17 IQEYE TECHNICAL TRAINING Settings Page - Network Tab Name: Specify the name of the camera IP address: Specify the IP address of the camera. This will not take effect until the camera is rebooted. Subnet mask: Specify the subnet mask, or netmask, that the camera should use.
- Page 18 IQEYE TECHNICAL TRAINING Settings Page - Network Tab Bandwidth limit: This sets the maximum network bandwidth limit in kilobits per second. "Unlimited" means that image streams are delivered at full speed. You may wish to change this so that an image stream doesn't take up all the bandwidth in your network.
- Page 19 IQEYE TECHNICAL TRAINING Settings Page - Security Tab You may choose two passwords: the general password for username "login" and the management password for username "root". When general password protection is enabled, users must enter the general password to view camera images. To change camera settings, users must enter the management password.
- Page 20 The camera will reboot after a successful update. License file: Select a local license file to unlock functionality on this camera. Contact IQinVision to obtain this file. The camera must be rebooted for changes to take effect.
- Page 21 IQEYE TECHNICAL TRAINING Settings Page - I/O Tab Use these settings to configure the behavior of the relay output of your camera. You may test your relay output configuration by pressing the 'relay' button at the bottom of this page. Button text The text on the "activate"...
- Page 22 IQEYE TECHNICAL TRAINING Settings Page - Multiview Tab Multiview enables you to setup your camera to deliver a web page showing streaming images from up to 9 cameras, simultaneously. For each of the nine display areas of that page, you must specify the following three values for the camera whose images will show in that display area.
- Page 23 IQEYE TECHNICAL TRAINING Settings Page - IQrecorder Tab IQrecorder enables you to setup your camera to record images on a PC card or an external FTP server, and to view the recorded images as an image stream. Images stored can be "normal" (regularly stored at a fixed record rate), or "event" (stored when triggered by motion and/or an external input).
- Page 24 IQEYE TECHNICAL TRAINING Settings Page - IQrecorder Tab Record rate Specify the number of seconds between recorded images. Examples 1.0 = record every second 10.0 = record every 10 seconds 0.5 = record twice a second Use 'max' for the maximum rate at which the camera can record images on the FTP server.
- Page 25 IQEYE TECHNICAL TRAINING Settings Page - IQrecorder Tab Max storage: The maximum storage used by this camera on the FTP server. Note that storage is measured in billions of bytes, not in true gigabytes (1,073,741,824 bytes). Enter the value "unlimited" if you do not want the camera to manage its FTP server disk space for you.
- Page 26 IQEYE TECHNICAL TRAINING Settings Page - Playback Tab Camera: Drop down to select camera for viewing Date / Time: Allows user to search on date and time Histogram: Displays area of the recorded video with motion / alarm recording Playback controls: Play reverse, Single Frame Reverse, Pause, Single Frame Forward, Play Forward, Event Forward &...
- Page 27 IQEYE TECHNICAL TRAINING Settings Page - Triggers Tab Your camera can capture image sequences in response to trigger events. Possible trigger events include the lapse of periodic intervals, signals from external relay devices (certain models), and motion within the image. Captured images can be transferred by FTP and/or e-mail.
- Page 28 IQEYE TECHNICAL TRAINING Settings Page - Triggers Tab Hostname: the name or IP address of the FTP server to which your camera will transfer trigger images. Enter a hostname of no more than 31 characters. Username: the username that your camera will use to log into the FTP server. Password: the password that your camera will use to log into the FTP server.
- Page 29 IQEYE TECHNICAL TRAINING...
Need help?
Do you have a question about the IQeye 7 Series and is the answer not in the manual?
Questions and answers