
Subscribe to Our Youtube Channel
Related Manuals for ShopBot D2418


Summary of Contents for ShopBot D2418
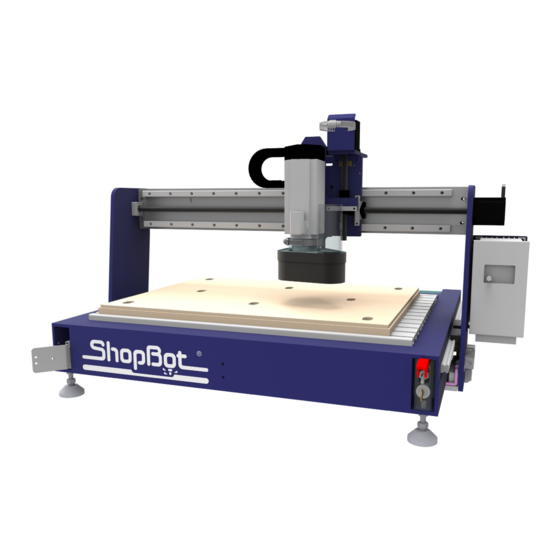
- Page 1 888-680-4466 • ShopBotTools.com Desktop Quick-Start Guide *Tool shown with optional spindle and speed controller. © Copyright 2016 ShopBot Tools, Inc. page 1...
- Page 2 Desktop Quick-Start Guide • September 13, 2016 © Copyright 2016 ShopBot Tools, Inc. page 2...
-
Page 3: Table Of Contents
Desktop Quick-Start Guide • September 13, 2016 Table of Contents In the Crate ..............................7 Main Parts of the ShopBot Desktop D2418 ....................9 Introduction ............................10 Uncrating ...............................10 Assemble Parts .............................11 Install Dust Enclosure (Optional) ......................12 Load Software ............................14 Computer Configuration ........................14 Connect Power ............................15... - Page 4 Desktop Quick-Start Guide • September 13, 2016 © Copyright 2016 ShopBot Tools, Inc. page 4...
- Page 5 DO NOT place hands on the rails of the ShopBot. Be aware that the machine may move unexpectedly in any direction, which can cause serious injury if hands are in the path of movement.
- Page 6 Desktop Quick-Start Guide • September 13, 2016 © Copyright 2016 ShopBot Tools, Inc. page 6...
-
Page 7: In The Crate
Desktop Quick-Start Guide • September 13, 2016 In the Crate Desktop D2418 Shown with optional spindle and speed controller. Thumb drive with software Quick-Start Guide Command Reference Guide © Copyright 2016 ShopBot Tools, Inc. page 7... - Page 8 Desktop Quick-Start Guide • September 13, 2016 Dust Enclosure (Optional) 1/4” and 1/2” Spindle or Router Collet Sets Collet Wrenches Bit Kit (Optional) Z Zero Assembly Power Cord Hold Down Bolts © Copyright 2016 ShopBot Tools, Inc. page 8...
-
Page 9: Main Parts Of The Shopbot Desktop D2418
Desktop Quick-Start Guide • September 13, 2016 Main Parts of the ShopBot Desktop D2418 Back View © Copyright 2016 ShopBot Tools, Inc. page 9... -
Page 10: Introduction
This quick start guide covers the basics of computer number controlled (CNC) digital routing using the ShopBot Desktop tool. It also provides essential information about machine set up and operation - information used almost every time the machine is run. Additional training and web resources that go beyond the basics are located in the back of this guide. -
Page 11: Assemble Parts
Plug in the Z zeroing assembly cable into its receptacle at the front left of the machine. Store the Z zero plate in the space be- low the plug. © Copyright 2016 ShopBot Tools, Inc. page 11... -
Page 12: Install Dust Enclosure (Optional)
“Load the software” section. Parts Required: Tools Required: • Allen Wrench • Flat Washers • 1/4” button head bolts • Double nuts (pre-installed) Attach side enclosure panels to the pre-installed double nuts. © Copyright 2016 ShopBot Tools, Inc. page 12... - Page 13 Wrap the rear panel up and clip it in place. Slide the front support under the side panels so the end tabs clip into the notches in the side panels. The lip should face up. © Copyright 2016 ShopBot Tools, Inc. page 13...
-
Page 14: Load Software
Also recommended: The equivalent of a dual core (or higher) Pentium processor and a minimum of 4GB RAM (8GB preferred). The ShopBot Desktop requires one USB port for connection to the tool. Additional USB ports may be required for a mouse, keyboard, and other USB peripherals. An open USB port to transfer part files to the computer from a thumb drive is also helpful. -
Page 15: Connect Power
Desktop Quick-Start Guide • September 13, 2016 Plug in the ShopBot thumb drive that came with the tool. Install ShopBot 3 and VCarve software. Refer to Uninstalling and Reinstalling ShopBot and VCarve Software document which was part of the binder received with the tool, or can be downloaded from shopbotdocs.com. - Page 16 Connect the USB cable to the computer. Windows will recog- nize a “New Device.” NOTE: It is best to use the same USB port every time the Shop- Bot is connected to the computer. © Copyright 2016 ShopBot Tools, Inc. page 16...
-
Page 17: Launch Software
Desktop Quick-Start Guide • September 13, 2016 Turn ON the machine. Launch Software Click on the ShopBot 3 icon. Note: The first time the program is opened, there will not be a settings file for the machine. Click “OK” and a prompt appears to load a settings file for the machine. -
Page 18: Move The Desktop Tool
Move the spindle/router to a safe Z position below the Z proximity switch and near the middle of the deck. Click on the “X” in the upper right corner to close the yellow KeyPad. © Copyright 2016 ShopBot Tools, Inc. page 18... - Page 19 Only allow the shank of the bit to extend above the top of the collet a maximum of 3/8”. Keep the top edge of the flutes outside of the collet. © Copyright 2016 ShopBot Tools, Inc. page 19...
- Page 20 NOTE: Over-tightening will make the collet difficult to remove and possibly damage it. Under-tightening will allow the bit to slip during operation. A firm one-hand squeeze (approximately 59 ft-lbs) is usually sufficient. © Copyright 2016 ShopBot Tools, Inc. page 20...
-
Page 21: Zero The X- And Y-Axes
Desktop Quick-Start Guide • September 13, 2016 Stand clear of the tool when it is in motion. A ShopBot is a very safe power tool as long as safety procedures are followed. Zero the X- and Y-Axes Click the middle white button marked with the X, Y to zero the X- and Y-axes to the left lower (front) corner of the ma- chine. -
Page 22: Zero The Z-Axis
Note: Z zeroing can be performed to the top of the spoil board or on the top of the project material, depending on how it is set in the design file. © Copyright 2016 ShopBot Tools, Inc. page 22... - Page 23 The router bit will retract to a position of 1/2” above the deck. The Z-axis is now zeroed to the top of the MDF deck. Put away the clip and Z zero plate. Press “OK” to exit the program. © Copyright 2016 ShopBot Tools, Inc. page 23...
-
Page 24: Move To Home Position
Place the front enclosure panel back into place if applicable. Move to Home Position Click the white button marked 0,0. The spindle/router will move to the home position in the left lower (front) corner of the machine. © Copyright 2016 ShopBot Tools, Inc. page 24... -
Page 25: Warm Up (Spindle Models Only)
After the spindle has run for 10 minutes, adjust the VFD to F200. The spindle will increase in speed as the dial is adjusted. F200 equals 12,000 RPM and is a common operating speed for carving and cutting wood. © Copyright 2016 ShopBot Tools, Inc. page 25... -
Page 26: Desktop Spindle Rpm Settings
To translate frequency to RPM, multiply the listed fre- quency by the Hertz setting. Frequency to RPMs for 60Hz (US, Canada, and Mexico. May apply to other countries): Display Spindle RPM 18,000 16,000 14,000 12,000 10,000 8,000 6,000 © Copyright 2016 ShopBot Tools, Inc. page 26... -
Page 27: Preparing To Cut
Prior to performing a cut, refer to the following documents, which are located in the binder that was shipped with the tool, or can be accessed via www.shopbotdocs.com: Feeds & Speeds Material Hold Down © Copyright 2016 ShopBot Tools, Inc. page 27... -
Page 28: Trim Deck And Rout Jig Holes
Click open the ShopBot 3 shortcut icon. Click “Cut Part”. Access to www.shopbottools.com > ShopBot Docs > Desktop > Files > Desktop Work Area Cut File to download a zipped folder containing the rabbet .sbp file. The file name appears in the display window in the ShopBotE- ASY controller. - Page 29 The router returns to this position after completing a cut- ting program. • Home position aligns with the center of the bit. • Most X and Y measurements for designing and routing are based off this location. © Copyright 2016 ShopBot Tools, Inc. page 29...
-
Page 30: Switch To Shopbot Full
Desktop Quick-Start Guide • September 13, 2016 Switch to ShopBot FULL Switch to ShopBot FULL in order to use additional func- tions. To do this, click on the ShopBot EASY help (?) button. Click on the “Switch to FULL” button. Click “OK” on the popup window. - Page 31 Repeat this program any time the deck gets worn from use. When the MDF deck gets thin and close to the bolts holding the deck to the machine, simply glue on a new piece of MDF. © Copyright 2016 ShopBot Tools, Inc. page 31...
-
Page 32: Maintenance
Apply a light coat of machine oil with an oil damped rag (not soaked or dripping). NOTE: Damage or wear due to misuse or an accident will require additional attention depending on the problem. © Copyright 2016 ShopBot Tools, Inc. page 32... -
Page 33: Resources
ShopBot Tutorials & Videos www.shopbottools.com/mSupport/tutorials.htm ShopBot Training Classes www.shopbottools.com/mSupport/training.htm Information on a variety of different CAD/CAM software packages for design www.shopbottools.com/mProducts/software.htm Tooling, materials, and more www.shopbottools.com/mSupport/resourcelist.htm ShopBot Forum http://www.talkshopbot.com/forum/forum.php? Technical support http://www.shopbottools.com/support.htm Documentation http://www.shopbottools.com/ShopBotDocs/ © Copyright 2016 ShopBot Tools, Inc. page 33...
Need help?
Do you have a question about the D2418 and is the answer not in the manual?
Questions and answers