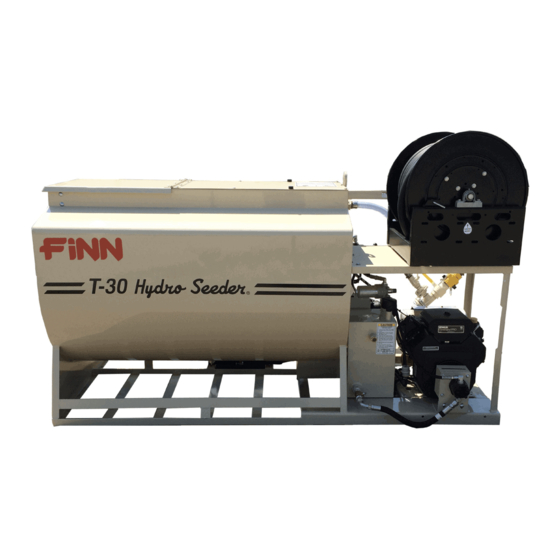
Finn HydroSeeder T30 Operator Instructions And Parts Manual
Hide thumbs
Also See for HydroSeeder T30:
- Operator instructions and parts manual (73 pages) ,
- Parts and operator's manual (61 pages) ,
- Practical service manual for the parts professional (51 pages)
Table of Contents
Advertisement
Quick Links
Operator Instructions and Parts Manual
T30 MN0629
9281 LeSaint Drive • Fairfield, Ohio 45014
Phone (513) 874-2818 • Fax (513) 874-2914
Sales: 1-800-543-7166
T30 HydroSeeder
Model MN
Serial No. _____________
Activate
Activate
Your Warranty
Your Warranty
By Registering
By Registering
TODAY!!!
TODAY!!!
®
Advertisement
Table of Contents

Subscribe to Our Youtube Channel
Related Manuals for Finn HydroSeeder T30


Summary of Contents for Finn HydroSeeder T30
- Page 1 Activate Activate Your Warranty Your Warranty By Registering By Registering TODAY!!! TODAY!!! 9281 LeSaint Drive • Fairfield, Ohio 45014 Phone (513) 874-2818 • Fax (513) 874-2914 Sales: 1-800-543-7166 T30 HydroSeeder ® Operator Instructions and Parts Manual Model MN Serial No. _____________ T30 MN0629...
- Page 2 FOR OFFICE USE ONLY DATE UPDATE DESCRIPTION CODE 03/18/16 Initial release. MN0318 06/29/16 Part numbers update. MN0629...
- Page 3 IF FINN CORPORATION DOES NOT HAVE YOUR COMPLETED REGISTRATION FORM ON FILE, YOUR WARRANTY CLAIM WILL BE DENIED. Once your FINN equipment has been registered, your FINN Limited Warranty will be activated per the warranty statement on the next page.
-
Page 5: Table Of Contents
Hydraulic System ........... 24 Continued to next page. ® HydroSeeder is a registered trademark of the FINN Corporation... - Page 6 INDEX CONTINUED Pump Maintenance ..........24 - 26 ®...
-
Page 7: Safety First
SAFETY FIRST With any piece of equipment, new or used, the most important part of its operation is SAFETY! FINN Corporation encourages you and your employees to familiarize yourselves with your new equipment and stresses safe operation. The first five pages of this manual are a summary of the main safety aspects associated with this unit. -
Page 8: Hydroseeder ® Safety Summary Section
Practice all other usual and customary safe working precautions. Above all, remember that safety is up to you. ® The FINN HydroSeeder is designed to mix and apply water, seed, fertilizer, agricultural lime, and hydraulic mulch to the prepared seedbed. The resultant slurry from mixing one or more of the above materials may react, causing harmful or deadly gasses within the tank. - Page 9 6. Operator(s) of equipment should 3. Recirculation valve must be open and material never ride on the machine at flowing back into the tank when using the remote speeds of greater than 5 mph valve. A closed or plugged recirculation line will (8 km/h).
- Page 10 Turn off engine, disconnect 8. It is recommended that only authorized, genuine battery cables, and perform FINN replacement parts be used on the machine. lockout/tagout procedures 9. Do not use ether cold start fluid, if engine is (29 CFR 1910.147).
- Page 11 COMMON SAFETY DECALS Hazard / Electrical Hearing Attention Shock Hazard Hazard Arc Flash Hazard or Electrocution Fire Hazard Explosion Hazard Hazard Body Electrostatic Fumes / Dust Entanglement Discharge Hazard Hazard Hazard Electrostatic Pinch Point / Burn Hazard Sensitive Area Entanglement Hazard Hazard Carbon...
- Page 12 COMMON SAFETY DECALS Vision Heavy Object Skin Puncture Protection Hazard Hazard Required Hearing Hot Surface Splash / Spray Protection Hazard Hazard Required Vision, Hearing Loose Clothing Stumble and Head Entanglement Hazard Protection Hazard Required Breathing, Pinch Point / Vision, Hearing Moving Belt Trip Hazard and Head...
- Page 13 COMMON SAFETY DECALS Do Not Ride Do Not Do Not on Moving Remove Obstruct Vehicle Guards or Block Do Not Spray Do Not Touch Power Lines ADDITIONAL SAFETY DECALS...
-
Page 14: Definition Of Hydroseeding
OPERATION AND MAINTENANCE. ® MANUAL FOR FINN T30 HYDROSEEDER This manual gives you step-by-step instructions for the operation and maintenance of the FINN ® T30 HydroSeeder . For best results and to ensure longer life of the equipment, please follow the instructions carefully. -
Page 15: Mounting The Hydroseeder
® MOUNTING THE HYDROSEEDER ® When mounting the HydroSeeder to a truck or trailer, follow the acceptable mounting method below. ® Bolt the HydroSeeder directly to the truck or trailer bed. Installer must ensure that the bed, as ® well as the bed-to-truck and HydroSeeder -to-bed connections are adequate for the maximum weights that are shown in the CARRIER VEHICLE REQUIREMENTS section. -
Page 16: Pre-Start Check
PRESSURE DISK 2. Remove cap and fill cap with sodium- (water soluble) base GREASE grease (FINN part number 000698). DO NOT use lithium- base (chassis lube) grease. 3. Replace cap. 4. Turn thumb nut counterclockwise until thumb nut is at the top of the stem. -
Page 17: Valve Operation
EQUIPMENT CHECK (CONTINUED) When thumb nut has moved down to within 1/2 in. (1.25 cm) of touching the cap, re-service the automatic pressure lubricator. 10. Check and clean the nozzles and hoses of any obstructions or foreign materials. 11. Check pump discharge, recirculation, and remote valve handles for free movement. VALVE OPERATION Never engage (turn on) slurry pump clutch when recirculation valve and either the pump discharge or remote valve is closed. -
Page 18: Starting Procedure
The following tables show loading versus coverage rates for the FINN T30. Table A shows rates for one-step applications. The coverage area is determined by the fiber mulch capacity of ®... - Page 19 TABLE A USING SEED, FERTILIZER, AND MULCH Unit Amount of Material in Tank in pounds (kilograms) Coverage Area Seed Fertilizer Mulch sq. ft. (sq. m) 28 (13) 32 (15) 120 (54) 3,485 (324) Table is based on 1,500 lbs. (680 kgs) of mulch, 400 lbs. (181 kgs) of fertilizer, and 345 lbs. (156 kgs) of seed at 8 lbs.
-
Page 20: Tank Capacity Chart
TANK CAPACITY CHART Inches (centimeters) Inches (centimeters) Gallons (Liters) from Top from Bottom (1136) 6.25 (15.9) 32.75 (83.2) (1041) 8.75 (22.2) 30.25 (76.8) (946) 11.0 (27.9) 28.0 (71.1) (852) 13.5 (34.3) 25.5 (64.8) (757) 16.0 (40.6) 23.0 (58.4) (662) 18.25 (46.4) 20.75 (52.7) (568) 20.5 (52.1) - Page 21 LOADING PROCEDURE (CONTINUED) 3. Piping System Cleanout Procedure (Purging Line) [Continued]: E. Increase engine speed to approximately 1/2 to 3/4. F. When discharge stream is clear, open recirculation valve and close discharge valve. After recirculation stream is clear, disengage (turn off) pump clutch. G.
-
Page 22: Loading And Mixing Bfm, Fgm, Smm And Other Viscous Slurries
LOADING AND MIXING BFM, FGM, SMM AND OTHER HIGHLY VISCOUS SLURRIES 1. With clutch disengaged (turned off) and the agitator control in the NEUTRAL position, start engine and allow it to warm up. See STARTING PROCEDURE. 2. Start filling unit with water from one of the water sources as listed below. When water reaches the top of agitator shaft, move agitator control to full REVERSE position. -
Page 23: Prior To Application
LOADING AND MIXING BFM, FGM, SMM AND OTHER HIGHLY VISCOUS SLURRIES (CONTINUED) 6. Start loading dry material, loading the lightest materials first. Agitator control should be in full REVERSE for mixing. (CONTINUED) Fertilizer – Cut open the fertilizer bag and dump contents into slurry tank. All other additives - Consult with manufacturer for proper loading technique. -
Page 24: Discharge Nozzle Selection
DISCHARGE NOZZLE SELECTION ® Nozzles are stored in the tool box. This HydroSeeder is equipped with three nozzles – one long distance and two fan nozzles. The following chart tabulates the approximate distance, width, and discharge time of the nozzles when used with the platform option. When using the base unit, these factors will vary according to the type and length of hose being used. -
Page 25: Procedure When Using Hoses
APPLICATION OF SLURRY (CONTINUED) 5. While moving along area to be seeded, operator should move nozzle back and forth in a slow, even arc. 6. If application is to be interrupted for a short period of time, leave the valves open and disengage (turn off) the pump clutch. -
Page 26: Cleaning And Maintenance
CLEANING AND MAINTENANCE DAILY ® 1. Cleaning the HydroSeeder A. Fill slurry tank to center of agitator shaft with clear water. B. Move agitator lever to full speed (forward or reverse) to flush off inside of tank top and walls. C. -
Page 27: Seasonal And Winter Storage Maintenance
CLEANING AND MAINTENANCE (CONTINUED) SEASONAL AND WINTER STORAGE MAINTENANCE 1. Drain slurry tank of all water prior to storage, and leave the drain plugs uninstalled. 2. Park unit in suitable location and chock wheels to prevent inadvertent movement. 3. If possible, cover machine with tarp or park inside of an enclosure. ®... -
Page 28: Lubrication And Fluids Chart
Weekly (40 Hours) Motor Oil (See Engine Seasonally (500 Hours) Manual Recommendations) Hydraulic Oil, Finn Vulhydra or ISO Grade 46 See Engine Manual Gasoline FLUID CAPACITIES Fuel - 6.6 gallons (25 L) -
Page 29: Pump Assembly
Suction Cover Washer 8 Locking Bolt Radial Lip Seal Lockwasher Casing Bearing Clutch Bearing Bolt Clutch Spacer Bearing Washer Pump Frame Frame Bearing Casing Drain Plug NOTE: See parts manual for FINN part number. 11LN 12LW Figure 5 – Pump Assembly Components... -
Page 30: Hydraulic System
The hydraulic oil filter must be replaced on schedule with a 5 absolute micron filter (FINN part number 023914). The hydraulic system relief is factory-set at 2,250 psi (15,513 kPa). - Page 31 PUMP MAINTENANCE (CONTINUED) B. IMPELLER CLEARANCE – TO BRING THE PUMP BACK TO PROPER TOLERANCE, PROCEED AS FOLLOWS: Pipe 1. Loosen four bolts (1B) and push pump Here Wrench suction cover (1) into pump casing (5) until pump suction cover hits the pump impeller (3).
-
Page 32: Troubleshooting Your Hydroseeder
PUMP MAINTENANCE (CONTINUED) 3. Install the seal spring on the hub of the impeller. After coating the threads on the pump shaft with an antiseize compound, install the impeller, seating it securely. 4. Utilizing the O-ring (2), reinstall pump suction cover using eight bolts (5B). At this time, check to see that the pump runs freely. - Page 33 ® TROUBLESHOOTING YOUR HYDROSEEDER (CONTINUED) B. If the recirculation system is not working: 1. Disengage (turn off) the pump clutch and shut down the engine. 2. Remove clamps attaching recirculation valve. 3. Slide rubber seals back and remove valve assembly. 4.
-
Page 34: Leaks
® TROUBLESHOOTING YOUR HYDROSEEDER Problem Probable Causes Suggested Solutions LEAKS: Tank Bearing Lack of lubrication – seal worn Replace seal and follow lube schedule. Bolts not tightened Tighten uniformly to 25 lb–ft (34 N•m). Pressure Pipe Clamps Rubber seal cracked, pinched, torn Replace, always grease seal or missing. -
Page 35: Valve
® TROUBLESHOOTING YOUR HYDROSEEDER Problem Probable Causes Suggested Solutions VALVE: Valve stuck Frozen Thaw out ice and lubricate; leave in open position during storage. Constant plugging during operation Foreign material in slurry Drain and clean out tank; check storage for foreign materials. - Page 36 THIS PAGE LEFT BLANK INTENTIONALLY...
- Page 37 T30 HydroSeeder ® Parts Manual Model MN WHEN ORDERING PARTS, BE SURE TO STATE SERIAL NUMBER OF MACHINE T30 MN0629...
- Page 38 WHEN ORDERING PARTS, BE SURE TO STATE SERIAL NUMBER OF MACHINE T30 MN0629...
- Page 39 COMMOM LOOSE PARTS Ref. No. Part Number Description No. Req’d 085145 Hydraulic Reservoir 085262 Kohler 19 HP Gasoline Engine (See Engine section) 004593 Drain Plug 085265 Pump Isolator 035143 Fuel Tank 035144 Fuel Cap 035123V Fuel Tank Shut-Off Valve 035123G Fuel Tank Shut-Off Valve Grommet F30-0009 Fuel Tank Strap...
- Page 40 WHEN ORDERING PARTS, BE SURE TO STATE SERIAL NUMBER OF MACHINE T30 MN0629...
-
Page 41: Suction, Discharge And Recirculation
SUCTION, DISCHARGE AND RECIRCULATION PIPING Ref. No. Part Number Description No. Req’d 085160 Clump Assembly 080366 Pipe Clamp 002439 Clamp Gasket 1 per 002868 90° Grooved Elbow 085210 Suction Pipe Weldment 008469 Discharge Flange Gasket 085178-01 Discharge Flange Pipe 005083-07 Recirculation Nozzle 005156 Pipe Clamp... - Page 42 WHEN ORDERING PARTS, BE SURE TO STATE SERIAL NUMBER OF MACHINE T30 MN0629...
-
Page 43: Clump Assembly
CLUMP ASSEMBLY Ref. No. Part Number Description No. Req’d 085160 Complete Gasoline Clump Assembly 080489 Suction Cover 0X0720 Suction Cover Bolt 000Y07 Suction Cover Nut 080499 O-Ring 085159 Impeller 080485 Mechanical Seal 080487 Pump Casing 0X0720 Suction Cover Bolt 000W07 Suction Cover Washer 080493 Radial Lip Seal... - Page 44 WHEN ORDERING PARTS, BE SURE TO STATE SERIAL NUMBER OF MACHINE T30 MN0629...
-
Page 45: Hydraulic System
HYDRAULIC SYSTEM Ref. No. Ref. Part Number Description No. Req’d 012044 Pressure Gauge 012874 Straight Male Adapter 022301 Street Tee 023186 Straight Male Adapter 023616 Straight Male Adapter 023911 Straight Female Adapter 055230 Male 90°... -
Page 46: Hydraulic Pump Drive Assembly
HYDRAULIC PUMP DRIVE ASSEMBLY Ref. No. Part Number Description No. Req’d 0X0616 3/8-16 x 1 in. Lg. Hex Head Bolt 080642 Hydraulic Pump F30-0001 Hydraulic Pump Coupling Guard 080807 Coupling Half 5/8 in. Bore 080809 Coupling Insert 080808 Coupling Half 1 in. Bore 190123-24 1/4 in. -
Page 47: Hydraulic Agitator Drive Assembly
HYDRAULIC AGITATOR DRIVE ASSEMBLY Ref. No. Part Number Description No. Req’d 0X0824 1/2-13 x 1-1/2 in. Lg. Hex Head Cap Screw 080482 Hydraulic Motor F60-0022-02 Agitator Coupling Guard 00Y08L 1/2-13 Locknut 085128-01 Torque Arrestor Plate 080523 2-Piece Rigid Coupling Assembly 022657 Worm Gear Clamp 085150... - Page 48 BEARING ASSEMBLY 1-1/2 in. (3.81 cm) Agitator Shaft NOTE: To tighten, turn nut not bolt. Through Back Side Torque to 25 ft. lbs. (275 kg/m). DO NOT OVER TORQUE! 1 Front (1F) 1 Rear (1R) Outside of Tank Wall NOTE: 085161-01 Rear Bearing Assembly 085161-02 Front Bearing Assembly (both include items #1 - 9) AGITATOR SHAFT ASSEMBLY...
-
Page 49: Agitator And Bearing Assembly
AGITATOR AND BEARING ASSEMBLY Ref. No. Ref. Part Number Description No. Req’d 085162-02 Front Clamping Ring 1 per 085162-01 Rear Clamping Ring 1 per 007416 Shaft Seal 1 per 006975 Rubber Flangette Seal 1 per 007212 Flangette w/Groove 1 per... - Page 50 GASOLINE ENGINE SPECIFIC PARTS Ref. No. Part Number Description No. Req’d 085262 Kohler Gasoline Engine KL4708303 Air Filter 080105 Fuel Filter KL1205001 Oil Filter KL2406817 Muffler 031421 Muffler Clamp 031420 Muffler Elbow NOT SHOWN 085142 Throttle Cable 080567 Choke Cable WHEN ORDERING PARTS, BE SURE TO STATE SERIAL NUMBER OF MACHINE T30 MN0629...
- Page 51 HOSE REEL PARTS Ref. No. Part Number Description No. Req’d 085246 Electric Hose Reel Assembly 080261 Female Nyglass Coupler 003308-10 1-1/4 in. Hose x 100 ft. F30-0005 Hose Reel Mount Tray 085252 Lead-In Hose 080378 Male Nyglass Coupler 020886 Push Button (see Live Hose Reel Wiring) NOT SHOWN 080800 Hose Roller and Spool Guide...
- Page 52 WHEN ORDERING PARTS, BE SURE TO STATE SERIAL NUMBER OF MACHINE T30 MN0629...
-
Page 53: Hose Reel Assembly
HOSE REEL ASSEMBLY Ref. No. Ref. Part Number Description No. Req’d 080801-02 Inlet Pipe 080801-14 Seal and Ring Assembly 080801-07 Snap Ring 080801-03 Bearing Housing Sub-Assembly 080801-10 Sprocket 080801-12 Chain Assembly 080801-08 O-Ring ... -
Page 54: Control Panel Wiring
(White) IGNITION (Red) SWITCH CLUTCH SWITCH CLUTCH (White) ENGINE PLUG CONTROL PANEL WIRING Ref. No. Part Number Description No. Req’d 085267 Control Panel Assembly 080654 Ignition Switch 080654-K Ignition Key 010531 Clutch Toggle Switch 080526 Clutch Toggle Switch Dust Boot 035084 Electric Clutch 085164... -
Page 55: Live Hose Reel Wiring
MOTOR SOLENOID (Red) CIRCUIT BREAKER (Red) (Red) (Black) (Blue) (Blue) CLUTCH REEL SWITCH BUTTON LIVE HOSE REEL WIRING Ref. No. Part Number Description No. Req’d 085267 Control Panel Assembly 008188 Electric Motor 008450 Hose Reel Relay 011653 Circuit Breaker 020886 Hose Reel Push Button 010531 Clutch Toggle Switch... -
Page 56: Tool Kit
Narrow Fan Nozzle 080260 Nyglass Adapter 160750 Reducer Bushing 004593 Drain Plug 006515 Coupler Gasket 012681A Finn Beige Aerosol Paint 080535 Remote Valve Assembly 012083 Full Port Ball Valve 080260 Male Nyglass Adapter 080261 Female Nyglass Coupler 160307 Close Nipple... -
Page 57: Seal Repair Kits
SEAL REPAIR KITS Part Number Description 023120 Seal Kit for Hydraulic Valve #080743 080615 Seal Kit for Hydraulic Motor #080482 080616 Seal Kit for Hydraulic Pump #080642 WHEN ORDERING PARTS, BE SURE TO STATE SERIAL NUMBER OF MACHINE T30 MN0629... - Page 58 14, 28 14, 18, 30, 31 1, 3, 5, 7, 10 22, 24 2, 4, 6, 7, 9, 12, 15 35, 37, 38 WHEN ORDERING PARTS, BE SURE TO STATE SERIAL NUMBER OF MACHINE T30 MN0629...
- Page 59 DECALS Ref. No. Ref. Part Number Description No. Req’d --------- Body Entanglement Hazard --------- Cutting Fingers / Reach Hazard --------- Eye Hazard --------- Eye-Hearing Hazard --------- Fall Off Edge Hazard --------- Gears / Pinch Point Hazard ...
-
Page 60: Decals
DECALS Ref. No. Ref. Part Number Description No. Req’d --------- Gasoline Fuel Decal 031569 Finn Name Plate 012260 Maintain Decals Plate 085158 "T30 Hydroseeder" Decal 031235 "Finn" Decal KITS 41400-01 T30 English Decal Kit The T30 Decal Kit is also available in the following languages.
Need help?
Do you have a question about the HydroSeeder T30 and is the answer not in the manual?
Questions and answers