
Subscribe to Our Youtube Channel
Related Manuals for Kampmann KSH


Summary of Contents for Kampmann KSH
- Page 1 ► Assembly, installation and operating instructions Keep these instructions in a safe place for future use! Issue01/21EN SAP No.1363595...
-
Page 3: Table Of Contents
6.1 Requirements governing the installation site..................12 6.2 Installation.............................. 12 6.2.1 Installation situation (unit installed)......................12 6.2.2 Installing KSH in a dry wall........................13 6.2.3 Fitting position of the diffuser front ......................14 6.2.4 Adjusting the eccentric rollers ........................14 6.2.5... -
Page 4: General
Luftdurchlässe Assembly, installation and operating instructions General About these instructions These instructions ensure the safe and efficient handling of this equipment. These instructions form an integral part of the equipment and have to be kept in the direct vicinity of the equipment and available to personnel at all times. All personnel must have carefully read through these instructions prior to commencing all work on the equipment. -
Page 5: Safety
Luftdurchlässe Assembly, installation and operating instructions Safety This section provides an overview of all important safety aspects to ensure optimum protection of personnel as well as safe and trouble-free operation. In addition to the safety instructions in these operating instructions, the valid safety, accident pre- vention and environmental protection regulations must be observed for the area of use of the unit. -
Page 6: Personnel Requirements - Qualifications
Luftdurchlässe Assembly, installation and operating instructions Personnel requirements - Qualifications Specialist knowledge The installation of this product requires specialist knowledge of heating, cooling, ventilation, installation and electrical engin- eering. This knowledge, generally learned in vocational training in one of the fields mentioned above, is not described separ- ately. -
Page 7: Transport, Storage And Packaging
IMPORTANT NOTE! Warranty claims can only be made within the applicable period for complaints. (More information is avail- able in the T&Cs on the Kampmann website) IMPORTANT NOTE! 2 people are needed to transport the unit. Wear personal protective clothing when transporting the unit. -
Page 8: Storage
Luftdurchlässe Assembly, installation and operating instructions Storage Store packaging under the following conditions: Do not store outdoors. Store in a dry and dust-free place. Store in a frost-free place. Do not expose to aggressive media. Protect from direct sunlight. Avoid mechanical vibrations and shocks. IMPORTANT NOTE! Under certain circumstances, packages can carry storage instructions that exceed the requirements listed here. -
Page 9: Technical Data
Nominal length Supply air volume V Exhaust air volume Sound power level Pressure loss on strips [mm] [m³/h] V [m³/h] Lw (total of supply supply air side Δp air and exhaust air) [Pa] [dB(A)] 1000 1000 Tab. 1: Technical data, KSH... -
Page 10: Construction And Function
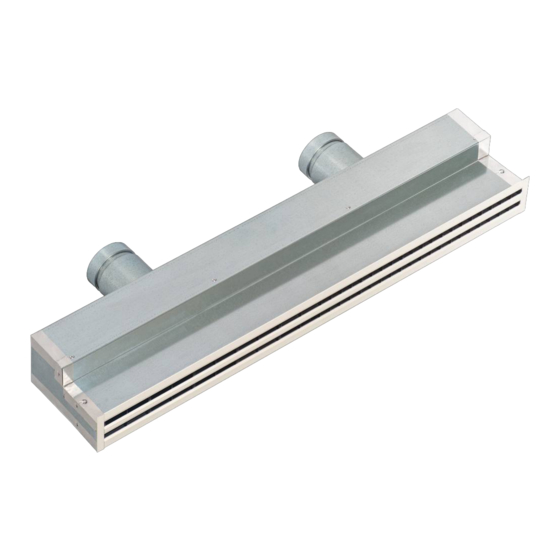
Brief description The KSH is a combined diffuser for use in and behind drywalls. The opening combines a supply and exhaust air opening in a system. The visible outlet front runs continuously, so that the opening has the appearance of a continuous slot. The KSH can... -
Page 11: Dimensions/Nominal Lengths
Luftdurchlässe Assembly, installation and operating instructions Dimensions/Nominal lengths Front view Side view General view Top view Fig. 2: Views of KSH (All figures in mm) Number of slots = 2 Nominal length Nominal length 600 Nominal length 800 Nominal length Nominal length... -
Page 12: Installation And Wiring
Risk of injury from sharp metal housing! The inner metal of the casing can have sharp edges. Wear suitable protective gloves. 6.2.1 Installation situation (unit installed) Fig. 3: KSH installation situation Spigot (Supply air/exhaust air) Dry wall, double panelled (A = 100 mm) -
Page 13: Installing Ksh In A Dry Wall
Position the bracket (on site) left and right with the large drill hole on the dry wall. Mark points for drill holes on the KSH. Fig. 4: Positioning the brackets Use a steel drill (Ø4 mm) to drill the marked holes. -
Page 14: Fitting Position Of The Diffuser Front
Alternative installation situation (KSH Standard installation situation rotated) Fig. 8: Fitting positions of KSH 6.2.4 Adjusting the eccentric rollers The air stream can be manually adjusted using the eccentric rollers as shown on the diagram below using a slot-head screw- driver. -
Page 15: Adjusting The Optional Volumetric Flow Limiter
Luftdurchlässe Assembly, installation and operating instructions 6.2.5 Adjusting the optional volumetric flow limiter The optional volumetric flow limiter can be manually adjusted by turning as shown below using the scale. Fig. 10: Setting values... -
Page 16: Pre-Commissioning Checks
Luftdurchlässe Assembly, installation and operating instructions Pre-commissioning checks Check before initial commissioning whether all necessary conditions have been met so that the unit can function safely and properly. Structural tests Check that the unit is securely standing and fixed. Check the horizontal installation/suspension of the unit. Check whether all components are properly fitted. -
Page 17: Maintenance
Unscrew the screws on the left and right on the front of the diffuser until they can be removed. Fig. 11: Loosen screws on the left and right. Remove the diffuser front from the KSH. Fig. 12: Removing the diffuser front Bend bracket down to remove the sound insulation backing Fig. 13: KSH bracket... -
Page 18: Cleaning The Volumetric Flow Limiter
Luftdurchlässe Assembly, installation and operating instructions Remove the acoustic insulation backing (2 pieces) and remove any dirt if re- quired. Fig. 14: Removing acoustic insulation backing Carefully use a damp cloth to clean the diffusers. Fig. 15: Cleaning the diffusers Cleaning the volumetric flow limiter Clean dust and dirt away from the volumetric flow limiter if need be. -
Page 19: Table
Luftdurchlässe Assembly, installation and operating instructions Table Tab. 1 Technical data, KSH ..............................9 Tab. 2 Dimensions of available nominal lengths (number of slots 2) ................11 Tab. 3 Dimensions of available nominal lengths (number of slots 3) ................11... - Page 20 Country Contact Kampmann UK Ltd. Dial House, Govett Avenue Shepperton, Middlesex, TW17 8AG T +44 1932/ 228592 Great Britain F +44 1932/ 228949 E info@kampmann.co.uk W Kampmann.co.uk...
Need help?
Do you have a question about the KSH and is the answer not in the manual?
Questions and answers