Table of Contents
Advertisement
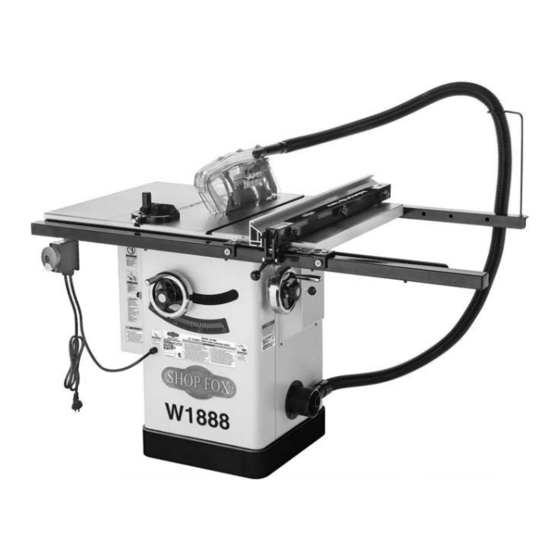
Model W1888
***IMPORTANT UPDATE***
Applies to Models Mfd. Since 10/20
and Owner's Manual Revised 10/20
Phone #: (360) 734-3482 • Tech Support: techsupport@woodstockint.com • Web: www.woodstockint.com
We made the following changes to this machine since the manual was printed:
•
Added push stick hangar.
Revised inventory on Page 17 and added steps to assembly on Page 28.
•
Aside from the information contained in this update, all other content in the owner's manual is
applicable and MUST be read and understood for your own safety.
IMPORTANT: Keep this update with the owner's manual for future reference. If you have any further
questions, contact our Technical Support.
Revised Inventory
Box Contents (see Figure 1)
Z. Flat Washers 5mm .........................................2
AA. Hex Nuts
⁄
"-20 ...........................................2
1
4
AB. Push Stick Hangar .........................................1
Added Assembly Steps (Follows Step 33,
Page 28)
34. Locate hole in cabinet near bottom left corner of
cabinet access door, then open door (see Figure 35).
35. Thread (1)
⁄
"-20 hex nut with (2) 5mm flat washers
1
4
onto push stick hangar, secure with (1)
nut (see Figure 35), then close door.
COPYRIGHT © NOVEMBER, 2020 BY WOODSTOCK INTERNATIONAL, INC.
WARNING: NO PORTION OF THIS MANUAL MAY BE REPRODUCED IN ANY SHAPE OR FORM WITHOUT
#21524BL
READ THIS FIRST
⁄
"-20 hex
1
4
THE WRITTEN APPROVAL OF WOODSTOCK INTERNATIONAL, INC.
Qty
Z
Figure 1. Additional component inventory.
Figure 35. Push stick hangar installed.
AB
AA
Push Stick
Hangar
Cabinet
Access Door
Printed in Taiwan
Advertisement
Table of Contents

Related Manuals for Woodstock Shop Fox W1888


Summary of Contents for Woodstock Shop Fox W1888
- Page 1 Cabinet Access Door Figure 35. Push stick hangar installed. COPYRIGHT © NOVEMBER, 2020 BY WOODSTOCK INTERNATIONAL, INC. WARNING: NO PORTION OF THIS MANUAL MAY BE REPRODUCED IN ANY SHAPE OR FORM WITHOUT THE WRITTEN APPROVAL OF WOODSTOCK INTERNATIONAL, INC. #21524BL...
- Page 2 MODEL W1888 10" HYBRID TABLE SAW W/RIVING KNIFE OWNER'S MANUAL (FOR MODELS MANUFACTURED SINCE 10/20) 601745 Phone: (360) 734-3482 • Online Technical Support: techsupport@woodstockint.com COPYRIGHT © APRIL, 2020 BY WOODSTOCK INTERNATIONAL, INC., REVISED OCTOBER, 2020 (MN) WARNING: NO PORTION OF THIS MANUAL MAY BE REPRODUCED IN ANY SHAPE OR FORM WITHOUT THE WRITTEN APPROVAL OF WOODSTOCK INTERNATIONAL, INC. V2.10.20 #20868AI Printed in Taiwan...
- Page 3 This manual provides critical safety instructions on the proper setup, operation, maintenance, and service of this machine/tool. Save this document, refer to it often, and use it to instruct other operators. Failure to read, understand and follow the instructions in this manual may result in fire or serious personal injury—including amputation, electrocution, or death.
-
Page 4: Table Of Contents
Contents INTRODUCTION........2 SHOP-MADE.SAFETY.ACCESSORIES..... 55 Woodstock Technical Support ....2 Featherboards ........55 Machine Specifications ......3 Push Sticks ........58 Identification ........6 Push Blocks ........59 Narrow-Rip Auxiliary Fence & Push Block .. 60 Controls & Components ......7 Outfeed &... -
Page 5: Introduction
Woodstock International, Inc. is committed to customer satisfaction. Our intent with this manual is to include the basic information for safety, setup, operation, maintenance, and service of this product. -
Page 6: Machine Specifications
Model W1888 (For Machines Mfd. Since 10/20) MODEL W1888 10" HYBRID TABLE SAW WITH RIVING KNIFE Product Dimensions Weight......................403 lbs. Width (side‐to‐side) x Depth (front‐to‐back) x Height........66 x 40 x 48 in. Footprint (Length x Width)..............19‐1/2 x 20‐1/2 in. Shipping Dimensions Carton #1 Type................ - Page 7 Model W1888 (For Machines Mfd. Since 10/20) Main Specifications Main Information Table Saw Type..................Hybrid Maximum Blade Diameter................10 in. Arbor Size....................5/8 in. Arbor Speed..................4000 RPM Maximum Width of Dado................13/16 in. Blade Tilt Direction..................Left Max Blade Tilt..................45 deg. Maximum Depth of Cut At 90 Degrees............
- Page 8 Model W1888 (For Machines Mfd. Since 10/20) Other Related Information Number of Dust Ports..................2 Dust Port Size..................1‐1/2, 4 in. Compatible Mobile Base................D4666 Other Country of Origin ..................... Taiwan Warranty ....................... 2 Years Approximate Assembly & Setup Time ..............1 Hour Serial Number Location ................
-
Page 9: Identification
Model W1888 (For Machines Mfd. Since 10/20) Identification Become familiar with the names and locations of the controls and features shown below to better understand the instructions in this manual. Blade ⁄ " Miter Left Guard Dust Port Gauge Extension Right Wing Extension... -
Page 10: Controls & Components
Model W1888 (For Machines Mfd. Since 10/20) Controls.&.Components Refer to Figures.1–3.and the following descriptions to become familiar with the basic controls and components of this machine. Understanding these items and how they work will help you understand the rest of the manual and safely operate this machine. -
Page 11: Safety
Model W1888 (For Machines Mfd. Since 10/20) SAFETY SAFETY For.Your.Own.Safety, Read.Manual.Before.Operating.Machine The. purpose. of. safety. symbols. is. to. attract. your. attention. to. possible. hazardous. conditions.. This. manual.uses.a.series.of.symbols.and.signal.words.intended.to.convey.the.level.of.importance.of.the. safety.messages..The.progression.of.symbols.is.described.below..Remember.that.safety.messages.by. themselves. do. not. eliminate. danger. and. are. not. a. substitute. for. proper. accident. prevention. mea- sures—this.responsibility.is.ultimately.up.to.the.operator! Indicates.an.imminently.hazardous.situation.which,.if.not.avoided,. - Page 12 INTENDED.USAGE..Only use machine for its keep machine in good working condition. A intended purpose—never make modifications machine that is improperly maintained could without prior approval from Woodstock malfunction, leading to serious personal injury International. Modifying machine or using or death.
-
Page 13: Additional Safety For Table Saws
Model W1888 (For Machines Mfd. Since 10/20) Additional.Safety.for.Table.Saws Serious. cuts,. amputation,. or. death. can. occur. from. contact. with. rotating. saw. blade. during. opera- tion..Workpieces,.broken.blades,.or.flying.particles.thrown.by.blade.can.blind.or.strike.operators.or. bystanders. with. deadly. force.. To. reduce. the. risk. of. these. hazards,. operator. and. bystanders. MUST. completely.heed.the.hazards.and.warnings.below. HAND.&.BODY.POSITIONING..Keep hands away FENCE..To reduce risk of kickback, make sure from saw blade and out of blade path during... -
Page 14: Preventing Kickback
Model W1888 (For Machines Mfd. Since 10/20) Preventing.Kickback • Never move the workpiece backwards or try to back it out of a cut while the blade is moving. If you cannot complete a cut for Below are ways to avoid the most common some reason, stop the saw motor and allow causes of kickback: the blade to completely stop before backing... -
Page 15: Glossary Of Terms
Model W1888 (For Machines Mfd. Since 10/20) Glossary.of.Terms The following is a list of common definitions, terms and phrases used throughout this manual as they relate to this table saw and woodworking in general. Become familiar with these terms for assembling, adjusting or operating this machine. -
Page 16: Electrical
Model W1888 (For Machines Mfd. Since 10/20) ELECTRICAL Circuit.Requirements This machine must be connected to the correct size and type of power supply circuit, or fire or electrical damage may occur. Read through this section to determine if an The machine must be properly set up adequate power supply circuit is available. -
Page 17: Grounding Requirements
Model W1888 (For Machines Mfd. Since 10/20) Grounding.Requirements This machine MUST be grounded. In the event of certain types of malfunctions or breakdowns, grounding provides a path of least resistance for electric current to travel—in The machine must be properly set up order to reduce the risk of electric shock. -
Page 18: Converting Voltage To 230V
Model W1888 (For Machines Mfd. Since 10/20) Converting.Voltage.to. 230V The voltage conversion MUST be performed by an electrician or qualified service personnel. The voltage conversion procedure consists of rewiring the motor and installing the correct plug. A wiring diagram is provided on Page 83 for your reference. -
Page 19: Setup
Model W1888 (For Machines Mfd. Since 10/20) SETUP Unpacking This machine has been carefully packaged for safe This machine presents transportation. If you notice the machine has been serious injury hazards damaged during shipping, please contact your authorized to untrained users. Read Shop Fox dealer immediately. -
Page 20: Inventory
Model W1888 (For Machines Mfd. Since 10/20) Inventory The following is a list of items shipped with your machine. Before beginning setup, lay these items out and inventory them. Note: If you cannot find an item on this list, carefully check around/inside the machine and packaging materials. - Page 21 Model W1888 (For Machines Mfd. Since 10/20) Box.Contents.Cont'd.(Figure.12). Z. Front Rail Tube 63" ........1 AA. Front Rail Tape Scale ........1 AB. Front Rail 55"..........1 AC. Rear Rail 57" ..........1 AD. Fence Assembly ..........1 Fasteners.(Not.Shown). AE. Cap Screws M10-1.5 x 30 (Wing/Table) ..........6 AF.
-
Page 22: Hardware Recognition Chart
Model W1888 (For Machines Mfd. Since 10/20) Hardware.Recognition.Chart USE THIS CHART TO IDENTIFY HARDWARE DURING THE INVENTORY/ASSEMBLY ⁄ " ⁄ " ⁄ " PROCESS. ⁄ " ⁄ " ⁄ " ⁄ " ⁄ " ⁄ " ⁄ " ⁄ " 10mm 12mm ⁄... -
Page 23: Cleaning Machine
Model W1888 (For Machines Mfd. Since 10/20) Cleaning.Machine To prevent corrosion during shipment and storage of your machine, the factory has coated the bare metal surfaces of your machine with a heavy-duty rust prevention compound. Gasoline.and.petroleum. products.have.low.flash. If you are unprepared or impatient, this compound can points.and.can.explode. -
Page 24: Machine Placement
Model W1888 (For Machines Mfd. Since 10/20) Machine.Placement Weight.Load Physical.Environment Refer to the Machine.Specifications for the The physical environment where your machine is weight of your machine. Make sure that the operated is important for safe operation and the surface upon which the machine is placed will longevity of its components. -
Page 25: Assembly
Model W1888 (For Machines Mfd. Since 10/20) Assembly Before beginning the assembly process, refer to Items. Needed.for.Setup and gather everything you need. Ensure all parts have been properly cleaned of any heavy-duty rust-preventative applied at the factory (if applicable). Be sure to complete all steps in the assembly procedure prior to performing the Test.Run.or connecting the machine to power. - Page 26 Model W1888 (For Machines Mfd. Since 10/20) 5. Remove switch from inside saw cabinet, and install motor door by inserting door pins into hinge sockets on cabinet (see Figure 17). Hinge Socket Figure.17. Motor door installed. 6. Inspect extension wings and main table (see Figure. 18) mating surfaces for burrs or foreign materials that may inhibit assembly.
- Page 27 Model W1888 (For Machines Mfd. Since 10/20) 9. Attach front rail to table with (2) M10-1.5 x 25 hex bolts, (2) 10mm flat washers, and (2) 10mm lock washers, as shown in Figure.21. Finger tighten fasteners for now. Front Rail Figure.21.
- Page 28 Model W1888 (For Machines Mfd. Since 10/20) 14. Attach rear rail to main table using (2) M10-1.5 x 25 hex bolts, 10mm lock washers, and 10mm flat Rear Rail washers, as shown in Figure.24. Check to make sure rear rail is parallel to table and below miter slots before completely tightening hex bolts.
- Page 29 Model W1888 (For Machines Mfd. Since 10/20) 18. Install saw blade as outlined in Blade.Installation on Page.36. Foot 19. Place fence on rails on right–hand side of blade. Note: Make sure cam foot contacts cam on fence lock handle before you place fence on rail; otherwise, fence will not lock onto rail tube (see Figure 27).
- Page 30 Model W1888 (For Machines Mfd. Since 10/20) 25. Install fence, move it over to just touch blade, and verify that indicator line is directly over "0" mark. — If you need to correct position of indicator line, loosen Phillips head screws on pointer window, adjust pointer window so line is over "0"...
- Page 31 Model W1888 (For Machines Mfd. Since 10/20) 30.. Place 3 ⁄ " hose clamps over each end of 3" dust hose, then attach 3" dust hose to dust chute and dust port inside cabinet (see Figure 32). ⁄ " Hose Clamp Figure.32.
-
Page 32: Dust Collection
Model W1888 (For Machines Mfd. Since 10/20) Dust.Collection Recommended.CFM.at.Dust.Port:....500.CFM+ Do not confuse this CFM recommendation with the rating of the dust collector. To determine the CFM at the dust port, you must consider these variables: (1) CFM rating of the dust collector, (2) hose type and length between the dust collector and the machine, (3) number of branches or wyes, and (4) amount of other open lines throughout... -
Page 33: Test Run
Model W1888 (For Machines Mfd. Since 10/20) Test.Run Once assembly is complete, test run the machine to ensure it is properly connected to power and safety components are functioning properly. Serious. injury. or. death. can. result. from. using. this. machine. BEFORE. If you find an unusual problem during the test run, understanding. -
Page 34: Operations
Model W1888 (For Machines Mfd. Since 10/20) OPERATIONS General This machine will perform many types of operations that are beyond the scope of this manual. Many of these operations can be dangerous or deadly if performed incorrectly. The instructions in this section are written with the understanding that the operator has the necessary knowledge and skills to operate this machine. -
Page 35: Workpiece Inspection
Model W1888 (For Machines Mfd. Since 10/20) Workpiece.Inspection •. Large/Loose Knots:.Loose knots can Some workpieces are not safe to cut or may become dislodged during the cutting require modification before they can be made operation. Large knots can cause kickback safe to cut. -
Page 36: Non-Through & Through Cuts
Model W1888 (For Machines Mfd. Since 10/20) Non-Through. &.Through.Cuts Non-Through.Cuts A non-through cut is a sawing operation where the blade Fence does not protrude above the top face of the wood stock, Saw Blade as shown in Figure.37. Workpiece Examples of non-through cuts include dadoes and rabbets. -
Page 37: Blade Size Requirements
Model W1888 (For Machines Mfd. Since 10/20) Blade.Size.Requirements When choosing a main blade, make sure the blade size meets the requirements listed below. The thickness of the blade body and teeth can be measured with calipers or any precision measuring device. Blade Size Requirements: •... - Page 38 Model W1888 (For Machines Mfd. Since 10/20) Laminate.Blade.Features.(Figure.42): • Best for cutting plywood or veneer • 40-80 teeth • Triple chip tooth profile • Very shallow gullet Triple Chip Thin.Kerf.Blade: A blade with thinner kerf than a Blade standard blade. Since the spreader/riving knife included with this table saw is sized for standard blades, thin kerf blades cannot be used on this saw unless they meet the Blade.Requirements specified in this manual;...
-
Page 39: Blade Installation
Model W1888 (For Machines Mfd. Since 10/20) Blade.Installation Review this section, even if your saw blade came pre- installed. To.reduce.risk.of.injury,. Items.Needed. always. disconnect. Leather Work Gloves ........1 Pair power. to. saw. before. Arbor Wrench ............1 changing. blades.. Since. blade. is. sharp,. use. To install blade, do these steps: extra. - Page 40 Model W1888 (For Machines Mfd. Since 10/20) 5. Install new blade, flange, and arbor nut on arbor (see Figure.46), with upper teeth facing front of saw. Ensure the tapered edge of the flange faces the (Front of arbor nut and the recess faces away from the arbor Table Saw) Flange nut (see Figure.47).
-
Page 41: Blade Guard Assembly
Model W1888 (For Machines Mfd. Since 10/20) Blade.Guard.Assembly The term "blade guard" refers to the assembly that consists of the clear polycarbonate shield and dust Dust Enclosure enclosure, the spreader, and the anti-kickback pawls on each side of the spreader (see Figure.48). Each of these components have important safety functions during the Anti-Kickback operation of the saw. - Page 42 Model W1888 (For Machines Mfd. Since 10/20) 3. Adjust flat head cap screws (see Figure 50) to make sure table insert is flush with table (use a Flat Head Cap straightedge as a guide). Screw (1 of 4) Note: The blade guard, when properly installed, should be set up similarly to Figure 50.
- Page 43 Model W1888 (For Machines Mfd. Since 10/20) Anti-Kickback.Pawls Arresting Hooks The anti-kickback pawls allow the workpiece to travel in only one direction. If the workpiece moves backwards, such as during a kickback, the pawls will dig into the workpiece to slow or stop it. Pawl To work properly, the pawls must return to their resting position after pivoting (see Figure 53), and they must NOT...
-
Page 44: Riving Knife
Model W1888 (For Machines Mfd. Since 10/20) Riving.Knife The riving knife works in the same manner as the spreader on the blade guard assembly. It is a metal plate Minimum 1mm Height Difference that prevents the newly cut workpiece from pinching the Maximum 5mm backside of the blade and causing kickback. -
Page 45: Ripping
Model W1888 (For Machines Mfd. Since 10/20) Ripping Ripping means cutting with the grain of a natural wood workpiece. In man-made materials such as MDF or plywood, ripping simply means cutting lengthwise. Serious. injury. can. be. caused. by. kickback.. Kickback. is. a. high-speed. To make a rip cut, do these steps: ejection. -
Page 46: Crosscutting
Model W1888 (For Machines Mfd. Since 10/20) Crosscutting "Crosscutting" means cutting across the grain of a natural wood workpiece, usually with a miter saw. In other man- made materials, such as MDF or plywood, crosscutting Turn.saw.OFF.and.allow.blade.to.come. means cutting across the width of the workpiece. to. -
Page 47: Miter Cuts
Model W1888 (For Machines Mfd. Since 10/20) Miter.Cuts A miter cut is an angled crosscut. Miters are usually cut in the same manner as crosscuts, using the miter gauge and a predetermined mark on the workpiece. To.perform.a.miter.cut,.do.these.steps: 1.. Ensure that blade guard/spreader is installed. 2. -
Page 48: Blade Tilt/Bevel Cuts
Model W1888 (For Machines Mfd. Since 10/20) Blade.Tilt/Bevel.Cuts When the blade tilt collar bolts are properly adjusted (as described starting on Page 66), the blade tilt handwheel allows the operator to tilt the blade to the left, between 0° and 45°. This is used most often when cutting bevels, compound miters, or chamfers. - Page 49 Model W1888 (For Machines Mfd. Since 10/20) Cutting.Dadoes.with.a.Dado.Blade Because dado blades are much wider than standard blades, they place a greater amount of force against the Dado. blades. have. a. higher. risk. of. workpiece when cutting. This additional force increases kickback.
- Page 50 Model W1888 (For Machines Mfd. Since 10/20) Cutting.Dadoes.with.a.Standard.Blade A ripping blade (described on Page.34) is typically the best blade to use when cutting dadoes with a standard Blade Cut 1 blade because it removes sawdust very efficiently. Fence Workpiece To.use.standard.saw.blade.to.cut.dadoes,.do.these. steps: 1.
-
Page 51: Rabbet Cutting
Model W1888 (For Machines Mfd. Since 10/20) Rabbet.Cutting Commonly used in furniture joinery, a rabbet cut is an L-shaped groove cut in the edge of the workpiece. Rabbets can be cut with either a dado blade or a standard Dado. blades. have. a. higher. risk. of. saw blade. - Page 52 Model W1888 (For Machines Mfd. Since 10/20) Cutting.Rabbets.with.a.Standard.Blade A ripping blade is typically the best blade to use for cutting rabbets when using a standard blade because it removes sawdust very efficiently. (See Page.34 for blade details.) Also, a sacrificial fence is not required when cutting rabbets with a standard blade.
-
Page 53: Resawing
Model W1888 (For Machines Mfd. Since 10/20) Resawing Resawing is the process of cutting a thick piece of stock into one or more thinner pieces. Resawing. operations. require. proper. IMPORTANT: Although resawing can be done with a table procedures. to. avoid. serious. injury. saw, we strongly recommend that you use a bandsaw and. - Page 54 Model W1888 (For Machines Mfd. Since 10/20) To.build.a.resaw.barrier,.do.these.steps: #8 x 2" ⁄ " 1. Cut your wood pieces to specified size. If you are Wood Screw using hardwood, cut pieces oversize, then joint and plane them to correct size to make sure they are square and flat.
- Page 55 Model W1888 (For Machines Mfd. Since 10/20) To build an auxiliary fence, do these steps: Knob Flat Washer (1 of 3 1. Cut auxiliary fence board to size. If you are using hardwood, cut board oversize, then joint and plane board to correct size to make sure board is square and flat.
- Page 56 Model W1888 (For Machines Mfd. Since 10/20) Resawing.Operations The table saw motor is pushed to its limits when resawing. If the motor starts to bog down, slow down You. may. experience. kickback. during. your feed rate. Motor overloading and blade wear can this.procedure..Stand.to.the.side.of.the.
- Page 57 Model W1888 (For Machines Mfd. Since 10/20) 8. Plug in table saw, turn it ON, and use a push stick or push block to feed workpiece through blade, using a slow and steady feed rate. The. danger. of. kickback. increases. relative.to.the.depth.of.a.cut..Reduce.
-
Page 58: Shop-Made.safety.accessories
Model W1888 (For Machines Mfd. Since 10/20) SHOP-MADE.SAFETY.ACCESSORIES Featherboards Easily made from scrap stock, featherboards provide an We.recommend.using.a.bandsaw. added degree of protection against kickback, especially for.making.fingers.in.the.next.step. when used together with push sticks. They also maintain because.it.tends.to.be.safer..A.table. pressure on the workpiece to keep it against the fence saw.can.be.used,.but.it.will.over-cut. - Page 59 Model W1888 (For Machines Mfd. Since 10/20) 4. Rout a ⁄ "– ⁄ " wide slot 4"–5" long in workpiece and 1"–2" from short end of featherboard (see Figure. "— " Slot 79). 1"—2" 5. Cut a miter bar approximately 5" long that will fit in table miter slot, as shown in Figure.80.
- Page 60 Model W1888 (For Machines Mfd. Since 10/20) Mounting.Featherboard.w/Clamps 1. Lower saw blade, then adjust fence to desired width The. featherboard. should. be. placed. and secure it. firmly. enough. against. the. workpiece. to. keep. it. against. the. fence. but. not. 2. Place workpiece against fence, making sure it is 1" in so.
-
Page 61: Push Sticks
Model W1888 (For Machines Mfd. Since 10/20) Push.Sticks Supporting: A second push stick can be used to keep the workpiece firmly against the fence while cutting. When using a push stick in this When used correctly, push sticks reduce the risk manner, only apply pressure before the blade;... -
Page 62: Push Blocks
Model W1888 (For Machines Mfd. Since 10/20) Push.Blocks The notched end of the push block is then used to push the workpiece the rest of the way through the cut, keeping the operator's hands at When used correctly, a push block reduces a safe distance from the blade. -
Page 63: Narrow-Rip Auxiliary Fence & Push Block
Model W1888 (For Machines Mfd. Since 10/20) Narrow-Rip.Auxiliary. Fence.&.Push.Block There are designs for hundreds of specialty jigs that can be found in books, trade magazines, and on the internet. ⁄ " Hardwood Length of Table These types of jigs can greatly improve the safety and Saw Rip Fence consistency of cuts. - Page 64 Model W1888 (For Machines Mfd. Since 10/20) Using.Auxiliary.Fence.and.Push.Block Auxilliary Fence 1. Place auxiliary fence on table and clamp it to fence at both ends, then adjust distance between auxiliary fence and blade—this determines how wide Blade workpiece will be ripped (see Figure.93). 2.
-
Page 65: Outfeed & Support Tables
Model W1888 (For Machines Mfd. Since 10/20) Outfeed.&.Support.Tables One of the best accessories for improving the safety and Support Outfeed ease of using a table saw is simply placing a large table Table Table (outfeed table) behind the saw to catch the workpiece (see Figure.96). -
Page 66: Accessories
Dealer. If you do not have a dealer in your area, these products are also available through online dealers. Please call or e-mail Woodstock International Inc. Customer Service to get a current listing of dealers at: 1-800-840-8420 or at sales@woodstockint.com. -
Page 67: Maintenance
Model W1888 (For Machines Mfd. Since 10/20) MAINTENANCE General For optimum performance from your machine, follow this maintenance schedule and refer to any specific instructions given in this section. Daily.Check • Inspect blades for damage or wear. • Check for loose mounting bolts/arbor nut. •... -
Page 68: Lubrication
Model W1888 (For Machines Mfd. Since 10/20) Lubrication It is essential to clean components before lubricating them because dust and chips build up on lubricated components and make them hard to move. Simply adding more grease to them will not yield smooth moving components. -
Page 69: Service
If you require additional machine service not included in this section, please contact Woodstock International Technical Support at (360) 734-3482 or send e-mail to: techsupport@woodstockint.com. Blade.Tilt.Stops MAKE. - Page 70 Model W1888 (For Machines Mfd. Since 10/20) 4. Tilt blade away from 0° by about 5°, so there is Trunnion room for 90° stop collar to move. Bracket Set Screws 5. Open motor door, loosen set screws shown in Figure. 103, then thread 90°...
-
Page 71: Miter Slot To Blade Parallelism
Model W1888 (For Machines Mfd. Since 10/20) Miter.Slot.to.Blade. Parallelism Your table saw will give the best results if the miter slot and the rip fence are adjusted parallel to the blade. If either of these are not exactly parallel, your cuts and your finished work will be lower in quality, but more importantly, the risk of kickback will be increased. - Page 72 Model W1888 (For Machines Mfd. Since 10/20) 6. Loosen (4) table mounting bolts securing table top to base (see Figure.108), and lightly tap table in direction needed to square table to blade. Mounting 7.. Repeat Steps.2–6 until blade and miter slot are Bolts parallel, then retighten table mounting bolts.
-
Page 73: Spreader Or Riving Knife Alignment
Model W1888 (For Machines Mfd. Since 10/20) Spreader.or.Riving.Knife. Alignment Checking.Alignment The blade guard spreader/riving knife must be aligned with the blade when installed. If the spreader/riving knife is not aligned with the blade, then the workpiece will be forced sideways during the cut, which will increase the risk of kickback. - Page 74 Model W1888 (For Machines Mfd. Since 10/20) Adjusting.Alignment The spreader/riving knife mounting position can be adjusted into alignment with the blade using the set Screw screws on the spreader/riving knife mounting block. (1 of 2) Set Screw (1 of 4) Tools.Needed.
-
Page 75: Fence Adjustments
Model W1888 (For Machines Mfd. Since 10/20) Fence.Adjustments There are four main adjustments for the fence: height off the table, squareness, parallelism with the miter slot, and clamping pressure. These adjustments are interconnected and some repetition may be needed when adjusting. Tools.Needed. - Page 76 Model W1888 (For Machines Mfd. Since 10/20) Parallelism & Clamping Pressure Set screws on the rear side of the fence flange position the fence parallel to the blade and adjust the clamping pressure to hold the fence securely. Before starting this procedure, make sure the blade is parallel with the miter slot.
- Page 77 Model W1888 (For Machines Mfd. Since 10/20) Optional.Offset.Fence.Adjustment X = Your Measurement Some woodworkers prefer to offset the rear of the fence " from the blade, as shown in Figure 118, to help ⁄ X" + ⁄ " prevent the workpiece from binding and burning. X"...
-
Page 78: Fence Scale Calibration
Model W1888 (For Machines Mfd. Since 10/20) Fence.Scale.Calibration The fence scale indicator window, shown in Figure 119, can be calibrated with the fence scale if you notice that Screws your cuts do not accurately match what is shown on the fence scale. - Page 79 Model W1888 (For Machines Mfd. Since 10/20) Table/Dado.Insert. Adjustment The table/dado insert must sit perfectly flush with the table to provide a smooth, continuous surface for the workpiece to slide over. The insert is held in place by a magnet and sits on top of four adjustment screws (see Figure 120).
-
Page 80: Miter Gauge Adjustments
Model W1888 (For Machines Mfd. Since 10/20) Miter.Gauge.Adjustments The miter gauge can be adjusted so it is perpendicular to the blade and snug in the T-slot. Lock Knob Tools.Needed. 90° Square ............1 45° Square ............1 Hex Wrench 2mm ..........1 Hex Wrench 2.5mm ..........1 Hex Wrench 4mm ..........1 Set Screw Checking/Setting.90°.Stops... -
Page 81: Belt Tension & Replacement
Model W1888 (For Machines Mfd. Since 10/20) Belt.Tension.&. Replacement The drive belt stretches slightly as the saw is used. Most of the belt stretching will happen during the first 16 hours of use, but it may continue through continued use. If you notice that the belt is slipping, it will need to be tensioned. -
Page 82: Troubleshooting
Model W1888 (For Machines Mfd. Since 10/20) Troubleshooting The following troubleshooting tables cover common problems that may occur with this machine. If you need replacement parts or additional troubleshooting help, contact our Technical Support. Note: Before contacting Tech Support, find the machine serial number and manufacture date, and if available, your original purchase receipt. - Page 83 Model W1888 (For Machines Mfd. Since 10/20) Operation PROBLEM POSSIBLE.CAUSE CORRECTIVE.ACTION fence 1. Rip fence mounted/adjusted incorrectly. 1. Remount rip fence. Adjust fence to ensure adjust- does not move ment screws are not too tight (Page.72). smoothly. 2. Rails dirty or sticky. 2.
-
Page 84: Electrical Safety Instructions
Model W1888 (For Machines Mfd. Since 10/20) Electrical.Safety.Instructions These pages are current at the time of printing. However, in the spirit of improvement, we may make changes to the electrical systems of future machines. Compare the manufacture date of your machine to the one stated in this manual, and study this section carefully. -
Page 85: Electrical Components
Model W1888 (For Machines Mfd. Since 10/20) Electrical.Components ON/STOP Switch Start Capacitor Capacitor Circuit Breaker Figure.126. Motor capacitors. Figure.128. Switch box components. Motor Junction Figure.127. Motor junction box. -82-... -
Page 86: Wiring Diagram
Model W1888 (For Machines Mfd. Since 10/20) Wiring.Diagram SWITCH BOX ON/STOP SWITCH Rewired for 230V WARNING! SHOCK HAZARD! Disconnect power before working on wiring. 230 VAC 6-15 PLUG 115 VAC (As Recommended) 5-20 Plug Neutral Read Page 81 STOP Ground Before Wiring Ground... -
Page 87: Parts
Model W1888 (For Machines Mfd. Since 10/20) PARTS Body 10-3 10-1 10-2 10-4 18V2 13V2 37V2 17V2 REF PART # DESCRIPTION REF PART # DESCRIPTION X1888001 EXTENSION WING X1888020 FLAT WASHER 5MM X1888002 CAP SCREW M10-1.5 X 30 X1888021 LOCK WASHER 5MM X1888003 LOCK WASHER 10MM X1888022... -
Page 88: Trunnion
Model W1888 (For Machines Mfd. Since 10/20) Trunnion 129 208 115V2 106-5 106-7 106-3 106-6 106-4 107 108 157V2 106-9 106-10 106-11 106-2 106-8 106-1 115V2 120V2 -85-... - Page 89 Model W1888 (For Machines Mfd. Since 10/20) Trunnion Parts List PART # DESCRIPTION PART # DESCRIPTION X1888101 LOCK NUT M16-2 X1888150 FLAT HD CAP SCR M5-.8 X 50 X1888102 FLAT WASHER 5/8 X1888151 SAW BLADE 10" X 40T X1888103 CAP SCREW M8-1.25 X 20 X1888152 ARBOR FLANGE X1888104...
-
Page 90: Power Switch
Model W1888 (For Machines Mfd. Since 10/20) Power.Switch 223V2 232V2 231V2 221V2 224X 222V2 (for 230V conversion) PART # DESCRIPTION REF PART # DESCRIPTION 221V2 X1888221V2 TAP SCREW M3 X 20 V2.10.20 233 X1888233 STRAIN RELIEF TYPE-3 PG11 222V2 X1888222V2 PADDLE SWITCH UV03-006 V2.10.20 235 X1888235 POWER CORD 14G 3W 72"... -
Page 91: Blade Guard
Model W1888 (For Machines Mfd. Since 10/20) Blade.Guard 312A REF PART # DESCRIPTION REF PART # DESCRIPTION X1888301 FLAT HD CAP SCR M5-.8 X 10 X1888320 SPACER 6 X 10 X 4MM X1888302 GUARD SUPPORT (LEFT) X1888321 BUTTON HD CAP SCR M4-.7 X 5 X1888303 GUARD SUPPORT (RIGHT) X1888322... -
Page 92: Miter Gauge
Model W1888 (For Machines Mfd. Since 10/20) Miter.Gauge REF PART # DESCRIPTION REF PART # DESCRIPTION X1888400 MITER GAUGE ASSEMBLY X1888409 SET SCREW 10-24 X 1/4 X1888401 MITER HANDLE 5/16-18 X 1 X1888410 STOP LINK X1888402 FLAT WASHER 5/16 X1888411 POINTER X1888403 MITER GAUGE BODY... -
Page 93: Fence
Model W1888 (For Machines Mfd. Since 10/20) Fence 512V2 REF PART # DESCRIPTION PART # DESCRIPTION X1888500 FENCE ASSEMBLY X1888511 KNOB 3/8-16, D1-9/16, BALL X1888501 GLIDE PAD 512V2 X1888512V2 LOCK NUT 3/8-16 V2.10.20 X1888502 KNURLED NUT M12-1.75 X1888513 PHLP HD SCR 10-24 X 3/8 X1888503 SET SCREW M12-1.75 X 20 NYLON-TIPPED X1888514... -
Page 94: Rails
Model W1888 (For Machines Mfd. Since 10/20) Rails PART # DESCRIPTION PART # DESCRIPTION X1888602 FENCE GUIDE TUBE X1888611 HEX NUT M10-1.5 X1888603 FENCE RAIL (FRONT) X1888612 FENCE RAIL (REAR) X1888604 FENCE SCALE LABEL X1888613 HEX BOLT M10-1.5 X 25 X1888605 FLAT WASHER 6MM X1888614... -
Page 95: Labels & Cosmetics
Model W1888 (For Machines Mfd. Since 10/20) Labels.&.Cosmetics 601745 PART # DESCRIPTION PART # DESCRIPTION X1888701 DO NOT OPEN DOOR WARNING LABEL X1888709 SHOP FOX BLACK TAPE X1888702 BLADE GUARD LABEL 710V2 X1888710V2 MACHINE ID LABEL V2.10.20 703V2 X1888703V2 FENCE LABEL V2.10.20 X1888711 READ MANUAL LABEL X1888704... -
Page 96: Warranty
Woodstock International, Inc. will repair, replace, or arrange for a dealer refund, at its expense and option, the Shop Fox machine or machine part proven to be defective for its designed and intended...
Need help?
Do you have a question about the Shop Fox W1888 and is the answer not in the manual?
Questions and answers