Table of Contents
Advertisement
Quick Links
Advertisement
Table of Contents

Subscribe to Our Youtube Channel
Related Manuals for Smeg KV26


Summary of Contents for Smeg KV26
- Page 1 ANGLED HOOD Instructions booklet...
-
Page 3: Table Of Contents
Contents PRECAUTIONS INSTALLATION - 4 USE - 6 MAINTENANCE - 7 CONFIGURATION - 8 INSTALLATION INSTRUCTIONS - 9 AIR CONNECTION SYSTEMS - 19 FILTER VERSION - 19 EXTRACTION VERSION - 20 INSTRUCTIONS FOR USE - 22 CONTROL UNIT - 22 CLEANING AND MAINTENANCE - 32 EXTERNAL CLEANING - 32 CLEANING METAL FILTERS - 32... -
Page 4: Installation
• Check the integrity of the hood once it has been removed from the packaging. If the product is damaged, do not use it. Contact the SMEG assistance service. • Before connecting the appliance, make sure that the mains voltage is the same as the voltage indicated on the technical data label inside the appliance. - Page 5 Installation WARNING! Read this manual carefully before installing and/or using the hood. • Comply with the legal requirements regarding the discharge of extracted air when the hood is in operation. • Caution: Failure to install the screws or fixing devices in accordance with these instructions may result in electrical hazards •...
-
Page 6: Use
• Do not cook or fry in a way that creates strong flames that may be drawn by the hood while it is in operation and cause a fire. • Do not flambé foods under the hood: Risk of fire. •... -
Page 7: Maintenance
Maintenance • Disconnect the appliance from the power supply before carrying out cleaning or maintenance. • Maintain the filters carefully and regularly according to the schedule recommended by the manufacturer. • Clean the surfaces of the hood using a damp cloth and a neutral liquid detergent. -
Page 8: Configuration
Configuration This appliance has been designed to be used as an EXTRACTOR hood (extraction of air to the outside) or as a FILTER hood (air is recirculated indoors). EXTRACTION VERSION To configure the hood as the extraction version, connect the motor outlet using a rigid or flexible pipe having an internal diameter of not less than 120 mm, directly to the external steam and odour extraction system. - Page 9 Installation instructions...
- Page 10 Installation instructions...
- Page 11 Installation instructions...
- Page 12 Installation instructions...
- Page 13 Installation instructions...
- Page 14 Installation instructions...
- Page 15 Installation instructions...
- Page 16 Installation instructions...
- Page 17 Installation instructions The hood is supplied with all the accessories required for installation. For the minimum distance between the lower surface of the hood and the type of hob, please refer to the image on page 9. The hood is fitted with a fume non-return valve, make sure that it is free to open and close.
- Page 18 Installation instructions 4) Remove the hood from the wall and drill the 2 holes. 5) Secure the mounting systems to the wall by tightening the expansion plugs. 6) Hang the hood from the holes L1 and level it using the adjustment screws.
- Page 19 Air connection systems FILTER VERSION Leave the motor inlet unobstructed. Odour filters are already fitted to some hoods by the manufacturer. Refer to the following pages to find out which models are fitted with odour filters.
- Page 20 Air connection systems EXTRACTION VERSION The maximum length of the duct covers is 850 mm. Bend the two appendages for fastening the lower duct cover by 90°; see the figure on page 12. Position the 2 brackets for the upper duct cover at the upper limit indicated;...
- Page 21 Electrical connection Electrical connections should be carried out by a qualified installer. In the case of direct electrical connection to the mains, a suitable bipolar switch with a minimum contact separation of 3 mm and that complies with current standards should be installed between the appliance and the power supply.
- Page 22 Instructions for use CONTROL UNIT For an optimal and efficient use of the product, it is recommended that you switch on the hood a few minutes before you start cooking and keep it on for at least 15 minutes after you have finished or until the steam and odours have been completely eliminated.
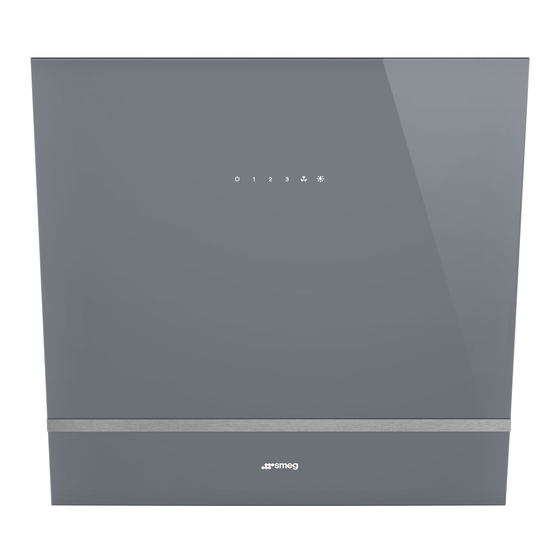
- Page 23 Instructions for use 6-button control panel _______________________________________________________ A) Shutdown timer B) Speed selection C) Turbo function G) Light brightness adjustment Light colour temperature adjustment Touch Technology _______________________________________________________ The unit uses capacitive sensors to detect the touch of the button on the front glass panel. Lighting _______________________________________________________ When power is turned on, the unit will be in the off mode.
- Page 24 Instructions for use Button functions _______________________________________________________ Hood OFF button. (If the fan and the lights are on). Speed 1 button. Lights up when the motor is running at speed 1. Speed 2 button. Lights up when the motor is running at speed 2. Speed 3 button.
- Page 25 Instructions for use Light brightness adjustment _______________________________________________________ Briefly touching the button immediately switches the lights on or off. Touching and holding this button for more than 1 second gradually increases the brightness to the maximum level and then decreases it to the minimum level as long as the button is pressed.
- Page 26 Instructions for use 9-button control panel _______________________________________________________ A) Shutdown timer B) Speed selection C) Turbo function D) 24h air exchange function E) Automatic switch-off F) Filter alarm reset G) Light brightness adjustment Light colour temperature adjustment Hob and hood connection Touch Technology _______________________________________________________ The unit uses capacitive sensors to detect the touch of the button...
- Page 27 Instructions for use Button functions _______________________________________________________ Hood OFF button. (If the fan and the lights are on). Speed 1 button. Lights up when the motor is running at speed 1. Speed 2 button. Lights up when the motor is running at speed 2. Speed 3 button.
- Page 28 Instructions for use Light brightness adjustment _______________________________________________________ Briefly touching the button immediately switches the lights on or off. Touching and holding this button for more than 1 second gradually increases the brightness to the maximum level and then decreases it to the minimum level as long as the button is pressed. Release the button once you have obtained the required brightness.
-
Page 29: Instructions For Use
Instructions for use GHOST function _______________________________________________________ When this product is turned off, only the button remains illuminated (at low brightness). If the button is pressed, the hood will be set to standby and all buttons will light up with a brightness of 5%. - Page 30 Instructions for use Hob and hood connection _______________________________________________________ Automatic operation specifications – Auto-Vent 2.0 Some models are provided with a wireless communication system to allow them to be controlled automatically via an induction hob. Automatic switch-on When the hob is switched on, the hood switches on if it is in STANDBY mode (all buttons illuminated at low brightness).
- Page 31 Instructions for use Hob and hood connection _______________________________________________________ Automatic / manual operation If the hood is operating in automatic mode and the customer changes some hood parameters via the user interface, automatic mode will be disabled and the hood will no longer respond to the Auto-Vent 2.0 command from the hob.
-
Page 32: Cleaning And Maintenance
Cleaning and maintenance Always disconnect the hood from the power supply before carrying out cleaning and/or maintenance. Regular cleaning ensures that the appliance provides good performance and a long service life. Special attention should be paid to the grease filters and carbon filters. Note: The accumulation of grease inside the filter panels as well as affecting the performance of the extractor hood can also be a fire hazard. -
Page 33: Replacing Odour Filters
Cleaning and maintenance REPLACING ODOUR FILTERS (filter version only) This type of filter retains odours until the material becomes saturated. They cannot be washed and cannot be regenerated. It is therefore recommended to replace them at least every six months or more frequently if the hood is used intensively. - Page 34 Rotate the used odour filters by 90° and remove them from their seat Take 2 new filters, insert them on the motor and rotate them by 90° Reinstall the grease filter Close the panel Models KV26 – KV28 – KV394 - KVFAB...
- Page 35 Cleaning and maintenance ODOUR FILTERS ON GREASE FILTERS Open the panel Remove the grease filters Remove the retaining springs Replace the odour filter Reinsert the retaining springs Reinstall the grease filters Close the panel Models KV194 – KV694...
-
Page 36: Replacing The Lamps
Replacing the lamps Always disconnect the hood from the power supply before carrying out cleaning and/or maintenance. The hood is fitted with a LED lighting system. The LED lights guarantee optimal lighting, last up to 10 times longer than traditional lamps and use 90% less power. This appliance is fitted with a Class 1M white LED light according to standard EN 60825-1:1994 + A1:2002 + A2:2001;... - Page 37 Replacing the lamps...
-
Page 38: Treatment Of Weee
Treatment of WEEE In accordance with art. 26 of Italian Legislative Decree no. 49 of 14 March 2014 "Implementation of Directive 2012/19/EU, on waste electrical and electronic equipment (WEEE)" The crossed out bin symbol on the appliance or its packaging indicates that the product, at the end of its working life, must be collected separately from other waste. - Page 39 1701094...
Need help?
Do you have a question about the KV26 and is the answer not in the manual?
Questions and answers