
Subscribe to Our Youtube Channel
Related Manuals for Salvatori FLAMINGO


Summary of Contents for Salvatori FLAMINGO
- Page 1 FLAMINGO APPENDIABITI / COAT STAND Via Aurelia 395/E, 55047, Querceta (LU), Italy salvatori.it info@salvatori.it +39 0584 769 200...
- Page 3 Dimensioni / Dimensions H - 300 cm H - 360 cm H - 118.11 in H - 141.73 in...
- Page 4 Nell’imballaggio / In the box Scatola 1 / Box 1 piccolo medio grande small medium large Scatola 2 / Box 2...
- Page 5 Installazione / Assembly Nota! / Note! Si consiglia di far eseguire l’installazione a personale qualificato. Installation should only be carried out by qualified tradespeople. Nota! / Note! Attenzione, durante la movimentazione del prodotto, onde evitare di danneggiare la pietra e le strutture in metallo, si consiglia di appoggiare sempre i diversi elementi su una superficie protettiva.
- Page 6 1. Misurare la distanza (h) tra pavimento e soffitto, nella posizione in cui si vuole installare Flamingo / Measure the distance (h) between the floor and ceiling in the position where you want to install Flamingo Soffitto Ceiling Pavimento Floor Nota! / Note! Si consiglia di utilizzare un metro laser per la misurazione.
- Page 7 If the distance between the floor and ceiling is less than 299 cm / 117.7 in (for Flamingo 300) or 359 cm / 141.3 in (for Flamingo 360), you will need to cut the extreme end of rod G. The total length (L) of the combined rod should be 5 cm / 1.9 in less than the total ceiling height (h).
- Page 8 4. Rifinire il bordo tagliato da eventuali schegge o imperfezioni / Ensure the cut edge is perfectly smooth Per la rifinitura utilizzare carta abrasiva per ferro. Use an abrasive pad or sandpaper suitable for iron. 5. Preparazione dei fori per il fissaggio / Prepare ceiling and floor drill holes 1.
- Page 9 5. Forare il pavimento con il trapano utilizzando una punta ø6 mm. 6. Inserire i tasselli (L) a pavimento. 5. Drill holes in the floor using a ø6 mm bit. 6. Insert the plugs (L) into the floor.
- Page 10 6. Posizionamento della struttura / Position the structure - Inserire la cover (H) nel manicotto superiore. - Inserire l’asta (G) nel manicotto. - Place the cover (H) of the upper sleeve. - Insert the rod (G) into the sleeve. - Mettere la struttura in posizione centrando i fori dei manicotti con i fori realizzati a soffitto e pavimento.
- Page 11 7. Fissaggio della struttura / Attach the structure Per rendere accessibili i fori del manicotto superiore staccare manualmente la cover, fissare il manicotto con le apposite viti (L), utilizzando avvitatore o cacciavite con punta a croce, riattaccare la cover in modo da nascondere le viti. Move the ceiling sleeve cover so that you can access the sleeve.
- Page 12 8. Regolazione dell’altezza e stabilità della struttura / Adjust height and check stability Svitare il dado e controdado con chiave da 19 mm, fino ad arrivare all’altezza indicata sulla dima (P). Abbassare il manicotto in modo da nascondere le viti. Unscrew the nut with a 19 mm wrench, until you reach the height indicated on the template provided (P).
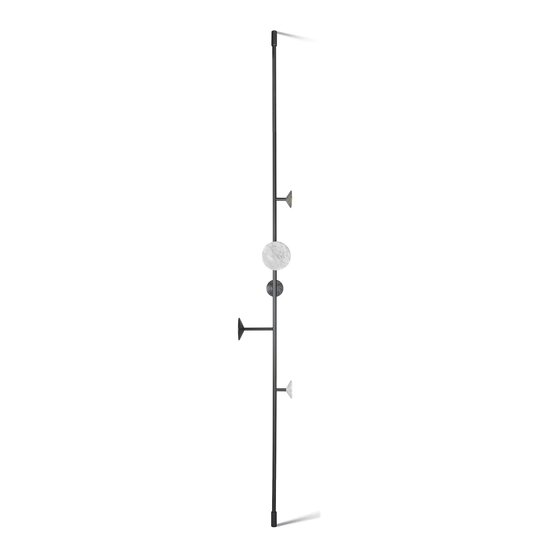
- Page 13 9. Fissaggio dei cinque braccetti (M, N, O) / Attach the arms (M, N, O) Avvitare manualmente i cinque braccetti fino al completo serraggio. Screw the five arms in and tighten them fully.
- Page 14 10. Fissaggio dei cinque elementi in marmo (B, C, D) / Add the marble handles (B, C, D) Avvitare manualmente i cinque marmi fino al completo serraggio. Attach the five marble handles and tighten them fully.
- Page 15 (caffè,profumo, ecc.), per cui è necessario rimuoverlo entro pochi minuti per evitare che la macchia si fissi. Every Flamingo leaves our factory in Tuscany pre-sealed. Since we do not like to paint the surface of our lovely stone with transparent paints or resins, we apply three coats of the highest possible level of protective penetrating sealant.
- Page 16 STONEPLUS: protettivo ravvivante a base solvente consigliato per Pietra d’ A vola. Where particularly assiduous cleaning or maintenance is required, Salvatori recommends the following products for use on the stone basin: PS87 PRO: for the removal of stubborn stains FOB XTREME: neutral solvent-based protectant which does not alter the stone’s natural...
-
Page 17: Dati Tecnici / Technical Data
Dati Tecnici / Technical Data Materiale Pietra naturale: Marmo Bianco Carrara, Grigio Versilia, Gris du Marais®, Pietra d’ A vola Pietra naturale: Marmo Bianco Carrara, Palissandro Bluette, Rosa Perlino, Verde Alpi Materials Natural stone: Bianco Carrara, Grigio Versilia, Gris du Marais®, Pietra d’ A vola Natural stone: Bianco Carrara, Palissandro Bluette, Rosa Perlino, Verde Alpi... - Page 18 Textures / Textures Levigato Honed Per qualsiasi ulteriore domanda o chiarimento, non esitate a inviarci una e-mail all’indirizzo customercare@salvatori.it. Should you have any questions or require advice or further information, please feel free to email our Customer Care team at customercare@salvatori.it.
- Page 20 Via Solferino 11 26 Wigmore St 55047 Querceta (LU) 20121 Milan (MI) London W1U 2RL salvatori_official ITALY ITALY UNITED KINGDOM info@salvatori.it T: +39 0584 769 200 T: +39 02 8050 0372 T: +44 (0)20 748 684 91 info@salvatori.it milano@salvatori.it info@salvatoriuk.com...
Need help?
Do you have a question about the FLAMINGO and is the answer not in the manual?
Questions and answers