
Subscribe to Our Youtube Channel
Related Manuals for Krüger & Matz KM1808


Summary of Contents for Krüger & Matz KM1808
- Page 1 MIcRO SySTEM WITh DVD, hDMI, USB, BT, NFc, DAB+, FM kM1808 BEDIENUNGSANLEITUNG OWNER’S MANUAL MODE D’EMPLOI GEBRUIkSAANWIjzING INSTRUKCJA OBSŁUGI MANUAL DE UTILIzARE...
-
Page 3: Bevor Sie Beginnen
Bedienungsanleitung Bevor Sie beginnen Vielen Dank für den kauf dieses Systems. Bitte lesen Sie die Bedienungsanleitung bevor Sie das Gerät benutzen. Bewahren Sie die Bedienungsanleitung auf für späteres nachschlagen. Für Ihre Sicherheit Die Lüftungsöffnungen des Geräts dürfen Vor dem Betrieb dieses Systems über- nicht mit Gegenständen wie zeitungen, prüfen Sie die Spannung dieses System um Tischtücher, Vorhänge usw. - Page 4 Bedienungsanleitung SIchERhEITSANLEITUNGEN 1. Reinigen Sie dieses Gerät nur mit einem weichen leicht feuchten Tuch. 2. Benutzen Sie nur original zubehör. 3. Trennen Sie das Gerät von der Stromversorgung, während Gewitter, oder wenn es für eine lange zeit nicht verwendet wird. 4.
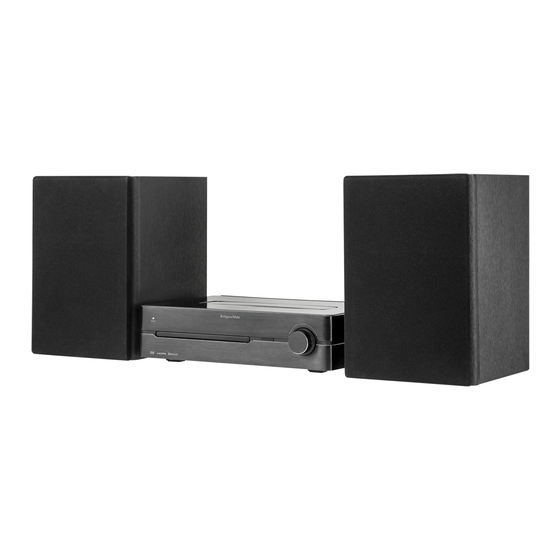
- Page 5 Bedienungsanleitung PRODUKTBESCHREIBUNG...
- Page 6 Bedienungsanleitung 1. Taste Bereitschaft 12. koaxial Eingang 2. Betriebsanzeige 13. Display 3. Diskfach 14. Lautstärkeregler 4. Taste Nächste / Vorherige 15. Optischer Eingang 5. Fernbedienungs-Sensor 16. Audio Ausgang (L&R) 6. Taste Öffnen / Schließen 17. Video Ausgang 7. Taste Wiedergabe / Pause 18.
-
Page 7: Einlegen Der Batterien
Bedienungsanleitung EINLEGEN DER BATTERIEN 1. Öffnen Sie das Batteriefach. 2. Legen Sie 2 AAA Batterien mit der korrekten Polarität (+/-) ein wie angezeigt 3. Schließen Sie das Batteriefach Behandlung der Fernbedienung • Entnehmen Sie die Batterie, wenn die Fernbedienung für einen längeren zeitraum nicht verwendet wird. - Page 8 Bedienungsanleitung ANSCHLIESSEN Achtung: Stellen Sie alle Anschlüsse her, bevor Sie das Gerät mit der Netzsteckdose verbinden. Anschließen der DAB/FM Antenne Die mitgelieferte UkW / DAB-Antenne an den ANT-Buchse auf der Rückseite des Geräts anschließen, durch drehen des Antennen-Schraubdeckel (wie angezeigt). Achtung: Um Lärm zu vermeiden, halten Sie die Antenne fern vom System, Verbindungs- und Netzkabel.
- Page 9 Bedienungsanleitung Anschluss an die Composite Video-Buchse Verbinden Sie das composite Video kabel (gelb) mit der VIDEO Buchse an diesem Gerät und der Video Eingangs-Buchse am TV. Verbinden Sie dann die Audiokabel (rot / weiß) mit den AUDIO OUT R / L-Buchsen an diesem Gerät und den Audio-Eingangsbuchsen am TV.
- Page 10 Bedienungsanleitung Koaxialbuchse Verwenden Sie ein Antennenkabel (nicht im Lieferumfang enthalten) um die TV kOAXIAL Buchse und kOAXIAL Buchse am Gerät zu verbinden. AUX Buchse Verwenden Sie ein RcA Audio-kabel (nicht im Lieferumfang enthalten) um die TV- Audio-Ausgangsbuchsen mit den AUX (R L) Buchsen am Gerät zu verbinden. Verwenden Sie ein RcA auf 3,5 mm Audio-kabel (im Lieferumfang enthalten), um die kopfhörer-Buchse des Audio-Players mit den AUX (R L) Buchsen am Gerät zu verbinden.
-
Page 11: Einstellen Der Uhr
Bedienungsanleitung Anschließen des Netzkabels Schließen Sie das Netzkabel an die Steckdose an. Das Gerät ist betriebsbereit. Achtung: • Achten Sie darauf, den Netzstecker aus der Steckdose zu ziehen, wenn Sie ausgehen oder wenn das Gerät für einen längeren zeitraum nicht benutzt wird. •... -
Page 12: Modus Auswählen
Bedienungsanleitung 3. Drücken Sie dann die Taste EINGABE auf der Fernbedienung, zum bestätigen. Manuelle Uhreinstellung 1. Im Bereitschafts-Modus, drücken und halten der Taste UhR bis “cLOck SET” über die Anzeige rollt. 2. Drücken Sie die Tasten auf der Fernbedienung, um die blinkenden Stundenanzeige einzustellen und drücken die Taste UhR oder EINGABE an der Fernbedienung, zum bestätigen, danach beginnt die Minutenanzeige zu blinken. -
Page 13: Dab Radio
Bedienungsanleitung Lautstärkeregler um den Ton wieder einzuschalten. Equalizer Voreinstellung Sie können die klangwiedergabe einfach durch die Auswahl aus 5 voreingestellte Equalizern anpassen. Drücken Sie wiederholt die Taste EQ, um durch die folgenden Optionen zu blättern: FLAch> POP> cLASSIc > ROck > jAzz (Schleife) Einstellen der Bildschirmhelligkeit Dieses Gerät verfügt über drei helligkeitsstufen für die Uhrzeitanzeige. - Page 14 Bedienungsanleitung automatisch ausgewählt. 1. Drücken Sie die Taste MENÜ auf der Fernbedienung, um das DAB-Menü aufzurufen. Drücken Sie dann die Tasten um "VOLLE SUchE [FULL ScAN]" zu wählen. Drücken Sie die Taste auf der Fernbedienung, zum bestätigen. Auf dem Display erscheint "ScAN ...", sowie der Fortschritt der Suche und die Anzahl der Sender, die bisher gefunden wurden.
- Page 15 Bedienungsanleitung Informationen wie Programmdetails usw. hinweis: DAB - im Gegensatz zu normalen Radio, gruppieren mehrere Radiosender zusammen und übertragen sie auf einer Frequenz. • Signalstärke Auf dem Display wird ein Balken die Signalstärke zeigen, desto stärker das Signal ist, desto länger wird der Balken, von links nach rechts sein. •...
- Page 16 Bedienungsanleitung • Manuelle Sendereinstellung • Drücken Sie wiederholt die Tasten , bis Sie den gewünschten Sender finden. • Wenn der Empfang immer noch schlecht ist, versuchen die Position der Antenne zu ändern oder versuchen das Radio an einen anderen Ort zu bewegen.
-
Page 17: Wiedergabe Von Usb Geräten
Bedienungsanleitung WIEDERGABE VON USB GERäTEN Durch den Anschluss eines USB Massenspeichergerät (wie USB Flash-Speicher, USB Flash-Player oder Speicherkarten) an diesem Gerät können Sie die gespeicherte Musik des Geräts auf diesem Gerät genießen. 1. Stecken Sie das USB-Gerät in den USB-Steckplatz. 2. - Page 18 Bedienungsanleitung • Um zum vorherigen / nächsten Titel zu springen, drücken Sie die Tasten am Gerät oder Tasten auf der Fernbedienung. • Drücken und halten Sie die Tasten auf der Fernbedienung, für schnellen Vor- / Rücklauf. Drücken Sie die Taste um die Wiedergabe fortzusetzen.
- Page 19 Bedienungsanleitung Wiedergabe um zum Titelmenü zurückzukehren. Auswählen einer Untertitelsprache • Während der Wiedergabe drücken Sie die Taste UNTERTITEL, um eine Untertitelsprache auf der DVD auszuwählen. • Bei manchen DVD kann die Sprache nur über das Disk-Menü geändert werden. Drücken Sie die Taste MENU, um dieses Menü aufzurufen. Auswählen eines Kamerawinkels Während der Wiedergabe drücken Sie wiederholt die Taste WINkEL, um einen kamerawinkel auszuwählen.
-
Page 20: Wiedergabe Von Bluetooth Geräten
4. Schalten Sie die Bluetooth -Funktion auf Ihrem Gerät ein. 5. Suche nach anderen Bluetooth-Geräten mit Ihrem Gerät. 6. Wählen Sie "kM1808" in der kopplungsliste. 7. Geben Sie das Standard-Passwort "0000" ein, wenn nötig. 8. Beginnen Sie mit der Musikwiedergabe am Bluetooth-Gerät, Sie können die Fernbedienung des Systems benutzen um die Bluetooth Wiedergabe zu kontrollieren. -
Page 21: Einstellen Des Schlaftimers
Bedienungsanleitung • kompatibilität mit allen Bluetooth-Geräten wird nicht garantiert. • jedes hindernis zwischen diesem System und dem Bluetooth-Gerät kann die Reichweite verringern • halten Sie das System fern von anderen elektronischen Geräten die Interferenzen verursachen können. • kompatibilität mit allen Bluetooth-Geräten wird nicht garantiert. •... -
Page 22: Anpassung Der Einstellungen
Bedienungsanleitung 2. Drücken Sie die Tasten auf der Fernbedienung, um die blinkenden Stundenanzeige einzustellen und drücken die Taste TIMER, zum bestätigen, die Minutenanzeige wird auf dem Display blinken. 3. Drücken Sie die Tasten auf der Fernbedienung, um die blinkenden Minutenanzeige einzustellen und drücken die Taste TIMER, zum bestätigen. 4. - Page 23 Bedienungsanleitung TV system [AUTO] - dla telewizorów kompatybilnych z systemami PAL i NTSc. [NTSc] - dla telewizorów z systemem NTSc. [PAL] - dla telewizorów z systemem PAL Einschalt- [ON]: Wählen Sie diese Option um Letzte Speicherfunktion für DISk zu wiederherstellung aktivieren.
-
Page 24: Disk Schützen
Bedienungsanleitung OSD sprache Wählen Sie die gewünschte Sprache für die Bildschirmmenüs des Geräts Audio • Sie können eine bevorzugte Sprache für Audio, Untertitel und Disk-Menü Untertitel auswählen. DVD menü • • Wenn Sie eine bevorzugte Sprache auswählen, die nicht auf der DVD aufgezeichnet ist, wird eine der vorhandenen Sprachen automatisch ausgewählt. -
Page 25: Fehlerbehebung
Bedienungsanleitung FEHLERBEHEBUNG Wenn Sie ein Problem mit Ihrem System haben, suchen Sie in dieser Liste nach einer möglichen Lösung, bevor Sie den kundendienst anrufen. Wenn Sie das Problem mit den hier angegebenen hinweisen nicht lösen können, oder das System ist beschädigt worden, rufen Sie eine qualifizierte Person, wie z. B. Ihren Fachhändler, für Behebung. -
Page 26: Technische Daten
Im Falle irgendwelcher Zweifel oder Fragen siehe unsere Häufig gestellte Fragen-Seite. Die Spezifikationen können ohne Ankündigung geändert werden. “hiermit erklär die Firma Lechpol dass sich das Gerät kM1808 im Einklang mit den grundlegenden Anforderungen und anderen relevanten. Bestimmungen der Richtlinie 2014/53/UE befindet. -
Page 27: Before Use
Owner’s manual Before Use Thank you for purchasing this system. Please read these operating instructions before operating the unit. The operating instructions should be retained for future reference. For your safety Don’t obstruct the ventilation openings of the equipment with items such as newspa- Before operating this system, check the per, table-cloths,curtains, etc.. -
Page 28: Hearing Safety
Owner’s manual 1. clean with soft, slightly damp cloth only. 2. Use only original accesories. 3. Unplug the device during lightning storms or when unused for long periods of time. 4. Different types of batteries or new and used batteries are not to be mixed. 5. -
Page 29: Product Description
Owner’s manual PRODUCT DESCRIPTION... -
Page 30: Remote Control Overview
Owner’s manual 1. Standby Button 12.coaxial input 2. Power indicator 13. Display 3. Disc Tray 14. Volume control knob 4. Next Button / Previous Button 15. Optical input 5. Remote Sensor 16. Audio output sockets (L&R) 6. Open/close Button 17. Video output socket 7. -
Page 31: Installation Of Batteries
Owner’s manual Installation of batteries 1. Open the battery cover. 2. Insert 2 AAA batteries with correct polarity (+/-) as indicated. 3. close the battery cover. Handling the Remote Control • Remove the batteries if the remote control is not going to be used for an extended period of time. -
Page 32: Connecting The Fm/Dab Antenna
Owner’s manual CONNECTIONS caution: Make all connections before plugging the unit into the Ac Power outlet. Connecting the FM/DAB Antenna connect the supplied FM/DAB Antenna to the ANT socket on the rear of the unit by turning the Antenna screw cap (as indicated). Note: Do not overtighten, this could damage the Antenna. -
Page 33: Connecting Hdmi
Owner’s manual Connecting to the composite video socket • connect the composite video (yELLOW) cable to the VIDEO socket on this unit and the video input socket on the TV. • Then connect audio cables (RED/WhITE) to the AUDIO OUT R / L sockets on this unit and the audio input sockets on TV. -
Page 34: Aux Socket
Owner’s manual COAxIAL Socket Use the cOAXIAL (not included) cable to connect the TV's cOAXIAL OUT socket and cOAXIAL socket on the unit. AUx Socket Use a RcA to RcA audio cable (not included) to connect the TV’s audio output sockets to the AUX (R L) socket on the unit. -
Page 35: General Operation
Owner’s manual Connecting the AC Power Cable Insert the Ac Power cable into a wall outlet, then your unit is ready to use. Caution: • Be sure to unplug the power plug from the outlet when the unit is not in use for an extended period of time. -
Page 36: Select The Correct Tv System
Owner’s manual Manual setting of the clock 1. In STANDBy mode, press and hold cLOck until “cLOck SET” scrolls on the display. 2. Press the buttons on the remote control to adjust the hour digits while flashing, then press the CLOCK or ENTER button on the remote control to confirm, then the minute digits will flash. -
Page 37: Presetting Equalizer
Owner’s manual Presetting Equalizer you can adjust the sound reproduced simply by choosing from 5 preset equalizers. Press the EQ button repeatedly to scroll through the following options: FLAT > POP > cLASSIc > ROck > jAzz (looped) Changing the Front Panel Darkness To dim or brighten the display, press the DIMMER button repeatedly on the remote control to the desired brightness. -
Page 38: Presetting Stations Manually
Owner’s manual perform a full scan. 2. Once the scan has finished, the unit will display the total number of stations have been found and a list of the found stations. All the stations that have been found will be stored automatically. To explore the found stations, press the buttons to the selected station. -
Page 39: Fm Radio Operation
Owner’s manual on one frequency. There are national and local multiplexes. Local ones contain stations that are specific to that area. • channel number • Frequency • Error in signal A number showing the error rate. If the number is 0, it means the signal received is error free and the signal strength is strong. -
Page 40: Rds Reception
Owner’s manual 2. Press the or number (0~9) buttons to select the preset number. 3. Press the PROG button to store the station. 4. Repeat above steps 1 to 3 for each station you want to store in memory with a preset number. -
Page 41: Play Control
Owner’s manual USB Storage Device Data Protection • Always insert the USB device in the correct direction. Failure to do so may result in damage to the USB device and this unit. • Do not remove the USB device while it is being accessed. •... -
Page 42: Display Menu
Owner’s manual mode. The selected mode will show on the display: RPT ONE - Repeat current track. RPT ALL - Repeat all tracks. RPT OFF - Repeat turned off. Repeat A-B (DVD/VcD/cD/MP3/WMA) 1. During music or video play, press the A-B button at the start point. 2. -
Page 43: Play From Bluetooth Device
3. Turn on the Bluetooth function on your device. 4. Search for other Bluetooth device with your device. 5. Select “KM1808” in the pairing list. 6. Enter default password “0000” if necessary. 7. Start music play on your Bluetooth device, you can use this unit’s remote to... -
Page 44: Set Sleep Timer
Owner’s manual Note: • The device will also be disconnected when the device is moved beyond the operation range. • If you want to reconnect the device to the unit, place it within the operational range. • The operational range between this unit and a Bluetooth device is up to 8 meters. •... -
Page 45: Setting Adjustments
Owner’s manual • DISc (to wake to your Disc music) • USB (to wake to your USB music) Press the TIMER button on the remote control to confirm, the display will show the volume level. 5. Press the buttons on the remote control to adjust the volume, and then press the TIMER/SLEEP button on the remote control to confirm. - Page 46 Owner’s manual ScREEN SAVER ON: The screen saver starts up if nothing is played back and no operations are performed for 4 minutes. OFF: The screen saver does not start up. hD Resolution The resolution options include AUTO, 480i/576i, 480p/576p,720p, 1080i, 1080p.
-
Page 47: Hdmi Audio
Owner’s manual hDMI cEc you can use one single remote control to control all hDMI cEc devices that connected via hDMIconnection. ON: Enable hDMI-cEc feature. OFF: Disable hDMI-cEc feature. hDMI AUDIO AUTO: Detect and select the best supported audio format automatically. PcM: Multi-channel audio format will be down-mixed to two channel sound. -
Page 48: Troubleshooting
Owner’s manual TROUBLESHOOTING If you are having a problem with your system, check this list for a possible solution before calling for service. If you can not solve the problem from the hints give here, or the system has been physically damaged, call a qualified person, such as your dealer, for service. -
Page 49: Specifications
In case of any doubts or questions reach out to our Frequently Asked Questions section. Specifications are subject to change without prior notice. “The Lechpol company declares that product kM1808 is consistent with the essential requirements and other 2014/53/UE relevant provisions of directive . -
Page 50: Avant L'utilisation
Mode d’emploi Avant l’utilisation Nous vous remercions d’avoir acheté kruger & Matz. Veuillez lire le manuel d’utilisation avant d’utiliser le dispositif. Le manuel d’utilisation doit être conservé pour une utilisation future. Pour votre sécurité obstruer ouvertures ventilation du dispositif avec des objets Avant d’allumer le système, vérifiez si la tels que journaux, nappe, rideaux, etc. - Page 51 Mode d’emploi 1. Le dispositif doit être nettoyé avec un chiffon doux, légèrement humide. 2. Ne pas utiliser d'accessoires non originaux. 3. Le dispositif doit être débranché de la prise d'alimentation en cas d'orage ou s'il n'est pas utilisé pendant une longue période. 4.
-
Page 52: Description Du Produit
Mode d’emploi DESCRIPTION DU PRODUIT... - Page 53 Mode d’emploi 1. Bouton standby 12. Entrée coaxial 2. Indicateur de niveau de charge 13. Écran 3. Lecteur de disques 14. commande de réglage du volume 4. Bouton Suivant / Précédent 15. Entrée optique 5. capteur IR 16. Sorties audio (droite, gauche) 6.
-
Page 54: Installation Des Piles
Mode d’emploi Installation des piles 1. Avant d'utiliser la télécommande, vous devez ouvrir le boîtier pour placer les piles. 2. Insérez 2 piles AAA en respectant la polarité marquée (+/-). 3. Fermez le boîtier. Veuillez noter • Si la télécommande n’est pas utilisée pendant une longue période, retirez les piles de la télécommande. -
Page 55: Connexion De L'antenne Fm
Mode d’emploi CONNExION Remarque: Toutes les connexions doivent être faites avant de brancher l'appareil au réseau électrique. Connexion de l’antenne FM L'antenne FM / DAB doit être vissée dans la prise ANT située sur le panneau arrière. Remarque: • Ne pas serrer la fiche trop fort, car cela peut endommager l'antenne. •... -
Page 56: Connexion Hdmi
Mode d’emploi Brancher le bon câble. Revisser la borne dans le sens des aiguilles d’une montre. Connexion à la sortie vidéo Branchez le câble RcA jaune à la prise VIDEO de ce dispositif et à l'entrée vidéo de votre téléviseur. Ensuite, branchez les câbles audio (rouge et blanc) aux sorties AUDIO OUT R / L sur ce dispositif et aux entrées audio TV correspondantes. - Page 57 Mode d’emploi Entrée coaxial Le câble coaxial (non fourni) doit être connecté à la sortie optique du téléviseur et l'entrée optique du dispositif. Il faut brancher le câble RcA (non fourni) à la prise AUX du dispositif et aux prises de sortie audio du dispositif externe.
-
Page 58: Branchement Électrique
Mode d’emploi Branchement électrique Le dispositif doit être raccordé à la prise de courant avec la même tension que celle de l'étiquette sur le fond de l’appareil. Noter: • Débranchez l’appareil de la source d'alimentation s’il n’est pas utilisé pendant une longue période. -
Page 59: Réglage Manuel De L'horloge
Mode d’emploi • Appuyez ensuite sur le bouton ENTER sur la télécommande pour confirmer. Réglage manuel de l'horloge 1. En mode veille, appuyez et maintenez CLOCK jusqu'à ce que l'écran affiche « CLOCK SET ». 2. Lorsque les chiffres de l'heure clignotent sur l'écran, utilisez les boutons de la télécommande pour régler l'heure. -
Page 60: Recherche Automatique
Mode d’emploi sélectionner un des cinq modes: FLAT > POP > cLASSIc > ROck > jAzz (en boucle) Réglage de la luminosité de l’écran Pour régler la luminosité de l'écran, appuyez sur la touche DIMMER (Atténuation) sur la télécommande. LECTURE DEPUIS LES DISPOSITIFS ExTERNES 1. - Page 61 Mode d’emploi Appuyez sur le bouton pour naviguer dans la liste. • Une recherche complète n'éliminera pas votre liste de stations de radio DAB préférées. Pour supprimer les stations enregistrées dans la liste des Favorites, effectuer une réinitialisation du système. Enregistrer manuellement les stations Favorites La mémoire des stations Favorites de radio DAB peut contenir 20 positions.
- Page 62 Mode d’emploi RADIO Avant de brancher la radio, il est conseillé de s’assurer que l'antenne est complètement déployée et placée dans une position qui permet la réception radio optimale. Recherche automatique et enregistrement de vos stations Favorites. 1. Il faut appuyer plusieurs fois sur le bouton du dispositif ou sur le bouton SOURcE de la télécommande pour accéder au mode de radio TUNER.
- Page 63 Après la connexion d’un périphérique USB (mémoire flash, lecteur de carte mémoire), l'unité va lire les pistes stockées sur le support de stockage externe. Pour ce faire: 1. Connectez le périphérique USB au port USB de la chaîne KM1808, soit directement, soit par l'intermédiaire d'un câble (non fourni).
-
Page 64: Lecture Aléatoire
Mode d’emploi Protection des données sur des périphériques de stockage USB • Le périphérique de stockage USB doit être connecté du bon côté. Le raccordement de l'appareil dans le mauvais sens peut entraîner des dommages à l'appareil et au périphérique USB. •... -
Page 65: Menu D'affichage
Mode d’emploi point de départ. 2. Ensuite, appuyez sur A-B pour déterminer le point final. • La section désignée sera jouée en boucle. • Pour terminer la lecture en boucle, appuyez de nouveau sur A-B. Remarque: Le point de début et de fin doivent être déterminé dans la même piste. Sélection de la langue audio Pendant la lecture du disque, appuyez sur AUDIO pour sélectionner la langue audio pour la vidéo de DVD. - Page 66 Mode d’emploi • La fonction PBc vous permet de lire des cD (vidéo) en selon les réglages disponibles dans le menu. Pendant la lecture, appuyez sur le bouton MENU pour activer / désactiver le contrôle de la lecture. • Le menu est affiché si l'option de contrôle de la lecture est activée. •...
-
Page 67: Reglage De L'alarme
Mode d’emploi 4. Rechercher les appareils Bluetooth sur votre appareil. 5. Sélectionner "kM1808" de la liste des dispositifs à appairer. 6. Entrer le mot de passe par défaut: 0000 si nécessaire. 7. commencer la lecture à partir du périphérique externe. Le contrôle de la lecture peut également être fait à... - Page 68 Mode d’emploi 1. En mode veille, appuyez et maintenez la touche TIMER jusqu'à ce qu’apparaisse l’inscription [TIMER SET]. Les chiffres de l'heure clignoteront sur l'écran. 2. Pour changer l'heure, appuyez sur le bouton et puis confirmez en appuyant sur TIMER sur la télécommande. Les chiffres des minutes vont clignoter sur l'afficheur.
- Page 69 Mode d’emploi Système de télévision [AUTO] - pour les téléviseurs compatibles avec le PAL et NTSc. [NTSc] - pour un téléviseur NTSc. [PAL] - pour un téléviseur PAL Rétablissement de ON: démarre le dispositif en mode DISc l'alimentation OFF: désactive cette fonction Désactiver l'écran ON: la désactivation de l'écran si pendant au moins 4 minutes il n'y a pas de son de lecture aucun bouton n'est appuyé.
-
Page 70: Hdmi Audio
Mode d’emploi Par défaut Restauration des paramètres par défaut (sauf le mot de passe et le contrôle parental). Langue OSD Sélection de la langue de menu Audio Vous pouvez sélectionner la langue d'audio, de sous-titres et de Sous-titres menu. Menu DVD •... - Page 71 Mode d’emploi RESOUDRE LES PROBLEMES Si vous avez un problème avec votre appareil, consultez la liste suivante des solutions possibles avant d'appeler le service client. Si le problème n’est pas résolu avec ces instructions ou si l'appareil a été endommagé physiquement, appelez une personne qualifiée, par exemple le vendeur pour contacter le service client.
-
Page 72: Caractéristiques
Support. Les spécifications sont sujettes à modification sans préavis. „L’entreprise Lechpol déclare que le dispositif kM1808 est conforme aux exigences essentielles et autres dispositions pertinentes de la directive 2014/53/UE. La déclaration est téléchargeable sur www.lechpol.eu„... -
Page 73: Voor Gebruik
Gebruiksaanwijzing Voor gebruik Bedankt voor de aankoop van het product kruger&Matz. Alvorens met het gebruik te beginnen, lees de gebruiksaanwijzing. Bewaar de gebruiksaanwijzing voor latere raadpleging. Voor je veiligheid Bedek de ventilatieopeningen van het Alvorens het toestel op het stroomnetwerk toestel niet kranten,... - Page 74 Gebruiksaanwijzing 1. het apparaat kan schoongemaakt worden met een zacht, vochtig doekje. 2. Er dienen alleen originele accessoires gebruik te worden. 3. Bij onweer of langere tijd buiten gebruik dient het apparaat uitgeschakeld te worden uit de stroomvoorziening. 4. Er dienen geen verschillende batterijen tegelijk gebruikt te worden. 5.
- Page 75 Gebruiksaanwijzing HOOFDEENHEID...
- Page 76 Gebruiksaanwijzing 1. Standby knop 12. coaxial input 2. Oplaad-indicator 13 Scherm 3. Disc-speler 14. volume draaiknop 4. Volgende/Vorige knop 15. Optisch input 5. Infrarood sensor 16. Audio output (rechts, links) 6. Open/Sluit disc-speler 17. Video output 7. Afspelen/Pauze knop 18. AUX output (rechts, links) 8.
- Page 77 Gebruiksaanwijzing Installatie van de batterij 1. Alvorens met het gebruik van de afstandsbediening te beginnen, open de socket van de batterij. 2. Plaats 2 AAA batterijen volgens de aangegeven polarisatie (+/-). 3. Sluit de klep van de batterijennest Let op: Verwijder de batterijen indien de afstandsbediening voor een langere periode niet gebruikt wordt.
-
Page 78: Aansluiting Van De Fm Antenne
Gebruiksaanwijzing AANSLUITEN Let op: Alle aansluitingen dienen voordat de aansluiting op het stroomnetwerk te gebeuren. Aansluiting van de FM antenne FM/DAB antenne dient aan de ANT contrastekker op het achterpaneel vastgeschroefd te worden. Let op: • Draai de pin niet te hard omdat op deze manier de antenne kan worden beschadigd. -
Page 79: Hdmi Aansluiting
Gebruiksaanwijzing Aan de vide output aansluiten Sluit de gele RcA kabel aan de VIDEO contrastekker van dit apparaat en de video input van de televisie. Sluit vervolgens de audiokabels (rood en wit) aan de AUDIO OUT R/L uitput van dit apparaat en aan de juiste input van de televisie. -
Page 80: Coaxial Input
Gebruiksaanwijzing Coaxial input coaxial kabel (niet meegeleverd ) aansluiten aan de optische output van de televisie en optische input van dit apparaat. RcA kabel (niet meegeleverd ) aansluiten aan de AUX contrastekker van het apparaat en aan de audio contrastekkers van het externe apparaat. De juiste audio kabel (RcA - 3,5 mm, niet meegeleverd) aansluiten aan de audio contrastekkers van het externe apparaat en van de AUX inputs van dit apparaat. -
Page 81: Voeding Aan / Uit
Gebruiksaanwijzing Aansluiting van de voeding Sluit het toestel op de netstroom met dezelfde spanning als de spanning aangegeven op de onderkant van het toestel. Let op: • Indien het toestel voor een langere periode niet gebruikt wordt, onderbreek de verbinding met de spanning. •... -
Page 82: Handmatig Instellen Van De Klok
Gebruiksaanwijzing Handmatig instellen van de klok 1. Druk op cLOck in de standby modus en hou het ingedrukt totdat er "cLOck SET" zichtbaar is op het scherm. 2. Wanneer er cijfers knipperen op het scherm gebruik toetsen op de afstandsbediening om het juiste uur in te stellen. Druk vervolgens op cLOck of ENTER op de afstandsbediening om te bevestigen. - Page 83 Gebruiksaanwijzing Equalizer instellingen Om de Equalizer modus te wijzigen, druk enkele keren op de EQ knop en kies een van de vijf modussen: FLAT > POP > cLASSIc > ROck > jAzz (doorlussen) Regelen van De helderheid van display Om de helderheid van de display aan te passen, druk op de knop DIMMER (schemeren) op de afstandsbediening.
- Page 84 Gebruiksaanwijzing Druk op de knop om te navigeren op de lijst. • De volledige zoekopdracht zal de lijst van de favoriete DAB radiozenders niet overschrijven. Om zenders van de favorieten lijst te verwijderen, dient het systeem gereset te worden. Handmatig opslaan van de Favoriete zenders het geheugen van de Favoriete DAB zenders bedraagt 20 posities.
- Page 85 Gebruiksaanwijzing RADIO Alvorens radio aan te zetten, verzeker je ervan dat de FM/DAB antenne volledig uitgeschoven is en in een positie geplaatst die de optimale ontvangst van het radiosignaal mogelijk maakt. Automatisch zoeken en opslaan van Favoriete zenders 1. Om over te gaan naar de TUNER radiomodus druk een aantal keer op de knop op het apparaat of op de SOURcE knop op de afstandsbediening.
-
Page 86: Afspelen Uit Een Usb-Toestel
Gebruiksaanwijzing AFSPELEN VAN DISC 1. Om over te gaan naar de DISc modus druk een aantal keer op de knop het apparaat of op de SOURcE knop op de afstandsbediening. 2. Vervolgens druk op de knop om de Disc-lade te openen. 3. - Page 87 Gebruiksaanwijzing Bescherming van gegevens op USB-toestellen • USB opslagmedium dient op het toestel met de juiste zijde te worden aangesloten. het aansluiten met de onjuiste zijde kan tot beschadiging van het toestel en USB opslagmedium leiden. • Onderbreek de verbinding met het USB-toestel niet tijdens het aflezen van de gegevens.
- Page 88 Gebruiksaanwijzing video. 2. Vervolgens druk op de A-B om het eindpunt te bepalen. • Deze sectie zal herhaald afgespeeld worden. • Druk nogmaals op A-B om herhaald afspelen te beëindigen. Let op: het begin- en eindpunt moeten zich in hetzelfde werk bevinden. Kiezen van audio taal Druk op AUDIO tijdens het disc afspelen om te audio taal te kiezen voor de video DVD.
- Page 89 Gebruiksaanwijzing het menu. Druk op MENU om de afspelen controle aan/uit te doen. • het menu wordt getoond als de afspelen controle aan is. • Nadat de PBc functie uit is wordt normaal afspelen hervat. Zoek op tijdstip of nummer/hoofdstuk 1.
- Page 90 Gebruiksaanwijzing 5. kies „kM1808” op de lijst van toestellen om te paren. 6. Voer de standaard wachtwoord in: 0000 indien gevraagd. 7. Begin met het afspelen vanuit een extern toestel niveau. De controle van het afspelen kan eveneens via afstandsbediening van het toestel kM1808 gebeuren.
- Page 91 Gebruiksaanwijzing door op TIMER op de afstandsbediening te drukken. Er beginnen cijfers van de minuut-waarde te knipperen. 3. M.b.v. toetsen op de afstandsbediening dient de waarde van de minuut ingesteld te worden. Deze wordt bevestigd door op TIMER op de afstandsbediening te drukken.
- Page 92 Gebruiksaanwijzing herstel van voeding ON: doet het apparaat aan in de DISc modus OFF: functie gaat uit Uitdoen van het ON: bij het uitblijven van afspelen van geluid gedurende 4 minuut scherm en geen gedrukte knopen gaat het scherm uit. OFF: functie gaat uit hD resolutie Beschikbare opties: AUTO, 480i/576i, 480p/576p,720p, 1080i,...
-
Page 93: Hdmi Audio
Gebruiksaanwijzing Audio het is mogelijk om de taal van audio, ondertiteling en menu te kiezen. Ondertiteling • In geval van kiezen van een niet beschikbare taal zal het DVD menu apparaat een beschikbare taal kiezen. • Om audio-instellingen te overschrijven in het instellingenmenu druk op AUDIO op de afstandsbediening tijdens het afspelen van de DVD. -
Page 94: Oplossen Van Problemen
Gebruiksaanwijzing OPLOSSEN VAN PROBLEMEN Als er problemen met het toestel voorkomen alvorens de servicedienst te bellen, bekijk de onderstaande lijst van mogelijke oplossingen. Als je het probleem ondanks deze aanwijzingen niet kan oplossen of het toestel fysiek beschadigd is, bel een gekwalificeerde persoon, bv. - Page 95 Bij vragen of twijfels is het raadzaam om te kijken bij de Veelgestelde Vragen onder hulp- kopje. De productspecificatie kan zonder aankondiging gewijzigd worden. „Lechpol verklaart hierbij, dat het toestel kM1808 met de eisen en andere toegepaste bepalingen van de Richtlijn 2014/53/UE overeenstemt. Deze verklaring kunt u op de webpagina van Lechpol www.lechpol.eu downloaden”.
-
Page 96: Przed Użyciem
Instrukcja obsługi Przed użyciem Dziękujemy za zakup produktu Kruger&Matz. Prosimy przeczytać instrukcję obsługi przed rozpoczęciem używania urządzenia. Instrukcja należy zachować w celu przyszłego wykorzystania. Dla Twojego bezpieczeństwa Nie zasłaniaj otworów wentylacyjnych urządzenia przedmiotami takimi jak Przed włączeniem systemu sprawdź czy gazeta, obrus, firanka itd. Przegrzewanie napięcie dla tego systemu jest identyczne z spowoduje uszkodzenie i skróci żywotność... - Page 97 Instrukcja obsługi 1. Urządzenie należy czyścić jedynie za pomocą miękkiej, delikatnie wilgotnej ściereczki. 2. Nie należy używać nieoryginalnych akcesoriów. 3. Urządzenie należy odłączyć od gniazda zasilania sieciowego w przypadku burzy lub jeśli nie jest używane przez dłuższy czas. 4. Nie należy używać jednocześnie różnych baterii. 5.
-
Page 98: Opis Produktu
Instrukcja obsługi OPIS PRODUKTU... - Page 99 Instrukcja obsługi 1. Przycisk standby 12. Wejście coaxial 2. Wskaźnik poziomu naładowania 13. Wyświetlacz 3. Odtwarzacz dysków 14. Pokrętło regulacji głośności 4. Przycisk Następny / Poprzedni 15. Wejście optyczne 5. czujnik podczerwieni 16. Wyjścia audio (prawe, lewe) 6. Otwórz/zamknij tackę odtwarzacza dysków 17.
-
Page 100: Instalacja Baterii
Instrukcja obsługi Instalacja baterii 1. Przed rozpoczęciem używania pilota zdalnego sterowania, należy otworzyć gniazdo baterii. 2. Włożyć 2 baterie AAA, zgodnie z zaznaczoną polaryzacją (+/-). 3. Zamknąć klapkę gniazda baterii Uwaga: • Jeśli pilot ma być nieużywany przez dłuższy czas, należy wyjąć z niego baterie. •... -
Page 101: Podłączanie Głośników
Instrukcja obsługi PODłąCZAnie Uwaga: Wszystkich połączeń należy dokonać przed podłączeniem sprzętu do zasilania sieciowego. Podłączanie anteny FM/DAB Antenę FM/DAB, należy przykręcić do gniazda ANT znajdującego się na panelu tylnym. Uwaga: • Nie należy dokręcać wtyku zbyt mocno, gdyż może to uszkodzić antenę. •... - Page 102 Instrukcja obsługi Podłączenie do wyjścia video Należy podłączyć żółty kabel RCA do gniazda VIDEO tego urządzenia oraz wejścia video telewizora. Następnie podłączyć kable audio (czerwony i biały) do wyjść AUDIO OUT R/L na tym urządzeniu oraz odpowiednich wejść audio telewizora. AUDIO IN VIDEO Podłączenie HDMi Kabel HDMI (nie znajduje się...
- Page 103 Instrukcja obsługi Wejście coaxial Kabel coaxial (nie znajduje się w zestawie) należy podłączyć do wyjścia optycznego telewizora oraz wejścia optycznego tego urządzenia. Należy podłączyć kabel RCA (nie znajduje się w zestawie) do gniazd AUX urządzenia oraz gniazd wyjściowych audio na urządzeniu zewnętrznym. Odpowiedni kabel audio (RCA - 3,5 mm, nie znajduje się...
-
Page 104: Podłączanie Zasilania
Instrukcja obsługi Podłączanie zasilania Urządzenie należy podłączyć do gniazda zasilania sieciowego o napięciu zgodnym z napięciem na nadruku na spodzie urządzenia. Uwaga: • Urządzenie należy odłączyć od źródła zasilania sieciowego, jeśli nie będzie używane przed dłuższy czas. • Przed podłączeniem kabla zasilania AC, należy upewnić się, że wszystkie pozostałe przewody są... -
Page 105: Ustawienie Zegara
Instrukcja obsługi USTAWIENIE zEGARA Synchronizacja zegara Uwaga: domyślnie, zegar synchronizowany jest zgodnie z informacjami RDS. 1. W trybie czuwania, należy nacisnąć i przytrzymać przycisk MENU na pilocie zdalnego sterowania aby zsynchronizować zegar. 2. Aby zmienić tryb synchronizacji zegara, należy nacisnąć przycisk •... -
Page 106: Regulacja Poziomu Głośności
Instrukcja obsługi Regulacja poziomu głośności Aby zwiększyć/zmniejszyć poziom głośności, należy nacisnąć przycisk regulacji głośności +/- na pilocie sterowania lub dostosować go za pomocą pokrętła głośności na odtwarzaczu. Wyciszenie dźwięku Podczas odtwarzania należy nacisnąć przycisk MUTE aby wyciszyć. Aby przywrócić dźwięk, należy ponownie nacisnąć przycisk MUTE lub zmienić... -
Page 107: Automatyczne Wyszukiwanie
Instrukcja obsługi Aby wybrać opcję pełnego skanu, należy nacisnąć przycisk . Następnie zatwierdzić przyciskiem ENTER. Automatyczne wyszukiwanie Funkcja przeprowadzi automatyczne wyszukiwanie stacji radiowych DAB. Po zakończeniu wyszukiwania, pierwsza stacja zostanie automatycznie wybrana. 1. Aby wyświetlić menu radia DAB, należy nacisnąć przycisk MENU na pilocie. Aby wybrać... - Page 108 Instrukcja obsługi • DLS Informacje transmitowane przez stację radiową. Zazwyczaj są to np. szczegóły dotyczące nadawanej audycji itp. Uwaga: radio DAB grupuje kilka stacji radiowych i nadaje je pod jedną częstotliwością. • Siła sygnału Na wyświetlaczu pojawi się pasek wskazująca siłę sygnału; im silniejszy sygnał, tym dłuższy będzie pasek.
-
Page 109: Odtwarzanie Płyty
Instrukcja obsługi • W przypadku słabej siły sygnału, zaleca się wyregulowanie pozycji anteny lub zmianę lokalizacji urządzenia. Ręczne zapisywanie Ulubionych stacji Lista Ulubionych stacji radiowych może pomieścić 20 pozycji. 1. Należy ustawić częstotliwość na wybranej stacji, a następnie nacisnąć przycisk PROG. 2. -
Page 110: Odtwarzanie Z Urządzenia Usb
Aby to zrobić należy: 1. Podłączyć urządzenie USB do portu USB wieży KM1808, bezpośrednio lub za pomocą kabla (kabel nie jest załączony). 2. Nacisnąć przycisk USB na pilocie, bądź wybrać tryb USB za pomocą przycisku na odtwarzaczu. - Page 111 Instrukcja obsługi Zwolnione odtwarzanie w przód/tył 1. Podczas odtwarzania video, należy nacisnąć przycisk SLOW aby przewijać powoli. • Dźwięk jest wyciszony. 2. Aby wznowić odtwarzanie w normalnej prędkości, należy nacisnąć przycisk Odtwarzanie losowe Podczas odtwarzania, należy nacisnąć przycisk SHUFFLE. Urządzenie rozpocznie losowo odtwarzać...
-
Page 112: Programowanie Odtwarzania
Instrukcja obsługi napisów dla DVD. • Dla niektórych płyt DVD, ustawienia języka mogą być zmienione jedynie z poziomu menu dysku. Aby przejść do tego menu, należy nacisnąć przycisk MENU. Wybór kąta kamery Podczas odtwarzania, należy kilkukrotnie nacisnąć przycisk ANGLE aby wybrać odpowiedni kąt kamery. -
Page 113: Odtwarzanie Z Urządzenia Bluetooth
Na wyświetlaczu pojawi się napis "PAIR". 4. Wyszukać urządzenia Bluetooth na urządzeniu zewnętrznym. 5. Wybrać „KM1808” z listy urządzeń do sparowania. 6. Wprowadzić domyślne hasło: "0000" jeśli jest wymagane. 7. Rozpocząć odtwarzanie z poziomu urządzenia zewnętrznego. Kontrola odtwarzania może się... -
Page 114: Wyłącznik Czasowy
Instrukcja obsługi należy nacisnąć przycisk "PAIR" na pilocie lub nacisnąć i przytrzymać przycisk na urządzeniu aby ponownie uruchomić proces parowania; poprzednie połączenie zostanie przerwane. • Jeśli w ciągu 2 minut żadne kolejne urządzenie nie zostanie połączone, wieża przywróci połączenie z poprzednim urządzeniem. •... - Page 115 Instrukcja obsługi głośności. 5. Za pomocą przycisków dostosować poziom głośności, a następnie zatwierdzić przyciskiem TIMER/SLEEP na pilocie. Na ekranie zostanie wyświetlony napis "TMR ON / TMR OFF". 6. Za pomocą przycisków wybrać "TMR ON" aby aktywować wyłącznik, lub "TMR OFF" aby dezaktywować wyłącznik, a następnie zatwierdzić TIMER/SLEEP na pilocie.
- Page 116 Instrukcja obsługi Rozdzielczość HD Dostępne opcje: AUTO, 480i/576i, 480p/576p,720p, 1080i, 1080p. Uwaga: Jeśli ze względu na nieobsługiwaną rozdzielczość, na ekranie telewizora nie wyświetli się nic, należy ponownie podłączyć urządzenie i dostosować ustawienia rozdzielczości na 480p/576p. Proporcja Aby uniknąć zniekształcenia obrazu, zaleca się dostosowanie ustawień...
-
Page 117: Hdmi Audio
Instrukcja obsługi hDMI cEc Za pomocą jednego pilota można obsługiwać urządzenia HDMI CEC podłączone do tego urządzenia. ON: Włącz funkcję HDMI-CEC. OFF: wyłącz funkcję HDMI-CEC hDMI AUDIO AUTO: Wykryj i wybierz format audio automatycznie. PCM: format audio wielo-kanałowy będzie odtwarzany jako dwukanałowy. -
Page 118: Rozwiązywanie Problemów
Instrukcja obsługi ROZWiąZyWAnie PROBleMóW Jeśli masz jakiś problem z urządzeniem, sprawdź poniższą listę możliwych rozwiązań zanim zadzwonisz do serwisu. Jeśli nie rozwiążesz problemu z tymi wskazówkami lub urządzenie zostało fizycznie uszkodzone, zadzwoń do wykwalifikowanej osoby, na przykład dealera, w celu kontaktu z serwisem. Urządzenie USB nie jest obsługiwane Brak zasilania •... - Page 119 W przypadku pytań lub wątpliwości zachęcamy do zapoznania się z Najczęściej Zadawanymi Pytaniami w zakładce Pomoc. Specyfikacja produktu może ulec zmianie bez powiadomienia. „Niniejszym firma Lechpol oświadcza, że urządzenie KM1808 jest zgodne z zasadniczymi wymaganiami oraz innymi stosownymi postanowieniami dyrektywy 2014/53/UE. Właściwa deklaracja do pobrania na stronie www.lechpol.eu”...
-
Page 120: Cuvant Inainte
Manual de utilizare Cuvant inainte Va multumim pentru achizitionarea acestui sistem. Va rugam sa cititi aceste instructiuni de utilizare inainte de a utiliza aparatul. Instructiunile de utilizare trebuie sa fie pastrate pentru consultari ulterioare. Masuri de siguranta NU permiteti ca nimeni in special copiii Inainte de a utiliza acest sistem, verificati sa introduca nimic in orificiile din carcasa tensiunea de alimentare de la retea,... -
Page 121: Protejarea Auzului
Manual de utilizare 1. curatati aparatul cu un material textil uscat si moale. 2. Utilizați numai accesorii originale. 3. Scoateti din priza aparatul cand sunt descarcari electrice afara sau cand nu utilizati aparatul o lunga perioada de timp. 4. Nu utilizati impreuna baterii noi si baterii vechi. Utilizati doar acelasi tip de baterii (nu utilizati impreuna marci diferite). -
Page 122: Prezentare Dispozitiv
Manual de utilizare PREzENTARE DISPOzITIV... - Page 123 Manual de utilizare 1. Buton stand-by 12. Intrare coaxiala 2. Indicator alimentare 13. Afisaj 3. compartiment discuri 14. Buton control volum 4. Buton urmatorul / anteriorul 15. Intrare optica 5. Senzor telecomanda 16. Iesire audio (L&R) 6. Buton deschis/inchis 17. Iesire video 7.
-
Page 124: Instalare Baterii
Manual de utilizare Instalare baterii 1. Deschideti compartimentul bateriilor 2. Introduceti baterii respectand polaritatea corecta, ca si in figura 3. Inchideti compartimentul bateriilor Utilizare telecomanda • Scoateti bateriile daca telecomanda nu va fi folosita pentru o perioada indelungata. • Pentru a evita o posibila eroare, cititi urmatoarele instructiuni si utilizati telecomanda in mod corespunzator. -
Page 125: Conectarea Difuzoarelor
Manual de utilizare CONECTARE Atentie: Conectati unitatea la reteaua de alimentare, numai după conectarea difuzoarelor / dispozitivelor externe. Conectarea antenei de exterior FM/DAB conectati antena FM/DAB furnizata in soclul ANT de pe panoul din spate al aparatului. Prin rotirea surubului pentru antena (conform indicatiei) Atentie: Pentru a evita aparitia zgomotului, ţineţi antena departe de aparat, de cablul de conectare și de cablul de alimentare. - Page 126 Manual de utilizare Conectare semnal video compozit conectati cablul pentru semnalul video compozit (galben) la iesirea video a aparatului si la intrarea video la TV. Apoi conectati cablurile pentru semnal audio (rosu si alb) la iesirea audio a aparatului si la intrarea audio la TV. AUDIO IN VIDEO Conectare HDMI...
- Page 127 Manual de utilizare Intrare coaxiala Utilizati un cablu coaxial (nu este inclus) intre aparat si TV. Soclu intrare AUx Utilizati un cablu RcA – RcA (nu este inclus) intre iesirea audio de la TV si intrarea AUX a aparatului. Utilizati un cablu RcA - jack 3.5 mm (inclus) pentru a conecta iesirea pentru casti de la TV cu intrarea AUX a aparatului.
-
Page 128: Conectarea Cablului De Alimentare
Manual de utilizare Conectarea cablului de alimentare Conectati cablul de alimentare la priza. Unitatea este gata de funcţionare. Atentie: • Asiguraţi-vă că deconectaţi cablul de alimentare de la priză, atunci când nu folositi dispozitivul sau dacă nu este utilizat pentru o perioadă lungă de timp. •... - Page 129 Manual de utilizare Setare manuala ceas 1. In modul STANDBY, apasati si tineti apasat CLOCK pana cand apare pe afisaj “cLOck SET” . 2. Apasati butoanele de pe telecomanda pentru a regla ora atunci cand digitii pentru ora palpaie. Apasati CLOCK sau ENTER pentru confirmare. Apasati butoanele de pe telecomanda pentru a regla minutele atunci cand digitii pentru minute palpaie.
-
Page 130: Reglarea Luminozitatii Afisajului
Manual de utilizare următoarele setari: FLAch > POP > cLASSIc > ROck > jAzz Reglarea luminozitatii afisajului Unitatea dispune de trei nivele de luminozitate pentru a regla afișarea ceasului. Apăsaţi butonul DIMMER de pe telecomandă în mod repetat, pentru a alege luminozitatea dorită. REDARE DE PE DISPOzITIVE AUDIO ExTERNE 1. - Page 131 Manual de utilizare • Scanarea Full auto nu va inlocui posturile DAB din memorie. Daca doriti sa inlaturati posturile memorate anterior, trebuie resetat sistemul. Cautare manuala posturi Puteti memora pana la 20 posturi DAB radio. 1. cautati postul de radio dorit, apoi apasati butonul PROG de pe telecomanda. Pe ecran va apare “## Empty”...
-
Page 132: Ascultare Posturi Radio
Manual de utilizare mare, este recomandat sa reorientati antena sau sa repozitionati aparatul. • Mod audio Stereo/Mono • Ceas (daca nu este disponibil, afisajul va arata un timp incorect) • Data (daca nu este disponibila, afisajul va arata o data incorecta) ASCULTARE POSTURI RADIO Puteţi asculta posturi de radio. - Page 133 Manual de utilizare RECEPTIE RDS Afisare Mod FM De fiecare dată când apăsaţi butonul INFO, se va parcurge ciclic următoarele moduri de afișare: Nume post radio, Tipul de program, Text radio, frecventa, Clock info. Nota: • Informatia RDS va fi afisata doar daca aceasta este disponibila. •...
- Page 134 Manual de utilizare Pentru dispozitive cu cablu USB : 1. Introduceti un capat al cablului USB (nu este furnizat) in slotul USB de pe partea frontala a amplificatorului. 2. Introduceti celalalt capat al cablului USB in slotul dispozitivul de pe care doriti sa redati muzica.
- Page 135 Manual de utilizare Redare incetinita inapoi/inainte 1. Pe durata redarii video apasati butonul SLOW pentru a selecta viteza de redare incetinita. • Sunetul trece in modul silentios (mute). 2. Pentru a reveni la redarea normala, apasati butonul butonul. Redare aleatoare melodii Pe durata redarii, apasati butonul ShUFFLE, unitatea va incepe redarea aleatoare a melodiilor.
-
Page 136: Marire/Micsorare Imagine
Manual de utilizare • Pentru unele DVD-uri, limba subtitrarii poate fi schimbata doar din meniul discului. Apasati butonul MENUpentru a accesa acest meniu. Selectare unghi camera Pe durata redarii, apasati butonul ANGLE in mod repetat pentru a selecta unghiul camerei. •... -
Page 137: Redare Bluetooth
4. Porniti functia Bluetooth de pe dispozitivul de pe care doriti sa redati muzica si cautati dispozitivele Bluetooth din jur. 5. Selectati “KM1808” din lista dispozitivelor gasite 6. Introduceti parola implicita “0000” daca este necesar. 7. Incepeti redarea de muzica pe dispozitivul Bluetooth, puteti utiliza telecomanda pentru a controla dispozitivul Bluetooth. -
Page 138: Setare Alarma
Manual de utilizare perioada de timp prestabilita (in minute), conform cu bucla de mai jos: OFF > 120 > 90 > 60 > 45 > 30 > 15 >00 Apasati butonul SLEEP pentru a vedea timpul ramas pana la oprire. Pentru a dezactiva temporizarea opririi automate, apasati butonul SLEEP in mod repetat pana cand este afisat [SLEEP 00]. - Page 139 Manual de utilizare Osd La n gu ag e HDMI AU DI O PO W ER R E SUM E Audio SC R EE N SAV E R S ubt it l e HD Re s o lutio n D V D M e n u Aspe c t R at io HDMI CEC PAS SW OR D...
-
Page 140: Protejarea Discului
Manual de utilizare OSD Language Selectati limba pentru meniul afisat pe ecran. Audio Puteti selecta limba preferata pentru audio, subtitrare si meniu disc. Subtitle • Cand selectati o limba care nu este disponibila pe DVD, una dintre limbile DVD Menu disponibile este selectata automat. - Page 141 Manual de utilizare DEPANARE Daca aveti o problema cu sistemul, verificati lista de mai jos pentru a gasi o posibila solutie inainte de a apela la service. Daca nu puteti rezolva problema cu ajutorul indiciilor oferite aici , sau sistemul a fost deteriorat, apelati la un service autorizat.
- Page 142 In cazul in care aveti nevoie de lamuriri suplimentare consultati rubrica Intrebari Frecvente si Raspunsuri. Specificatiile sunt supuse schimbarilor fara notificare prealabila. „Compania Lechpol declară că produsul KM1808 este în conformitate cu cerinţele esenţiale și alte prevederi relevante ale Directivei 2014/53/UE. Declaraţia pentru descărcare este postata pe site- ul www.lechpol.eu”...
- Page 144 www.krugermatz.com is a registered trademark...
Need help?
Do you have a question about the KM1808 and is the answer not in the manual?
Questions and answers