Sony Vaio PCV-V200G Quick Start Manual
Vaio desktops: vaio desktop computer
Hide thumbs
Also See for Vaio PCV-V200G:
- User manual (131 pages) ,
- Specifications (1 page) ,
- Supplementary manual (9 pages)
Table of Contents
Advertisement
Quick Links
Download this manual
See also:
User Manual
Advertisement
Table of Contents

Related Manuals for Sony Vaio PCV-V200G


Summary of Contents for Sony Vaio PCV-V200G
- Page 1 VAIO® Computer AIO® Computer IO® Computer O® Computer ® Computer Computer Computer Quick Start uick Start ick Start ck Start k Start Start Start PCV-V200G / PCV-V210P omputer mputer puter uter ter er r tart art rt t...
- Page 2 The software described herein is governed by the terms of a separate user license agreement. This product contains software owned by Sony and licensed by third parties. Use of such software is subject to the terms and conditions of license agreements enclosed with this product. Some of the software may not be transported or used outside the United States.
- Page 3 Owner’s Record The model and serial numbers are located on the back of your Sony VAIO® computer. Record the model and serial numbers in the space provided here, and keep in a secure location. Refer to the model and serial numbers when you call the Sony Service Center.
- Page 4 Do not use the modem or a telephone to report a gas leak in the vicinity of the leak. ❑ The socket outlet shall be installed near the equipment and shall be easily accessible. To change the backup battery, please contact your nearest Sony Service Center. Caution—The use of optical instruments with this product will increase eye hazard.
- Page 5 L’appareil doit être le plus près possible d’une prise murale pour en faciliter l’accès. Pour changer la pile de rechange, veuillez contacter votre centre de service Sony le plus près. Avertissement: L'utilisation d'instruments optiques avec ce produit augmente les risques pour les yeux. Puisque le faisceau laser utilisé dans ce produit est dommageable pour les yeux, ne tentez pas de désassembler le boîtier.
-
Page 6: Regulatory Information
Regulatory Information If you have questions about this product, write to Sony Customer Information Service Center at 12451 Gateway Blvd., Ft. Myers, FL 33913, USA, or visit Sony Customer Service on the Sony Online Support Web site at http://www.sony.com/pcsupport. Declaration of Conformity Trade Name: Model No.:... - Page 7 Repair of this equipment should be made only by a Sony Service Center or Sony authorized agent. For the Sony Service Center nearest you, call 1-888-4-SONY-PC (1-888-476-6972), or visit the Sony Online Support Web site at http://www.sony.com/pcsupport.
- Page 8 Telephone Consumer Protection Act of 1991 (United States) hone Consumer Protection Act of 1991 (United States) The Telephone Consumer Protection Act of 1991 makes it unlawful for any person to use a computer or other electronic device, including FAX machines, to send any message unless such message clearly contains, in a margin at the top or bottom of each transmitted page or on the first page of the transmission, the date and time it is sent and an identification of the business, other entity, or individual sending the message, and the telephone number of the sending machine or such business, other entity, or individual.
- Page 9 Disposal of Lithium Battery You can return your unwanted lithium batteries to your nearest Sony Service Center or Factory Service Center. ✍ In some areas the disposal of lithium batteries in household or business trash may be prohibited. For the Sony Service Center nearest you, call 1-888-476-6972 in the United States or 1-800-961-7669 in Canada.
-
Page 11: Table Of Contents
Contents Getting Started ...13 Unpacking your Computer ...14 Locating Controls and Ports ...17 About the Front Panel ...18 About the Side Panels ...20 About the Back Panel ...23 About the Keyboard ...24 About the Mouse ...28 About the Remote Control ...30 Setting Up Your Computer Up Your Computer ...35 Connecting the Power Cord ...36... - Page 12 VAIO Computer Quick Start Upgrading Your VAIO Computer Installing Memory... 46 Troubleshooting g ...53 Support Options...55 Immediate Help and Support ... 55 Resources for Additional Help and Support ... 56 AIO Computer ...45...
-
Page 13: Getting Started
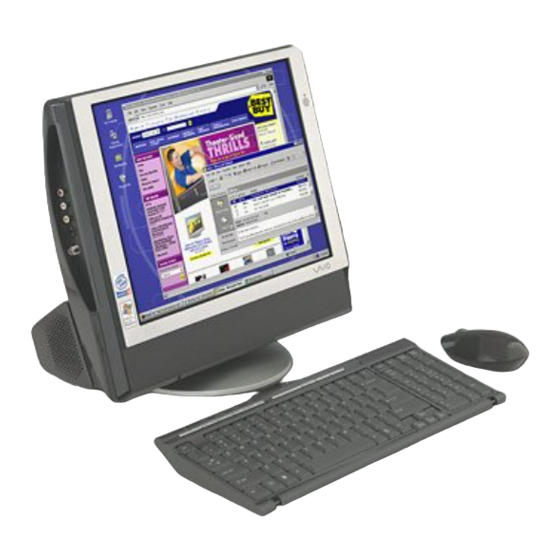
Getting Started d Congratulations on your purchase of the Sony VAIO® computer! Your new, high-performance, multimedia computer combines state-of-the-art computer functionality with the latest audio, video and information technology features. -
Page 14: Unpacking Your Computer
VAIO Computer Quick Start Unpacking your Computer Your computer may not be supplied with all of the accessories shown, depending on the system configuration you purchased. For details on the accessories supplied with your computer, see the online Specifications sheet. ✍... -
Page 15: Online Documentation
Guide. Specifications — This online specifications sheet describes the hardware ❑ and software configuration of your VAIO computer. Go to the Sony Online Support Web site at http://www.sony.com/pcsupport to view the online Specifications sheet. VAIO Software — Provides specific information about the preinstalled ❑... - Page 16 For more information about hard disk recovery Click Start in the Windows® taskbar, then click Help and Support. From the VAIO Help and Support Center menu, click VAIO Recovery Options. Other A software library containing the Microsoft® software and Sony® end-user license agreements.
-
Page 17: Locating Controls And Ports
Locating Controls and Ports Ports This section is intended to familiarize you with the controls, ports, and jacks that are available on your computer. Your computer may not be equipped with all of the hardware features described, and the location of the controls, ports, and jacks, may vary from the illustrations shown in this section. -
Page 18: About The Front Panel
VAIO Computer Quick Start About the Front Panel The front panel of your VAIO® computer is equipped with indicator lights and built-in speakers. Front panel Stereo speakers (built-in) The stereo speakers provide sound for software, audio, and video media. Infrared receiver Enables communication with the remote control that is supplied with models equipped with Giga Pocket ®... - Page 19 Memory Stick® media access indicator Light is amber when the Memory Stick media slot is in use. Power button Press the power button in from the right side, to turn the computer on and off. Power indicator Light is green while the power is on and amber when the computer is in Stand by mode.
-
Page 20: About The Side Panels
VAIO Computer Quick Start About the Side Panels s The side panels of your computer provide the connections for supplied and optional accessories. The icons on the side panel help you locate and identify the appropriate jack or port. Right panel Optical drive eject button Ejects a disc from the optical drive. - Page 21 Left panel Composite audio L In jack Connection for an audio cable (optional). Composite audio R In jack Connection for an audio cable (optional). Composite video In jack Connection for a video cable (optional). S-video In jack Connection for an S-video cable (optional). VHF/UHF port Connection for a TV coaxial cable (supplied).
-
Page 22: Microphone Jack
✍ i.LINK is a trademark of Sony used only to designate that a product contains an IEEE 1394 connection. The i.LINK connection may vary, depending on the software programs, operating system and compatible i.LINK devices. All products with an i.LINK connection may not communicate with each other. -
Page 23: About The Back Panel
About the Back Panel The back panel of your computer contains the AC power and USB ports. Back panel AC Input port Connection for the AC power cord (supplied). Universal Serial Bus (USB 2.0) ports (2) Connections for compatible high/full/low-speed USB devices. About the Back Panel... -
Page 24: About The Keyboard
VAIO Computer Quick Start About the Keyboard Your VAIO® computer is supplied with a wireless keyboard that has a standard key arrangement and additional keys that perform specific functions. Before attempting to use the wireless keyboard with your computer, see the section, “Connecting the Wireless Keyboard”... - Page 25 Mute Volume Control Function Numeric keypad Directional arrows Applications Windows * Use the Stand by button to resume from Stand by mode. Pressing other keys or using the mouse may not enable your computer to resume normal operation. DESCRIPTION Press to turn off speaker sound. Press again to restore sound.
- Page 26 VAIO Computer Quick Start Wireless keyboard (bottom) Battery compartment Compartment for the supplied AA batteries. Keyboard feet Extend to adjust the keyboard height. CONNECT button Press to enable the wireless keyboard to communicate with the system unit.
- Page 27 To set up the wireless keyboard Insert two AA batteries (supplied) into the wireless keyboard as shown. You can check your keyboard’s battery power level by clicking icon), located in the Windows® taskbar notification area. Inserting batteries into the wireless keyboard ✍...
-
Page 28: About The Mouse
VAIO Computer Quick Start About the Mouse Your VAIO® computer is supplied with a wireless optical mouse. Before attempting to use the wireless optical mouse with your computer, see the section, “Connecting the Wireless Mouse” on page 40. Wireless mouse (top) Left mouse button Press to perform specific mouse functions. -
Page 29: Connect Button
Wireless mouse (bottom) Power switch Slide power switch to turn the mouse on or off. CONNECT button Press to enable communication between your VAIO® computer and the wireless mouse. To set up the wireless mouse Insert two AA batteries (supplied) into the wireless mouse as shown. You can check your mouse’s battery power level by clicking located in the Windows®... -
Page 30: About The Remote Control
VAIO Computer Quick Start About the Remote Control The remote control is supplied with VAIO® computers that are equipped with Giga Pocket® Personal Video Recorder features and stop video recording and playback, select channels, and set viewing preferences. This section describes the basic functions of your Giga Pocket remote control Remote control BACK... - Page 31 MUTE button Press to turn off the sound. Press again to restore the sound. Channel number buttons (0-9) Press to select specific channels. (Press the ENT button to activate channel selection.) JUMP button Press to go to the previous channel. Press again to return to the current channel.
-
Page 32: Back Button
VAIO Computer Quick Start BACK button Press to return to the previous screen. (Note: This function is not available for the Giga Pocket software program.) APPLICATION START button Press to launch the Giga Pocket software program. VOLUME button Press to raise or lower the volume. STANDBY button Press to place the system into Stand by mode. -
Page 33: Menu Button
REW and FF buttons Press to rewind or fast-forward. PREV and NEXT buttons Press to move back to the previous screen or forward to the next screen. STOP button Press to stop playback. PLAY button Press to begin playback. PAUSE button Press to pause playback. - Page 34 VAIO Computer Quick Start To set up the remote control Insert two AA batteries (supplied) into the remote control, as shown. Inserting batteries into the remote control ✍ If your remote control does not operate properly, the batteries may need to be replaced.
-
Page 35: Setting Up Your Computer Up Your Computer
Setting Up Your Computer p Your Computer You can set up your system quickly and easily with the instructions provided in this section. For details on your system’s hardware configuration, see the online specifications sheet. -
Page 36: Connecting The Power Cord
VAIO Computer Quick Start Connecting the Power Cord g the Power Cord The computer’s power cord must be plugged into an AC power source, such as an AC wall outlet, surge protector, or Uninterruptible Power Supply (UPS), before you can establish communication with your wireless keyboard and wireless mouse. - Page 37 Use a coin to open the clamp, and then insert the power cord. Inserting the power cord into the clamp Plug the power cord into a grounded AC wall outlet, surge protector, or UPS. Connecting the power cord Connecting the Power Cord AC wall outlet...
-
Page 38: Connecting The Wireless Keyboard
VAIO Computer Quick Start Connecting the Wireless Keyboard Your VAIO® computer is supplied with a wireless keyboard. Before attempting to use the wireless keyboard, you must enable communication between the computer and the keyboard. ✍ When attempting to connect the wireless keyboard, confirm that the AA batteries (supplied) are properly inserted into the keyboard before your computer is turned on. - Page 39 Additional information about the wireless keyboard The wireless keyboard requires unobstructed communication with the system unit for proper operation. Do not exceed a maximum distance of 2 feet between your VAIO® ❑ computer and your wireless keyboard. ❑ Confirm that the supplied AA batteries are properly installed. Press the CONNECT buttons located on the left panel of the computer and ❑...
-
Page 40: Connecting The Wireless Mouse
VAIO Computer Quick Start Connecting the Wireless Mouse Your VAIO® computer is supplied with a wireless mouse. Before attempting to use the wireless mouse, you must enable communication between the computer and the mouse. ✍ When attempting to connect the wireless mouse, confirm that the AA batteries (supplied) are properly inserted into the mouse before your computer is turned on. - Page 41 Additional information about the wireless optical mouse The wireless optical mouse requires an ideal surface texture in order to provide precision pointing and tracking. Use surfaces such as plain paper, card stock, or fabric that have minimal ❑ repetitive patterns. Avoid surfaces such as mirrors, smooth glass, or magazines that have half- ❑...
-
Page 42: Connecting The Modem Cable
VAIO Computer Quick Start Connecting the Modem Cable Your computer is equipped with a single modem line jack to connect the supplied modem cable to your telephone wall jack. To use your wall jack for your telephone and modem lines, purchase a “1-to-2” jack adapter device (splitter). To connect the modem cable Unplug your telephone cable from the wall jack and insert the telephone cable into one of the RJ-11 jacks on a splitter device (optional). -
Page 43: Turning On Your Computer
Press the power button correctly to avoid damage to the computer. Registering Your Computer Take advantage of Sony’s commitment to quality customer support and receive these benefits by registering your computer: Sony Customer Support — Communicate with a Support Representative to ❑... -
Page 44: Turning Off Your Computer
VAIO Computer Quick Start Turning Off Your Computer Follow these steps when you are ready to turn off your computer for an extended period of time. To avoid loss of data, do not use the Power button to turn off the computer. To turn off your computer Click Start in the Windows taskbar, then select Turn Off Computer. -
Page 45: Upgrading Your Vaio Computer Aio Computer
Upgrading Your VAIO Computer grading Your VAIO Computer IO Computer In the future, you may want to increase or upgrade the memory in your VAIO® computer. This section provides information about installing memory. -
Page 46: Installing Memory
VAIO Computer Quick Start Installing Memory The amount of preinstalled memory can vary, depending on the system configuration purchased. See the online Specifications sheet for details about the type and amount of memory installed in your computer. Observe the proper safety precautions when you add or remove the memory in your computer. - Page 47 Removing the memory cover Gently place the system unit on a stable surface with the LCD screen facing down. Use caution when placing the LCD screen face-down on a table or other flat surface. The work surface must be free of any dirt or debris that may damage the screen.
-
Page 48: Removing A Memory Module
VAIO Computer Quick Start Removing a memory module Locate the memory module(s) you wish to remove. Push down on the latches, located on both sides of the module slot, to gently eject the module from the slot. Removing a memory module Side Latch Grasp the memory module by the sides and remove from the system unit. -
Page 49: Installing A Memory Module
Installing a memory module Remove the memory module from its anti-static package, handling it by the edges. Locate the center notch on the bottom edge of the memory module and align it to the center notch in the open module slot. Installing a memory module Module slot (open) - Page 50 VAIO Computer Quick Start Replacing the memory cover Align the memory cover tabs to the notches on the chassis. Gently press down on the memory cover until the cover snaps into place. Replacing the memory cover Memory cover tabs...
-
Page 51: Replacing The Back Cover
Installing Memory Replacing the back cover Gently slide the back cover in, until the cover release latches lock the cover into place. Replacing the back cover Back cover Cover release latches... - Page 52 VAIO Computer Quick Start...
-
Page 53: Troubleshooting G
Troubleshooting bleshooting This section describes how to troubleshoot common problems. For information on other troubleshooting topics, see the online VAIO® Computer User Guide. My computer does not start. Verify that the computer is plugged into a power source and that it is turned ❑... - Page 54 VAIO Computer Quick Start What can I do if my computer or software stop responding? You can try to locate and close the software program that has stopped responding. Press the Ctrl+Alt+Delete keys. The Windows Task Manager window appears. From the Applications tab, locate the software program that has the status message, “Not responding.”...
-
Page 55: Support Options
Support Options pport Options Sony provides several options to help solve common problems or to locate technical support for your VAIO® computer. This section describes available resources and offers suggestions on how to access this information for maximum results. Immediate Help and Support... -
Page 56: Resources For Additional Help And Support
❑ ❑ quick solutions to common problems. * You can locate the online Help for Sony software programs by pointing to the individual software program’s icon and selecting Help from the submenu. . The software’s main window... - Page 57 Sony Customer Information Services Center If other support options do not resolve your issue, you can contact a Sony Support representative directly. Before making a call to the Sony Customer Information Services Center, have this basic information readily available.
- Page 60 Printed on 100% recycled paper using VOC (Volatile Organic Compound) free vegetable oil based ink. Printed in Japan © 2004 Sony Electronics Inc. 4-681-453-01...