Advertisement
Elbow Installation (if supplied):
•
Install ½" BSP nipple at the desired elbow position.
•
Wall lining hole should be cut or finished as per the
dimension shown in the diagram on the right.
•
Cut off the threaded nipple 13±2mm from the wall lining
and apply thread seal tape to ensure a good seal.
Step 2
•
Screw the elbow onto the nipple ensuring that
the o-ring is sufficiently compressed to create a
watertight seal.
•
Ensure that the elbow is oriented vertically with
the outlet oriented downwards.
Care and Cleaning:
Never use abrasives or abrasive cleaning agents to clean this product. Clean regularly with
contamination free warm soapy water and a damp soft cloth.
Periodically the filter washer should be removed from the end of the shower hose and cleaned.
Methven warrants this product against manufacturing defects and that it is suitable for use
under the general operating conditions specified in this instruction sheet. However, regional
regulations apply and may affect your warranty. Please refer to www.methven.com or call
customer service for full details.
New Zealand
0800 804 222
439994
Australia
1300 638 483
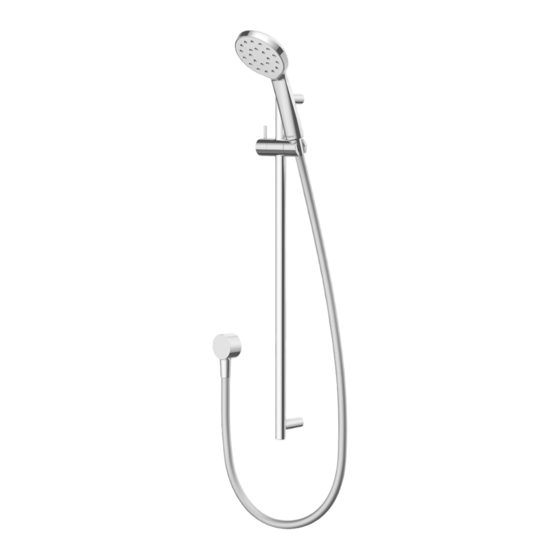
ROUND RAIL
Installation Guide
Technical Specifications:
Inlet Connections:
All ½" BSP
26mm max
* Regional specific regulations apply.
Please refer to your warranty statement at
www.methven.com
UK
0800 195 1602
ISSUE A
www.methven.com
Advertisement
Table of Contents

Related Manuals for METHVEN KRSRCPAU


Summary of Contents for METHVEN KRSRCPAU
- Page 1 Periodically the filter washer should be removed from the end of the shower hose and cleaned. Methven warrants this product against manufacturing defects and that it is suitable for use under the general operating conditions specified in this instruction sheet. However, regional regulations apply and may affect your warranty.
- Page 2 IMPORTANT: Please read all of the instructions before installation. Step 1 • Mount the rail connectors in desired position with General: the screws. Check the connectors are vertically aligned • This product must be installed in compliance with all relevant regional regulations. •...
Need help?
Do you have a question about the KRSRCPAU and is the answer not in the manual?
Questions and answers