
Subscribe to Our Youtube Channel
Related Manuals for Aruba 4100i Series


Summary of Contents for Aruba 4100i Series
- Page 1 Aruba 4100i Switch Series Installation and Getting Started Guide Part Number: 5200-8236 Published: July 2021 Edition: 1...
- Page 2 Copyright Information © Copyright 2021 Hewlett Packard Enterprise Development LP. Open Source Code This product includes code licensed under the GNU General Public License, the GNU Lesser General Public License, and/or certain other open source licenses. A complete machine-readable copy of the source code corresponding to such code is available upon request.
-
Page 3: Table Of Contents
User Configurable PoE Power Budget Installation Procedures for 24-port JL818A Switches Prepare the Installation Site Horizontal and Wall Mount Option Two-post Rack Mount Option Four-Post Rack Mount Option Install Transceivers (optional) Aruba 4100i Switch Series | Installation and Getting Started Guide... - Page 4 Power Cords Environmental Specifications RoHS Safety and Regulatory Information Connectivity Standards Battery Statements: Cabling and Technology Information Cabling Specifications Support and other resources Accessing Aruba Support Accessing Updates Aruba Support Portal My Networking Warranty Information Regulatory Information Documentation Feedback Contents...
-
Page 5: About This Document
Applicable Products JL817A - Aruba 4100i 12-port 1GbE (8-port Class 4 POE and 4-port Class 6 POE) 2-port SFP+ DIN Mount Switch JL818A - Aruba 4100i 24-port 1GbE (20-port Class 4 POE and 4-port Class 6 POE) 4-port SFP+ Switch... -
Page 6: Introducing The Switches
Power supplies Overview The Aruba 4100i Switch Series is a family of ruggedized networking switches, ideal for industrial environments and extreme conditions. They provide the foundation for high-performance networks supporting IoT, mobile, and cloud applications. They are for use in industrial applications. The end use environment may or may not be a restricted access location. -
Page 7: Front Of The Switches
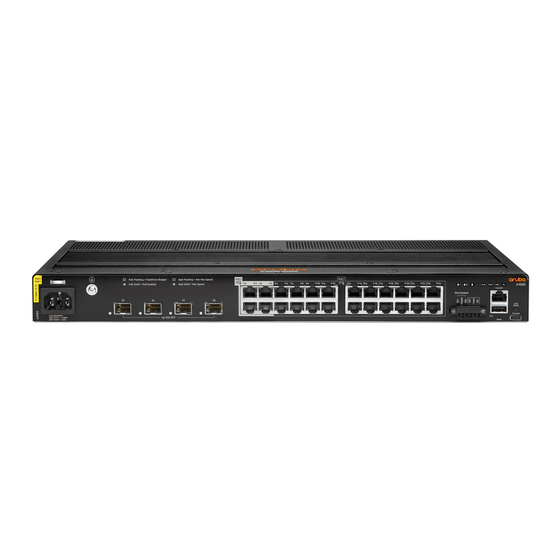
Ability to update the switch software. To download product updates, go to the Aruba Support Portal. JL817A - Aruba 4100i 12-port 1GbE (8-port Class 4 POE and 4-port Class 6 POE) 2-port SFP+ DIN Mount Switch 4 ports 10/100/1000 BaseT Class 6 PoE ports supporting up to 60W per port... - Page 8 Figure 1 Front of all 4100i switches Label Description Aruba 4100i 24-port 1GbE (20-port Class 4 POE and 4-port Class 6 POE) 4-port SFP+ Switch (JL818A) Aruba 4100i 12-port 1GbE (8-port Class 4 POE and 4-port Class 6 POE) 2-port SFP+ DIN Mount Switch (JL817A)
- Page 9 Figure 2 Front of switch (JL817A) Item Description Label Ground lug (must earth) DIN switch grounding must be connected 10G SFP+ ports SFP ports supporting 100M/1G/10GbE transceivers Alarm IN terminal Alarm 1 and 2 input terminal block Alarm OUT terminal Alarm output terminal block RJ-45 console port RJ-45 management console USB auxiliary port...
- Page 10 PoE mode (only for PoE enabled SKUs) USB-C console port USB mangement console Reset button Hard reset - hold for 5 seconds Soft reset - press and release within 5 seconds Aruba 4100i Switch Series | Installation and Getting Started Guide...
-
Page 11: Management Ports
Management ports You can connect the switch to a PC running Microsoft Windows or to a terminal server through either the RJ- 45 console port or the USB-C console port. These ports use the following connectors: RJ-45 console port uses a console connection with these pinout assignments: RJ-45 (Signal reference from chassis) Reserved Reserved... -
Page 12: 10/100/1000 Base-T Ports (Downlink)
Console Ports Aruba 4100i switches include an RJ-45 serial console port on the front of the switch. This port is used to connect a console to the switch by using an RJ-45 serial cable (not supplied). A DB9-to-RJ-45 console cable can be ordered from HPE: JL448A, Aruba X2C2 RJ45 to DB9 Console Cable. -
Page 13: Dc Power Connectors
The console can be a PC or workstation running a VT-100 terminal emulator, or a VT-100 terminal. The Aruba CX mobile app and the Aruba USB Bluetooth adapter enable you to configure your switch from your mobile device. For information about using the Aruba CX mobile app to configure the switch, see the Fundamentals Guide for your switch and software release. -
Page 14: Alarm Connector
For safe and reliable DC connection, use wiring that is 14 AWG, up to 2 meters. Ensure that the wires are secured by tightening the captive screws. Alarm connector JL817A Aruba 4100i Switch Series | Installation and Getting Started Guide... - Page 15 JL818A Alarm signals can be connected to the switch through the alarm connector. The switch supports two alarm inputs and one alarm output relay. The alarm connector provides six alarm wire connections. Alarm Specifications Input Dry contact. Do not apply any voltage source. Open or Closed state detect (Dry Contact detection). Output 1.0A @ 24 VDC or 0.5A @ 48VDC Max Power: 24W Supports Normally Open and Normally Closed...
- Page 16 Alarms can be configured in the CLI. Each alarm input can be configured as normally open or normally closed contact and can be used for environmental, power supply or port needs. The alarm output can be connected to an external device such as a light or bell. Aruba 4100i Switch Series | Installation and Getting Started Guide...
-
Page 17: Configuring Alarm Relays
Configuring alarm relays Industrial rugged switches have hardware alarm ports that generate an alarm on internal or external condition depending on alarm port wiring during system installation. The switch provides for 1x output alarm port that could be wired to an external device. When an external device like an external alarm bell is wired to the output port, configuring the event to output relay will trigger the bell to ring indicating the event. - Page 18 Featured introduced. Command Information Platforms Command context Authority Administrators or local user group members with execution config 4100i rights for this command. alarm snooze alarm snooze [time in minutes] [repeat] Aruba 4100i Switch Series | Installation and Getting Started Guide...
- Page 19 Selects the alarm for ambient temperatures reaching threshold limits. The threshold is 70°C. Threshold is reduced to 50°C when non-supported transceivers are detected; only the listed Aruba I-Temp transceivers listed on the product datasheet allow for the maximum of 70°C. Commercial Temp Aruba transceivers will trigger this derating of this threshold to 50°C.
- Page 20 Specifies the input alarm port. Examples Showing details for all alarm input ports on the switch: switch# show alarm input Alarm Snooze Timer Status: inactive ----------------------------------------------------------------------- Input Alarm IN1, Name: Door-Sensor ----------------------------------------------------------------------- Aruba 4100i Switch Series | Installation and Getting Started Guide...
- Page 21 Alarm Port Status log-and-trap Relay Trigger ----------------------------------------------------------------------- inactive true false closed ----------------------------------------------------------------------- Input Alarm IN2, Name: N/A ----------------------------------------------------------------------- Alarm Port Status log-and-trap Relay Trigger ----------------------------------------------------------------------- active false true open Showing details for alarm input ports IN1: switch# show alarm input IN1 Alarm Snooze Timer Status: inactive ----------------------------------------------------------------------- Input Alarm IN1, Name: Door-Sensor...
- Page 22 Alarm Snooze Timer Status: inactive Showing the status of an active 3-minute alarm snooze timer: switch# show alarm timer Alarm Snooze Timer Status: active Duration remaining: 2 min 55 sec Command History Aruba 4100i Switch Series | Installation and Getting Started Guide...
-
Page 23: Chassis Leds And Buttons On The Front Of The Switch
Release Modification 10.08 Featured introduced. Command Information Platforms Command context Authority Administrators or local user group members with execution 4100i Manager ( rights for this command. Chassis LEDs and buttons on the front of the switch JL817A Item Label Description Alarm 1 LED Alarm 1 LED to show alarm input 1 status Alarm 2 LED... - Page 24 Speed LED Port LEDs are showing speed information Unit Identification LED User-configurable LED with 3 states (on, off and flashing) Global Status LED Global status indicator (Health) LED - green and amber Aruba 4100i Switch Series | Installation and Getting Started Guide...
-
Page 25: Led Behavior
Item Label Description LED Mode button Push to toggle the display modes of port LEDs: Activity / Link Mode (default) PoE Mode Speed Mode Reset button Hard reset - hold for 5 seconds Soft reset - press and release within 5 seconds LED Behavior Global Status LEDs Description... - Page 26 System DC Input status LED (JL817A only) Description No DC input Solid Green DC input in normal operation Solid amber DC input fault or out of range 54V PoE Status LEDs (JL817A only) Aruba 4100i Switch Series | Installation and Getting Started Guide...
-
Page 27: Led Mode Select Button And Indicator Leds
Back of the Switch JL817A - Aruba 4100i 12-port 1GbE (8-port Class 4 POE and 4-port Class 6 POE) 2-port SFP+ DIN Mount Switch The rear panel of the switch has a latch for installation on a DIN rail. The latch is spring-loaded to move down to position the switch over a DIN rail and return to the original position to secure the switch to a DIN rail. -
Page 28: Power Supplies
JL818A - Aruba 4100i 24-port 1GbE (20-port Class 4 POE and 4-port Class 6 POE) 4-port SFP+ Switch Power Supplies (JL817A only) The following power supplies are supported for JL817A : (JL819A) Aruba 4000i POE 240W AC DIN PSU (JL820A) Aruba 4000i POE 480W AC DIN PSU (JL821A) Aruba 4000i POE 240W DC-DC DIN PSU The AC power supplies automatically adjust to any AC voltage;... - Page 29 Never insert or remove a power supply while the power cord or cable is connected. Verify that power has been turned off and the cord or cable has been disconnected from the power supply before installation or removal. Figure 1 JL819A Aruba 4000i POE 240W AC DIN PSU Introducing the Switches...
- Page 30 Figure 2 JL820A Aruba 4000i POE 480W AC DIN PSU Figure 3 JL821A Aruba 4000i POE 240W DC-DC DIN PSU Aruba 4100i Switch Series | Installation and Getting Started Guide...
-
Page 31: Installing The Switch
Chapter 3 Installing the switch Installing the switch The following sections show how to install and mount the switch. For more information contact your Aruba representative or Aruba authorized reseller. Included Parts The 4100i switch is shipped with the following components: Documentation kit JL817A does not include any accessory kit. -
Page 32: Parts Not Included
World Parts not included If you have not already done so, order an Aruba rack mount kit for use with your 4100i switch. Rack mounting your Aruba 4100i switch is supported using these rack mount kits: JL822A, Aruba 3U DIN-to-rack mounting kit for 2-post or 4-post racks (Ordered separately) for JL817A... - Page 33 All connections must be removed to de-energize the unit JL817A is only intended for use with Aruba Ruggedized Power Supplies; use with other power supplies could cause serious electrical problems, including injury or death to personnel, and damage to the switch and other property.
- Page 34 Before installing the switch, verify that the switch is operational by powering it on and observing the boot. For 10/100/1000 ports, the cable length from a switch to an attached device cannot exceed 328 feet (100 meters). Clearance to front and rear panels must meet these conditions: Front-panel LEDs can be easily read.
-
Page 35: Installation Precautions And Guidelines
Installation Precautions and Guidelines Review these environmental and enclosure guidelines before installation: Proper ESD protection is required whenever you handle Aruba equipment. Installation and maintenance personnel should be properly grounded by using ground straps to eliminate the risk of ESD damage to the switch. - Page 36 To help avoid personal injury or product damage when installing your switch, read the following installation precautions and guidelines. This equipment must be grounded. Never defeat the ground conductor or operate the equipment in the absence of a suitably installed ground conductor. Contact the appropriate electrical inspection authority or a electrician if you are uncertain that suitable grounding is available.
-
Page 37: Installation Procedures For 12-Port Jl817A Switches
8. Attach the other end of the ground wire to an appropriate ground, such as a ground bus, a grounded DIN rail, or a grounded bare rack. Installation Procedures for 12-port JL817A Switches Aruba 4100i Switch Series | Installation and Getting Started Guide... -
Page 38: Prepare The Installation Site
The JL817A must be installed with one of the following external power supplies: Power Supplies Dimensions Weight 0.96 kg (2.12 lb) JL819A Aruba 4000i POE 240W AC 121 x 85 x 124.1 mm (4.76 x 3.35 x DIN PSU 4.86 inch) 1.37 kg (3.02 lb) JL820A Aruba 4000i POE 480W AC 121 x 144 x 118.6 mm (4.76 x 5.67 x... -
Page 39: Mount The Power Supplies
The power supply unit can be mounted on 35mm DIN rails in accordance with EN60715. Observe all warning and cautions prior to installing the device(s). JL819A and can be mounted either vertically or horizontally with input terminal at the bottom and at the left, respectively. Aruba 4100i Switch Series | Installation and Getting Started Guide... - Page 40 Vertical Horizontal JL820A can only be mounted vertically with the input terminal block on the left side. JL821A can only be mounted vertically with the input terminal block at the bottom. Installing the switch...
- Page 41 2. Slide the bottom of the switch forward until it clicks into place. To dismount the power supply: 1. Pull down the lever to release to latch. 2. Tilt the bottom of the unit upward. Aruba 4100i Switch Series | Installation and Getting Started Guide...
- Page 42 3. Unhook the unit from the DIN rail. Connect and configure AC Power Supplies JL819A Item Description 3 pin AC input connector DC OK LED Installing the switch...
- Page 43 Input range: AWG 16-10 Output: AWG 14 AWG, up to 2 meters To connect the power supply input: Use L, N and PE connections of input terminal connector to establish the 100-240Vac connection. Aruba 4100i Switch Series | Installation and Getting Started Guide...
- Page 44 The unit is protected with internal fuse (not replaceable) at L pin and it has been tested and approved on 20 (UL) and 16A (IEC) branch circuits without additional protection device. An external protection device is only required if the supplying branch has an ampacity greater than above. 1.
- Page 45 PSU 1 and PSU 2 output voltage. Alternatively, adjust an extra 0.2V of output voltage difference between the two units at no load condition. Voltage difference during actual setup can be verified through Software command. Connect and configure the DC power supply Aruba 4100i Switch Series | Installation and Getting Started Guide...
- Page 46 Item Description Modbus over USB: used to connect a device running POWERMASTER or custom user application. Firmware update is also possible. DC Output: connected to the load. The output voltage is adjustable between 52 to 56 VDC. DC-OK dry contact: normally open relay contact is available; the relay closes when the output voltage is >90% of the programmed output voltage value.
- Page 47 Wire connections 1. Using a wire stripping tool, strip each of the solid 12 AWG wires leaving 7 mm exposed. 2. Fully insert the wires into the connecting terminal block connectors. Aruba 4100i Switch Series | Installation and Getting Started Guide...
-
Page 48: Power-On The Switch And Check Leds
Power-on the switch and check LEDs Prerequisites The Aruba 4100i switch does not contain a power on/off switch. It is turned on by connecting the switch to an AC or DC power source. Check LEDs for proper switch operation. For further detail see... - Page 49 Pull the metal tab using a flathead screwdriver (if needed), then hook the bottom of the switch onto the rail. 2. If needed, install the optional side enforcement brackets (5400-4042, not provided). To mount the switch on its side: Aruba 4100i Switch Series | Installation and Getting Started Guide...
- Page 50 1. Remove the Aruba cover on the side. 2. Remove the screws that secure the DIN bracket at the rear. Installing the switch...
- Page 51 3. Transfer the DIN bracket to the side and secure with the screws removed in the previous step. Torque the screws to 7 kg-cm (6.1 lb-in). 4. Snap the cover removed from step one onto the back panel. Aruba 4100i Switch Series | Installation and Getting Started Guide...
-
Page 52: Din-To-Rack Mount Option
5. Attach the switch onto the DIN rail: a. Hook the top of the bracket onto the DIN rail. b. Pull the metal tab using a flathead screwdriver (if needed), then hook the bottom of the switch onto the rail. For safe operation, review the mounting precautions in Installation Precautions and Guidelines, before mounting a... - Page 53 The mounting brackets have multiple mounting holes and can be rotated. Attach the bracket in an upright position. 2. Secure the bracket with screws (not provided) based on the sequence shown below. Remove the four break-off tabs for cabling as needed. Aruba 4100i Switch Series | Installation and Getting Started Guide...
-
Page 54: Aruba Side Enforcement Bracket Kit For Aruba Switches (Optional)
DIN rail. Aruba Side Enforcement Bracket Kit for Aruba Switches (optional) The optional Aruba side enforcement bracket kit (5400-4042) is used to stabilize supported switches in extreme environments, such as railway applications. This side enforcement bracket kit reinforces the mounting solution and supports the device mounted to the DIN rail. - Page 55 Pull the metal tab using a flathead screwdriver (if needed) then hook the bottom of the switch onto the rail. 4. Loosen the two screws labeled 3 on each of the clip assembly. Aruba 4100i Switch Series | Installation and Getting Started Guide...
- Page 56 1. Attach the clip assembly to the T-bracket and rail: a. Install the clip onto the bracket and rail from the top position. b. Push the clip up from the bottom to get a tight fit. Installing the switch...
- Page 57 2. Using a T-20 torx screw driver, secure the clip by first installing the inner two screws, then the outer screws. Torque the inner screws to 21 kg-cm (18.2 lb-in) and the outer screws to 17 kg-cm (14.8 lb- in). Aruba 4100i Switch Series | Installation and Getting Started Guide...
-
Page 58: User Configurable Poe Power Budget
3. Repeat the assembly procedure on the other side of the switch. User Configurable PoE Power Budget JL817A supported Standby Redundancy (Power ORing) but not Active Redundancy (Current Sharing). If two different external power supply units are used concurrently, the PoE Power Budget must be set with respect to the power supply with the lower power rating. - Page 59 Displays the detailed status of given member. <MEMBER-ID> Display the detailed status of given port. <IFNAME> Display the brief status of all ports or the given port. brief Examples Showing sample output for show power-over-ethernet : Aruba 4100i Switch Series | Installation and Getting Started Guide...
- Page 60 switch# show power-over-ethernet System Power Status Power Status : No redundancy Operational Power Status : No redundancy Total Available Power : 360 W Total Configured Power Total Failover Pwr Avl Total Redundancy Power Total Power Drawn Total Power Reserved Total Remaining Power : 360 W Trap Threshold : 80 %...
-
Page 61: Installation Procedures For 24-Port Jl818A Switches
5. Install transceivers (optional) 6. Connect the switch to a power source 7. Setup for initial configuration Prepare the Installation Site Cabling Infrastructure: Ensure the cabling infrastructure meets the necessary network specifications. Aruba 4100i Switch Series | Installation and Getting Started Guide... -
Page 62: Horizontal And Wall Mount Option
Installation Location: Before installing the switch, plan its location and orientation relative to other devices and equipment. In the front of the switch, leave a minimum of 6 inches (15.24 cm) of space for the twisted-pair, fiber- optic cabling and power cord. To avoid personal injury or product damage, review Installation Precautions and Guidelines on page 35 before... - Page 63 1 inch apart from other devices. 1. Remove the pre-installed flat head screws and do not reuse. Attach the wall mount bracket to the switch and secure with the 8mm M4 screws provided. Aruba 4100i Switch Series | Installation and Getting Started Guide...
-
Page 64: Two-Post Rack Mount Option
2. Secure the wall anchors to the wall and install the countersunk head M4 screws and washers. 3. Ensure that the ports are facing down. Supported walls: Concrete (cemented) or Plywood ¾” thick. JL818A can only be wall mounted with the ports facing downward. Two-post Rack Mount Option The switch is designed to be mounted in any EIA-standard 19-inch telco rack or communication equipment cabinet using the rack mount bracket. - Page 65 2. Hold the switch with attached brackets up to the rack and move it vertically until rack holes line up with the bracket holes, then insert and tighten the four countersunk M4 screws, attaching the brackets to the rack. Aruba 4100i Switch Series | Installation and Getting Started Guide...
-
Page 66: Four-Post Rack Mount Option
Figure 2 Mounting the switch in a two-post rack Four-Post Rack Mount Option The Aruba 4100i switch can be mounted in four-post racks and cabinets by using the Aruba X414 1U Universal 4-Post Rack Mount Kit (JL9583B) (sold separately). For safe operation, read the mounting precautions in... - Page 67 2. Attach the rack slides to the sides of the switch using eight countersunk M4 screws. Four screws per slide. 3. Install rack rail assemblies to the four-post rack, see the Aruba Version B Switch Rail Kit installation for Aruba Switches guide for your four-post rack (JL9583B).
-
Page 68: Install Transceivers (Optional)
This can take 1-3 seconds, with the worst case being 5 seconds. The Aruba transceivers are Class 1 laser devices. Avoid direct eye exposure to the beam coming from the transmit port. The transceivers operate only at full duplex. Half duplex operation is not supported. -
Page 69: Setup For Initial Configuration
If the port LED does not come on when the network cable is connected to the port, Diagnosing with the LEDs in the Troubleshooting chapter. Ports are enabled by default. Aruba 4100i Switch Series | Installation and Getting Started Guide... -
Page 70: Troubleshooting
By default, ports do not run selftest at boot. To enable port selftest on boot, save the no fastboot configuration to the switch. See the Diagnostics Guide for further detail. Diagnosing with the LEDs Aruba 4100i Switch Series | Installation and Getting Started Guide... -
Page 71: Led Patterns For General Switch Troubleshooting
LED Patterns for General Switch Troubleshooting 1. Check in the table for the LED pattern you see on your switch. 2. Refer to the corresponding diagnostic tip on the next few pages. JL817A Switch DC PSU LEDs 54V PoE Diagnostic (JL819A, JL820A, input Status Global Status... -
Page 72: Diagnostic Tips
(>0C°). If the condition persists, call your Aruba authorized network reseller, or use the electronic support services from Aruba to get assistance. The switch is not able to Check the connectivity of the DC cables to both PSU and Switch... - Page 73 Aruba support. initialization failure. If the port has a transceiver installed, verify the transceiver is either a supported Aruba transceiver. If using an unsupported SFP/SFP+ transceiver, confirm that unsupported transceiver mode is enabled. For a list of supported transceivers, see the Transceiver Guide.
-
Page 74: Hardware Diagnostic Tests
System Up Time timer to reset to zero. Checking the Switch LEDs Diagnosing with the LEDs on page 70 for information on interpreting the LED patterns. Checking Console Messages Aruba 4100i Switch Series | Installation and Getting Started Guide... -
Page 75: Testing Switch-To-Device Network Communications
Useful diagnostic messages may be displayed on the console screen when the switch is reset. Connect a PC running a VT-100 terminal emulator program to the switch’s Console Port and configure it to run at 115200 baud, and with the other terminal communication settings. Then, when you reset the switch, note the messages that are displayed. -
Page 76: Specifications
44 mm (1. 73 in) 444.5 mm (17.5 304.4 cm (12.0 in) Aruba 4100i 24-port 6.5 kg (14.33 lb) 1GbE (20-port Class 4 POE and 4-port Class 6 POE) 4-port SFP+ Switch (JL818A) Aruba 4100i Switch Series | Installation and Getting Started Guide... -
Page 77: Electrical
54VDC 240W 48 VDC 12-48VDC DIN Switch: 4.4A UL certified to Power Supply 11-55 VDC Output 54VDC AWG 14 AWG 16-12 50/60Hz JL817A JL819A - Aruba Power supply: AC Input up to 2 4000i POE 3.5A/1.3A 100V-240V meters 54VDC 240W Specifications... -
Page 78: Power Cords
For a list of the power cords that apply to your switch, Included Parts. Only Aruba-approved power cords may be used with Aruba devices. To access power cord information for your switch, see Included Parts. -
Page 79: Environmental Specifications
It can also cause serious electrical problems, including injury or death to personnel, and damage to the switch and other property. If you cannot verify that you have a power cord approved for use with your switch model, contact your authorized Aruba dealer or sales representative for assistance. Environmental Specifications Operating temperature -40°C to 60°C, 0m/s (-40°F to 140°F, 0 LFM) sealed enclosure... -
Page 80: Connectivity Standards
When selecting a fiber SFP device, make sure the device has the same (or better) operating temperature range as the switch. Use only an approved Laser Class 1 SFP transceiver. Japan Power Cord Warning Connectivity Standards Aruba 4100i Switch Series | Installation and Getting Started Guide... -
Page 81: Battery Statements
Compatible with these EN/IEC standard com- Technology Lasers IEEE standards pliance 10-T, 100-TX, 1000-T IEEE 802.3 100BASE-T IEEE 802.3u 100BASE-TX IEEE 802.3ab 1000BASE-T 1000-SX IEEE 802.3z 1000BASE-SX EN/IEC 60825 Class 1 Laser Product Laser Klasse 1 1000-LX IEEE 802.3z 1000BASE-LX EN/IEC 60825 Class 1 Laser Product... - Page 82 The only indicator of battery failure is the failure of the switch internal clock to keep the correct time across a reboot or power cycle. If a battery failure occurs, contact your authorized Aruba representative for assistance. Batteries are not customer-serviceable and battery failures should be referred only to service personnel authorized by Aruba.
-
Page 83: Cabling And Technology Information
This chapter includes switch connector information and network cable information for cables that should be used with Aruba 4100i switches. Incorrectly wired cabling is a common cause of problems for LAN communications. Aruba recommends that you work with a qualified LAN cable installer for assistance with your cabling requirements. - Page 84 The patch cables are frequently overlooked when testing cable and they must also comply with the cabling standards. For Conducted and Radiated Immunity in accordance with EN55024, the Aruba switch is limited to Performance Criteria A with shielded cables (CAT6A).
-
Page 85: Support And Other Resources
Other websites that can be used to find information: Airheads social forums and Knowledge https://community.arubanetworks.com/ Base Software licensing https://lms.arubanetworks.com/ End-of-Life information https://www.arubanetworks.com/support-services/end-of-life/ Aruba software and documentation https://asp.arubanetworks.com/downloads Accessing Updates To download product updates: Aruba 4100i Switch Series | Installation and Getting Started Guide... -
Page 86: Aruba Support Portal
Compliance-EnterpriseProducts Aruba is committed to providing our customers with information about the chemical substances in our products as needed to comply with legal requirements, environmental data (company programs, product recycling, energy efficiency), and safety information and compliance data, (RoHS and WEEE). For more information, see https://www.arubanetworks.com/company/about-us/environmental-citizenship/.
Need help?
Do you have a question about the 4100i Series and is the answer not in the manual?
Questions and answers