Table of Contents
Advertisement
Quick Links
Advertisement
Table of Contents

Subscribe to Our Youtube Channel
Related Manuals for VITINNI GLA-1003


Summary of Contents for VITINNI GLA-1003
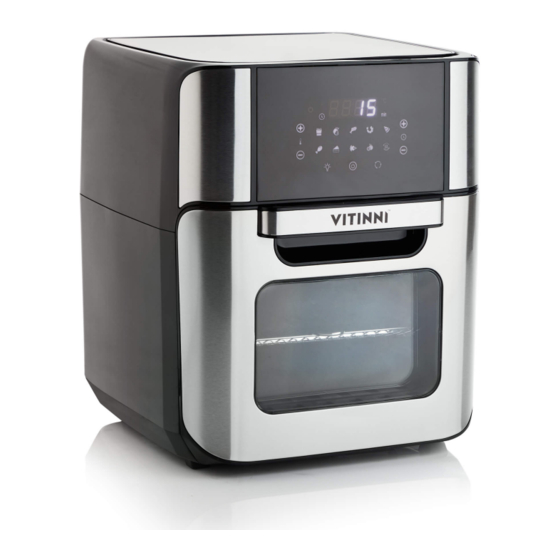
- Page 1 12LTR DIGITAL AIR FRYER WITH STAINLESS STEEL TRIM PLEASE READ AND KEEP THESE INSTRUCTIONS FOR FUTURE USE MODEL NO: GLA-1003 SAP Code: JF07540002 For further assistance, other products and more, join us at: Website: www.vitinni.co.uk Instagram: @vitinniuk Facebook: www.facebook.com/vitinni...
-
Page 2: Explanations Of Symbols
Thank you for choosing our Vitinni Stainless Steel 12LTR Air Fryer. Please read this user manual carefully and keep it for future reference. The manufacturer and importer do not accept any liability if the information in these operation instructions is not complied with. If you need any assistance, please contact our customer service team on the details provided on the back page of this manual. - Page 3 General Safety Instructions • WARNING! : Read all safety notices, instructions, illustrations and technical data provided with this Air Fryer before using for the first time. Failure to follow the safety notices and instructions may result in electric shock, fire or injuries. •...
- Page 4 • The Air Fryer should be placed on a stable surface when in use. • Do not place the Air Fryer against wall or other appliances; ensure there is at least 10cm of space Do not place anything on the top of the Air Fryer. •...
-
Page 5: Intended Use
Risk of Damage to Material and Property • The Air Fryer should only be connected to a properly installed socket. The socket must be readily accessible so that the connection to the mains can quickly be isolated. The mains voltage must match the technical data of the Air Fryer. •... -
Page 6: Items Supplied
Items Supplied Please check the list of supplied items which correspond to the numbered diagrams below. Air Fryer x 1 Rotating Basket x 1 Rotating Spit Fork with Locking Screw x 2 Shaft of the Rotating Spit x 1 Removal Tool x 1 Baking Rack x 2 Drip Tray x 1 Operating Instructions x 1... - Page 7 Air Fryer Overview 8. Heating Element 9. Support for the Shaft and Rotating Basket 10. Cooking Space 11. Holder for the Shaft and the Rotating Basket 12. Rails 13. Lighting 14. Control Panel 15. Display (Alternating display of temperature and remaining cooking time during operation) 16.
- Page 8 Accessories Drip Tray The drip tray (7) should always be inserted so that any dripping fat, crumbs or other food residues can be collected in it. It should be slid right into the bottom of the cooking space (10). Multi Use Cooking Racks The cooking racks (6) are intended for dehumidifying.
- Page 9 Rotating Spit The rotating spit consists of the shaft (4) and two rotating spit forks (3). The rotating spit is suitable for grilling large pieces of meat, e.g. chicken, grilled or roast pork. Use the rotisserie function (18) for even cooking. Assemble the rotating spit and insert it into the device: PLEASE NOTE! The shaft contains two small round notches marking the outermost position of the locking screws.
-
Page 10: Removal Tool
4. First insert the left hand side (marked L) of the rotating basket into the cooking space (10). To do this, insert the left end (with just one notch) of the shaft as far as it will go into the round holder (11) on the left hand side of the cooking space. - Page 11 Operating the Air Fryer PLEASE NOTE! Do not place food that is still packed in plastic wrap or plastic bags in the Air Fryer. Only ever place the hot accessories on a heat resist ant surface. Make sure that the food does not come into contact with the heating element of the Air Fryer.
-
Page 12: Choosing A Programme
9. Press the ON/OFF button (19). The displays on the control panel (19) switch on. 185 C and 15 minutes are pre-set. 10. Either set the temperature and cooking time manually with the buttons + / (17 and 21) and start the cooking process by pressing the ON/OFF button or select one of the 10 pre-set programmes (16) Choosing a Programme... - Page 13 If needed, change the cooking time or temperature of a selected programme with the buttons + / - (17 and 21). 11. If the rotating basket or the rotating spit is used, touch the button (18) to start the rotating function. (Touching the button again will stop the rotating function.) Until you are properly familiar with the Air Fryer, the condition of the food should be checked in between times to ensure that it does not burn.
-
Page 14: Technical Data
Technical Data • Model number: GLA-1003 • Power supply: 220 • 240 V~ 50/ 60 Hz • Power: 1800 W • Protection class I • Capacity: 12 l • Timer: Up to 90 minutes; • Drying programme: up to 24 hours •... -
Page 15: Troubleshooting
Troubleshooting If the device does not work properly, first check whether you are able to rectify the problem yourself. If the problem cannot be solved with the following steps, contact the customer service department. Do not attempt to repair an electrical device yourself! -
Page 16: Suggested Recipes
Disposal Dispose of the packaging material in an environmentally friendly manner so that it can be recycled. The Air Fryer is governed by the European Directive 2012/19/EU on waste electrical and electronic equipment (WEEE). Do not dispose of the Air Fryer as normal domestic waste, but rather in an environmentally friendly manner via an officially approved waste disposal company. -
Page 17: Home Made Chips
Recipes Home Made Chips Ingredients • 4 large potatoes • 1-2 tbsp. cooking oil • Salt/Pepper to taste Method Peel the potatoes and cut them into sticks of equal size. Depending on how thick you cut your potatoes, you can vary between potato wedges and thick or thin chips. The thicker the potatoes are cut, the longer the cooking time. - Page 18 Recipes Spicy Chicken Legs Ingredients • 4-6 chicken legs • 2-3 tbsp. olive oil • 1 garlic clove • 1 tsp. sugar • 1 tsp. paprika powder • Salt/Pepper to taste Method Peel the garlic and squeeze through the garlic press. Mix the clove of garlic with the sugar, paprika powder, salt, pepper and oil.
- Page 19 Recipes Chicken Breast Strips in Breadcrumbs Ingredients • 2 chicken breast fillets • 1-2 egg whites • ½ cup flour for breadcrumbs • ½ cup breadcrumbs • ½ tsp. salt • ½ tsp. pepper Method Separate off the egg whites. Place the egg whites, flour and breadcrumbs into three separate bowls.
- Page 20 Recipes Cod Fillet with Garlic and Herb Crust Ingredients • 100g cod fillet • 1-2 egg whites • 1 garlic clove • 1 tbsp. chopped basil • 1 tsp. paprika powder • ½ cup breadcrumbs • Salt & Pepper to taste Method Peel the garlic and squeeze through a garlic press.
- Page 21 Recipes Apple Turnovers Ingredients • 1-2 apples • 1 roll puff pastry • 50g brown sugar • 2 tbsp. flour • 1-2 tbsp. lemon juice Method Peel the apples, remove the cores and cut them into small pieces. Mix together the pieces of apple, flour, sugar and lemon juice and add cinnamon to taste.
- Page 22 Recipes Vegan Cup Cakes Ingredients • 275g self-raising flour • 1tsp. baking powder • 225g caster sugar • 200ml sunflower oil • 200ml soya milk • 1tsp vanilla extract • Cake cases Method Mix the flour, baking powder and sugar in a large bowl. Make a well in the centre and add the sunflower oil, soya milk and vanilla.
- Page 23 2 year period. Customer Services: If you would like further advice or information on your product, ensure you have the SAP code ready and please get in touch with us at Vitinni on the contact options below: SAP Code: JF07540002 Phone: 01706 716 116 (Mon –...
Need help?
Do you have a question about the GLA-1003 and is the answer not in the manual?
Questions and answers