
Related Manuals for La Sommeliere TR3V181


Summary of Contents for La Sommeliere TR3V181
- Page 1 MANUEL D’INSTRUCTIONS Modèles / Model number : TR3V181 / TR2V121 FR – MANUEL D’UTILISATION GB – USE INSTRUCTIONS p. 1 p. 22 NL – HANDLEIDING IT – MANUEL D’USO p. 41 p. 64...
-
Page 2: Consignes De Securite
1. CONSIGNES DE SECURITE Pour votre sécurité et pour une utilisation correcte de l’appareil, avant d’installer et d’utiliser l’appareil pour la première fois, lisez attentivement cette notice, y compris les mises en gardes et les conseils utiles qu’elle contient. Afin d’éviter d’endommager l’appareil et/ou de vous blesser inutilement, il est important que les personnes amenées à... - Page 3 l’intérieur de cet appareil, car elles pourraient s’y déverser. ATTENTION — Si le cordon d’alimentation est endommagé, vous devez le remplacer immédiatement auprès de votre fabricant, ou d’un revendeur qualifié, afin d’éviter tout risque d’électrocution. ATTENTION — Maintenez les ventilations bien ouvertes, et vérifiez bien que l’air peut circuler par les ouvertures, surtout si l’appareil est encastré...
- Page 4 d’éviter les risques d’incendie. • Cet appareil est destiné à ranger des boissons domestiques traditionnelles, selon les consignes livrées avec le système. L’appareil est lourd. Soyez prudent lorsque vous le déplacez. • N’utilisez jamais le socle, les tiroirs, les portes, et autres éléments similaires pour vous •...
- Page 5 R600a Instructions de sécurité Attention: Ne pas utiliser de dispositifs mécaniques ou d'autres moyens pour accélérer le processus de dégivrage, autres que ceux recommandés par le fabricant. Attention: N’obstruer aucune grille de ventilation de l’appareil. Attention : Ne pas stocker de substances explosives comme les bombes d'aérosol avec un propulseur inflammables dans cet appareil.
-
Page 6: Plaque Signaletique
2. PLAQUE SIGNALETIQUE Ci-dessous l’exemple d’une plaque signalétique : La plaque signalétique collée à l’intérieur ou à l’arrière de l’appareil (selon modèle) comporte toutes les informations spécifiques à votre appareil. Nous vous conseillons de noter son numéro de série sur ce livret avant son installation, pour vous y référer si nécessaire ultérieurement (intervention technique, demande d’assistance, etc.). - Page 7 3. DESCRIPTION PRODUITS DESCRIPTION PRODUIT : TR2V121 Panneau de contrôle Ventilateur Clayette bois Sonde Séparateur de zone Filtre à charbon actifs Ventilateur Sonde Petite clayette bois Grille de ventilation Pieds ajustables Serrure Charnière supérieure Porte vitrée Joint de porte...
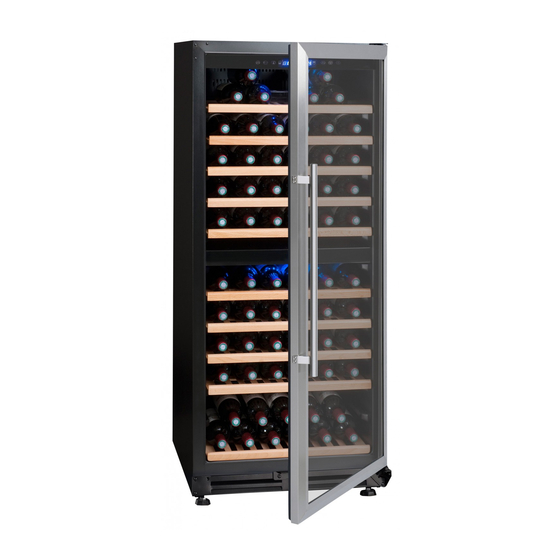
- Page 8 DESCRIPTION PRODUIT : TR3V181 Panneau de contrôle Filtre à charbons actifs Clayette bois Sonde Séparateur de zone Ventilateur Clayette bois Sonde Séparateur de zone Ventilateur Sonde Petite clayette bois Grille de ventilation Pied ajustable Charnière supérieure Joint de porte Porte vitrée...
- Page 9 4. INUSTRUCTIONS D’INSTALLATION Avant d’utiliser votre cave à vin Enlevez l’emballage extérieur et intérieur. ▪ ▪ Laissez votre appareil en position verticale au repos pendant environ 24h avant sa mise en service. Cela permettra de réduire la possibilité d'un dysfonctionnement du système de refroidissement dû...
- Page 10 CLASSE SYMBOLE PLAGE DE TEMPÉRATURE AMBIANTE (°C) De +10 à +32 Tempérée élargie Tempérée De +16 à +32 Subtropicale De +16 à +38 De +16 à +43 Tropicale Installation de la poignée ▪ Retirez le joint de la porte en commençant par l’angle, cela n’endommagera pas le produit et il sera facilement réinstallé.
- Page 11 Inverser le sens de la porte L'appareil est livré avec l'ouverture de la porte du côté gauche (de charnière sur le côté droit). La porte de cet appareil est capable de s’ouvrir de la gauche ou du côté droit. Pour inverser l'ouverture de la porte de votre cave et ouvert du côté...
- Page 12 REMARQUE : Toutes les pièces enlevées doivent être mises de côté pour permettre l'ouverture de la porte en sens inverse. 1. Utilisez les outils pointus pour soulever le cache charnière. (Figure 1) 2. Ouvrir la porte, dévisser la charnière de porte, veillez à tenir la porte de verre fermement après avoir retiré...
-
Page 13: Instructions D'utilisation
Alarme de température Si la température est anormalement haute, l’écran affichera le code erreur « HH », si la température est anormalement basse l’écran affichera le code « LL ». 5. INSTRUCTIONS D’UTILISATION La cave à vin doit être installée dans un endroit où la température ambiante se situe entre 16 et 38°C (60-100°F). - Page 14 TR3V181 Panneau de contrôle (Panneau de la zone du haut) RUN : c’est le voyant de mise sous tension, il indique que le produit est en marche si le voyant rouge est allumé. SET : bouton de réglage de la température de la zone du haut. Appuyez sur le bouton pour modifier la température jusqu’à...
- Page 15 Déplacement des clayettes coulissantes 1. Retirez toutes les bouteilles sur la clayette 2. Tirez la clayette vers vous 3. Repérez la petite patte en plastique 4. Appuyez sur le loquet en plastique vers le haut (côté gauche de la clayette) 5.
- Page 16 Rangement de vos bouteilles Ci-dessous plusieurs méthodes de rangement :...
-
Page 17: Nettoyage Et Entretien
6. NETTOYAGE ET ENTRETIEN Avant de nettoyer votre appareil (opération à faire régulièrement), débranchez l’appareil en retirant la prise de courant ou en débranchant le fusible dont elle dépend. Nous vous conseillons, avant la première utilisation et de façon régulière, de nettoyer l’intérieur comme l’extérieur (face avant, latérales et dessus) avec un mélange d’eau tiède et de produit de lavage doux. -
Page 18: En Cas De Panne
▪ Déplacez l’appareil en position verticale de préférence ou notez à partir des inscriptions portées sur l’emballage, le sens sur lequel peut être couché l’appareil. Protégez également votre appareil avec une couverture ou un tissu similaire. 7. EN CAS DE PANNE Malgré... - Page 19 8. DES PROBLEMES ET SOLUTIONS Beaucoup de problèmes peuvent être résolus facilement, vous permettant d’économiser le coût d’un appel téléphonique au SAV. Essayez de résoudre votre problème en suivant les suggestions ci- dessous avant d’appeler le SAV. GUIDE DE RESOLUTION DES PROBLEMES PROBLEME CAUSE POSSIBLE L’appareil n’est pas branché.
- Page 20 Dans un souci d’amélioration constante de nos produits, nous nous réservons la possibilité de modifier les caractéristiques techniques sans préavis. Les garanties des produits de la marque LA SOMMELIERE sont exclusivement énoncées par les distributeurs que nous avons choisis. Aucun élément des présentes ne peut être interprété...
- Page 21 FICHE PRODUIT EUROPÉENNE selon la réglementation (UE) N°1060/2010 CAVE À VIN DE VIEILLISSEMENT ET DE MISE À TEMPERATURE MARQUE LA SOMMELIERE RÉFÉRENCE COMMERCIALE TR2V121 TR3V181 DONNÉES ÉLECTRIQUES 220-240 V / 50 Hz DIMENSIONS DU PRODUIT (L x P x 595 x 680 x 1615 mm...
-
Page 22: General Safety Instructions
1. GENERAL SAFETY INSTRUCTIONS For your safety and correct usage, before installing and first using the appliance, read this user manual carefully, including its hints and warnings. To avoid unnecessary mistakes and accidents, it is important to make sure that all people using the appliance are thoroughly familiar with its operation and safety features. - Page 23 service agent or similarly qualified persons in order to avoid a hazard. WARNING —Keep ventilation openings, in the appliance enclosure or in the built-in structure, clear of obstruction. WARNING — D o n o t damage the refrigerant circuit. WARNING — Do not use electrical appliances inside the compartments of the appliance, unless they are of the type recommended by the manufacturer.
- Page 24 • The appliances manufacture storage recommendations should be strictly adhered to. Refer to relevant instructions for storage. • Do not place the appliance in direct sunlight. • Keep burning candles jumps and other items with naked flames away from the appliance so that do not set the appliance on fire.
- Page 25 R600a Safety regulation Warning: Do not use mechanical devices or other means to accelerate defrosting process, other than those recommended by the manufacturer. Warning: Keep ventilation openings in the appliance enclosure or in the structure clear of obstruction. Do not store explosive substances such as aerosol cans with a flammable propellant in this appliance.
-
Page 26: Technical Data
2. TECHNICAL DATA Below is an example of the nameplate: The nameplate attached to the inside or rear of the appliance (depending on the model) includes the entire information specific to your appliance. We recommend that you make a note of its serial number in this booklet prior to installation, so that you can refer to it later (technical work, request for assistance, etc.). - Page 27 3. DESCRIPTION OF THE APPLIANCES PRODUCT DESCRIPTION: TR2V121 Control panel Ventilation fan Full wooden shelf Sensor Baffle plate Active carbon filter Ventilation fan Sensor Small size wooden shelf Ventilation base Adjustable feet Lock Upper Hinge Glass door Door seal...
- Page 28 PRODUCT DESCRIPTION: TR3V181 Control panel Active carbon filter Big Wooden Shelf Sensor Baffle plate Middle ventilation fan Big wooden shelf Sensor Baffle plate Lower ventilation fan Sensor Small wooden shelf Ventilation base Adjustable feet Upper hinge Door seal Glass door...
-
Page 29: Installation Instructions
4. INSTALLATION INSTRUCTIONS Before using this appliance ▪ Remove the exterior and interior packing. ▪ Before connecting the appliance to the power source, let it stand upright for approximately 24 hours. This will reduce the possibility of a malfunction in the cooling system from handling during transportation. - Page 30 CLASS SYMBOL AMBIENT TEMPERATURES RANGE (°C) Extended temperate From +10 to +32 Temperate From +16 to +32 Subtropical From +16 to +38 Tropical From +16 to +43 Handle installation ▪ This wine cooler includes a stainless-steel handle that is required to operate this unit. To install the handle please follow the below instruction: Pull away the door gasket in the area where the handle is to be installed –...
- Page 31 Reversing the door swing of your appliance The unit is delivered to you with the door opening from the left side (hinge on right side). The door of this appliance is capable of opening from either the left or right side. To reverse the door swing of your cooler and open from the right side, please follow the instructions and diagram as follows.
- Page 32 NOTE: All parts removed must be saved to allow the door swing to be reversed 1. 1.Use the sharp tools to pry open the decoration nail on the top of the cabinet and the cap of door spindle carefully. (Fig 1) 2.
-
Page 33: Use Instructions
5. USE INSTRUCTIONS The wine cooler should be placed in where the ambient temperature is between 16-38°C (60-100°F). If the ambient temperature is above or below this range, the performance of the unit may be affected. For example, placing your unit in extreme cold or hot conditions may cause interior temperatures to fluctuate. - Page 34 TR3V181 control panel (Upper control panel) RUN light: indicator light of compressor working. While the compressor operating, the red light is on. While it stops operating, the red light is off. SET button: temperature setting button; Once you press the button, the temperature increases 1℃...
- Page 35 Shelf change Do as the following shows if needing to pull out or change the shelves; 1. Remove all bottles from the shelf 2. Pull the shelf toward you 3. Locate the small plastic tab 4. Press the plastic latch upward (left side of the shelf) 5.
- Page 36 Placement and storage of wines Several common layouts of wines: Your cabinet was designed to store a maximum number of bottles in total security. The wines are kindly advised to layout equally. The best temperature for red wines is 11-18℃;For white wines is 6-12℃.
-
Page 37: Care And Maintenance
6. CARE AND MAINTENANCE Before cleaning your appliance (something that should be done regularly), disconnect it by removing the plug or by pulling the fuse on the circuit. Before using your appliance for the first time and regularly after that, we recommend that you clean the inside and outside (front, side and top) with warm mixed with a gentle cleaning product. -
Page 38: Problems And Solutions
’ F THESE CHECKS REVEAL NOTHING THEN CONTACT YOUR RETAILER FTER ALES EPARTMENT CAUTION! Unplug the appliance before carrying out any maintenance or repair work. 8. PROBLEMS AND SOLUTIONS You can solve many common Wine Cooler problems easily, saving you the cost of a possible service call. - Page 39 As we continuously improve our products for the benefit of our customers, we reserve the right to modify technical characteristics without notice. Warranties for LA SOMMELIERE brand products are offered exclusively by selected retailers. No part of these instructions may be considered as a supplementary guarantee.
- Page 40 EUROPEAN DATA SHEET according to the regulations (UE) N°1060/2010 AGEING AND SERVICE TEMPERATURE WINE CELLAR BRAND LA SOMMELIERE COMMERCIAL REFERENCE TR2V121 TR3V181 POWER SUPPLY 220-240 V / 50 Hz PRODUCT DIMENSIONS (W x D x 595 x 680 x 1615 mm...
-
Page 41: Algemene Veiligheidsvoorschriften
1. ALGEMENE VEILIGHEIDSVOORSCHRIFTEN Lees met het oog op uw veiligheid en een juiste installatie van het apparaat aandachtig deze gebruiksaanwijzing, met inbegrip van de waarschuwingen en nuttige tips die erin zijn terug te vinden, voordat u het apparaat installeert en voor het eerst gebruikt. Om te vermijden dat het apparaat wordt beschadigd en/of dat u onnodig verwond raakt, is het belangrijk dat de personen die worden geacht gebruik te maken van dit apparaat, volledig op de hoogte zijn van de werking en de veiligheidsfuncties ervan. - Page 42 Algemene veiligheid — Dit apparaat is ontworpen om in een huiselijke omgeving te OPGELET werken. OPGELET — Berg in dit apparaat nooit brandbare stoffen zoals spuitbussen op, want deze zouden er kunnen uitlopen. OPGELET — Als het voedingssnoer is beschadigd, moet u het onmiddellijk bij uw fabrikant of een gekwalificeerde handelaar vervangen, om elk gevaar voor elektrocutie te vermijden.
- Page 43 Elektrische veiligheid Wij kunnen niet aansprakelijk worden gesteld voor incidenten die worden • veroorzaakt door een onjuiste elektrische installatie. voedingssnoer niet worden verlengd. Gebruik geen • verlengsnoeren, adapters of meervoudige contactdozen. Ga zorgvuldig na of de wandcontactdoos niet is beschadigd. Een •...
- Page 44 houden en mag u niet aan het snoer trekken. Stel het apparaat niet rechtstreeks bloot aan de zon. • Het apparaat moet uit de buurt van kaarsen, lantaarns en andere open • vlammen worden gehouden, om brandgevaar te vermijden. Dit apparaat is uitsluitend bestemd om wijn en dranken op te slaan. •...
- Page 45 Een goede luchtcirculatie is noodzakelijk, om gevaar voor oververhitting te • vermijden. Volg zorgvuldig de meegeleverde installatie-instructies, om ervoor te zorgen dat er voldoende ventilatie is. Zorg ervoor dat het apparaat de muren niet raakt en/of niet in aanraking • komt met warme elementen (compressor, condensator), om brandgevaar te vermijden.
- Page 46 R600a Veiligheidsinstructies Opgelet: versper geen enkel ventilatierooster van het apparaat. Opgelet: sla in dit apparaat geen ontplofbare stoffen op zoals spuitbussen met een brandbaar drijfgas. Opgelet: beschadig het koelcircuit van het apparaat niet. Opgelet: de koeleenheden die met isobutaan (R600a) werken, mogen niet worden geplaatst in een zone met ontstekingsbronnen (bijvoorbeeld elektrische contacten zonder afdichting) of op een plaats waar de koelvloeistof zich kan ophopen in...
-
Page 47: Technische Gegevens
2. TECHNISCHE GEGEVENS Hieronder ziet u een voorbeeld van een typeplaatje: De op de binnen- of achterzijde van het apparaat (afhankelijk van het model) geplakte typeplaat bevat alle informatie betreffende uw apparaat. We raden u aan om het serienummer voor de installatie in dit boekje te noteren zodat u er later indien nodig over beschikt (technische interventie, vraag om assistentie…) Wanneer het apparaat namelijk eenmaal geïnstalleerd en geladen is, is toegang een stuk gecompliceerder. - Page 48 3. Beschrijving van de inrichting BESCHRIJVING VAN HET PRODUCT: TR2V121 Bedieningspaneel Ventilator Houten oplegplank Sonde Scheiding van zones Filter met actieve koolstof Ventilator Sonde Kleine houten oplegplank Ventilatierooster Verstelbare voet Slot Bovenste scharnier Glazen deur Deurpakking...
- Page 49 BESCHRIJVING VAN HET PRODUCT: TR3V181 Bedieningspaneel Filter met actieve koolstof Houten oplegplank Sonde Scheiding van zones Ventilator Houten oplegplank Sonde Scheiding van zones Ventilator Sonde Kleine houten oplegplank Ventilatierooster Verstelbare voet Bovenste scharnier Deurpakking Glazen deur Slot Haak van het slot...
- Page 50 4. INSTALLATIEVOORSCHRIFTEN Voordat u dit apparaat gebruikt ▪ Verwijder de verpakking rondom en binnenin. ▪ Voordat u het apparaat aansluit op de stroombron, moet u het ongeveer 24 uur rechtop laten staan. Dat zal de kans verkleinen dat het koelsysteem slecht functioneert wegens de behandeling tijdens het transport.
- Page 51 BEREIK VAN KLASSE SYMBOOL OMGEVINGSTEMPERATUUR (°C) Uitgebreid gematigd Van +10 tot +32 Gematigd Van +16 tot +32 Subtropisch Van +16 tot +38 Tropisch Van +16 tot +43 De handgreep aanbrengen ▪ Verwijder de deurpakking beginnend bij de hoek. Het product wordt hierdoor niet beschadigd en de pakking kan gemakkelijk opnieuw worden aangebracht.
- Page 52 De richting van de deur omkeren In de levertoestand van het apparaat gaat de deur links open (met het scharnier aan de rechterkant). De deur van dit apparaat kan ofwel links ofwel rechts opengaan. Om de openingsrichting van de deur van uw wijnkelder om te keren, zodat de deur rechts opengaat, de instructies en het schema hieronder volgen.
- Page 53 OPMERKING: Alle onderdelen die worden verwijderd moeten worden bewaard om het openen van de deur in de omgekeerde richting mogelijk te maken. 1. Gebruik de scherpe gereedschappen om de scharnierbedekking op te tillen. (Figuur 2. De deur openen, het deurscharnier losschroeven, daarbij de glazen deur goed vasthouden nadat de schroef verwijderd is, en vervolgens de deur verwijderen.
- Page 54 Vergrendelen van de deur met de sleutel Uw apparaat is uitgerust met een systeem voor het vergrendelen van de deur met een sleutel. De sleutels bevinden zich in een plastic zakje, samen met de gebruiksaanwijzing. Steek de sleutel in het slot en draai hem linksom om de deur te openen. Om de deur te sluiten, voer de omgekeerde bewerking uit en vergewis u ervan dat de sleutel helemaal in het slot zit.
- Page 55 5. UW WIJNKAST IN WERKING STELLEN De wijnkast moet worden geïnstalleerd op een plaats waar de omgevingstemperatuur tussen 16 en 38°C (60-100°F) ligt. Als de omgevingstemperatuur buiten dit bereik is, kan dat de prestaties van het apparaat ongunstig beïnvloeden. Door uw apparaat bijvoorbeeld te plaatsen waar omgevingstemperatuur uiterst koud of zeer warm is, kunnen er schommelingen in de...
- Page 56 TR3V181 Bedieningspaneel (Paneel van de bovenste zone) RUN: dat is het controlelampje van inschakeling. Het lampje licht rood op wanneer het product in werking is. SET: instelknop temperatuur. Druk op de knop om de temperatuur te wijzigen tot u de gewenste temperatuur bereikt.
- Page 57 De verschuifbare oplegplanken verplaatsen 1. Verwijder alle flessen van de oplegplank 2. Trek de oplegplank naar u toe 3. Bepaal waar het kleine plastic voetje zich bevindt 4. Druk de plastic pal naar boven (linkerzijde van de oplegplank) 5. Druk de plastic pal naar beneden (rechterzijde van de oplegplank) 6.
- Page 58 Uw flessen schikken Hieronder volgen verschillende methoden om uw flessen te schikken:...
-
Page 59: Wartung
6. WARTUNG Voordat u uw apparaat schoonmaakt (regelmatig uit te voeren interventie), het apparaat loskoppelen door de stekker uit te trekken of haar zekering los te koppelen. We raden u aan om voor het eerste gebruik en daarna op regelmatige basis de binnen- en buitenkant (voorkant, zijkant en onderkant) schoon te maken met een mengsel van lauw water en een zacht reinigingsproduct. - Page 60 7. IN GEVAL VAN EEN DEFECT Ondanks alle zorg die wij aan onze producten besteden, kan een defect nooit volledig uitgesloten worden. Voordat u contact opneemt met de dienst na verkoop van uw handelaar, moet u echter het volgende controleren: ▪...
-
Page 61: Problemen En Oplossingen
8.PROBLEMEN EN OPLOSSINGEN U kunt veel eenvoudige problemen aan uw chambreerkamer oplossen, zonder de naverkoopdienst te hoeven raadplegen. Probeer de onderstaande suggesties. PROBLEEM MOGELIJKE OORZAAK De stekker steekt niet in het contact De Aan/Uit knop staat op de UIT positie. De wijnkast start niet Gesprongen zekering. - Page 62 Met het oog op de voortdurende verbetering van onze producten behouden wij ons het recht voor om de technische kenmerken zonder voorafgaande kennisgeving te wijzigen. De garanties van de LA SOMMELIERE -producten worden uitsluitend door de door ons gekozen dealers gegeven. Geen enkel onderdeel van deze handleiding kan geïnterpreteerd worden als een aanvullende garantie.
- Page 63 EUROPESE GEGEVENSKAART volgens Verordening 1060/2010 (EU) WIJNKAST MERK LA SOMMELIERE HANDELSREFERENTIE TR2V121 TR3V181 STROOMVOEDING 220-240 V / 50 Hz AFMETINGEN VAN HET 595 x 680 x 1615 mm 595 x 680 x 1795 mm PRODUCT (B x D x H)
- Page 64 1. SICUREZZA GENERALI Per la vostra sicurezza e per usare in modo corretto l'apparecchio, prima di installarlo ed utilizzarlo per la prima volta, leggere attentamente le presenti istruzioni comprese le avvertenze e i consigli utili che contengono. Per evitare di danneggiare l'apparecchio e/o di ferirsi, è...
- Page 65 circolare dalle aperture, soprattutto se l'apparecchio è incassato nella parete. — Non danneggiare il circuito di refrigerazione. ATTENZIONE — Non usare apparecchiature elettriche all'interno dello scomparto, a meno che ATTENZIONE non siano del tipo consigliato dal produttore. — Il sistema refrigerante e isolante contengono gas infiammabili. Quando si ATTENZIONE smaltisce l'apparecchio, conferirlo in un centro per la raccolta differenziata autorizzato.
- Page 66 Attenzione: pulizia e manutenzione ▪ Prima di effettuare la manutenzione, scollegare l'apparecchio per togliere la corrente. ▪ Non pulire l'apparecchio usando oggetti metallici, generatori di vapore, oli volatili, solventi organici o componenti abrasivi. ▪ Non pulire nessuna parte dell'apparecchio con prodotti infiammabili. I vapori possono creare un rischio di incendio o di esplosione.
- Page 67 Questo apparecchio è destinato solo ad uso domestico. Il produttore non può essere ritenuto responsabile in caso di altro utilizzo. R600a Istruzioni di sicurezza Attenzione: non ostruire nessuna griglia di ventilazione dell'apparecchio. Attenzione: non conservare all'interno dell'apparecchio sostanze esplosive come le bombolette spray con gas infiammabile.
- Page 68 2. TARGHETTA INFORMATIVA Qui sotto è illustrato l'esempio di una targhetta informativa: La targhetta informativa incollata all'interno o sul retro dell'apparecchio (a seconda del modello) contiene tutte le caratteristiche tecniche del frigo cantina. Consigliamo di annotare il numero di serie su questo libretto prima dell'installazione, per ulteriore riferimento (intervento tecnico, richiesta di assistenza, ecc.).
-
Page 69: Descrizione Dell'apparecchio
3. DESCRIZIONE DELL'APPARECCHIO DESCRIZIONE DELL'APPARECCHIO: TR2V121 Pannello dei comandi Ventola Ripiano in legno Sensore Separatore di zona Filtro a carboni attivi Ventola Sensore Piccolo ripiano in legno Griglia di ventilazione Piedino regolabile Serratura Cerniera superiore Porta in vetro Guarnizione della porta... - Page 70 : TR3V181 DESCRIZIONE DELL'APPARECCHIO Pannello dei comandi Filtro a carboni attivi Ripiano in legno Sensore Separatore di zona Ventola Ripiano in legno Sensore Separatore di zona Ventola Sensore Piccolo ripiano in legno Griglia di ventilazione Piedino regolabile Cerniera superiore Guarnizione della porta...
-
Page 71: Istruzioni Di Installazione
4. ISTRUZIONI DI INSTALLAZIONE Prima di utilizzare il frigo cantina ▪ Rimuovere l'imballo esterno ed interno. ▪ Lasciare l'apparecchio a riposo in posizione verticale per circa 24 ore prima di metterlo in funzione. Così facendo, si limiterà la possibilità di un eventuale malfunzionamento del sistema di raffreddamento dovuto al trasporto. - Page 72 CLASSE SIMBOLO INTERVALLO DI TEMPERATURA AMBIENTE (°C) Temperata estesa Da +10 °C a +32 °C Temperata Da +16 °C a +32 °C Subtropicale Da +16 °C a +38 °C Tropicale Da +16 °C a +43 °C MONTAGGIO DELLA MANIGLIA ▪ Togliere la guarnizione della porta cominciando dall'angolo;...
- Page 73 Inversione del senso di apertura della porta L'apparecchio è fornito con l'apertura della porta a sinistra (cerniera sul lato destro). Tuttavia, la porta di questo apparecchio può essere aperta sia da destra che da sinistra. Per invertire l'apertura della porta del frigo cantina e aprirla dal lato destro, seguire le istruzioni e i disegni come segue.
- Page 74 OSSERVAZIONE: tutti pezzi che vengono tolti devono essere riposti da parte per consentire l'apertura della porta nel senso inverso. 1. Usare uno strumento appuntito per sollevare il copri cerniera. (Figura 1) 2. Aprire la porta, svitare la cerniera della porta, fare attenzione a tenere saldamente la porta di vetro dopo aver tolto la vite, quindi togliere la porta.
- Page 75 5. FUNZIONAMENTO DEL FRIGO CANTINA Il frigo cantina deve essere installato in un luogo in cui la temperatura ambiente sia compresa tra 16 e 38°C (60-100°F). Una temperatura ambiente più alta o più bassa di questo intervallo può influire negativamente sulle prestazioni dell'apparecchio. Ad esempio, collocare l'apparecchio in un luogo in cui la temperatura ambiente è...
- Page 76 TR3V181 Pannello dei comandi (Pannello della zona alta) RUN: è la spia di messa sotto tensione; se la spia è accesa in rosso, indica che l'apparecchio è in funzione. SET: pulsante di regolazione della temperatura. Premere il pulsante per modificare la temperatura fino a ottenere quella desiderata.
- Page 77 Spostamento dei ripiani scorrevoli 1. Togliere tutte le bottiglie dal ripiano. 2. Tirare il ripiano verso di sé. 3. Cercare il piccolo tassello di plastica. 4. Premere il gancetto di plastica verso l'alto (lato sinistro del ripiano). 5. Premere il gancetto di plastica verso il basso (lato destro del ripiano).
- Page 78 Disposizione delle bottiglie Di seguito sono illustrati vari metodi di disposizione:...
-
Page 79: Pulizia E Manutenzione
6. PULIZIA E MANUTENZIONE Prima di pulire l'apparecchio (operazione da fare regolarmente), scollegare l'apparecchio togliendo la spina dalla presa di corrente o staccando il fusibile da cui dipende. Consigliamo prima del primo utilizzo e in seguito regolarmente, di pulire l'interno e l'esterno (lato frontale, fianchi e piano superiore) con acqua tiepida e detersivo delicato. -
Page 80: In Caso Di Guasti
Risparmio energetico ▪ L'apparecchio deve essere collocato in un locale fresco, lontano da qualsiasi fonte di calore (altri elettrodomestici) e dall'esposizione diretta al sole. ▪ Il locale in cui viene collocato l'apparecchio deve essere ventilato. Non coprire mai le fessure di areazione. ▪... - Page 81 8. PROBLEMI E POSSIBILI CAUSE In molti casi è possibile risolvere dei semplici problemi del frigo cantina senza doversi rivolgere al servizio assistenza. Provare a seguire i consigli forniti qui sotto. PROBLEMA POSSIBILE CAUSA • La spina non è inserita. Il frigo cantina non si •...
-
Page 82: Protezione Dell'ambiente
Al fine del continuo miglioramento dei nostri prodotti, ci riserviamo la possibilità di modificare le caratteristiche tecniche senza preavviso. Le garanzie dei prodotti del marchio LA SOMMELIERE sono stabilite esclusivamente dai distributori che abbiamo scelto. Nessun elemento contenuto nel presente manuale può... - Page 83 SCHEDA PRODOTTO EUROPEA secondo il regolamento (UE) N°1060/2010 FRIGO CANTINA PER INVECCHIAMENTO E MESSA A TEMPERATURA LA SOMMELIERE MARCA TR2V121 TR3V181 RIFERIMENTO COMMERCIALE DATI ELETTRICI 220-240 V / 50 Hz DIMENSIONI DEL PRODOTTO 595 x 680 x 1615 mm 595 x 680 x 1795 mm...
Need help?
Do you have a question about the TR3V181 and is the answer not in the manual?
Questions and answers