Riello 40 GS5 Installation, Use And Maintenance Instructions
Forced draught gas burner one-stage operation
Hide thumbs
Also See for 40 GS5:
- Installation, use and maintenance instructions (33 pages) ,
- Installation, use and maintenance instructions (36 pages) ,
- Installation, use and maintenance instructions (12 pages)

Related Manuals for Riello 40 GS5


Summary of Contents for Riello 40 GS5
- Page 1 Installation, use and maintenance instructions Forced draught gas burner One-stage operation CODE MODEL TYPE 3755219 RIELLO 40 GS5 552 T1 20146122 (2) - 06/2018...
- Page 2 Translation of the original instructions...
-
Page 3: Table Of Contents
Contents Declarations....................................3 Information and general warnings............................4 Information about the instruction manual ........................4 2.1.1 Introduction.................................. 4 2.1.2 General dangers................................4 2.1.3 Other symbols ................................4 2.1.4 Delivery of the system and the instruction manual...................... 5 Guarantee and responsibility............................5 Safety and prevention................................ - Page 4 Contents 5.13.14 Hour counter function (B4) ............................25 5.13.15 Monitoring the power supply voltage .........................25 5.13.16 Frequency supply error ..............................25 5.13.17 Internal voltage fault..............................25 5.13.18 Checking the fan motor ..............................26 5.13.19 Checking the faults of the gas valve and the motor ....................26 5.13.20 EEprom check................................26 5.13.21 Ionisation current ...............................26 5.13.22 Post-purging................................26...
-
Page 5: Declarations
31020 San Vendemiano (TV) Italy Values measured: Max. CO: 70 mg/kWh Max. NOx: 93 mg/kWh Legnago, 21.04.2018 Executive General Manager Research & Development Director RIELLO S.p.A. - Burner Department RIELLO S.p.A. - Burner Department Mr. U. Ferretti Mr. F. Comencini 20146122... -
Page 6: Information And General Warnings
Information and general warnings Information and general warnings Information about the instruction manual 2.1.1 Introduction WARNING: MOVING PARTS The instruction manual supplied with the burner: This symbol indicates that you must keep limbs is an integral and essential part of the product and must not away from moving mechanical parts;... -
Page 7: Delivery Of The System And The Instruction Manual
Information and general warnings The system supplier must carefully inform the user about: 2.1.4 Delivery of the system and the instruction – the use of the system; manual – any further tests that may be required before activating the When the system is delivered, it is important that: system;... -
Page 8: Safety And Prevention
Safety and prevention Safety and prevention Introduction The burners have been designed and built in compliance with the type and pressure of the fuel, the voltage and frequency of the current regulations and directives, applying the known technical electrical power supply, the minimum and maximum deliveries for rules of safety and envisaging all the potential danger situations. -
Page 9: Technical Description Of The Burner
Technical description of the burner Technical description of the burner Burner designation Range: RIELLO 40 G Fuel: Natural gas Light oil Light oil - Natural gas Size Variations: Light oil with pre-heater Conical head Reduced ignition output Two-stage Standard head... -
Page 10: Technical Data
Technical description of the burner Technical data Model RIELLO 40 GS5 Type 552 T1 18 58 Heat output (Hi) min - max 15,500 50,000 kcal/h NCV 8 12 kWh/m – 7,000 10,340 kcal/m Fuel Family 2 Pressure: min. 16 mbar – max. 200 mbar... -
Page 11: Firing Rate
Technical description of the burner Firing rate The burner output is chosen from within the diagram area (Fig. 2). The firing rate value (Fig. 2) has been obtained considering an ambient temperature of 20°C, an atmospheric pressure of 1013 mbar (approx. 0m above sea level), and with the combustion head ATTENTION adjusted as shown on page 16. -
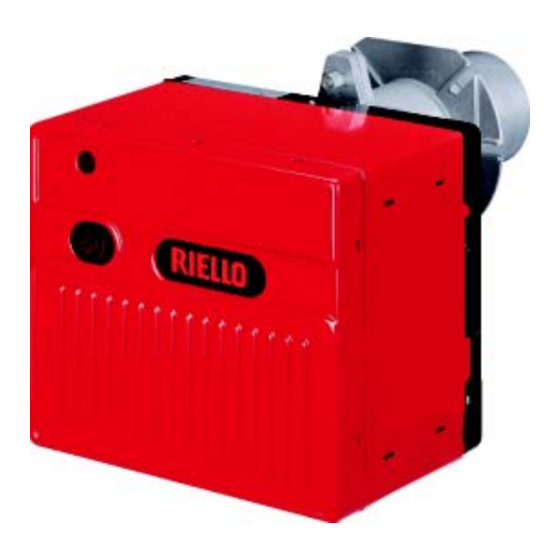
Page 12: Burner Description
Technical description of the burner Burner description 20065193 Fig. 4 Air dampers 11 Actuator Damper fixing screws 12 Flange Pressure test point (-) 13 Pressure test point (+) Cover fixing screw 14 Combustion head Air pressure switch 15 Electrode-probe Motor 16 Gas train elbow Lock-out signal with reset button The supplied grommet and the cover fixing screw... -
Page 13: Electrical Control Box
Technical description of the burner 4.10 Electrical control box The control box is a control and supervision system for forced To install the control box it is necessary to: draught burners, for intermittent operation (at least one controlled tighten the screw (A) with a tightening torque of 1 - 1.2 Nm; shutdown every 24 hours). -
Page 14: Actuator
Technical description of the burner 4.11 Actuator Warnings To avoid accidents, material or environmental damage, observe the following instructions! Avoid opening, modifying or forcing the actua- ATTENTION tors. All interventions (assembly and installation operations, assistance, etc.) must be carried out by qualified personnel. ... -
Page 15: Installation
Installation Installation Notes on safety for the installation After carefully cleaning all around the area where the burner will The installation of the burner must be carried out be installed, and arranging the correct lighting of the environ- by qualified personnel, as indicated in this manual ment, proceed with the installation operations. -
Page 16: Preliminary Checks
Installation Preliminary checks 5.4.1 Control of the supply A burner label that has been tampered with, re- moved or is missing, along with anything else that After removing all the packaging, check the integ- prevents the definite identification of the burner rity of the contents. -
Page 17: Securing The Burner To The Boiler
Installation Securing the burner to the boiler Separate the combustion head assembly from the burner Provide an adequate lifting system of the burner. body by removing nut 1) and removing the group A)(Fig. 10). Fix the group B)(Fig. 10) to the boiler plate 2), inserting the supplied insulating gasket 3). -
Page 18: Combustion Head Adjustment
Installation Combustion head adjustment To adjust, proceed as follows: loosen the screw A) (Fig. 12 ), move the elbow B) so that the rear plate of the coupling (C) coincides with the set point; tighten the screw A). Example: S7015 The burner is installed in a 40 kW boiler. -
Page 19: Gas Feeding
Installation 5.10 Gas feeding Explosion danger due to fuel leaks in the pres- The fuel supply line must be installed by qualified ence of a flammable source. personnel, in compliance with current standards and laws. Precautions: avoid knocking, attrition, sparks and ATTENTION heat. -
Page 20: Gas Train Installation
Installation 5.10.3 Gas train installation MBC 65/1 Disconnect the electrical power using the main switch. DANGER Check that there are no gas leaks. Pay attention when handling the train: danger of crushing of limbs. 20065208 Make sure that the gas train is properly installed Fig. -
Page 21: Electrical Wiring
Installation 5.11 Electrical wiring 5.11.1 Notes on safety for the electrical wiring The electrical wiring must be carried out with the electrical supply disconnected. Electrical wiring must be made in accordance with the regulations currently in force in the country of destination and by qualified personnel. -
Page 22: Electrical Diagram
Installation 5.11.3 Electrical diagram Key (Fig. 20) Air damper opening motor Main switch Motor capacitor Ionisation probe connector Ignition electrode Filter Hour counter (230V - 0.1A max.) Fan motor Air pressure switch Min. gas pressure switch Remote reset connection Lockout light (230V - 0.5A max.) One-stage damper conn. -
Page 23: Operating Programme
Installation 5.12 Operating programme Normal operation Lockout due to extraneous light during pre-purging 20147598 POWER SUPPLY 20147599 POWER SUPPLY t s m t s m Green blink Orange Green blink Lockout L E D No flame during operation Orange Red, green blink blink L E D Lockout... -
Page 24: Table Of Times
Installation 5.13 Table of times Symbol Description Value (sec.) Standby: the burner is waiting for the heat request, the closure of the gas pressure switch, the open- ing of the air pressure switch Standby time for an input signal: reaction time, control box remains in waiting mode for t1 Flame or flame simulation detected before demand for heat: the control box remains idle. -
Page 25: Fault Diagnostics - Lockouts
Installation 5.13.2 Fault diagnostics - lockouts Fault description Reset button colour Seconds Colour code GREEN, RED Extraneous light (false flame signal) blinking alternately Gas pressure switch not closing fault or contact open of ORANGE the electric damper opener of the solenoid valve SM, 2 blinking inverted minutes after the heat request ORANGE... -
Page 26: Checking The Gas Pressure Switch
Installation 5.13.3 Checking the gas pressure switch 5.13.6 Intermittent operation When the gas pressure switch is open the motor is not powered. After 24 hours of continuous operation, the control box starts the automatic switch-off sequence, followed by a restart, in order to If, after a heat request, the gas pressure switch open, the motor check for a possible fault with the flame detector. -
Page 27: Duration Of Ignition Transformer Discharge
Installation 5.13.9 Duration of ignition transformer discharge 5.13.15 Monitoring the power supply voltage The spark ignition is present during all safety time. The control box automatically measures the mains voltage. If the voltage is less than 160V or more than 280V, the burner In the event of continuous recycling or heat re- stops, interrupts the operating cycle and remains in stand-by, sig- quests that are close together, the maximum al-... -
Page 28: Checking The Fan Motor
Installation Post-purging occurs: 5.13.18 Checking the fan motor if the heat request is interrupted during the safety time; The control box automatically detects the presence of the fan mo- if the heat request is interrupted during normal operation; tor and, in the event of a fault, it performs a lockout. -
Page 29: Lockout Log
Installation 5.13.24 Lockout log 5.13.26 Admissible lengths of the external connections to the burner The control box allows the logging of the type and number of lock- outs that have occurred and keeps them even without the electri- Maximum cal power supply. length Outlet cables of the burner Identification... -
Page 30: Programming Menu
Installation 5.14 Programming menu If the number of presses on the reset or remote reset button ex- 5.14.1 General notes ceeds the maximum allowable, the value that stays in memory The programming menu can be accessed via the integrated reset will be the maximum one. -
Page 31: Shut-Down Test
Installation 5.14.3 Shut-down test 5.14.6 Setting the long pre-purging The control box allows you to set the long pre-purging, see para- Sequence for shut-down test programming Programming allowed in OPERATING mode and in STAND- graph “Block diagram for entering the menu” on page 28. Sequence for setting a long pre-purging ... -
Page 32: Displaying The Lockout Log
Installation 5.14.7 Displaying the lockout log The control box allows you to display the last 10 lockouts that oc- curred and were logged, accessing the Programming menu on page 28. Access to this page is possible both in STAND-BY, as well as in the OPERATING status. -
Page 33: Lockout Types
Installation 5.15 Lockout types Whenever a lockout occurs, the control box shows the reasons The sequence of pulses issued by the control box of the LED in for the fault (and the reasons can be identified by the reset button the reset button identifies the possible types of fault, which are colour). -
Page 34: Start-Up, Calibration And Operation Of The Burner
Start-up, calibration and operation of the burner Start-up, calibration and operation of the burner Notes on safety for the first start-up The first start-up of the burner must be carried out Check the correct working of the adjustment, com- by qualified personnel, as indicated in this manual mand and safety devices. -
Page 35: Maintenance
Maintenance Maintenance Notes on safety for the maintenance The periodic maintenance is essential for the good operation, safety, yield and duration of the burner. Disconnect the electrical supply from the burner It allows you to reduce consumption and polluting emissions and by means of the main system switch. -
Page 36: Safety Components
Maintenance Gas train 7.2.4 Safety components Check that the gas train is suited to the burner capacity, the type The safety components must be replaced at the end of their life of gas used and the mains gas pressure. cycle indicated in Tab. O. The specified life cycles do not refer to the warranty terms indicated in the delivery or payment Electrode-probe conditions. -
Page 37: Faults - Possible Causes - Solutions
Faults - Possible causes - Solutions Faults - Possible causes - Solutions Here below you can find some causes and the possible solutions In the event the burner stops, in order to prevent for some problems that could cause a failure to start or a bad any damage to the installation, do not unblock the working of the burner. -
Page 38: Operating Faults
Faults - Possible causes - Solutions Faults Possible Causes Solution The burner continues to re- The gas pressure in the gas-mains lies very Lower and set the pressure switch. peat the starting cycle without close to the value to which the gas pressure going on lockout. -
Page 39: Appendix - Accessories
Appendix - Accessories Appendix - Accessories Long head kit Standard length Long head length Burner Code (mm) (mm) RIELLO 40 GS5 3000820 LPG kit Burner Code RIELLO 40 GS5 3000882 Town gas kit Burner Code RIELLO 40 GS5 3000889 Remote reset kit for control box... - Page 40 RIELLO S.p.A. I-37045 Legnago (VR) Tel.: +39.0442.630111 http:// www.riello.it http:// www.riello.com Subject to modifications...
Need help?
Do you have a question about the 40 GS5 and is the answer not in the manual?
Questions and answers