Table of Contents
Advertisement
Quick Links
Advertisement
Table of Contents

Related Manuals for Elation KL FRESNEL 6 CW


Summary of Contents for Elation KL FRESNEL 6 CW
- Page 1 KL FRESNEL 6 CW™ user manual...
- Page 2 +31 45 546 85 66 | +31 45 546 85 96 fax | www.elationlighting.eu | info@elationlighting.eu Elation Professional Mexico | AV Santa Ana 30 | Parque Industrial Lerma, Lerma, Mexico 52000 +52 (728) 282-7070 D O C U M E N T V E R S I O N Due to additional product features and/or enhancements, an updated version of this document may be available online.
-
Page 3: Table Of Contents
C O N T E N T S General Information Limited Warranty (USA Only) Safety Guidelines Maintenance Guidelines Fixture Overview Installation Guidelines System Menu Manual Dimming Control DMX Channel Functions And Values Specifications... -
Page 4: General Information
Gel Frame powerCON TRUE1 Cable Fixture Safety Cable + Barn Door Safety Cable CUSTOMER SUPPORT Contact ELATION Service for any product related service and support needs. Also visit forums.elationlighting.com with questions, comments or suggestions. ELATION SERVICE USA - Monday - Friday 8:00am to 4:30pm PST 323-582-3322 | Fax 323-832-9142 | support@elationlighting.com... -
Page 5: Limited Warranty (Usa Only)
No accessories should be shipped with the product. If any accessories are shipped with the product, Elation Professional shall have no liability what so ever for loss and/or or damage to any such accessories, nor for the safe return thereof. C. This warranty is void if the product serial number and/or labels are altered or removed;... -
Page 6: Safety Guidelines
This fixture is a sophisticated piece of electronic equipment. To guarantee a smooth operation, it is important to follow all instructions and guidelines in this manual. Elation Professional is not responsible for injury and/or damages resulting from the misuse of this fixture due to the disregard of the information printed in this manual. - Page 7 S A F E T Y G U I D E L I N E S DO NOT TOUCH the fixture housing during operation. Turn OFF the power and allow approximately 15 minutes for the fixture to cool down before serving. DO NOT shake fixture, avoid brute force when installing and/or operating fixture.
-
Page 8: Maintenance Guidelines
Regular inspections are recommended to insure proper function and extended life. There are no user serviceable parts inside this fixture, please refer all other service issues to an authorized Elation service technician. Should you need any spare parts, please order genuine parts from your local Elation dealer. -
Page 9: Fixture Overview
F I X T U R E O V E R V I E W 1. Fuse 2. powerCON TRUE1 In 3. powerCON TRUE1 Out 4. 5pin DMX In 5. 5pin DMX Out 6. 3pin DMX Out 7. 3pin DMX In I N S T A L L A T I O N 8. -
Page 10: Installation Guidelines
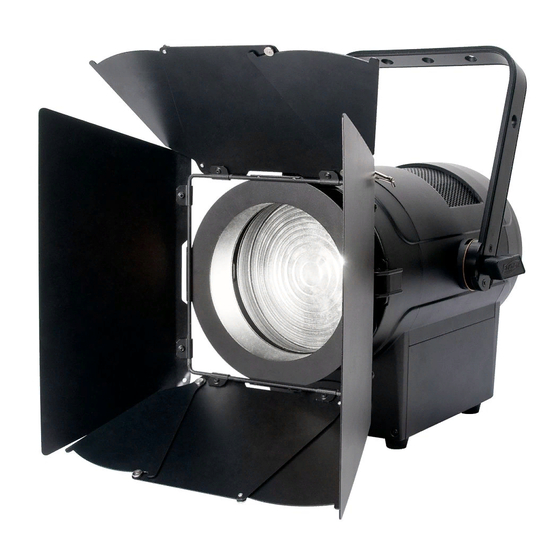
I N S T A L L A T I O N I N S T R U C T I O N S FLAMMABLE MATERIAL WARNING Keep fixture minimum 5.0 feet (1.5m) away from flammable materials and/or pyrotechnics. ELECTRICAL CONNECTIONS A qualified electrician should be used for all electrical connections and/or installations. - Page 11 GEL FRAME AND BARN DOOR INSTALLATION The fixture has 2 slots on the front to hold the GEL FRAME and BARN DOOR. The first smaller slot is for the GEL FRAME and the second larger slot is for the BARN DOOR. The fixture also has a top lock that secures these accessories to the fixture.
- Page 12 CLAMP INSTALLATION When mounting the fixture to truss, be sure to secure an appropriately rated professional grade rigging clamp to the fixture using an M10 screw fitted through one of the 3 holes of the yoke bracket. The fixture provides a built-in rigging point for a SAFETY CABLE. Be sure to only use the designated rigging point for the safety cable and never secure a safety cable to a carrying handle.
- Page 13 RIGGING Overhead rigging requires extensive experience, including amongst others calculating working load limits, installation material being used, and periodic safety inspection of all installation material and the fixture. If you lack these qualifications, do not attempt the installation yourself. Improper installation can result in bodily injury. Fixture is fully operational in the specific mounting positions illustrated below.
-
Page 14: System Menu
S Y S T E M M E N U The fixture includes an easy to navigate system menu. The control panel (see image below) located on the side of the fixture provides access to the main system menu and is where all necessary system adjustments are made to the fixture. - Page 15 ELATION KL FRESNEL 6 CW S Y S T E M M E N U Supports Software Versions: ≥ 1.03 Features subject to change without notice. MAIN SUB MENU OPTIONS / VALUES DESCRIPTION (Default Settings in BOLD) MENU Address Address...
- Page 16 DIMMER CURVE MODES - Dim Curve Select desired DIMMER MODE (Standard, Stage, TV, Architectural, Theatre, Stage2).
-
Page 17: Manual Dimming Control
M A N U A L D I M M I N G C O N T R O L u FEATURE IS DISABLED WHEN DMX INPUT CABLE IS CONNECTED TO FIXTURE! TO USE MANUAL DIMMING KNOB, DISCONNECT DMX CABLE IF CONNECTED. Follow steps below to enable manual DIMMING control knob. -
Page 18: Dmx Channel Functions And Values
D M X C H A N N E L F U N C T I O N S A N D V A L U E S ELATION KL FRESNEL 6 CW DMX Channel Values / Functions (5 DMX Channels) Supports Software Versions: ≥... - Page 19 MODE / CHANNEL VALUE FUNCTION Dimmer Dimmer Standard Extended 16bit LED REFRESH RATE | DIMMER CURVES* *Hold selected DMX value for 5 seconds to set LED Refresh Rate. 000-100 IDLE 101-105 900 Hz* 106-110 1000 Hz* 111-115 1100 Hz* 116-120 1200 Hz* 121-125 1300 Hz*...
-
Page 20: Specifications
S P E C I F I C A T I O N S SOURCE 150W 5,600K Cool White LED Engine 50,000 Hour Average LED Life* *May vary depending on several factors including but not limited to: Environmental Conditions, Power/Voltage, Usage Patterns (On-Off Cycling), Control, and Dimming. EFFECTS Electronic Dimmer and Strobe Variable 16-bit Dimming Modes and Curves... - Page 21 DIMENSIONAL DRAWINGS Specifications and improvements in the design of this unit and this manual subject to change without written notice.
Need help?
Do you have a question about the KL FRESNEL 6 CW and is the answer not in the manual?
Questions and answers