
Subscribe to Our Youtube Channel
Related Manuals for Weather Fast 103-0285N


Summary of Contents for Weather Fast 103-0285N
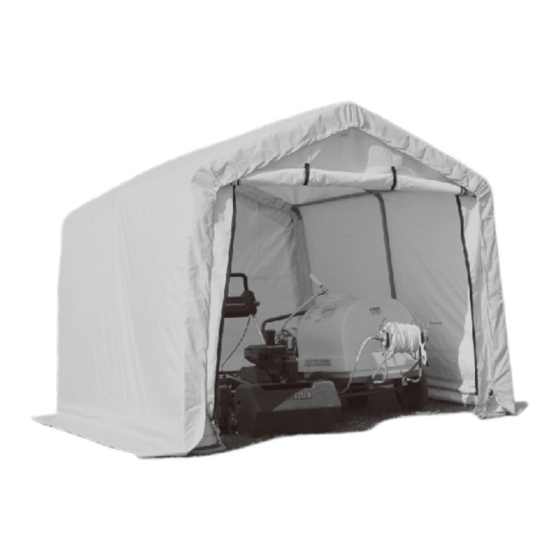
- Page 1 Fabric Storage Shed 8 x 8 x 7' (2.4 x 2.4 x 2.1 m) ASSEMBLY MANUAL Model NO.:103-0285N Tools required for assembly (not included)
- Page 2 TABLE OF CONTENTS Important safety instructions ...........................................2 Intended use ..............................................2 Parts list ................................................ 3 Assembly preparation ............................................ 4 Assembly ..............................................4 - 8 IMPORTANT SAFETY INSTRUCTIONS WARNING! ● To reduce the risk of serious injury, read the following safety instructions before assembling and using the product. ●...
- Page 3 PARTS LIST Description Illustration Upright Pole with Dimples Center Extension Tube Bent Corner Leg Shoulder Cross Rail Rafter Pole Bottom Cross Rail 4-Way Peak Connector 3-Way Side Connector - Left 3-Way Side Connector - Right 4-Way Side Connector 3-Way Peak Connector 4-Way Cross Rail Clamp 3-Way Cross Rail Clamp Ratchet Tie Down...
- Page 4 ASSEMBLY PREPARATION ● Place all parts from the packaging box in a cleared area and arrange them on the ground in front of you. ● Remove all packaging materials and place them back in the box. Do not dispose of the packaging materials until assembly is complete. ●...
- Page 5 ASSEMBLY Step 1: Assembling roof frame Step 2: Attaching legs ● Lay out the roof frame parts as shown below (fig. 1). ● Assemble the legs (fig. 5). Leg type Connect to Upright pole (1), Corner legs Bent corner leg (3) Upright pole (1), Center Legs Center extension tube (2)
- Page 6 ASSEMBLY Step 2: Attaching legs Step 4: Squaring up frame ● Repeat the same procedure on the opposite side. (fig. 8). ● Be sure the frame is standing at the desired location. ● Level the frame both end-to-end and side-to-side. ●...
- Page 7 ASSEMBLY Step 6: Installing front door and back panels fig.17 fig.18 ● Install the front door panel (19) first. During installation, ensure the zipper of the front door panel (19) is closed, for easier installation (fig. 13). Front door panel (19) fig.19 (inside view) ●...
- Page 8 ASSEMBLY ● Repeat the same procedure to install the back panel (20) to its proper Make sure the cross rails (6) are level and horizontal. ● position. Step 7: Installing roof tarp NOTE: ● The roof tarp (18) is pre-assembled with tube sleeves along its lower part on each side.
Need help?
Do you have a question about the 103-0285N and is the answer not in the manual?
Questions and answers
How do I assemble?
To assemble the Weather Fast 103-0285N:
1. Preparation:
- Ensure all parts are complete and undamaged.
- At least two people are needed due to heavy lifting.
- Required tools are not included.
- Keep children away during assembly.
2. Step 1: Assemble Roof Frame:
- Lay out roof frame parts as shown.
- Use shoulder cross rails (4), 3-way peak connectors (11), and 4-way peak connector (7).
- Insert rafter poles (5).
3. Step 2: Attach Legs:
- Assemble corner and center legs using upright poles (1), corner legs (3), center extension tubes (2), and the correct connectors.
- Insert center legs into 4-way side connectors (10).
4. Adjust Bottom Cross Rails:
- Make sure all bottom cross rails (6) are level with the ground.
- Tighten fittings (15, 16, 17).
5. Install Front Door and Back Panels:
- Begin with the front door panel (19). Close the zipper before installation.
- Disconnect the shoulder cross rail (4) from the 3-way peak connector (11), loop the strap over the connector, then reconnect the rail.
- Thread the strap through the ratchet spindle to secure it.
6. Repeat the Procedure on the Opposite Side:
- Follow the same steps for the other side of the shed.
Follow all warnings and ensure stability during each step.
This answer is automatically generated