Advertisement
Quick Links
Advertisement

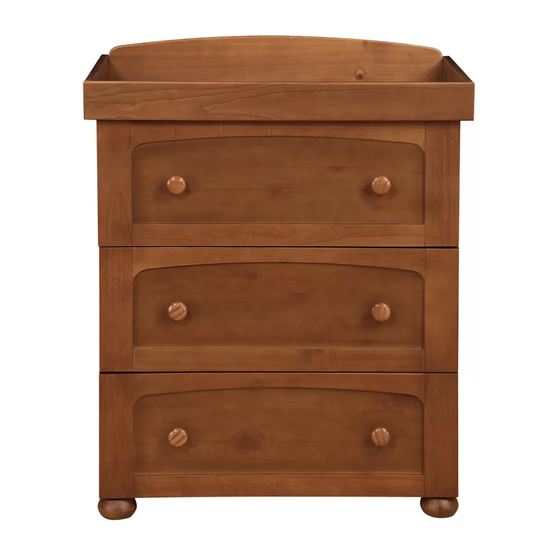
Related Manuals for John Lewis Rachel Dresser


Summary of Contents for John Lewis Rachel Dresser
- Page 1 Instruction manual Important retain for future reference please read carefully...
- Page 2 Your child’s safety is your responsibility. If you have a query with this product or require replacement parts, please contact your nearest John Lewis department store. Lay out the parts on a soft level surface and compare to the part/fixing checklist on pages 2 and 3.
- Page 3 Wooden Parts Crossbar x 1 Top Panel x 1 Drawer Brace x 3 Drawer Back x 3 Side Panel x 2 (L & R) Foot x 4 Drawer Side (L & R) x 6 Drawer Base x 3 Changer Front x 1 Changer Side x 2 (L &...
- Page 4 Assembly 1 NOTE: Take care to insert the dowels into the correct holes as indicated. Crossbar Repeat for the opposite end of each Top Panel A x 2 Base A x 2 Assembly 2 H x 4 Foot Foot Base...
- Page 5 Assembly 3 Side Panel F x 3 Crossbar F x 3 Top Panel Base Assembly 4 Side Panel F x 6...
- Page 6 Assembly 5 NOTE: Slot at top Back panel (top) NOTE: When fitting the back, push the panel into the corner so that the side and top edges contact the rebate evenly all the way around the frame of the dresser. This will ensure that the dresser frame is square and that the drawers will align with each other.
- Page 7 Assembly 7 Drawer Brace D x 3 Drawer Base NOTE: Repeat for remaining drawers Assembly 8 Changer Front (each end) A x 2 (each end) Changer Back A x 2 Changer Side (x 2)
- Page 8 Assembly 9 Changer Side F x 2 Changer Back C x 2 Changer Side NOTE: Insert Cam Nut (Part C) with arrowed slot facing the Changer Front. To lock Changer Front in place, turn Changer Front Cam nuts (part C) 1/2 turn clockwise with a large flat-bladed screwdriver after assembly.
- Page 9 Assembly 11 The dresser is supplied with a fixing kit which will secure it and help to guard against accidental tipping. WARNING : Installation only to be carried out by a competent person. Check the suitability of the wall before fitting. Screw (15mm) Screw (25mm) Washer x 2...
-
Page 10: Care And Maintenance
Do not use the changing unit if any of the parts are broken, torn or missing. Any additional or replacement parts can only be obtained from the manufacturer or the distributer. This changing unit complies with BSEN 12221:2008 +A1:2013. John Lewis Partnership 171 Victoria Street London SW1E 5NN JLPRD www.johnlewis.com...
Need help?
Do you have a question about the Rachel Dresser and is the answer not in the manual?
Questions and answers