
Subscribe to Our Youtube Channel
Related Manuals for Atlas Copco DWS VSD+


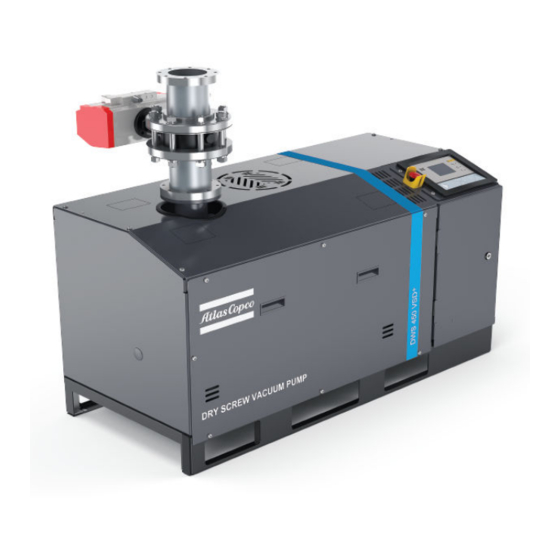
Summary of Contents for Atlas Copco DWS VSD+
- Page 1 Dry Screw Vacuum Pump DWS VSD+ INSTRUCTION MANUAL 1950840208_A Original instructions...
- Page 2 1950840209 DWS VSD+ installation recommendation 1950851570 Trademark credit ©2021 Atlas Copco AB, Stockholm, Sweden. Fomblin® is a registered trademark of Solvay Solexis SpA Krytox® is a registered trademark of DuPont (E.I. du Pont de Nemours and Company) Loctite® is a registered trademark of Henkel Corporation Natural Blue®...
-
Page 3: Table Of Contents
4.12. Event history menu..........52 1950840208_A Page 3 07/2021 - ©Atlas Copco... - Page 4 8.1. Safety............105 1950840208_A Page 4 07/2021 - ©Atlas Copco...
- Page 5 Legal declarations..........132 1950840208_A Page 5 07/2021 - ©Atlas Copco...
- Page 6 Figure 23: DP clean assembly for the pump only systems......101 1950840208_A Page 6 07/2021 - ©Atlas Copco...
-
Page 7: Safety And Compliance
We reserve the right to change the design and the stated data. The illustrations are not binding. Keep the instructions for future use. 1.2. Trained personnel For the operation of this equipment “trained personnel” are: 1950840208_A Page 7 07/2021 - ©Atlas Copco... - Page 8 Safety and compliance ▪ skilled workers with knowledge in the fields of mechanics, electrical engineering, pollution abatement and vacuum technology and ▪ personnel specially trained for the operation of vacuum pumps 1950840208_A Page 8 07/2021 - ©Atlas Copco...
-
Page 9: Safety Symbols
Warning - Risk of explosion There is a risk of explosion when you do the task. Warning - Read the manual Warning - Use protective equipment Use appropriate protective equipment for the task. 1950840208_A Page 9 07/2021 - ©Atlas Copco... -
Page 10: Introduction
Purge free kit is available as a factory-fit option for clean application. 2.4. Interface overview Refer to Front view on page 11 and Side view on page 12 for interface overview. 1950840208_A Page 10 07/2021 - ©Atlas Copco... -
Page 11: Front View
Process inlet Floor mounting hole (4 off) Floor mounting hole (4 off) Figure 2 Front view - DWS 450 VSD+ Process inlet Process inlet Floor mounting hole (4 off) Floor mounting hole (4 off) 1950840208_A Page 11 07/2021 - ©Atlas Copco... -
Page 12: Side View
Manual valve gas ballast 0‑80 slm Manual valve gas ballast 0‑80 slm (MV1) (MV1) (MV2) (MV2) Gas inlet Gas inlet Exhaust outlet Exhaust outlet Mains power inlet Mains power inlet Communication cable Communication cable 1950840208_A Page 12 07/2021 - ©Atlas Copco... -
Page 13: Genius Instant Insights (Option)
The connected antenna can be mounted outside the pump. For more detail, refer to Cloud User Handbook. 1950840208_A Page 13 07/2021 - ©Atlas Copco... - Page 14 The modem can transmit signals that could interfere with this equipment. 1950840208_A Page 14 07/2021 - ©Atlas Copco...
-
Page 15: Technical Data
Body dimensions length x width x height* 65 x 24 x 43 49.8 x 24 x 43 inch Mass (excluding packaging) 1267 1172 pound Noise level (at ultimate with a pi- < 70 dB(A) ped exhaust) 1950840208_A Page 15 07/2021 - ©Atlas Copco... -
Page 16: Performance Data
The loading data in Table: Loading data is for dry pumping systems with optional levelling feet and castors. Table 4 Loading data Load at levelling foot position (kg) Pump DWS 750 VSD+ DWS 450 VSD+ 1950840208_A Page 16 07/2021 - ©Atlas Copco... -
Page 17: Figure 5 Levelling Foot Loads - Dws 750 Vsd
Technical data Figure 5 Levelling foot loads - DWS 750 VSD+ Figure 6 Levelling foot loads - DWS 450 VSD+ 1950840208_A Page 17 07/2021 - ©Atlas Copco... -
Page 18: Dimension Drawing
Communication cable Mains power inlet Mains power inlet Motor cranking access Motor cranking access Emergency stop button Emergency stop button Adapter (standard) Adapter (standard) Adapter (standard)/Adapter with Adapter (standard)/Adapter with bellow (optional) bellow (optional) 1950840208_A Page 18 07/2021 - ©Atlas Copco... -
Page 19: Figure 8 Dimension Drawing - Dws 450 Vsd
Communication cable Mains power inlet Mains power inlet Motor cranking access Motor cranking access Emergency stop button Emergency stop button Adapter (standard) Adapter (standard) Adapter (standard)/Adapter with Adapter (standard)/Adapter with bellow (optional) bellow (optional) 1950840208_A Page 19 07/2021 - ©Atlas Copco... -
Page 20: Purge Data
Units 2.5 - 6.9 bar gauge Purge gas supply pressure range 36 - 100 psi gauge Purge gas supply quality ISO 8573 - Class 2 Purge gas inlet connection 1/2 inch BSP female 1950840208_A Page 20 07/2021 - ©Atlas Copco... - Page 21 MV-1 on 0.01 0-130 12-142 MV-2 on * The dry pumping systems in a standard configuration must run with a seal purge. If the purge free kit is equipped, this table is not applicable. 1950840208_A Page 21 07/2021 - ©Atlas Copco...
-
Page 22: Electrical Data
Must be fitted with a cross‑sec- Second protective earth (ground) tional area at least equal to phase conductor conductor size Typical earth leakage† For 380 - 460 V systems: For DWS 750 VSD+ < 10 1950840208_A Page 22 07/2021 - ©Atlas Copco... -
Page 23: Electrical Connections
Table 9 Electrical connections Mating connector description/ Internal supply Description external supply rating rating Mains connection Main terminals, suitable for 1.5 mm² - 25 mm², rated voltage 1000 V, rated current 76 A 1950840208_A Page 23 07/2021 - ©Atlas Copco... - Page 24 Table 10 Wire assembly according to VDE 0295 Fine stranded wires VDE 0295 class Wire size (mm²) 84 x 0.30 80 x 0.40 128 x 0.40 200 x 0.40 280 x 0.40 400 x 0.40 1950840208_A Page 24 07/2021 - ©Atlas Copco...
-
Page 25: Cooling-Water Data
G3/8 inch BSP female Water outlet connection G3/8 inch BSP female * Maximum coolant temperatures may need to be reduced if Glycol or other coolants are used dependent on the dilution and type. 1950840208_A Page 25 07/2021 - ©Atlas Copco... -
Page 26: Dp Clean High Flow Purge/Solvent Flush (Option)
Table 13 High flow purge/solvent flush data Feature Specification Rating 2.5 - 6.9 barg Pneumatic valve gas Nitrogen or clean dry air supply (36 - 100 psig) Pneumatic valve inlet 3/8 inch compression fitting connection 1950840208_A Page 26 07/2021 - ©Atlas Copco... - Page 27 3/8 inch BSP female tion pipe connection Note: The DP clean solvent suction pipe is supplied with the pump but not fitted. Refer to the instruction given with the kit to activate the function. 1950840208_A Page 27 07/2021 - ©Atlas Copco...
-
Page 28: Elektronikon® Graphic Controller
Refer to Inputs menu on page 37. Shutdown warning A shutdown warning limit is a programmable limit below the shutdown limit. 1950840208_A Page 28 07/2021 - ©Atlas Copco... - Page 29 The controller has an ARAVF function which automatically restarts the pump, if the voltage is reconnected after voltage failure. Initially this function does not operate. If you want the ARAVF function to operate, contact our customer centre. 1950840208_A Page 29 07/2021 - ©Atlas Copco...
-
Page 30: Control Panel
Keys to move through the menu. To stop the pump. Automatic operation LED goes Stop button out. To start the pump. Automatic operation LED Start button flashes to show that the controller is in operation. 1950840208_A Page 30 07/2021 - ©Atlas Copco... -
Page 31: Icons Used
Week timer Week timer is active Emergency stop Active protection Shutdown functions Warning Service Service is necessary Value lines display icon Main screen display Chart display icon No communication/network fault General icons Not valid 1950840208_A Page 31 07/2021 - ©Atlas Copco... - Page 32 Digital input Special protection Table 16 System icons Description Icon Pump element Frequency converter Motor Network problem General alarm Inputs Outputs Alarms (warnings, shutdown) Counters Test Settings Service Saved data Access key/User password 1950840208_A Page 32 07/2021 - ©Atlas Copco...
-
Page 33: Main Screen
The main screen is automatically set to off when no keys are pushed for some minutes. Refer to Figure: Control panel. The five main screen views that can be selected are: ▪ Two value lines ▪ Four value lines 1950840208_A Page 33 07/2021 - ©Atlas Copco... -
Page 34: Two And Four Value Lines Screens
▪ Section A: shows the information about the pump operation (for example, the inlet pressure or the temperature at the pump outlet). On the pumps with a frequency converter, the load degree (flow given in %) of the maximum flow of the actual inlet pressure. 1950840208_A Page 34 07/2021 - ©Atlas Copco... -
Page 35: Chart Views
4 minutes. It also shows the value at that selected time. ▪ The switch button (icon) to select other screens is changed into a small chart and is highlighted (active). 1950840208_A Page 35 07/2021 - ©Atlas Copco... -
Page 36: Selection Of A Main Screen View
Figure 13 Typical Main screen (4 value lines) To go to the Menu screen: ▪ Use the Scroll keys to move the cursor to the Menu icon. ▪ Push the Enter key. ▪ The Menu screen that follows is shown: 1950840208_A Page 36 07/2021 - ©Atlas Copco... -
Page 37: Inputs Menu
Start from the Main screen (refer to Main screen on page 33): ▪ Use the Scroll keys to move the cursor to the Menu action button. ▪ Push the Enter key, the screen that follows is shown: 1950840208_A Page 37 07/2021 - ©Atlas Copco... - Page 38 ▪ If an input has a warning or shutdown, the initial icon is replaced by the applicable warning or shutdown (for example, the Stop icon or the Warning icon shown in the screen above). 1950840208_A Page 38 07/2021 - ©Atlas Copco...
- Page 39 The first item in the list is selected (in this example, Inlet Pressure). To change the selection, push the Enter key again. A pop‑up window opens: Push the Enter key again to remove this input from the chart. Another pop-up window opens (confirmation): 1950840208_A Page 39 07/2021 - ©Atlas Copco...
- Page 40 Elektronikon® graphic controller Select Yes to remove or No to stop the step. In almost the same way a different input signal can be selected as the Main Chart Signal: 1950840208_A Page 40 07/2021 - ©Atlas Copco...
-
Page 41: Outputs Menu
▪ Push the Enter key. The screen that follows is displayed: Menu Menu Regulation Regulation ▪ Use the Scroll keys to move the cursor to the outputs icon (refer to menu icon). ▪ Push the Enter key. The screen that follows is displayed: 1950840208_A Page 41 07/2021 - ©Atlas Copco... -
Page 42: Counters
Start from the Main screen (refer to Main screen on page 33): ▪ Use the Scroll keys to move the cursor to the Menu action button. ▪ Push the Enter key. The screen that follows is shown: 1950840208_A Page 42 07/2021 - ©Atlas Copco... -
Page 43: Control Mode Selection
▪ The screen shows a list of all counters with their readings. 4.9. Control mode selection Function To select the control mode for the pump. The control modes are as follows: ▪ Local control ▪ Remote control ▪ Local Area Network (LAN) control 1950840208_A Page 43 07/2021 - ©Atlas Copco... - Page 44 ▪ Use the Scroll keys to move the cursor to the regulation icon. ▪ Push the Enter key. The regulation screen shows the three control modes as follows: ▪ Local control ▪ Remote control ▪ LAN control 1950840208_A Page 44 07/2021 - ©Atlas Copco...
- Page 45 ▪ Select the necessary control mode. ▪ Push the Enter key on the controller. ▪ The selected control mode is shown on the Main screen. Refer to Icons used on page 31 for the meaning of the icons. 1950840208_A Page 45 07/2021 - ©Atlas Copco...
-
Page 46: Service Menu
▪ Push the Enter key. The screen that follows is shown: ▪ Use the Scroll keys to move the cursor to the Service icon (refer to Menu icon). ▪ Push the Enter key. The screen that follows is shown: 1950840208_A Page 46 07/2021 - ©Atlas Copco... - Page 47 8760 hours, which corresponds to one year (second row). This means that the controller will launch a service warning when 4000 running hours or 8760 real hours are reached, whichever comes first. 1950840208_A Page 47 07/2021 - ©Atlas Copco...
- Page 48 ▪ Use the Scroll keys to select the value to be changed. A screen almost the same as the one below is shown: 1950840208_A Page 48 07/2021 - ©Atlas Copco...
- Page 49 ▪ Change the value as necessary using the ▲ or ▼ key. ▪ Push the Enter key to confirm. Note: Running hours can be changed in steps of 100 hours. Real time hours can be changed in steps of 1 hour. 1950840208_A Page 49 07/2021 - ©Atlas Copco...
-
Page 50: Modifying The Setpoint
Start from the Main screen (refer to Main screen on page 33): ▪ Use the Scroll keys to move the cursor to the Menu action button. ▪ Push the Enter key. The screen that follows is shown: 1950840208_A Page 50 07/2021 - ©Atlas Copco... - Page 51 ▪ The screen shows the settings. ▪ To change the settings, use the Scroll keys to move the cursor to the Modify action button. ▪ Push the Enter key. The screen that follows is shown: 1950840208_A Page 51 07/2021 - ©Atlas Copco...
-
Page 52: Event History Menu
Start from the Main screen (Refer to Main screen on page 33): ▪ Use the Scroll keys to move the cursor to the Menu action button. ▪ Push the Enter key. The screen that follows is shown: 1950840208_A Page 52 07/2021 - ©Atlas Copco... -
Page 53: Modifying General Settings
▪ Push the Enter key to view the date, time and status of the pump, when the selected shutdown or emergency stop occurred. 4.13. Modifying general settings Menu icon, Settings Function To display and change different settings. 1950840208_A Page 53 07/2021 - ©Atlas Copco... - Page 54 The status bar shows the description related to the selected icon. Each icon covers one or more items, such as: ▪ Access level ▪ Elements ▪ Fan ▪ Converters ▪ Motor/Starter ▪ General ▪ ARAVF ▪ Network 1950840208_A Page 54 07/2021 - ©Atlas Copco...
-
Page 55: Info Menu
Enter key. In the setting menu, you can adjust: ▪ Runtime at minimum pressure ▪ Pre purge time ▪ Post purge time 4.14. Info menu Menu icon, Info Function To display the internet address. 1950840208_A Page 55 07/2021 - ©Atlas Copco... -
Page 56: Week Timer Menu
For example, Start pump: 5.00 AM, Pressure setpoint 2: 5.01 AM (or later). Procedure Start from the Main screen (refer to Main screen on page 33): ▪ Use the Scroll keys to move the cursor to Menu action button. 1950840208_A Page 56 07/2021 - ©Atlas Copco... - Page 57 ▪ Select Week action schemes and push the Enter key. A new window is displayed. The first item in the list is highlighted in red. ▪ Push the Enter key to change the Week Action Scheme 1. 1950840208_A Page 57 07/2021 - ©Atlas Copco...
- Page 58 Enter key to create an action. Monday Monday Modify Modify ▪ A new pop-up window is displayed. Use the Scroll keys to move the cursor to the necessary action from the list. ▪ Push the Enter key. 1950840208_A Page 58 07/2021 - ©Atlas Copco...
- Page 59 Monday Start Start Save Save Modify Modify ▪ A pop-up window is displayed. Use the Scroll keys to change the hours. á â Use the Scroll keys to select the minutes. ß à 1950840208_A Page 59 07/2021 - ©Atlas Copco...
- Page 60 ▪ Push the Enter key. Monday Monday Are you sure? Are you sure? Save Save Modify Modify ▪ Push the Escape key to exit the window. The action is shown below the day the action is planned. 1950840208_A Page 60 07/2021 - ©Atlas Copco...
- Page 61 Week Timer Week Action Schemes Week Action Schemes Week Cycle Week Cycle Status Status Week Timer Inactive Week Timer Inactive Remaining Running Time Remaining Running Time ▪ A list of 10 weeks is displayed. 1950840208_A Page 61 07/2021 - ©Atlas Copco...
- Page 62 Week Action Scheme 3 Modify Modify ▪ Check the status of the Week Timer. ▪ Use the Escape key to go back to the main Week Timer menu. ▪ Select the status of the Week Timer. 1950840208_A Page 62 07/2021 - ©Atlas Copco...
- Page 63 Week Timer Week Timer Week Week Week Timer Inactive Week Timer Inactive Week 1 Week 1 ▪ Push the Escape key to exit the window. The status shows that the week 1 is active. 1950840208_A Page 63 07/2021 - ©Atlas Copco...
- Page 64 Remaining Running Time ▪ This timer is used when the week timer is set and the pump must continue to operate (for example, 1 hour). ▪ This timer is before the Week Timer action. 1950840208_A Page 64 07/2021 - ©Atlas Copco...
-
Page 65: User Password Menu
▪ Use the Scroll keys to move the cursor to Menu action button. ▪ Push the Enter key. The screen that follows is shown: ▪ Use the Scroll keys to move the cursor to the Settings icon (refer to Modifying general settings on page 53). 1950840208_A Page 65 07/2021 - ©Atlas Copco... -
Page 66: Web Server
▪ Make sure that you are logged in as administrator to change the IP settings. ▪ Use the internal network card from your computer or an USB to LAN network card. ▪ Use an UTP cable (CAT 5e) to connect to the controller. 1950840208_A Page 66 07/2021 - ©Atlas Copco... - Page 67 ▪ Go to Network and Sharing Centre. ▪ Click Change adapter settings. ▪ Select the Local Area connection which is connected to the controller. ▪ Click with the right button and select properties. 1950840208_A Page 67 07/2021 - ©Atlas Copco...
- Page 68 ▪ After selecting TCP/IPv4, click on the properties button to change the settings. ▪ Use the settings as follows: ▪ IP Address 192.168.100.200 ▪ Sub-netmask 255.255.255.0 ▪ Click ok and close the network connections. 1950840208_A Page 68 07/2021 - ©Atlas Copco...
- Page 69 ▪ Gateway = 10.25.42.250 ▪ Subnet mask = 255.255.254.0 ▪ Connect controller to the company’s network (LAN) with a UTP cable (min.CAT 5e). ▪ Adapt the network settings in the controller: ▪ Go to Main Menu. 1950840208_A Page 69 07/2021 - ©Atlas Copco...
- Page 70 Elektronikon® graphic controller ▪ Go to Settings. ▪ Go to Network. ▪ Go to Ethernet. 1950840208_A Page 70 07/2021 - ©Atlas Copco...
- Page 71 ▪ Set the Ethernet communication to off. This lets you change the settings. ▪ Adapt the IP address. ▪ Adapt the Gateway address. ▪ Adapt the Subnet mask. ▪ Set the Ethernet communication to on. ▪ Wait until the LAN network connects to the controller. 1950840208_A Page 71 07/2021 - ©Atlas Copco...
- Page 72 If a licence is for ESi is foreseen, the menu contains 3 buttons: ▪ Pump: shows all pump settings. ▪ Es: shows the ESi status if a licence is given. ▪ Preferences: Change the temperature and pressure unit. 1950840208_A Page 72 07/2021 - ©Atlas Copco...
- Page 73 Counters give an overview of all the actual counters from controller and pump. ▪ Info Status Machine status is always shown on the web interface. ▪ Digital Inputs Gives an overview of all Digital inputs and status. 1950840208_A Page 73 07/2021 - ©Atlas Copco...
- Page 74 ▪ Service Plan ▪ Shows all levels of the service plan and status. ▪ This screen only shows the running hours. ▪ It is possible to show the actual status of the service interval. 1950840208_A Page 74 07/2021 - ©Atlas Copco...
-
Page 75: Programmable Settings
If it is necessary to change the timer setting, contact us. The intervals must not be more than the nominal intervals and must align in a related sequence. Refer Modifying general settings on page 53. 1950840208_A Page 75 07/2021 - ©Atlas Copco... - Page 76 The settings for the proportional band and integration time are deter- Proportional band and mined by experiment. Adjusting these settings can damage the integration time pump. Contact us. 1950840208_A Page 76 07/2021 - ©Atlas Copco...
-
Page 77: Transportation
Follow the procedure laid out in Storage on page 128 and then read form HS1 and fill out form HS2, which can be found at the back of this manual. 1950840208_A Page 77 07/2021 - ©Atlas Copco... -
Page 78: Installation
Before carrying out any maintenance the supply of these sources should be locked and tagged out. ▪ Any unintended overflows or spills of oil or water must be removed immediately to avoid the risk of slips. 1950840208_A Page 78 07/2021 - ©Atlas Copco... - Page 79 For the dry pumping system to perform to specification, appropriate facilities must be provided as detailed in this manual. Before installing, we recommend that you read the publication P60102675 Installation recommendations for the pumps. 1950840208_A Page 79 07/2021 - ©Atlas Copco...
-
Page 80: Installation Drawings
Installation 6.1. Installation drawings Figure 15 Installation drawing - DWS 750 VSD+ A. Inlet valve assembly A. Inlet valve assembly B. Utility side B. Utility side 1950840208_A Page 80 07/2021 - ©Atlas Copco... -
Page 81: Locate The Dry Pumping System
Move the dry pumping system to its operating position using any of the following methods: ▪ Use a forklift or pallet truck to lift the dry pumping system. 1950840208_A Page 81 07/2021 - ©Atlas Copco... -
Page 82: Levelling The Pump
▪ All dry pumping systems can be secured by fitting the bolts or studs (not supplied) through the mounting holes in the base frame. Use M16 (5/8 inch) bolts with shake-proof washers or other suitable anchor bolts of the same size. 1950840208_A Page 82 07/2021 - ©Atlas Copco... -
Page 83: Piping And Ventilation
The maximum air temperature at intake opening is 40 °C (104 °F), (minimum 5 °C / 41 °F) Ventilation alternative: The required ventilation to limit vacuum pump room temperature can be calculated from: = 1.06 (N + Q ) / T process 1950840208_A Page 83 07/2021 - ©Atlas Copco... -
Page 84: Compressed Air Connection
Properties for the compressed air connection: ▪ The supply pressure should be between 2 bar(g) and 10 bar(g) (29 psi and 145 psi) 1950840208_A Page 84 07/2021 - ©Atlas Copco... -
Page 85: Lubrication
18 for the correct position of the electrical connection. 1. Give an isolating switch. 2. Check that the motor cables and wires in the electric cabinet are connected to their terminals. 1950840208_A Page 85 07/2021 - ©Atlas Copco... -
Page 86: Connect The Dry Pumping System To The Vacuum/Exhaust System
6.6. Connect the dry pumping system to the vacuum/ exhaust system WARNING: Pipe the exhaust to a suitable treatment plant to prevent the discharge of dangerous gases or vapours to the surrounding atmosphere. 1950840208_A Page 86 07/2021 - ©Atlas Copco... - Page 87 We recommend using our braided flexible pipelines. The pipelines should be rated for 110 °C. ▪ Adequately support vacuum/exhaust pipelines to prevent the transmission of stress to pipeline coupling joints. 1950840208_A Page 87 07/2021 - ©Atlas Copco...
- Page 88 Figure: Connecting the pump inlet. 3. Use the trapped O-ring and clamp supplied to connect the exhaust outlet (Front view on page 11 or Side view on page 12) to the exhaust extraction system. 1950840208_A Page 88 07/2021 - ©Atlas Copco...
-
Page 89: Connect The Purge Gas Supply
Nitrogen and clean dry air are suitable purge gases for the dry pumping systems. To use a different purge gas, contact us. Check visually that the dial pressure gauge and rotameter (if installed) is not damaged when installing the dry pumping system. 1950840208_A Page 89 07/2021 - ©Atlas Copco... -
Page 90: Flammable/Pyrophoric Materials
Switch on the inert gas purge to remove air from the pump and the exhaust pipeline before the process starts. Switch off the purge flow at the end of the 1950840208_A Page 90 07/2021 - ©Atlas Copco... -
Page 91: Leak Test The Dry Pumping System
Note: For further information on the leak testing, contact us or the supplier for advice. 1950840208_A Page 91 07/2021 - ©Atlas Copco... -
Page 92: Electrical Supply
WARNING: Risk of electric shock. Isolate the electrical supply before disconnecting the electrical supply cable from the dry pumping system. 1950840208_A Page 92 07/2021 - ©Atlas Copco... -
Page 93: Mains Supply Cable Connection
Refer to Table: General electrical data. 6.9.1. Mains supply cable connection WARNING: The mains terminal is not approved for connection and disconnection under load. Use the following instructions to make the electrical supply cable: 1950840208_A Page 93 07/2021 - ©Atlas Copco... -
Page 94: Emc Filter
The drive has a built-in EMC filter. The EMC filter switch is in ON position by default. Move the screw position to switch ON (enable) and OFF (disable). Figure 20 EMC filter switch location Switch ON Switch ON Switch OFF Switch OFF 1950840208_A Page 94 07/2021 - ©Atlas Copco... -
Page 95: Figure 21 Symmetric Grounding
Table 22 Asymmetric grounding Type of grounding Diagram Grounded at the corner of the delta connection Grounded at the middle of the side Single-phase, grounded at the end point Three-phase variable transformer without solidly grounded neutral 1950840208_A Page 95 07/2021 - ©Atlas Copco... -
Page 96: Connect And Set Up The Cooling Water
Ensure that both sets of plastic plugs are removed before connecting the cooling water hoses. Refer to Figure: Remove the plastic plugs from the water fittings. Retain the plastic plugs for future use. 1950840208_A Page 96 07/2021 - ©Atlas Copco... -
Page 97: Figure 22 Remove The Plastic Plugs From The Water Fittings
6. Once the water flow rate has been set the water flow meter may be removed. 7. Inspect the water hoses, pipelines and connections and check that there are no leaks. Turn off the water supply while completing the remainder of the installation procedures. 1950840208_A Page 97 07/2021 - ©Atlas Copco... -
Page 98: Install The Accessories
6. If the dry pumping system starts and continues to operate, continue at step 8. If a warning or alarm condition is indicated: ▪ Shut down the dry pumping system. Refer to Stop the pump on page 104. ▪ Contact us. 1950840208_A Page 98 07/2021 - ©Atlas Copco... -
Page 99: Install Additional Safety Equipment
There are also two manual valves for gas ballast control, they were set at the close position as default. Different gas ballast flow rate can be achieved by adjusting MV1 and MV2 manually, for details refer to Table: Gas system flow option. 1950840208_A Page 99 07/2021 - ©Atlas Copco... -
Page 100: High Flow Purge And Solvent Flush Set Up
Figure: DP clean assembly for the pump only systems. Refer to DP clean high flow purge/solvent flush (option) on page 26 for information about fittings and typical purge gas flows. 1950840208_A Page 100 07/2021 - ©Atlas Copco... -
Page 101: Connecting The Dry Pumping System For Serial Communications
Pneumatic valve electrical connection Pneumatic valve electrical connection 6.16. Connecting the dry pumping system for serial communications 6.16.1. MODBUS MODBUS-RTU communication is available (AC D+ D-). Refer to Figure: Service diagram for more information. 1950840208_A Page 101 07/2021 - ©Atlas Copco... -
Page 102: Operation
Also check for leaks. 5. Make sure the pump outlet is not obstructed. 6. Connect the inlet pipework. 7. Connect the cooling water and purge gas supply. 8. Check the oil level. 1950840208_A Page 102 07/2021 - ©Atlas Copco... -
Page 103: Start The Pump
▪ The display shows the vacuum pressure of the pump, and the different icons show the status of the pump. ▪ If the alarm LED is lit or flashes, correct the fault. Refer to Icons used on page 1950840208_A Page 103 07/2021 - ©Atlas Copco... -
Page 104: Stop The Pump
1. Set the electrical supply to off. 2. Shut off the system connected to the pump. 3. Open the vent plug and release the compressed gases. 4. Isolate the pump from the pump system. 5. Drain the oil. 1950840208_A Page 104 07/2021 - ©Atlas Copco... -
Page 105: Maintenance
Particular caution should be exercised when working with fluorinated materials which may have been exposed to temperatures greater than 260 °C. Refer to our safety datasheets for detailed information. 1950840208_A Page 105 07/2021 - ©Atlas Copco... - Page 106 131. Ensure that the purge gas and cooling water supplies are connected in parallel and that they meet the specifications given in Technical data on page 15. Contact us for more information. 1950840208_A Page 106 07/2021 - ©Atlas Copco...
-
Page 107: Preventive Maintenance Schedule
O‑rings, lubricants and all exhaust accessories. WARNING: Suitable lifting equipment must be used to move the dry pumping system. It is too heavy to lift by hand. 1950840208_A Page 107 07/2021 - ©Atlas Copco... -
Page 108: Draining The Cooling Water
107. 2. Connect a regulated clean dry air supply (5 barg or 73 psig) to the cooling water supply connection (Side view on page 12). Do not turn on the air supply yet. 1950840208_A Page 108 07/2021 - ©Atlas Copco... -
Page 109: General Maintenance
1. Switch off the dry pumping system and allow it to stand for at least 5 minutes. 2. Check that the oil level is in line with the MAX indicator. If the oil level is below the maximum it must be topped up. 1950840208_A Page 109 07/2021 - ©Atlas Copco... -
Page 110: Inspect The Connections, Pipelines, Cables And Fittings
If the dry pumping system is not relocated for maintenance, ensure that all supplies are locked out and tagged out before starting the following procedure. 1. Remove the enclosure side and top panels. 1950840208_A Page 110 07/2021 - ©Atlas Copco... -
Page 111: Overhaul
Do not attempt to overhaul the pump without our training and tooling. We provide a full range of overhaul options worldwide. We can provide training, tooling and spares to enable the users to overhaul their pumping systems. Contact us for more information. 1950840208_A Page 111 07/2021 - ©Atlas Copco... -
Page 112: Fault Finding
Remedy Install the pump at a suitable place or ensure a sufficient flow of cooling air. Cause Pump is operating in the wrong pressure range. Remedy Check the pressure levels within the system. 1950840208_A Page 112 07/2021 - ©Atlas Copco... - Page 113 Pump gets too hot on page 112. Cause Incorrect mains voltage for the motor. Remedy Connect the motor to the correct mains voltage. Cause Exhaust is blocked or restricted. Remedy Clean the exhaust pipe. 1950840208_A Page 113 07/2021 - ©Atlas Copco...
- Page 114 Oil gets too dark Cause Oil has been used up. Remedy Exchange the oil. Cause Pump gets too hot. Remedy Pump gets too hot on page 112. After the remedy of the fault, exchange the oil. 1950840208_A Page 114 07/2021 - ©Atlas Copco...
- Page 115 Remedy Contact us. Fault Pump does not attain its pumping speed Cause Pump speed(frequency) is set wrongly. Remedy Correct the pump speed, see . Cause Intake screen is clogged. Remedy Clean intake screen. 1950840208_A Page 115 07/2021 - ©Atlas Copco...
-
Page 116: Converter Fault Codes
The figure that follows shows the typical display of the pump stopped by a shutdown. Shutdown Shutdown Use the Scroll keys to move the cursor to the Stop icon or the Protections icon and push the Enter key. 1950840208_A Page 116 07/2021 - ©Atlas Copco... - Page 117 Fault finding Protections Protections General General The display shows the fault (Main Motor Converter Alarm) and a fault code (31 in this case). 1950840208_A Page 117 07/2021 - ©Atlas Copco...
- Page 118 External Fault at Input Terminal S5 (EF5) External Fault at Input Terminal S6 (EF6) External Fault at Input Terminal S7 (EF7) External Fault at Input Terminal S8 (EF8) Internal Fan Fault (FAn) Overspeed (oS) Speed Deviation (dEv) 1950840208_A Page 118 07/2021 - ©Atlas Copco...
- Page 119 PLC Detection Error 1 (PE1) PLC Detection Error 2 (PE2) DriveWorksEZ Fault (dWFL) EEPROM Memory DriveWorksEZ Data Er (dWF1) Output Voltage Detection Fault (voF) Braking Resistor Transistor Fault (rF) Braking Transistor Overload Fault (boL) 1950840208_A Page 119 07/2021 - ©Atlas Copco...
- Page 120 ASIC On-delay Error (CPF29) ASIC BBON Error (CPF30) ASIC Code Error (CPF31) ASIC Start-up Error (CPF32) Watch-dog Error (CPF33) ASIC Power/Clock Error (CPF34) External A/D Converter Error (CPF35) Control Circuit Error (CPF40) Control Circuit Error (CPF41) 1950840208_A Page 120 07/2021 - ©Atlas Copco...
- Page 121 Option Connection Error (oFb01) Same Type of Option Card Already Connected (oFb02) A/D Conversion Error (oFb05) Option Response Error (oFb06) Option RAM Fault (oFb10) Option Operation Mode Fault (SLMOD) (oFb11) Drive Receive CRC Error (oFb12) 1950840208_A Page 121 07/2021 - ©Atlas Copco...
- Page 122 Option Receive Frame Error (oFC16) Option Receive Abort Error (oFC17) Encoder Option AD Conversion Error (oFC50) Encoder Option Analog Circuit Error (oFC51) Encoder Communication Timeout (oFC52) Encoder Communication Data Error (oFC53) Encoder Error (oFC54) Resolver Error (oFC55) 1950840208_A Page 122 07/2021 - ©Atlas Copco...
- Page 123 - Overvoltage Cause The deceleration time is too short and too much regenerative energy is flowing back into the drive. Remedy Contact us. Cause The acceleration time is too short. Remedy Contact us. 1950840208_A Page 123 07/2021 - ©Atlas Copco...
- Page 124 Replace the defective communications cable. Cause The communication protocol is not compatible. Remedy Examine the values set in H5-xx. Examine the settings on the controller side and correct the difference in communication conditions. 1950840208_A Page 124 07/2021 - ©Atlas Copco...
- Page 125 Remedy Correct errors with the wiring for main circuit drive input power. Cause There is loose wiring in the drive input power terminals. Remedy Tighten the terminal screws to the correct tightening torque. 1950840208_A Page 125 07/2021 - ©Atlas Copco...
- Page 126 There was a problem with the drive hardware. Remedy Re-energise the drive. Contact us. Fault Uv3 - Soft charge answerback fault Cause The relay or contactor on the soft-charge bypass relay is damaged. Remedy Re-energise the drive. Contact us. 1950840208_A Page 126 07/2021 - ©Atlas Copco...
- Page 127 Cause The EMS button or motor thermal switch been triggered. Remedy If EMS is triggered, reset the button and reset the fault. If motor thermal switch is triggered, check the wiring and cooling. 1950840208_A Page 127 07/2021 - ©Atlas Copco...
-
Page 128: Storage
3. If the pump is to be stored for longer than six weeks, it must be manually rotated every 14 days or less. Contact us for details. 4. When required for use, prepare and install the dry pumping system as described in Installation on page 78 of this manual. 1950840208_A Page 128 07/2021 - ©Atlas Copco... -
Page 129: Disposal
Take particular care with the following: ▪ Fluoroelastomers which may have decomposed as the result of being subjected to high temperatures. ▪ Components which have been contaminated with dangerous process substances. ▪ Lithium battery. 1950840208_A Page 129 07/2021 - ©Atlas Copco... -
Page 130: Service
HS1, fill in the electronic HS2 form, print it, sign it, and return the signed copy to us. NOTICE: If we do not receive a completed form, your equipment cannot be serviced. 1950840208_A Page 130 07/2021 - ©Atlas Copco... -
Page 131: Spares And Accessories
H11312025 Cubicle vent filter kit G1950851774 Blow off valve service kit 750 3490790545 Blow off valve service kit 450 3490790546 For information about all other spares, refer to the customer parts manual M58840845. 1950840208_A Page 131 07/2021 - ©Atlas Copco... -
Page 132: Legal Declarations
Legal declarations... - Page 133 EU Declaration of Conformity Atlas Copco Vacuum Belgium n.v. Documentation Officer Industrielaan 40 Jana Sigmunda 300 B-3730 Hoeselt Lutín , 78349 Belgium Czech Republic T: +42(0) 580 582 728 documentation@vt.atlascopco.com The product specified and listed below DWS 450-750 VSD+ 19508136XX...
- Page 134 You must retain the signed legal declaration for future reference This declaration becomes invalid if modifications are made to the product without prior agreement. Signed for and on behalf of Atlas Copco Vacuum Belgium Andries De Bock – Vice President Engineering Terry Hong–...
- Page 135 ADDITIONAL LEGISLATION AND COMPLIANCE INFORMATION EMC (EU, UK): Class A Industrial equipment Caution: This equipment is not intended for use in residential environments and may not provide adequate protection to radio reception in such environments. RoHS (EU, UK): Material Exemption Information This product is compliant with the following Exemptions Annex III: 6(c) Copper alloy containing up to 4% lead by weight...
- Page 136 材料成分声明 China Material Content Declaration 有害物质 Hazardous Substances 部件名称 六价铬 多溴联苯 多溴二苯醚 Part name 铅 汞 镉 Hexavalent Polybrominated Polybrominated Lead Mercury Cadmium Chromium biphenyls diphenyl ethers (Pb) (Hg) (Cd) (Cr VI) (PBB) (PBDE) 电机(泵和机械增压泵) Motors (pump and mechanical booster) 泵和增压泵...
- Page 137 atlascopco.com...
Need help?
Do you have a question about the DWS VSD+ and is the answer not in the manual?
Questions and answers