
Related Manuals for COSMOGAS AGUAPLUS 60


Summary of Contents for COSMOGAS AGUAPLUS 60
- Page 1 INSTALLATION, USE AND MAINTENANCE MANUAL FLOOR STANDING CONDENSING WATER HEATER WITH STORAGE TANK AGUAPLUS 62403705 - R01 29-01-2021_UK...
-
Page 2: Safety Instructions
Feel water before bathing or showering. AGUAPLUS COSMOGAS... - Page 3 Before performing any cleaning or maintenance, disconnect the appliance from the mains power supply. After any cleaning or maintenance, before reconnecting the power supply, make sure that all internal parts are properly dry. AGUAPLUS COSMOGAS...
-
Page 4: Table Of Contents
13.5 - Conversion of appliance models from 100 to 140 from one type of gas to another ..........41 13.6 - Ignition .................................. 43 13.7 - Check gas supply pressure and make any necessary adjustment ..............43 13.8 - Checking CO2 level ............................. 44 AGUAPLUS COSMOGAS... - Page 5 15.16 - 100, 115 and 140 models multi-line wiring diagram ................... 68 16 - TECHNICAL FEATURES ........................... 17 - FORCED MENU ............................18 - CONTROL MENU DIAGRAM ........................19 - PRODUCT FICHE ............................20 - UE DECLARATION OF CONFORMITY ..................... AGUAPLUS COSMOGAS...
-
Page 6: Code Requirements
- BS 5482-3:2005 - Domestic butane and propane gas burning installations. Installations in boats, yachts and other vessels. - Building regulations issued by the Department of the Environment and Building Standards Regulations. - Gas safety (Installation and Use) Regulations current issue. AGUAPLUS COSMOGAS... -
Page 7: General Information
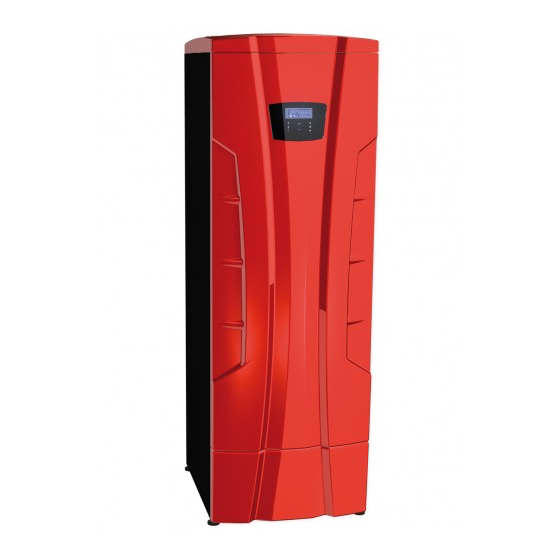
2.1 - Presentation Congratulations! This appliance is truly one of the best products on the market. Each individual part was designed, created, tested and assembled with pride at the COSMOGAS factory, therefore guaranteeing the best quality control. 2.2 - Overview of the models AGUAPLUS XXX “60”... -
Page 8: Main Components
6 - Supply connection 16 - Water flow rate 7 - Hot water outlet pipe 17 - ---------- 8 - Gasket 18 - Water inlet pipe 9 - Heat exchanger 10 - Return connection Figure 3-1 - Internal components AGUAPLUS COSMOGAS... - Page 9 22 - Heat insulator 30 - Gasket 23 - Sight glass 31 - Flapper valve 24 - Fan-burner connection 32 - Flapper magnet 25 - Fan 33 - Flapper sensor 26 - Water inlet temperature sensor Figure 3-2 - Internal components AGUAPLUS COSMOGAS...
- Page 10 9 - Hot water outlet pipe 23 - “Burner 1” control board 10 - Burner “1” (MASTER) 24 - Front cover 12 - Gas inlet pipe 25 - Bottom front cover Figure 3-3 - Internal compents of 60 and 70 models AGUAPLUS COSMOGAS...
- Page 11 28 - Fan covering 32 - Flue gas exhaust manifold 29 - Flue gas temperature sensor 33 - Condensate blocked drain switch 43 - Heat exchanger temperature fuse Figure 3-4 - Internal components of 60 and 70 models AGUAPLUS COSMOGAS...
- Page 12 38 - ---------- 35 - P/T Safety relief valve 39 - Hot water outlet 36 - ---------- 40 - Cold water inlet 37 - Condensate drain 41 - Pump Figure 3-5 - Internal components of 60 and 70 models AGUAPLUS COSMOGAS...
- Page 13 10 - Burner “1” (Master) 23 - Burner “1” control board (Master) 11 - Burner “2” 24 - Front cover 12 - Gas inlet pipe 25 - Bottom front cover Figure 3-6 - Internal components of 100, 115 and 140 models AGUAPLUS COSMOGAS...
- Page 14 28 - Fan covering 32 - Flue gas exhaust manifold 29 - Flue gas temperature sensor 33 - Condensate blocked drain switch 43 - Heat exchanger temperature fuse Figure 3-7 - Internal components of 100, 115 and 140 models AGUAPLUS COSMOGAS...
- Page 15 38 - ---------- 35 - P/T Safety relief valve 39 - Hot water outlet 36 - ---------- 40 - Cold water inlet 37 - Condensate drain 41 - Pump Figure 3-8 - Internal components of 100, 115 and 140 models AGUAPLUS COSMOGAS...
-
Page 16: Operation
30 - Stainless steel hot water tank 31 - Water outlet 32 - Pump 33 - Temperature sensor 34 - Cold water inlet 35 - Drain valve 36 - Primary heat exchanger temperature fuse Figure 4-1 - Functional schematic for models 60 and 70 AGUAPLUS COSMOGAS... - Page 17 31 - Water outlet 32 - Pump 33 - Temperature sensor 34 - Cold water inlet 35 - Drain valve 36 - Primary heat exchanger temperature fuse Figure 4-2 - Functional schematic for models 100, 115 and 140 AGUAPLUS COSMOGAS...
-
Page 18: Operation And Intended Use
4.1.3 - Types of system temperature higher than 60°C to disinfect it or adopt equivalent The following types of system con be created with this systems. appliance: - System solely for the production of domestic hot water (see Figure 8-2). AGUAPLUS COSMOGAS... -
Page 19: Installation - Place Of Installation
- connection to gas pipe; - water supply connection; - domestic hot water system connection; - electrical connection; - connection to condensate drain; - safety valve discharge connection; - room ventilation. 020021.01.006 020021.01.007 Figure 5-1 Undoing transport pallet screws AGUAPLUS COSMOGAS... -
Page 20: Requirements For Correct Ventilation
- Hydrochloric acid/muratic acid; - Cements and glues; - Antistatic fabric softeners used in clothes dryers; - Chlorine-type bleaches, detergents and cleaning solvents found in household laundry rooms; - Adhesives used to fasten building products and other similar products; AGUAPLUS COSMOGAS... -
Page 21: Installation - Setup
Once the appliance has been positioned properly, the lifting cables (detail “B” in Figure 6-1) must be removed before applying the top cover. MIN 0 020010.01.013 MAX 0,39 " (10 mm) 020010_01_030 Figure 6-2 - Install leveling feet B = Locking nut AGUAPLUS COSMOGAS... -
Page 22: Installation - Dimensions And Minimum Distances To Respect
1”1/2 1”1/2 136 mm * 110 mm 1” 28mm 1”1/2 1”1/2 136 mm * 110 mm 1” 28mm * Air intake in the environment, do not obstruct or add any fittings; Figure 7-2 - Dimensions and diameters connections AGUAPLUS COSMOGAS... -
Page 23: Installation - Plumbing
In Figure 7-2 you can check the appliance gas fitting which is useful for maintenance work. positioning. The sections of piping that make up the gas adduction system must always ensure sufficient gas supply to cover the maximum required. AGUAPLUS COSMOGAS... -
Page 24: Temperature And Pressure Relief Valve
L = Hot water outlet M = Water intlet N = Gasket (Factory supplied) P = Pipe (Factory supplied) R = Condensate drain S = Nut (Factory supplied) Figure 8-1 Piping of the P-T relief valve discharge and water connections AGUAPLUS COSMOGAS... -
Page 25: Installation Example
It is up to the designer to determine the components needed, including any additional equipment and all safety devices which, if decided, will be suitably sized; as provided by national and local installation regulations. Figure 8-2 - Example of piping diagram AGUAPLUS COSMOGAS... -
Page 26: Expansion Tank
To size the water flow needed consider the appliance pressure drops as reported in Figure 8-3. RIC 01-2015 0,98 0,66 0,33 1000 2000 3000 4000 5000 6000 17,6 26,4 Figure 8 - 3 - Water side head loss AGUAPLUS COSMOGAS... -
Page 27: Installation - Condensate Disposal
C = Stppers for duct inspection D = Anti-odour siphon system E = Atmospheric connection (duct vent) F = Condensate drain G = Condensate outlet pipe Figure 9-2 - Condensate drain Figure 9-3 - Correct installation of condensate outlet pipe AGUAPLUS COSMOGAS... -
Page 28: Installation - Electrical Connections
8.- Connect the brown cable (Phase) to terminal “101”; 9.- Connect the blue cable (Neutral) to terminal “102”; A = Cable conduit B = Line (hot) cable C = Neutral cable D = Ground cable Figure 10-1 - Electrical connections box AGUAPLUS COSMOGAS... -
Page 29: Connecting The Appliance In Cascade
For water, gas, flue exhaust and air intake connections, ask The appliances work independently without requiring for conceptual drawings to the manufacturer. additional electrical connections. Water Appliance 3 Appliance 4 Appliance 2 Appliance 1 Cold Water Figure 10-3 Cascade connection conceptual diagram AGUAPLUS COSMOGAS... -
Page 30: Installation - Air Intake And Flue Exhaust Ducts
Further details on ventilation requirements and allowances can be found in sections 5.1.1 and 5.1.2. Key Figure 11-1 A = Plant room; B = Ventilation openings; Figure 11-1 - Exhaust/intake systems AGUAPLUS COSMOGAS... -
Page 31: Flue Exhaust
Figure 11-3 - Assembled system CODE DESCRIPTION 60T-140T 62617344 PIPE 1m Ø110 62617345 ELBOW 45° Ø110 62617346 ELBOW 90° Ø110 62617289 PIPE 1m Ø160 62617297 ELBOW 45° Ø160 62617298 ELBOW 90° Ø160 Figure 11-4 - Securing exhaust ducts AGUAPLUS COSMOGAS... -
Page 32: Installation - External Cover
13.- Use screws “D” to fasten the guard for electrical connections “L”, for intake “M” and for exhaust “N” (or “P”) to the upper covering (figures 12-26 and 12-27); remember to insert gaskets “O” and “W” as shown in figure 12-26. AGUAPLUS COSMOGAS... - Page 33 12 - INSTALLATION - External cover 62610111.002 62610111.001 62610111.003 Figure 12-1 Figure 12-2 Figure 12-3 62610112.014 62610111.005 Figure 12-5 Figure 12-6 62610112.012 Figure 12-4 62610111.006 62610111.042 Figure 12-8 Figure 12-9 62610111.007 62610112.013 62610111.009 Figure 12-7 Figure 12-10 Figure 12-11 AGUAPLUS COSMOGAS...
- Page 34 12 - INSTALLATION - External cover 62610111.010 62610111.011 62610111.012 62610111.013 Figure 12-12 Figure 12-13 Figure 12-14 Figure 12-15 62610111.023 Figure 12-16 62610111.039 62610112.001 62610112.002 Figure 12-17 Figure 12-18 Figure 12-19 62610112.003 62610112.005 62610112.004 Figure 12-20 Figure 12-21 Figure 12-22 AGUAPLUS COSMOGAS...
- Page 35 12 - INSTALLATION - External cover 62610111.021 Figure 12-24 62610111.028 Figure 12-23 62610112.006 Figure 12-25 N - P 62610111.044 Figure 12-26 62610111.030 62610111.031 Figure 12-27 Figure 12-28 AGUAPLUS COSMOGAS...
- Page 36 12 - INSTALLATION - External cover 62610112.007 62610111.032 Figure 12-30 Figure 12-29 62610112.010 Figure 12-32 62610112.009 Figure 12-31 AGUAPLUS COSMOGAS...
-
Page 37: Start-Up
3 months, repeat the above operation to again fill the condensate trap. WARNING!!! Once the appliance has been started up again, make sure no flue gases are escaping from plug “F”. 020014.01.030 Figure 13-1 - Filling the condensate outlet siphon AGUAPLUS COSMOGAS... -
Page 38: General Warnings On Gas Supply
In Figure 7-1 you can check the position of gas connection. The sections of piping that make up the gas adduction system must always ensure sufficient gas supply to cover the maximum required. AGUAPLUS COSMOGAS... -
Page 39: Conversion Of Appliance Models 60 And 70 From One Type Of Gas To Another
C - From another room, or failing that from a neighbour’s, immediately call a qualified installer or the gas supply company. In their absence, call 020010.01.019 the fire departement. Figure 13-4 - Replacing gas orifice AGUAPLUS COSMOGAS... - Page 40 13 - COMMISSIONING Burner 2 Burner 1 (Master) A - Connector from Burner 1 (MASTER) B - Connector from display C - Connector from Burner 2 Figure 13-5 - Burner Position AGUAPLUS COSMOGAS...
-
Page 41: Conversion Of Appliance Models From 100 To 140 From One Type Of Gas To Another
LP gas; apply label “A” if the appliance as converted from LP gas to methane. 020010.01.022 D - Gas inlet pressure port E - CO2 regulation screw F - Factory regulation screw (do not touch) Figure 13-6 - Gas valve AGUAPLUS COSMOGAS... - Page 42 LP gas CO2 (G31) at minimum output 9,7 to 9,9 LP gas O2 (G31) at maximum output 5,2 to 5,6 LP gas O2 (G31) at minimum output 5,9 to 6,1 Figure 13-8 - Settings for the various operating gases AGUAPLUS COSMOGAS...
-
Page 43: Ignition
Do not force the screws to close the pressure port in order to avoid damaging to the gas valve. WARNING!!! Carry out the gas leak test only with a leak detection fluid. The use of open flame is absolutely forbidden. AGUAPLUS COSMOGAS... -
Page 44: Checking Co2 Level
D - Gas inlet pressure port E - CO2 regulation screw F - Factory regulation screw (do not touch). Figure 13-10 - Gas valve AGUAPLUS COSMOGAS... -
Page 45: Checking Co2 Level And Any Adjustments On Appliance Models From 100 Up To 140
14.- Close the combustion analysis hole in figure 11-2 with appropriate plug “F” as per the instructions from the drain pipe manufacturer. WARNING!!! Once plug “H” is positioned with the appliance at maximum output heat, make sure there are no flue exhaust leaks, which could cause damage. AGUAPLUS COSMOGAS... -
Page 46: Use
Simply press any key to switch it T - On/off switch back on. In the event of any anomaly, the display switches back on automatically. This function can be modified by following section 14.7 (Energy saving). AGUAPLUS COSMOGAS... -
Page 47: Ignition And Shutdown Procedure
20°C to 80°C. WARNING!!! Domestic water temperature over 51°C can cause scalding. Children, the disabled and the elderly are at high risk for scalds. Check the water temperature before getting into a bath or shower. AGUAPLUS COSMOGAS... -
Page 48: User Menu
If it shows 1:29, it means 29 minutes; lock-up or error. e.g.: If it shows 2:12, it means 12 hours; e.g.: If it shows 3:15, it means 15 days; N/A : Not Applicable. e.g.: If it shows 4:26, it means 26 weeks. AGUAPLUS COSMOGAS... -
Page 49: Installer Menu
From 0 to 35 temperature (N/A) 2021 Climatic adjustment : external design temperature °C From -20 to 5 (winter) (N/A) 2022 Climatic adjustment: supply temperature cor- °C From 0 to 80 responding to the external design temperature (winter) (N/A) AGUAPLUS COSMOGAS... -
Page 50: Diagnostics
During normal appliance operation, display “N” in figure 14-1 continuously shows the appliance work status via the following indications: Parameter Parameter description Display on display “N” in Figure 14-1 Antifreeze function active Boiler temperature (°C) AFro Heat request operating state. Supply temperature (°C) AGUAPLUS COSMOGAS... -
Page 51: Diagnostics: "Loc" Lock
Loc 17 Software error inside Replace the command and control board command board Loc 18 Software error inside Replace the command and control board command board Loc 19 Software error inside Replace the command and control board command board AGUAPLUS COSMOGAS... - Page 52 Make sure that the flue gas sensor (parameter 1006) If the temperature does not rise, replace the flue gas ignites increases the temperature when the burner ignites. temperature sensor or the command and control board. AGUAPLUS COSMOGAS...
-
Page 53: Diagnostics: "Err" Errors
Make sure the grounding and the neutral are at 0 If the neutral is not at zero, restore the correct volt electrical power supply. If the neutral is at 0 volt, try replacing the board. AGUAPLUS COSMOGAS... - Page 54 Make sure the display is connected to the If the display is not connected to the MASTER it MASTER shows “NO-CONN”. If it is none of the above cases, replace the control board and/or the display. * This error locks up all burners AGUAPLUS COSMOGAS...
-
Page 55: Maintenance
5.- Empty the appliance through valve “2” in figure 3-3; 6.- Disassemble the anode, after checking its status, and replace it if necessary or reassemble it being careful with its gasket; 7.- Having done this, restore the initial status of the appliance and restart it. AGUAPLUS COSMOGAS... -
Page 56: Disassembling The Casing And Accessing The Inner Components
3.- disassemble spark generator “A” in Figure 15-2, a leak detection fluid. Using naked flames is absolutely unscrewing screws “D” in Figure 15-2 and disconnecting prohibited. it from the ignition glow plugs. 020022.01.007 Figure 15-1 - Disassembling the casing and opening the control panel AGUAPLUS COSMOGAS... -
Page 57: Cleaning The Burner And The Primary Exchanger, Flue Gas Side
“R” and “S” are in good condition (see figure 15-5). If necessary, replace them along with burner gasket 020009.01.012 “T” (see figure 15-5). 020010.01.020 Figure 15-2 - Spark generator disassembly 020022.01.008 020010.01.021 020009.01.014 Figure 15-4 - Gas valve disassembly Figure 15-3 - Air manifold disassembly AGUAPLUS COSMOGAS... - Page 58 Figure 15-5 - Disassembling the burner fan unit GASKET 020009.01.032 BURNER UNIT The gasket ensures combustion chamber seal. If the gasket is damaged, do WARNING !!! NOT reuse it. It . To replace it, consult the manufacturer. must be replaced along with the burner unit AGUAPLUS COSMOGAS...
-
Page 59: Heat Insulators
To accurately position the electrodes, it is a good idea to use a vernier caliper to respect the tolerances shown in Figure 15-7. A = LH ignition electrode B = RH ignition electrode C = Detection electrode Figure 15-7 - Positioning electrodes on the burner AGUAPLUS COSMOGAS... -
Page 60: Cleaning The Air Intake Filter
WARNING !!! Follow figure 15-9 carefully to but box “A” back in the right position. After the above maintenance, restore the liquid level in the siphon as per section 13.1.2. 020022.01.011 Figure 15-9 - Disassembling and opening the condensate neutralizer box AGUAPLUS COSMOGAS... -
Page 61: Connecting The Display To The Other Burners
Burner 1 (Master) A = Connector for Burner 1 (Master) dialogue B = Connector from display C = Connector for Burner 2 dialogue (Only in 100 and 140 models) Figure 15-10 Connecting the display in the other burners AGUAPLUS COSMOGAS... -
Page 62: How To Move A Control Board
4. Disconnect all the other connectors from the Burner 1 16. Repower the appliance; The new Burner 1 control board (Master) control board; now controls the appliance; 5. Remove the Burner 1 (Master) control board from the appliance; S4 SELECTOR 020009.01.010_a Figure 15-11 - Command board AGUAPLUS COSMOGAS... - Page 63 15 - MAINTENANCE Models 100-115-140 Models 60-70 Figure 15-12 Setting parameters 3001, 3050 and selectors S4 AGUAPLUS COSMOGAS...
-
Page 64: Emptying The Appliance
RESET key. WARNING!!! If, during forcing, the output heat dispensed by the appliance is much greater than the output heat absorbed by the system, the appliance switches off continuously to reach the maximum allowed temperature (93°C). AGUAPLUS COSMOGAS... -
Page 65: Temperature And Water Measurement Probes
There are various temperature sensors on the exchanger body. The electrical resistance between the two sensor contacts must match what is shown in Figure 15-13. 1001 1006 1007 The temperature probes are: Figure 15-13 - Water sensor curve AGUAPLUS COSMOGAS... -
Page 66: 60 And 70 Models Multi-Line Wiring Diagram
15 - MAINTENANCE 15.15 - 60 and 70 models multi-line wiring diagram Figure 15-14 - Multi-line wiring diagram part 1 - continues on the following page AGUAPLUS COSMOGAS... - Page 67 15 - MAINTENANCE Figure 15-14 - Multi-line wiring diagram part 2 - continued from the previous page AGUAPLUS COSMOGAS...
-
Page 68: 100, 115 And 140 Models Multi-Line Wiring Diagram
15 - MAINTENANCE 15.16 - 100, 115 and 140 models multi-line wiring diagram Figure 15-15 - Multi-line wiring diagram part 1 - continues on the following page AGUAPLUS COSMOGAS... - Page 69 15 - MAINTENANCE Continues Figure 15-15 - Multi-line wiring diagram part 2 - continues on the following page AGUAPLUS COSMOGAS...
- Page 70 15 - MAINTENANCE Figure 15-15 - Multi-line wiring diagram part 3 - continued from the previous page AGUAPLUS COSMOGAS...
- Page 71 RPP1 - Burner 1 (MASTER) main circuit pump relay RPP2 - Burner 2 main circuit pump relay RPP3 - Burner 3 main circuit pump relay (N/A) RPP4 - Burner 4 main circuit pump relay (N/A) N/A = Not Applicable AGUAPLUS COSMOGAS...
-
Page 72: Technical Features
Maximum water pressure Minimum water pressure Rated power supply voltage Rated power supply frequency Absorbed electrical power Degree of electrical protection IP21 IP21 IP21 IP21 IP21 Degree of electrical protection with outdoor covering IPX5D IPX5D IPX5D IPX5D IPX5D AGUAPLUS COSMOGAS... - Page 73 0,5 ; + 50 0,5 ; + 50 0,5 ; + 50 0,5 ; + 50 0,5 ; + 50 Weight of the appliance (empty) Weight of the appliance in operation Water content of the integrated hot water tank AGUAPLUS COSMOGAS...
-
Page 74: Forced Menu
0 to 126 3086 Number of Stopbits 1 or 2 3100 Material selection ABS; CPVC; PVC; SST; PP. 3101 Nation Selection US, CA Switch Switch “S4” position (see fig 15-11 and 15-12) On or Off “S4” N/A = Not Applicable AGUAPLUS COSMOGAS... - Page 75 6.- Press the RESET key to save the changes; 7.- Wait 10 seconds; 8.- Power off the appliance; 9.- Repower the appliance to exit the forced menu and go back to its normal operation. AGUAPLUS COSMOGAS...
-
Page 76: Control Menu Diagram
14.9) Parameters Parameters displayable menu under normal parameters operating (see conditions section 14.9) (see section 14.10) User menu parameters (see section 14.8) Go back to normal operation Go back to normal operation Figure 18-1 - Command menu diagram AGUAPLUS COSMOGAS... -
Page 77: Product Fiche
19 - PRODUCT FICHE (a) Supplier’s name or trade mark COSMOGAS AGUAPLUS (b) Supplier’s model identifier (c) Load profile (d) Energy efficiency class (e) Water heating energy efficiency ηwh 85,2 85,2 85,3 85,0 85,5 (f) Daily electricity consumption Qelec 0,280... -
Page 78: Ue Declaration Of Conformity
20 - UE DECLARATION OF CONFORMITY The undersigned CEO of the company COSMOGAS S.r.L., with registered office in Via L. Da Vinci no. 16 - 47014 Meldola (FC) ITALY, DECLARES under its own responsibility that the instantaneous water heater: SERIAL No. - Page 80 COSMOGAS s.r.l. Via L. da Vinci 16 - 47014 MELDOLA (FC) ITALY info@cosmogas.com www.cosmogas.com...
Need help?
Do you have a question about the AGUAPLUS 60 and is the answer not in the manual?
Questions and answers