Table of Contents
Advertisement
Quick Links
Advertisement
Table of Contents

Subscribe to Our Youtube Channel
Related Manuals for Ampac Fire Finder EN54-2


Summary of Contents for Ampac Fire Finder EN54-2
- Page 1 ireF inder...
- Page 2 INCOMING ALARM CONDITION 1) INDICATION FIRE FIRE LED STEADY DESCRIPTION TYPE LOOP No SENSOR No STATUS: ALARM LCD DISPLAY OF DESCRIPTION DATE TIME TYPE, ADDRESS, DATE TIME AND NUMBER OF ALARMS SENSOR ALARMS 1 OF xx 2) SOUNDER SILENCE OR SOUND EVACUATION PRESS KEY SOUNDER EVACUATE...
- Page 3 TABLE OF CONTENTS Page No. Non Disclosure Agreement ....................1 About This Manual ....................... 2 Introduction ........................ 2 General Requirements ....................2 References......................... 2 Symbols ........................2 System Overview ............... Error! Bookmark not defined. FACP Configuration Examples ........Error! Bookmark not defined. FireFinder Description ..............
-
Page 4: Table Of Contents
Sounder / Bell Control Board (302-7420/1) ....Error! Bookmark not defined. 6.10 Printer ................. Error! Bookmark not defined. 6.10.1 Indicators and Buttons ........Error! Bookmark not defined. 6.10.2 Maintenance..........Error! Bookmark not defined. 6.10.3 Printer Connections and Jumpering ....Error! Bookmark not defined. 6.10.4 Printer 5 Volt Power Supply (BRD42PVCB1) . - Page 5 Troubleshooting Chart .............. Error! Bookmark not defined. Address Setting ................. Error! Bookmark not defined. Glossary of Terms ......................21 Definitions .......................... 22 Qick Reference Guides ...................... 23...
- Page 6 AMPAC; Is approved for release by written authorisation of AMPAC; or Is not designated by AMPAC in writing or by appropriate stamp or legend to be of a secret, confidential or proprietary nature. 4. This Agreement will be binding upon and inure to the benefit of the parties hereto, and their respective successors and assigns.
- Page 7 About This Manual Introduction This manual contains all the information required to install, commission and operate the FireFinder SERIES II Fire Alarm Control Panel (FACP) fitted with Version 6 software and is only available to and for the use of personnel engaged in its installation, commissioning and operation. General Requirements The FireFinder Series II FACP has been designed and manufactured from high quality commercial components so as to comply with major world standards.
-
Page 8: Firefinder Operation
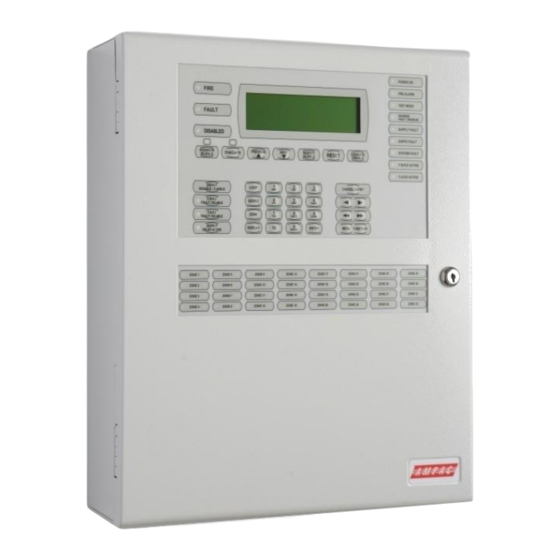
FireFinder Operation The Control Panel Figure 1: The SP1M FireFinder Control Panel FIRE FIRE (Red) – This LED will be illuminated steady if any fire alarms are present on the system. FAULT FAULT (Yellow) – This LED will be illuminated steady if there are any faults on the system, whether they are loop faults, module faults, device faults etc. - Page 9 PREVIOUS PREVIOUS – This button is used for scrolling backwards through fire alarms, faults, or disablement’s displayed on the LCD. NEXT NEXT – This button is used for scrolling forwards through fire alarms, faults, or disables displayed on the LCD. BUZZER SILENCE BUZZER SILENCE –...
- Page 10 F.A.R.E. ACTIVE F.A.R.E (Fire Alarm Routing Equipment) ACTIVE (Red) – This LED will be illuminated when the FARE output is active. DEVICE DISABLE / ENABLE DEVICE DISABLE / ENABLE – This button is used to disable or re-enable selected individual or groups of detectors, devices or zones. F.W.R.E.
- Page 11 Note: the key can only be removed in the NORMAL position. LCD DISPLAY – PALM: 000 FIREFINDER 16/2/2007 14.31.15 = Number of Customer defined text AMPAC EUROPE LTD Pre-alarms present PH: +44 (0) 1302 833 522 AC:1S FAULT: 000 SYSTEM IS NORMAL = Access Level 1...
-
Page 12: Functions And Menus
Take note of the 4 digit password number displayed on the screen; then Contact the AMPAC head office and quote the above number; A temporary password will be issued and a new password can then be programmed into the FACP. -
Page 13: The Main Menu
The Main Menu The MAIN MENU is accessed by pressing MENU. MAIN MENU 0: ALARMS 1 :PREALARMS 2: FAULTS 3: DISABLES 4:STATUS 5 :TEST 6: SOUNDERS 7: PRINTER: SELECT NO. AC: 2S ALM: 000 PALM: 000 FLT: 000 DIS: 000 Figure 3: The Main Menu While in the MAIN MENU press the appropriate number on the keypad to view any;... - Page 14 Networked Panel – ONLY DISPLAY NETWORK STATUS 0: NETWORK POINTS 1: REMOTE SLAVE MODULES 2: REMOTE EXTERNAL LED MIMIC MODULES SELECT NO. AC: 2S ALM: 000 PALM: 000 FLT: 000 DIS: Figure 5: Display Network Status) Is pressed to access NETWORK STATUS DISPLAY NETWORK POINTS 0: STATUS 1: POWER SUPPLY...
-
Page 15: Testing Menu
A values: , for a network panel is pressed to access AVALUES. Enter the Loop number then ENTER then Sensor number then ENTER . Loop 1 sensor 1 STAT: NORMAL AVALUE: 25 MODE: 0 I: 000 O:: 000 AC: 2S ALM: 000 PALM: 000 FLT: 000... -
Page 16: Main Functions
Main Functions LEVEL III MAIN FUNCTIONS 0: DATE 1: TIME 2: DAY/NIGHT 3: LOGS 4: TESTS 5: I/O 5: PASSWORD 6: PROG SELECT NO. AC: 3S ALM: 000 PALM: 000 FLT: 000 DIS: 000 Figure 11: The Level III Functions Menu Setting the Function Date Facility Select FUNCTION. -
Page 17: The Function Test Facility
This screen allows the operator to view the Logs by pressing to VIEW BY ENTRY NUMBER or by pressing to VIEW BY DATE. In each case the screen will ask for the appropriate information (ENTRY NUMBER or DATE) to be entered before anything can be displayed. -
Page 18: Function Manual I/O Control
Function Manual I/O Control Press To display the Manual I/O Control menu MANUAL I/O CONTROL 0: INPUT 1 :OUTPUT 2: REMOVE ALL MANUAL CONTROL SELECT NO. AC: 3S ALM: 000 PALM: 000 FLT: 000 DIS: 000 Figure 12: The Manual I/O Control Menu MANUAL I/O CONTROL Press ... -
Page 19: Forgotten Passwords
1. enter 9999 into the password field; 2. Take note of the 4 digit password button displayed on the screen; 3. contact the AMPAC head office and quote this number; 4. a temporary password will be issued to allow access to the level 3 functions 5. -
Page 20: Device Programming
EDIT ZX BRIGADE OPTIONS AND CONFIG ALRM: Y/N BELL: Y/N AUX: Y/N SPRK: Y/N AIF: Y/N ALARM LED: Y/N CONFIG: LATCHING Use < or > to change setting AC: 3S ALM: 000 PALM: 000 FLT: 000 DIS: 000 Figure 16: Brigade Options These keys are used to set the Y/N field that is the selected Zone that will activate the Brigade options ALRM, bell etc. -
Page 21: Input Programming
e.g.: DESC DETECTOR 1 TYPE SMOKE 6. Allocate / Edit the Sensor to a Zone and set the device type 7. e.g.: XP95 Photo, XP95 Heat etc. 8. Set /edit and displays the Output Configurations or options. 9. e.g.: Latching, AVF, Non-latching etc 10. -
Page 22: Extra Devices Detected
Extra Devices Detected If Self Learn is enabled and FireFinder detects extra modules or devices, that is devices or modules that have been added or there has been a change of description or type, the FireFinder LCD will indicate this by displaying the screen below. FIREFINDER 26/2/2007 08:05:45... -
Page 23: Incoming Fire Alarm Signal
Incoming Fire Alarm Signal Will operate the red common LED fire indicator Will display location of fire alarm origin on the LCD Will activate external alarm. Will activate the internal FACP buzzer. (optional) Will activate any ancillary equipment so programmed. ... -
Page 24: Accessing A Loop, Sensor Or Zone
Accessing a Loop, Sensor or Zone LOOP OR SENSOR 12. From the default display, press LOOP 13. Enter the loop number you wish to interrogate then press SENSOR. 14. Press the button for the sensor number. 15. Press the TO button if you wish to access a range of sensors on the loop, 16. -
Page 25: Certification Information
Certification Information The FireFinder™ is designed and manufactured by: AMPAC TECHNOLOGIES PTY LTD 7 Ledgar Rd Balcatta WA 6021 Western Australia HEAD OFFICE 61-8-9242 3333 FAX: 61-8-9242 3334 Manufactured to: Certificate of Compliance Number: Equipment Serial Number: Date of Manufacture:... - Page 26 Glossary of Terms ACF: ANCILLARY CONTROL FACILITY ACKD: ACKNOWLEDGED AHU: AIR HANDLING UNIT ALM: ALARM AVF: ALARM VERIFICATION FACILITY AZF: ALARM ZONE FACILITY AZC: ALARM ZONE CIRCUIT RELAY COMMON CONTACT (WIPER) CIC: CONTROLLER INTERFACE CARD CONNECTOR CPU: COMMON PROCESSOR UNIT DGP: DATA GATHERING POINT EARTH:...
- Page 27 Definitions Addressable system - a fire alarm and detection system that contains addressable alarm zone facilities or addressable control devices. Alarm Verification Facility (AVF) - that part of the FACP, which provides an automatic resetting function for spurious alarm signals so that they will not inadvertently initiate Master Alarm Facility (MAF), or ACF functions.
- Page 28 Qick Reference Guides The following guides; 1. Prompt / assist an experienced operator to move through the Menu and Function facilities of the FACP without having to consult the main body this manual; and 2. provide a proforma for Brigade response to an alarm Quick Reference FireFinder MAIN MENU OPTIONS...
- Page 29 Page 24...
- Page 30 NOTES:...
- Page 31 Email: info.nsw@ampac.net (HEAD OFFICE) Assessed to ISO9001 LPCB ref. no 952 (AMPAC Europe) UNCONTROLLED DOCUMENT NOTE: Due to AMPAC’s commitment to continuous improvement specifications may change without notice.
Need help?
Do you have a question about the Fire Finder EN54-2 and is the answer not in the manual?
Questions and answers