Advertisement
Quick Links
W e striv e t o ensur e tha t ou r product s ar e o f th e highes t quality
an d fre e o f manufacturin g defect s o r missin g parts . Howev e r ,
yo u hav e an y problem s wit h you r ne w product,
gameroom@escaladesports.com
Please
hav e you r mode l numbe r whe n inquirin g abou t parts.
Whe n contactin g Escalad e Sport s pleas e provid e you r mode l numbe r , d at e
cod e (i f a pplicable ) an d par t n umbe r i f requestin g a replacemen t part . T hes e
number s ar e locate d o n th e product , packaging , an d t hi s owner s m anual .
Y ou r Mode l Numbe r
2 - G04801W/F -
Dat e Cod e
Purchase Dat e
PLEASE RETAIN THIS INSTRUCTION MANUAL FOR FUTURE REFERENCE
D O NO T RETUR N I T T O TH E S T ORE
pleas e contac t u s tol l fre e @:
1-88 8 -996-2729
F AX : 1-866-873-3531
Cust o me r Servi c e Depa r tme n t
Evansvill e I N 47706
G04801W/F
O r writ e to:
Escal a d e Spor t s
P .O . Bo x 8 8 9
- HL
1
,
Advertisement

Related Manuals for ESCALADE Atomic


Summary of Contents for ESCALADE Atomic
- Page 1 W e striv e t o ensur e tha t ou r product s ar e o f th e highes t quality an d fre e o f manufacturin g defect s o r missin g parts . Howev e r , yo u hav e an y problem s wit h you r ne w product, D O NO T RETUR N I T T O TH E S T ORE pleas e contac t u s tol l fre e @:...
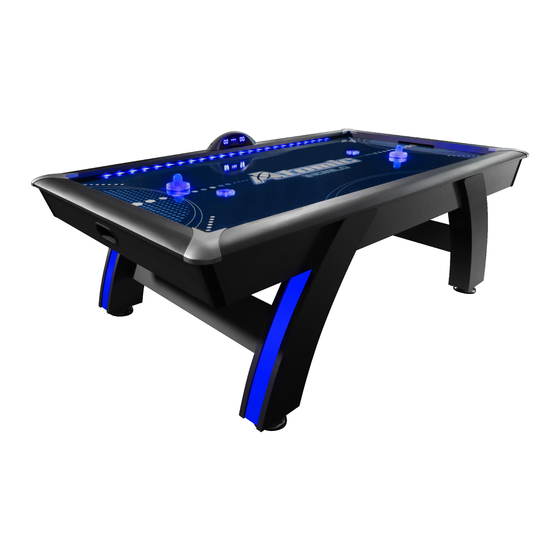
- Page 2 IMPORTANT! READ EACH STEP IN THIS MANUAL BEFORE YOU BEGIN THE ASSEMBLY. TWO ADULTS ARE REQUIRED TO ASSEMBLE THIS 90" INDIGLO AIR HOCKEY TABLE Tools Required: T1 - Allen Wrench (Included) Phillips Screwdriver Furniture Polish and Cloth Assembly Tips Make sure you understand the following tips before you begin to assemble your hockey table. 1.
-
Page 3: Hardware Identifier
HARDWARE IDENTIFIER (To Scale) H4 = 2 pcs H1 = 8 pcs H3 = 8 pcs H2 = 16 pcs 3.5 mm x 18 mm 8.5 mm x 22 mm 8 mm x 35 mm 8 mm x 40 mm Phillips Round Allen Head Bolt Flat Washer... - Page 4 PARTS REQUIRED: 8 pcs - H1 8 x 35mm Allen Head Bolt 8 pcs - H2 8.5 x 22mm Flat Washer 2 pcs - P2 Left Leg 2 pcs - P3 Right Leg P1 Air Hockey Table Cabinet 1 pc - T1 Allen Wrench 8 pcs - H5 M8 Lock Washer...
- Page 5 PARTS REQUIRED: 8 pcs - H3 8 x 40mm Allen Head Bolt 8 pcs - H2 8.5 x 22mm Flat Washer 2 pcs - P4 End Leg Panel 4 pcs - P5 Leg Leveler 8 pcs - H5 M8 Lock Washer STEP:2 Install End Leg Panels (P4) onto the Legs using Bolts (H3), Lock Washers (H5) and Flat Washers (H2) as shown in FIGURE 2.
- Page 6 ELECTRICAL CONNECTIONS & SPARE PARTS DRAWINGS Please Do Not - ON/OFF To Wall allow to become Switch Outlet a trip hazard P2 Left LED Leg - Junction Box C2-A/C Adapter customer plug in Factory C13 Air Blower P3 Right LED Leg connected customer plug in G04801...
- Page 7 PARTS REQUIRED: 2 pcs - H4 3.5 x 18mm Phillips Round Head Screw P6 Electronic Scorer STEP:3 Lift the table assembly from the floor with at least six strong adults, turn it over, and set the table assembly on its legs in the location where you will play. First,feed the Electronic Scorer plug (P6) down through the hole on one side of the long top rail as shown in FIGURE 3.
- Page 8 Replacement of LED Rail Lights STEP ONE : Should the LED lights not be working in the rail - Firstly , make sure the wall outlet cord is plugged in to a live A/C outlet properly. Secondly , make sure the ON/Off Switch (C1) is in the "ON" position . Thirdly , make sure the A/C Adapter (C2) is tightly plugged in to its outlet under the table .
- Page 9 Replacement of LED Leg Lights STEP ONE : Should the LED lights not be working in a Leg (s) - Firstly , make sure the wall outlet cord is plugged in to a live A/C outlet properly. Secondly , make sure the ON/Off Switch (C1) is in the "ON" position . Thirdly , make sure the A/C Adapter (C2) is tightly plugged in to its outlet under the table .
- Page 10 LED PUCK BATTERY CHANGE INSTRUCTION The purchase of a new CR2016 lithium 3V Battery is required STEP ONE: STEP TWO: IF BATTERY HOLDER BRACKET Remove screws and back Remove CR2016 Lithium MOVES, RE-INSTALL IT TO LED PUCK AS SHOWN IN DIAGRAM. cap from LED Puck using Small Battery 3V from LED Puck.
-
Page 11: Product Parts List
Congratulations! You have now assembled your Hockey Table. Please note the Care and Use instructions below to ensure many years of trouble free use of your Hockey Table. CARE AND USE OF YOUR HOCKEY TABLE . 1 Use only a suitable 120v AC household outlet, and insure the cord is not a trip hazard. For long life and best play from your air hockey table, apply spray furniture polish to a clean cloth and wipe down the playfield with air motor running to make the best play and frequently thereafter. - Page 12 ESCALADE P " . ) " l a i l l a v i t 888-996-2729 ® l l i l i a gameroom Other than shipping requirements, no charge will be made for such replacement of in-warranty products.
Need help?
Do you have a question about the Atomic and is the answer not in the manual?
Questions and answers