Brizo MultiChoice 60 Series Installation Instructions Manual
Valve trim
Hide thumbs
Also See for MultiChoice 60 Series:
- Installation instructions & owner's manual (32 pages)
Advertisement
Available languages
Available languages
Quick Links
Write purchased model number here.
For easy installation of your Brizo
will need:
• To READ ALL the instructions completely
before beginning.
• To READ ALL warnings,care, and
maintenance information.
Table of Contents:
Warranty ............................................................................. Page 2
Installation Instructions ....................................................... Pages 3 - 7
Maintenance ....................................................................... Page 7
Replacement Parts ............................................................. Pages 8-13
THIS VALVE MEETS OR EXCEEDS THE
FOLLOWING STANDARDS:
ASME A112.18.1/CSA B125.1 and ASSE 1016.
CAUTION: This system/device must be set by the
installer to ensure safe, maximum temperature.
Any change in the setting may raise the discharge
temperature above the limit considered safe and
may lead to hot water burns.
NOTICE TO INSTALLER: CAUTION!–As the
installer of this valve, it is your responsibility
to properly INSTALL and ADJUST this valve
per the instructions given. This valve does
not automatically adjust for inlet temperature
changes, therefore, someone must make the
necessary temperature knob adjustments at
the time of installation and further adjustments
may be necessary due to seasonal water
temperature change. YOU MUST inform the
owner/user of this requirement by following the
instructions. If you or the owner/user are unsure
how to properly make these adjustments, please
refer to page 7 and if still uncertain, call us at
1-877-345-BRIZO (2749).
After installation and adjustment, you must affix
48984 Rev. J
48984 Rev J.indd 1
MultiChoice
Installation Instructions
Owners Manual
60 Series
faucet you
®
You May Need
your name, company name and the date you
adjusted the temperature knob to the caution label
provided and apply or attach the label to the back
side of the closest cabinet door and the warning
label to the water heater. Leave this Instruction
Sheet for the owner's/user's reference.
WARNING: This thermostatic bath valve is
designed to minimize the effects of outlet water
temperature changes due to inlet pressure and
temperature changes, commonly caused by
dishwashers, washing machines, toilets and
the like. It may not provide protection from hot
water burns when there is a failure of other
temperature controlling devices elsewhere
in the plumbing system, if the temperature
knob is not properly set or if the hot water
temperature is changed after the settings
are made or if the water inlet changes due to
seasonal changes.
WARNING: Do not install a shut-off device on
either outlet of this valve. When this type of
device shuts off the water flow, it can defeat
the ability of the valve to balance the hot and
cold water pressures.
1
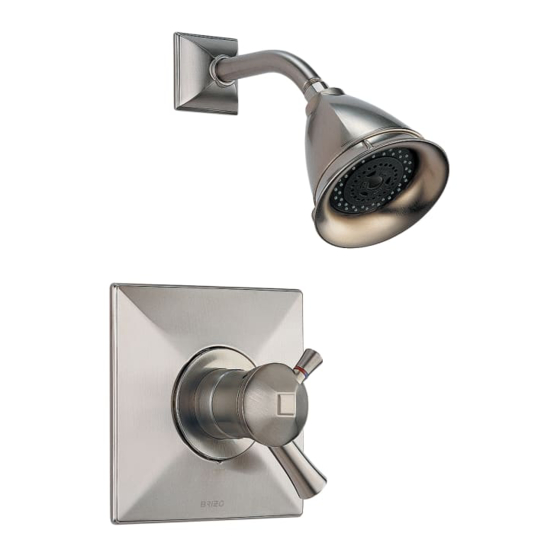
Valve Trim
®
1/19/12
1/25/12 4:16 PM
Advertisement

Subscribe to Our Youtube Channel
Related Manuals for Brizo MultiChoice 60 Series


Summary of Contents for Brizo MultiChoice 60 Series
- Page 1 Valve Trim ® Installation Instructions Owners Manual 60 Series Write purchased model number here. For easy installation of your Brizo faucet you ® will need: • To READ ALL the instructions completely before beginning. • To READ ALL warnings,care, and maintenance information.
-
Page 2: Cleaning And Care
Lifetime Faucet and Finish Limited Warranty REPLACEMENT AS WELL AS ANY OTHER All parts and finishes of the Brizo ® faucet are KIND OF LOSS OR DAMAGES ARE warranted to the original consumer purchaser to EXCLUDED. Proof of purchase (original sales be free from defects in material &... -
Page 3: Cartridge Installation
60 Series Installation Cartridge Installation Turn off water supplies. Remove cover (1), Rotate the cartridge (1) so the word “UP” (2) bonnet nut (2) and test cap (3) from the body. If appears on the top. Insert cartridge into valve this is not a thin wall mounting, the entire plas- body as shown. - Page 4 60 Series Installation Showerhead and Tub Spout Installation FOR RSVP SHOWERHEAD AND ® SHOWER ARM INSTALLATION: Install a 1/2" threaded pipe nipple to extend beyond the FOR SHOWERHEAD INSTALLATION: finished wall 3/8" to 1/2". Apply plumber tape to thread on pipe nipple and screw brass adapter Connect top outlet (1) to shower arm (2) with proper fittings.
- Page 5 60 Series Installation Valve Trim Installation (See page 6 for Siderna™ valve trim installation.) If your model requires a spacer (1), install it into sleeve (2). Slide the sleeve over the cartridge, body and O-ring. Ensure sleeve is properly positioned over the front of cartridge.
- Page 6 60 Series Installation Siderna™ Valve Trim Installation Slide trim sleeve (1) over cartridge and bonnet Assemble the two mounting sleeves (1) and two nut (2). When the sleeve is properly positioned mounting plates (2). Slide the mounting plate tighten the 2 set screws (3) to secure. assemblies over the sides of the trim sleeve as shown.
- Page 7 60 Series Installation Installation and Adjustment of the Temperature Knob Failure to do so may cause injury. RSVP Siderna™ ® Adjust temperature limit stop! Turn on water For RSVP (series T60X90) models, ® supplies; let the water run at both full hot and full temperature lever is intended to point upward cold to ensure the water is running as hot/cold near 12 o’clock position.
- Page 8 48984 Rev J.indd 8 1/25/12 4:16 PM...
- Page 9 ® 60 Serie ASME A112.18.1 / CSA B125.1 ASSE 1016 Escriba aquí el número del modelo comprado. Para instalación fácil de su llave Brizo ® usted necesitará: • LEER TODAS las instrucciones completamente antes de empezar • LEER TODOS los avisos, cuidados, e información de mantenimiento.
- Page 10 GarantÍa Limitada De Por Vida de la Llave y su Acabado CUALQUIER OTRO TIPO DE PÉRDIDA O Todas las piezas y acabados de la llave Brizo ® DAÑOS ESTÁN EXCLUÍDOS. Prueba de compra están garantizados al consumidor comprador (recibo original de venta) del comprador...
- Page 11 Instalación de la Serie 60 Instalación del Cartucho Cierre los suministros de agua. Quite la cubi- Gire el cartucho (1) de manera que la palabra “UP” (2) aparezca encima. Introduzca el cartucho en el erta (1), la tuerca tapa (2) y la tapa de prueba (3). Si no es para instalar en pared delgada, puede cuerpo de la válvula como se muestra.
- Page 12 Instalación de la Serie 60 Instalación de la Cabeza de la Regadera y el Surtidor de la Bañera PARA LA INSTALACIÓN DE LA CABEZA ROCIADORA DE LA REGADERA RSVP Y DEL ® BRAZO DE LA REGADERA: Para extender la tubería que sobrepase la pared acabada de 3/8"...
-
Page 13: Instalación Final
Instalación de la Serie 60 Instalación Final Si su modelo requiere un separador (1), insértelo en la manga (2). Deslice la manga sobre el cartucho, el cuerpo de la pieza y el aro O. Asegure la cubierta de ajuste se coloca correctamente sobre el frente del cartucho de la ducha. - Page 14 Instalación de la Serie 60 Instalación Final Para Siderna™ Deslice el accesorio del casquillo o manga (1) Ensamble los casquillos de instalación (1) y dos sobre el cartucho y la tuerca tapa (2). Cuando chapas de instalación (2). Deslice los ensambles el casquillo esté...
- Page 15 Instalación de la Serie 60 Instalación y Ajuste del Pomo de Temperatura El no hacerlo puede causar lesión. RSVP ® Siderna™ ¡Ajuste el tope del límite de temperatura! Abra Para los modelos RSVP (series T60X90), la ® los suministros de agua; deje que corra el agua palanca que controla la temperatura del agua caliente y fría totalmente abierta para asegurar que está...
- Page 16 48984 Rev J.indd 16 1/25/12 4:16 PM...
- Page 17 ® 60 Série ASME A112.18.1 / CSA B125.1 ASSE 1016 Inscrivez le numéro de modèle ici. Pour installer votre robinet Brizo facilement, ® vous devez: •LIRE TOUTES les instructions avant de débuter. •LIRE TOUS les avertissements ainsi que toutes les instructions de nettoyage et d’entretien.
-
Page 18: Instructions De Nettoyage
GARANTIE À VIE LIMITÉE DES ROBINETS ET DE LEURS FINIS DE TOUTE AUTRE NATURE NE SONT Toutes les pièces et les finis du robinet Brizo ® PAS COUVERTS PAR LA GARANTIE. Toute sont protégés contre les défectuosités de réclamation en vertu de la présente garantie matériau et les vices de fabrication par une... - Page 19 Installation – Série 60 Installation de la cartouche. Interrompez l’arrivée d’eau. Enlevez le Tournez la cartouche (1) de sorte que le mot « UP » (2) se trouve sur le dessus. Introduisez la couvercle (1), l’écrou à portée sphérique (2) et le capuchon d’essai (3) du corps.
- Page 20 Installation – Série 60 Installation de la pomme de douche et du bec de baignoire INSTALLATION DU BRAS DE DOUCHE ET DE LA POMME DE DOUCHE RSVP : Installez un ® manchon fileté 1/2 po de manière qu’il présente une saillie de 3/8 po à 1/2 po par rapport à la INSTALLATION DE LA POMME DE DOUCHE : surface finie du mur.
- Page 21 Installation – Série 60 Installation des pièces de finition Si le modèle que vous installez nécessite une pièce d’espacement (1), introduisez-la dans le manchon (2). Faites glisser le manchon sur la cartouche, le corps et le joint torique. Assurez la couverture d’équilibre est correctement placé Faites glisser le joint torique (1) sur la cartouche au-dessus de l’avant de la cartouche de douche.
- Page 22 Installation – Série 60 Installation des pièces de finition - Siderna Glissez le manchon de finition (1) sur la cartou- Assemblez les deux manchons (1) et les deux che et l’écrou-chapeau (2). Lorsque le manchon plaques de montage (2). Glissez les plaques de est placé...
- Page 23 Installation – Série 60 Installation et réglage du bouton de température Il y a risque de blessure si le bouton de température n’est pas réglé. RSVP Siderna ® Réglez la butée limitatrice de température! Sur les modèles RSVP (série T60X90), ®...
- Page 24 T60005, T60205 & T60405 Models / Modelos / Modèles RP62929▲ Shower Flange Pestaña de la Regadera 82305▲ RP40593 ▲ Collerette Showerhead Shower Arm Cabeza de Regadera Brazo de Regadera Pomme de Douche Tuyau de Pomme de Douche RP49089▲ Trim Ring Aro de accesorio Anneau décoratif RP47201...
- Page 25 T60010, T60210 & T60410 Models / Modelos / Modèles RP34356▲ Shower Flange Pestaña de la Regadera RP51146▲ Collerette Showerhead RP49087 ▲ Cabeza de Regadera Shower Arm Pomme de Douche Brazo de Regadera Tuyau de Pomme de Douche RP49089▲ Trim Ring Aro de accesorio Anneau décoratif RP47201...
- Page 26 T60020, T60220 & T60420 Models / Modelos / Modèles RP44009▲ Shower Flange Pestaña de la Regadera Collerette RP44013▲ RP44008 ▲ Showerhead Shower Arm Cabeza de Regadera Brazo de Regadera Pomme de Douche Tuyau de Pomme de Douche RP49089▲ Trim Ring Aro de accesorio Anneau décoratif RP47201...
- Page 27 T60040, T60240 & T60440 Models / Modelos / Modèles RP42430▲ RP40593 ▲ Shower Flange Shower Arm Pestaña de la Regadera RP42431▲ Brazo de Regadera Collerette Showerhead Tuyau de Pomme de Douche Cabeza de Regadera Pomme de Douche RP49089▲ Trim Ring Aro de accesorio Anneau décoratif RP47201...
- Page 28 T60080, T60280 & T60480 Models / Modelos / Modèles RP51034▲ Shower Flange Model 81380▲ Pestaña de la Regadera Showerhead Collerette Cabeza de Regadera Pomme de Douche RP44008 ▲ Shower Arm RP47201 Brazo de Regadera Cartridge Assembly Tuyau de Pomme de Douche Cartucho Cartouche RP63690...
- Page 29 T60090, T60290 & T60490 Models / Modelos / Modèles RP40650 RP48040 ▲ Set Screw Shower Arm & Set Screw Tornillo de Ajuste Brazo de Regadera y Tornillo de Ajuste Vis de Calage Tuyau de Pomme de Douche et Vis de Calage RP48041▲...
- Page 30 Notes / Notas / Notes 48984 Rev J.indd 30 1/25/12 4:16 PM...
- Page 31 Notes / Notas / Notes 48984 Rev J.indd 31 1/25/12 4:16 PM...
- Page 32 Delta Faucet Company Product Service 55 E. 111th Street Indianapolis, IN 46280 48984 Rev J.indd 32 1/25/12 4:16 PM...
Need help?
Do you have a question about the MultiChoice 60 Series and is the answer not in the manual?
Questions and answers