Subscribe to Our Youtube Channel
Summary of Contents for Ledon 300005
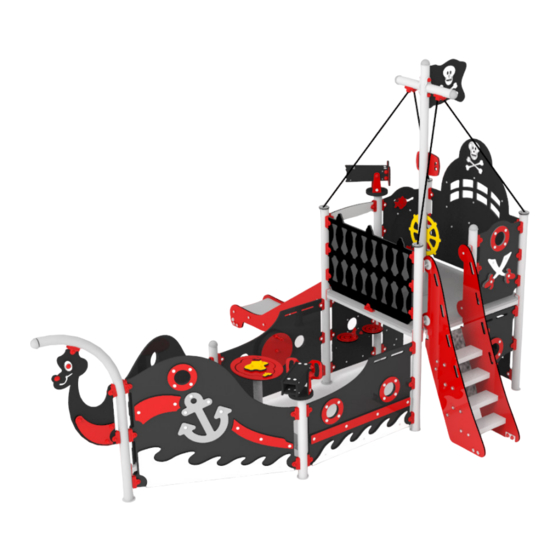
- Page 1 Pirate Ship 300005 (Concrete) Assembly instructions Montageanleitung • Montagevejledning LxBxH 90 cm 10 H 444 x 396 x 299 cm...
-
Page 2: Table Of Contents
Contents Inhaltsverzeichnis • Indholdsfortegnelse Gode råd og vink . . . . . . . . . . . . . . . . . . . . . . . . . . . . . . . . . . . . . . . . . . . . . . . . . . . . . . . . . . . . . . . . . . . . . . . . . . . . . . . . . . . . . . . . . . . . . . Pladshensyn og faldunderlag . -
Page 3: Gb De
Some good advice and tips Ein paar gute Ratschläge und Tipps • Gode råd og vink 1 . Tag komponenterne af pallen og læg dem på jorden 2 . Check efter komponentlisten om alle er med 3 . Vær omhyggelig med afstande generelt 4 . -
Page 4: Clearance And Fall Protection
Clearance and fall protection Platzbedarf und Fallschutzunterlage • Pladshensyn og faldunderlag Faldunderlag: I overensstemmelse med EN 1177 Safety surface: In accordance with EN 1177 Fallschutzbelag: Gemäß EN 1177 24 m Pladshensyn Clearance Platzbedarf 34 m... -
Page 5: Components Overview
Component overview Bauteileübersicht • Komponentorientering 70020 70027 70023 70009 70017 70016 70018 190,291 70002 70007 70021 70012 250,014 70056 70006 70040 70013 70024 70026 70025 70023 70011 70003 70008 70022 70001 70019 70005 70050 70056... -
Page 6: Komponentorientering
Component overview Bauteileübersicht • Komponentorientering 26809 26817 26817 26803 26812 26808 26814 26805 26806 26804 26811 26807 26818 26817 26810... -
Page 7: Start
Site preparation Vorbereitung • Start 72 cm 165 cm... -
Page 8: Montage 1
Assembly 1 Montage 1 250,014 10 mm 10 x 20 mm 40 x 40 mm 10 x 35 mm 40 x 40 mm 25 x 40 mm 8 x 35 mm... -
Page 9: Montage 2
Assembly 2 Montage 2 40 x 40 mm 10 x 35 mm 10 mm 40 x 40 mm 10 x 20 mm 250,014... -
Page 10: Montage 3
10 X 40 mm Assembly 3 Montage 3 8 x 35 mm 8 x 45 mm 8 x 35 mm 10 x 25 8 x 35 mm 70027 10 x 25 mm 10 x 35 mm 10 x 35 mm... -
Page 11: Montage 4
Assembly 4 Montage 4 8 x 35 mm 8 x 35 8 x 35 mm 10 x 40 mm... -
Page 12: Montage 5
Assembly 5 Montage 5 Start her 10 x 40 mm 10 mm M8 20 mm 8 X 45 mm... -
Page 13: Montage 6
Assembly 6 Montage 6 190,291 10 X 35 mm BH 10 x 35mm 10 X 35 mm 8 X 45 mm 10 x 150 mm... -
Page 14: Montage 7
Assembly 7 Assembly 7 montage 7 montage 7 8 x 35 mm 10 x 35 mm... -
Page 15: Montage 8
Assembly 8 montage 8 The 4 holes must be drilled in the floor 10 x 40 UH 10 x 35 BB 8 x 35 mm 8 x 35 BB 10 x 35 UH 10 x 35 mm 10 x 35 BB... -
Page 16: Finish
Finish Færdig...


Need help?
Do you have a question about the 300005 and is the answer not in the manual?
Questions and answers