
Subscribe to Our Youtube Channel
Related Manuals for Stagnoli DAPHNE


Summary of Contents for Stagnoli DAPHNE
- Page 1 Istruzioni Instructions Anleitungen I - Barriera GB – Barrier D - Schranke F - Barrière DAPHNE 3m fast...
- Page 2 L’installazione deve essere effettuata solo da personale qualificato e rispettando le vigenti normative riguardanti le chiusure automatizzate. • DAPHNE è stata realizzata appositamente per gestire il controllo del passaggio di veicoli, quindi, è vietato utilizzare il prodotto per scopi diversi da quelli previsti o in modo improprio.
- Page 3 Istruzioni Instructions Anleitungen...
-
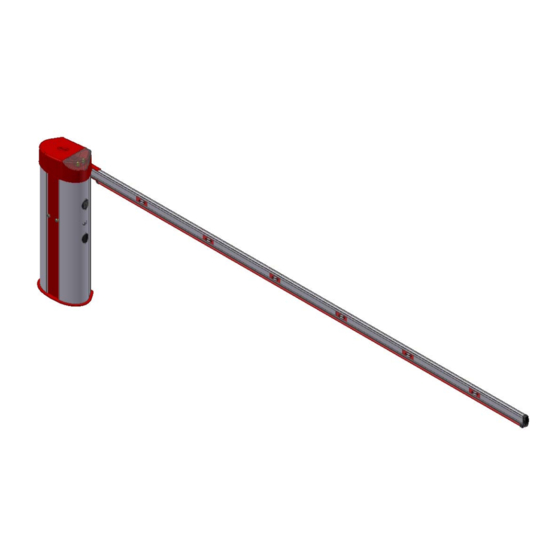
Page 4: Misure D'ingombro
Istruzioni Instructions Anleitungen Caratteristiche tecniche Daphne 3m veloce Dati tecnici DAPHNE 3m veloce Alimentazione 230V~ (50Hz) Assorbimento motore. (A) Alimentazione motore 24V ––––– Potenza motore max. 120W Tempo di apertura (sec) Temperatura operativa (°C) -20 ↔ +60 Ciclo di lavoro (%) -
Page 5: Manovra Manuale
Istruzioni Instructions Anleitungen Manovra manuale • La manovra manuale va eseguita solo a motore fermo in caso di mancanza di energia elettrica. • Togliere il cilindro estraibile(1) con la chiave rossa e con l’ausilio della chiave esagonale(2) sbloccare il motoriduttore girando in senso antiorario. - Page 6 Istruzioni Instructions Anleitungen Fissaggio barriera • Togliere il coperchio superiore svitando le viti (Fig. 3). • Aprire le ante, posizionare la barriera sulla piastra di fondazione facendo corrispondere i fori con i tiranti filettati e fissare la barriera avvitando i dadi M10 sui rispettivi tiranti (Fig.4). Fig.
- Page 7 Istruzioni Instructions Anleitungen Regolazioni asta: l’apertura standard della barriera è in senso antiorario come indicato in (Fig. 7). Fig. 7 • Per invertire il senso di apertura, spostare la centrale di comando(1), spostare la molla nella posizione opposta (Fig.8) e invertire il collegamento del motore elettrico sulla centrale di comando (Fig.9).
- Page 8 Istruzioni Instructions Anleitungen • Bilanciare l’asta regolando il tirante filettato, l’asta deve essere in equilibrio nella posizione di metà corsa (45°) (Fig. 10). 45° Fig. 10 • Procedere con la programmazione seguendo le istruzioni della centrale di comando e dopo aver effettuato la programmazione completa aggiustare le posizioni di fine corsa dell’asta agendo sui rispettivi antivibranti in gomma(1) (Fig.
- Page 9 Istruzioni Instructions Anleitungen Regolazione tensione catena Il tensionamento della catena è regolato direttamente in fabbrica, tuttavia se notate che la catena è allentata, registrarla agendo sulle viti (1) come mostrato di seguito. Tensionare Allentare Fig. 12 Manutenzione ordinaria E’ consigliabile dopo l’installazione, effettuare dei controlli delle parti almeno ogni 6 mesi: •...
- Page 10 Installation must be carried out by qualified personnel only, in compliance with current standards concerning automatic closing mechanisms. • Daphne has been designed and made specifically to manage the access control of vehicles. It is therefore forbidden to use the product for different reasons other than those foreseen in this manual.
- Page 11 Istruzioni Instructions Anleitungen...
- Page 12 Istruzioni Instructions Anleitungen DAPHNE’S Technical Details Tecnical Details DAPHNE 3 m fast Power Supply 230V~ (50Hz) Current absorbed Motor (A) Motor Power Supply 24V ––––– Maximum Power Max 120W Opening Time (sec) Operating Temperature (°C) -20 ↔ +60 Duty Cycle (%)
-
Page 13: Manual Manoeuvre
Istruzioni Instructions Anleitungen Manual Manoeuvre • The manual manoeuvring of the arm should only be carried out when the motor has stopped due to a cut in the power supply • Pull off the self releasing cylinder (1) and with the Alan key (2) unblock the motor turning the key in an anticlockwise direction. - Page 14 Istruzioni Instructions Anleitungen Fixing the barrier • Take the top cover off by unscrewing the screws (Fig. 3). • Open the barrier wings, position the barrier on the foundation plate making sure that the lower holes correspond to the screwable rods and screw everything in place with the M10 nuts.
- Page 15 Istruzioni Instructions Anleitungen Adjusting the arm: the standard opening of the barrier is in an anticlockwise direction as in (Fig. 7). Fig. 7 • To invert the opening direction of the arm, move the spring to the opposite position (Fig.8) and invert the connection of the electric motor to the control panel (Fig.9).
- Page 16 Istruzioni Instructions Anleitungen • Balance the barrier’s arm adjusting the screwable rods. The arm must be in equilibrium in the half way position (45°) (Fig. 10). 45° Fig. 10 • Proceed with the programming of the control panel following the specific electrical instructions and after having carried out the complete programming regulate the position of the arm’s limit switches, lowering or raising the relative rubber antivibration drums (1) (Fig.
-
Page 17: Ordinary Maintenance
Istruzioni Instructions Anleitungen Adjusting the chain’s tension The chain’s tension is adjusted directly in the warehouse, however, if you notice that the chain is slightly slack, adjust, using screws (1) as in example (Fig. 12). Tightening Slackening Fig. 12 Ordinary Maintenance It is advisable, after installation, to carry out checks on the moving parts, at least every 6 months: •... - Page 18 Normen durchzuführen. • DAPHNE wurde eigens für die Regelung von Fahrzeugdurchfahrten entwickelt; eine zwecksentfremdete oder nichtsachgemäße Verwendung des Produktes ist daher untersagt. • Es sind ausschließlich Originalteile zu verwenden. Die Herstellerfirma Stagnoli übernimmt keine Haftung für Schäden, die durch Gebrauch der nichtbestimmungsgemäßen Ersatzteile verursacht werden.
- Page 19 Istruzioni Instructions Anleitungen...
- Page 20 Istruzioni Instructions Anleitungen Technische Merkmale Daphne DAPHNE 3m Technische Daten Stromversorgung 230V~ (50Hz) Stromaufnahme (A) Betriebsspannung 24V ––––– Motorleistung max. 120W Laufzeit Öffnung (Sek.) Betriebstemperatur (°C) -20 ↔ +60 Einschaltdauer (%) intensiv (90) Schutzgrad IP Gewicht* (Kg) Baumlänge max. (m) Abmessungen Max.
- Page 21 Istruzioni Instructions Anleitungen Manueller Betrieb • Bei Stromausfall, darf der manueller Betrieb ausschließlich beim zuvor abgestellten Motor ausgeführt werden. • Den abnehmbaren Zylinder abziehen(1). Inbusschlüssel (2) entgegen dem Uhrzeigersinn drehend, den Getriebemotor entriegeln. • Um die Kraftübertragung einzuleiten ist der rote Schlüssel in den Zylinder einzuführen.
- Page 22 Istruzioni Instructions Anleitungen Befestigung der Schranke • Durch die Lösung der Schrauben die obere Abdeckhaube abnehmen (Abb. 3). • Die Gehäuseflügel öffnen; die Schranke auf der Fundamentplatte aufstellen, dafür die Gewindebolzen den vorbereiteten Bohrungen anpassen; die Schranke durch Aufschrauben der Mutter M10 auf die entsprechen Bolzen, befestigen (Abb.4). Abb.
- Page 23 Istruzioni Instructions Anleitungen Einstellung des Schrankenbaums: die Standardöffnung der Schranke wird entgegen dem Uhrzeigersinn erreicht, so wie dem Abb.7 zu entnehmen ist. Abb. 7 • Will man die Öffnungsrichtung umkehren, so ist die Federführung in entgegengesetzte Stellung zu bringen (Abb.8). Der Motoranschluss an der Steuerungszentrale muss ebenfalls umgekehrt werden (Abb.9).
- Page 24 Istruzioni Instructions Anleitungen • Der Schrankenbaum ist auszubalancieren, dafür müssen die Gewindebolzen justiert werden. Der Stab muss in der Hälfte des Laufwegs (45°) Gleichgewicht halten können(Abb. 10). 45° Abb. 10 • Mit der Programmierung fortfahren, dafür den Anweisungen der Steuerungszentrale Folge leisten.
- Page 25 Istruzioni Instructions Anleitungen Einstellung der Kettenspannung Die Kettenspannung wird direkt von Werk her eingestellt, dennoch sollte eine Lockerung in der Kettenspannung festgestellt werden, so ist diese mittels Schrauben nachzustellen (1) dafür sind die Anweisungen gemäß der Abbildung zu befolgen (Abb. 12). Spannen ö...
- Page 26 L’installation doit être effectuer uniquement par le personnel qualifié et en respectant les instructions normatives concernant les fermetures automatiques. • DAPHNE a été réalisée expressément pour gérer le contrôle du passage des véhicules, il est défendu alors d’utiliser le produit pour les buts divers des ceux prévus ou du mode impropre.
- Page 27 Istruzioni Instructions Anleitungen...
-
Page 28: Caractéristiques Techniques
Istruzioni Instructions Anleitungen Caractéristiques techniques Données techniques DAPHNE 3m Alimentation 230V~ (50Hz) Absorption moteur (A) Alimentation moteur 24V ––––– Puissance moteur max. 120W Temps d’ouverture (sec) Temperature opérationnelle(°C) -20 ↔ +60 Cycle de travail (%) intensif (90) Niveau de protection IP Poids* (Kg) Longueur max. - Page 29 Istruzioni Instructions Anleitungen Manœuvre manuelle (Fig. 1) • manoeuvre manuelle sera exécutée uniquement lors le moteur arrêté au cas du manque d’énergie électrique. • Retirer le cylindre extrayable(1) et avec l’auxiliare de la clé héxagonale(2) débloquer le motoréducteur tournant au sens contraire au movement de l’horloge.
- Page 30 Istruzioni Instructions Anleitungen Fixation de la barrière • Retirer la couverture supérieure dévissant les vis (Fig. 3). • Ouvrire les antes, positionner la barrière sur la pplaque de fondation faisant correspondre les orifices des tirants rayés et faire fixer la barrière vissant écrous M10 sur les tirants relatifs (Fig.4).
- Page 31 Istruzioni Instructions Anleitungen Regulation de la barre : l’ouverture standard de la barrière est au sens contraire au mouvement de l’horloge comme indiqué en (Fig. 7). Fig. 7 • Pour invertir le sens d’ouverture, déplacer le ressort en position opposée (Fig.8) et faire invertir la connexion du moteur électrique sur la centrale de commando (Fig.9).
- Page 32 Istruzioni Instructions Anleitungen • Équilibrer la barre regulant le tirant rayé, la barre doit être en équilibre en position de demi course (45°) (Fig. 10). 45° Fig. 10 • Procéder avec la programmation respectant les instructions de la centrale de commande et après avoir effectué...
- Page 33 Istruzioni Instructions Anleitungen Régulation de la tension de la chaîne La force de tension de la chaîne est régulée directement en fabrique, toutefois si vous notez que la chaîne est relâchée, registrer la en agissant sur les vis (1) comme montré en suivant (Fig. 12). Tendre Relacher Fig.
- Page 34 Istruzioni Instructions Anleitungen...
- Page 35 Istruzioni Instructions Anleitungen N° COMPONENTE Q.TA' COD. Corpo barriera X61A1000 Cerniera X61A903 Anta Dx X61A998 Anta Sx X61A999 Piastrina di giunzione dx X61A997 Piastrina di giunzione sx X61A996 Coperchio barriera DACOP6M Coperchio lampeggiante DACOP Vite 3,9x13 X61A274 Scheda elettronica lampeggiante X61A296 Vite 2,9x9,5 X61A584...
- Page 36 Istruzioni Instructions Anleitungen Rev. 1 10/07 Stagnoli s.r.l. Via Mantova, Traversa 1^, 105 A/B-25017 Lonato (Bs) - Italia Tel. +39 030 9139511 Fax. +39 030 91380 www.stagnoli.com...
Need help?
Do you have a question about the DAPHNE and is the answer not in the manual?
Questions and answers