Advertisement
Advertisement

Subscribe to Our Youtube Channel
Related Manuals for Gorenje B2000P2


Summary of Contents for Gorenje B2000P2
- Page 1 Instructions for use, installation and connection Electric oven...
-
Page 2: Table Of Contents
Electric oven Dear Customer! Congratulations on your purchase. See for yourself: our products read reliability. These ample instructions have been compiled in order to help you learn how to handle the appliance. They will show you step by step what your appliance is capable of, so please read them carefully before you attempt to use your cooker for the fi... -
Page 3: Safety Precautions
Safety precautions • To avoid any possible hazard, the appliance may be installed by qualifi ed personnel only. • Any repairs by unqualifi ed persons may result in electric shock or short circuit. In order to avoid possible injuries to your body or to the appliance, do not attempt any repairs by yourself. Such work should be carried out by qualifi... -
Page 4: Description Of The Appliance
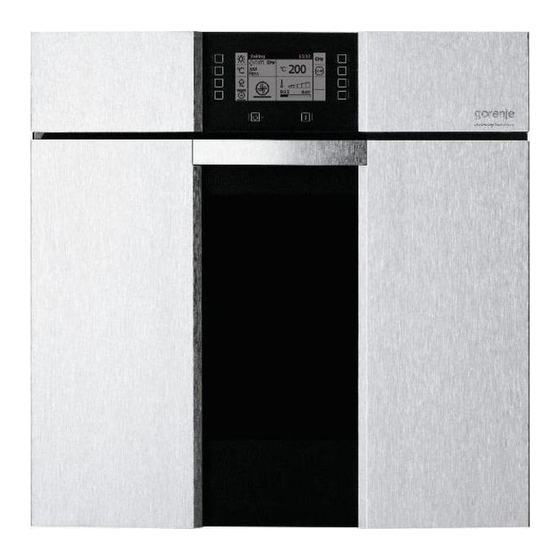
Description of the appliance 1. Control panel 2. Oven door handle 3. Oven door Control panel A Sensors for control and settings D Operation signal LED B Sensor illumination E LCD display C Mains ON/OFF sensor F INFO sensor... - Page 5 All oven commands and selections are carried out by touching relevant sensors. • Each selection is accompanied by sound signal. • Display illumination is automatically switched off and changes to clock display if no sensor is touched within 5 minutes, except during baking.
-
Page 6: Basic Settings
Basic settings Prior fi rst use • Take all the accessories out of the oven and clean it with warm water and your usual mild detergent. Never use aggressive cleaners! • During the fi rst heating the oven might produce a somewhat unpleasant smell of a new product. - Page 7 Display Basic appliance controls 1. Oven illumination ON/OFF 6. Additional settings: language, clock, display 2. Baking own recipes from memory brightness 3. Baking factory memorized recipes 7. Memory - saving, deleting, amending own 4. Manual baking settings recipes 5. Return to preceding menu 8.
- Page 8 Oven controls Operating mode manual settings All heating parameters in this mode are set manually Temperature values for the selected heating mode are already preselected, you can only ad just them prior commencement of baking/roasting. • Oven operation mode is selected by touching the relevant mode sensor or selection arrows Top/bottom heater...
- Page 9 Bottom heater and fan Both the bottom and fan are in operation. The mode is useful for baking thin pastry and preparation of preserved fruit and vegetables. Use the fi rst guide level from the bottom, and not too high pans, to allow the air to circulate along the upper side of the food.
- Page 10 Timer function settings • Press sensor to select the desired setting. Flashing arrow indicates selected setting. Touch selection arrows to select desired time setting. Setting oven operation period • Operation period can be set anywhere from 0 to 10 hours in 1 minute intervals.
- Page 11 Graphic display of oven temperature: Oven is cold. Oven is heated at approximately half of the set value. Oven is heated at the selected temperature. Oven temperature is slightly over the set value. This appears if you reduced the setting of the already heated oven.
- Page 12 For the reasons of safety oven is automatically switched off after certain period: - after 10 hours if the set baking temperature exceeds 120°C - after 24 hours if the set baking temperature is less than 120°C Baking/roasting factory This mode is used for preparation of food from the list with memorized recipes automatic baking mode, temperature and baking period settings.
- Page 13 Baking/roasting chart Meat: Food Weight Mode Temp Guide Time Remark (kg) (°C) level (min) Pork roast Deep pan Deep pan Deep pan Stewed beef Covered oval glass pan - on the grid Covered oval glass pan - on the grid Veal roast Deep pan Deep pan...
- Page 14 Pastry: Leavened dough, Agitated dough, Puff dough, Sponge dough Pastry: Leavened dough: Food Mode Temp Guide Time Remark (°C) level (min) Pizza Preheating - shallow enameled biscuit tray White bread Shallow enameled biscuit tray Sprinkled cake Shallow enameled biscuit tray Raisin star cake Dark 25 cm round model - on the grid Pastry: Agitated dough:...
- Page 15 Pastry: Frozen: Food Mode Temp Guide Time Remark (°C) level (min) Apple strudel Shallow enameled biscuit tray Croissants Shallow enameled biscuit tray Pizza Shallow enameled biscuit tray Note: the INFO-recipes menu contains data regarding oiling the pans. When baking bread, oil and dust the pan only where the bread loaf is to be placed.
- Page 16 Saving and editing own • Select Memory from the Master menu . and open Memory recipes content. Here you can select New entry, Edit or Delete entry. • Confi rm each selection. New entry If you already have 12 saved recipes, new entry is not possible.
- Page 17 Deletion In the Delete menu, all recipe names are displayed. Select the recipe(s) you wish to delete. A warning appears for confi rmation. After confi rmation the selected recipe is permanently deleted from memory. Specifi c settings Child lock The oven can be protected against accidental start or changes of baking program.
- Page 18 Telescopic pull-out Telescopic pull-out guides are fi tted in levels 2, 3, and 5. guides Telescopic pull-out guides and other oven accessories can become very hot during operation. Use kitchen gloves or similar protection! • To insert the grid, biscuit tray or drip pan, fi rst pull the telescopic guide of one level out.
-
Page 19: Preparation Of Food
Grease fi lter Inserted grease fi lter at the rear panel of the oven protects (depending on the model). the fan, the heater and the oven from accidental staining with grease. For roasting meat we recommend the use of grease. Remove the fi... - Page 20 Use of meat probe in combination with timer functions (for experienced users only) Meat probe can be used in combination with selecting roasting time or end of roasting (see section ‘Timer settings’). However, remember the following: • If you set the time of operation the oven will stop working when preset time runs out, irrelevant of whether the actual temperature of food had reached the preset value.
- Page 21 Baking with top/bottom heater • Use only single guide level. • This baking position is especially suitable for baking dry pastry, bread and teacakes. • Use dark baking pans. Light pans refl ect heat and pastry is not adequately browned. •...
- Page 22 Pastry with wet stuffi ng, like cheese cake, is undercooked Next time reduce the baking temperature and extend the baking time. Warnings regarding the baking tables: • The tables indicate the temperature range. Always select lower temperature fi rst. You may always increase the temperature in case pastry needs more baking.
- Page 23 Pastry Guide Temperature Guide Temperature Baking level (in °C) level (in °C) time (from (from (in min.) below) below) Sweet pastry Marble cake, raisin cake 160-170 150-160 55-70 Square cake 160-170 150-160 60-70 Ring cake 160-170 150-160 45-60 Cheese cake (tart form) 170-180 150-160 60-80...
- Page 24 Roasting meat • Best results are obtained with the engagement of both top and bottom heater or hot air • Best heating mode for each type of roasting pan is indicated by bold print in the Roasting Tables. • Note! For roasting meat we recommend the use of grease fi...
- Page 25 Meat Weight Guide le- Tempe- Guide le- Tempe- Roasting (in g) vel (from rature vel (from rature time below) (in °C) below) (in °C) (in min.) Beef Beef loin 1000 200-220 180-190 100-120 Beef loin 1500 200-220 170-180 120-150 Roastbeef, medium 1000 220-230 180-200...
- Page 26 Grilling and browning • Take extra precautions when grilling. Intensive heat from (barbecue) infrared heater makes the oven and the accessories extremely hot. Use protective gloves and special barbecue thongs! • Perforated roast may produce spurting of hot grease (sausages). Use long grill tongs to prevent skin burns and protect your eyes.
- Page 27 Grill food Weight Guide Tempe- Tempe- Roasting time (in g) level (from rature rature (in min.) below) (in °C) (in °C) Meat and sausages 2 beefsteaks, rare 12-14 2 beefsteaks, medium 16-18 2 beefsteaks, well done 20-22 2 pork sirloins 19-22 2 pork chops 20-22...
- Page 28 Preserving fruit and Use the bottom heater mode together with the fan. vegetables • Prepare food for preserving and the jars in a usual manner Use the conventional jars with glass cover and rubber gasket. Never use jars with threaded or tin covers, or tins. Jars should be of the same size, fi...
-
Page 29: Cleaning And Maintenance
Cleaning and maintenance Never clean the appliance with pressurized hot steam cleaner! Before cleaning switch the cooker off and let it cool down completely. Front side of the casing Clean the surfaces with liquid non-abrasive cleaning agents for smooth surfaces, using soft sponge. - Page 30 • Never use aggressive cleaners, like polishing agents, dish cleaning accessories, corrosion inhibitors, or any other devices that might cause scratches. • Coated, stainless steel or zinc-coated surfaces or aluminum parts must not come into contact with oven sprays, since they might cause damage or discoloration.
- Page 31 Removal and reinsertion of oven door Open the door to the horizontal position. Pull the bottom hinge supports upwards to the vertical position and lock them to the latch of upper hinge support. Close the door halfway (see fi g.) and pull it out.
-
Page 32: Specifi C Alerts And Troubleshooting
Specifi c alerts and troubleshooting Any unskilled attempt to repair the appliance is extremely dangerous as it might cause electric shock and short circuit. To avoid such injuries any repairs may be performed only by qualifi ed personnel, or after sales service. However, there are some minor faults which may be easily removed by the user, in accordance with the instructions that follow. - Page 33 Instalation for electric • Panels and furniture lining of the kitchen cabinet receiving oven the hob must be treated with temperature resistant adhesives (100°C), otherwise they might be discoloured or deformed because of inadequate temperature resistance. • Before installation you must remove the rear panel from the kitchen cabinet in the area of installation.
- Page 34 Connection to the power Wrong connection may permanently damage parts of the supplay appliance and render your warranty void! Electric connection may be carried out by qualifi ed service personnel only! Mains voltage of the user (230 V) must be verifi ed with the measuring device! •...
-
Page 35: Technical Information
Technical information Electric integrated oven EVP454-433L Dimensions (height-width-depth in mm) 588x555x548 Installation dimensions (height-width-depth in 600x560x550 Power connection AC 230 V Mains voltage 230 V, 50 Hz Oven Maximum temperature 275°C Guide levels -Telescopic guides on 3 levels Top/bottom heater (kW) 0,9/1,1 Grill/fan heater (kW) 2,0/2,2... - Page 36 EVP454-433L 134492/en (06-09)
Need help?
Do you have a question about the B2000P2 and is the answer not in the manual?
Questions and answers